
Want to make your own cool patch? An embroidery patch is a piece of fabric with a design stitched onto it. You can make these patches yourself! Yes, DIY patch making is fun and easy once you know the steps. This guide shows you how.
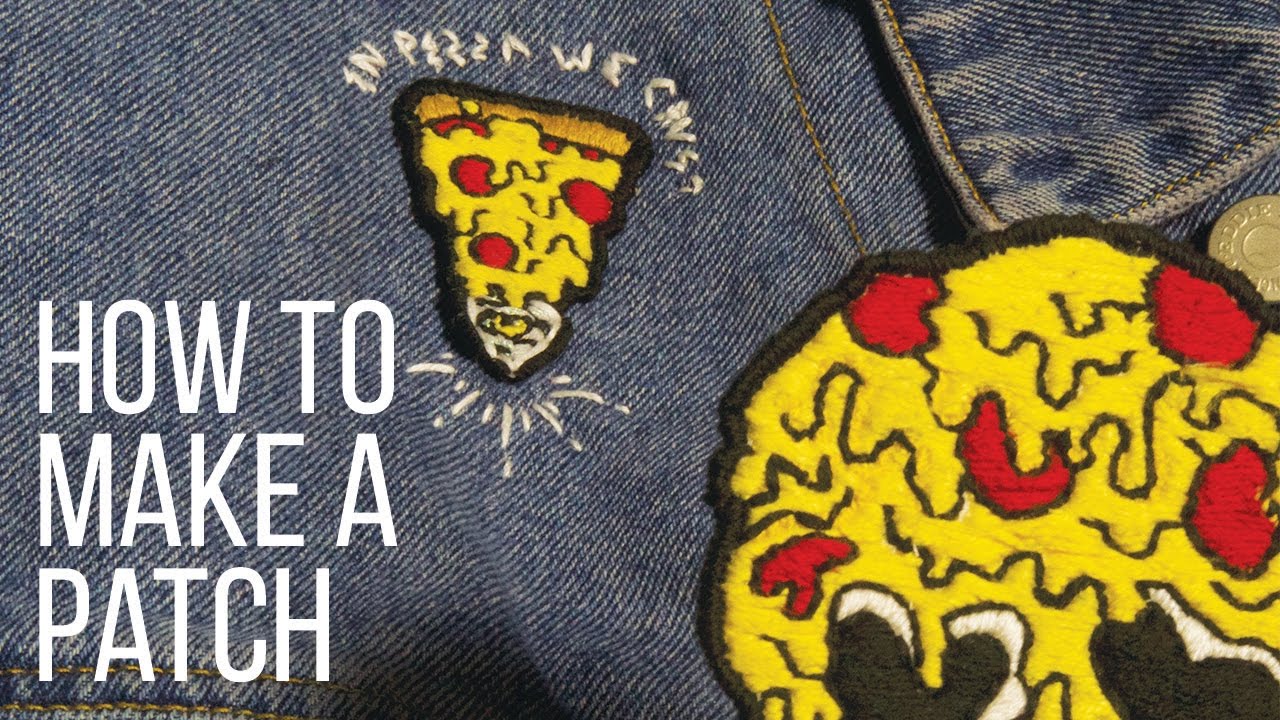
Image Source: i.ytimg.com
Getting Started: What You Need
To make your own embroidery patch, you need some basic things. Having the right embroidery patch supplies makes everything easier. Don’t worry, most items are easy to find.
Picking Your Materials
Your patch will need fabric and thread. Choosing the right type is important.
Fabric for Embroidery Patches
You need fabric that can hold stitches well. It should not stretch too much.
- Felt: This is a great choice for beginners. It does not fray when cut. It is easy to stitch on.
- Twill: This is often used for store-bought patches. It is strong and durable. It frays, so you need to finish the edges well.
- Cotton: Basic cotton fabric works too. Choose a medium weight kind. It needs good stabilizer.
- Canvas: This is a sturdy option. Good for tough patches.
Pick a fabric color that works with your design.
Threads You Will Use
You need embroidery thread. This thread is colorful and strong.
- Embroidery Floss: This is for hand stitching. It has six strands. You can use all six or fewer for finer details.
- Machine Embroidery Thread: If using a machine, you need special thread for that. Rayon or polyester threads are common.
Pick colors that match your design plan.
Getting Your Tools Ready
You need tools to draw, stitch, and cut.
- Needles:
- For hand stitching: Embroidery needles have a larger eye for the floss.
- For machine stitching: Use a needle made for embroidery machines.
- Scissors:
- Small, sharp scissors are best for cutting threads.
- Fabric scissors are needed to cut out your patch shape.
- Embroidery Hoop (for hand stitching): This holds your fabric tight. It makes stitching easier.
- Stabilizer: This is very important! Embroidery patch stabilizer supports your fabric while you stitch. It stops the fabric from bunching up. We will talk more about this.
- Design Tools: Pencil, paper, markers.
- Transfer Method: Something to get your design onto the fabric. Carbon paper, heat transfer pens, or a light box work.
Learning About Stabilizer
Embroidery patch stabilizer is like a helper for your fabric. It gives the fabric body. It keeps stitches flat and smooth. Different kinds exist.
Kinds of Stabilizer
Choosing the right stabilizer depends on your fabric and how you stitch.
- Cut-Away Stabilizer: You cut away the extra after stitching. It stays part of the patch forever. Good for stretchy fabrics or complex designs. It gives permanent support.
- Tear-Away Stabilizer: You can gently tear it away after stitching. It is good for stable fabrics like felt. It is easy to remove.
- Wash-Away Stabilizer: This dissolves in water. It is good when you don’t want any stabilizer left. Useful for delicate fabrics or designs on top of fabric.
- Heat-Away Stabilizer: This melts away when you iron it.
For patches, a cut-away or tear-away is often used behind the fabric. Sometimes, a wash-away is used on top for fuzzy fabrics like fleece. It keeps stitches from sinking in.
How to Use Stabilizer
Cut a piece of stabilizer bigger than your design. Put it behind your fabric. If using a hoop, put both the fabric and stabilizer in the hoop together. Make them tight.
Steps to Make Embroidered Patches: Hand Method
Making a patch by hand is a simple way to start. This hand embroidery patch tutorial guides you.
Step 1: Plan Your Design
Decide what your patch will look like.
- Draw your design on paper. Keep it simple at first.
- Think about size and shape. Round, square, or a custom shape?
- Choose your colors.
Step 2: Get Fabric and Stabilizer Ready
Cut your patch fabric a bit larger than your final patch size. Cut a piece of tear-away or cut-away embroidery patch stabilizer a bit larger than your fabric.
Step 3: Put Fabric and Stabilizer Together
Place the stabilizer behind your fabric. Smooth them flat. Put them into your embroidery hoop. Make the fabric and stabilizer tight like a drum head. This is important for good stitches.
Step 4: Put Your Design on Fabric
You need to get your design from paper to fabric.
- Tracing: If your fabric is light, put the design under the fabric and trace it with a water-soluble pen.
- Carbon Paper: Use special fabric carbon paper between your design and fabric. Draw over the lines to transfer.
- Wash-Away Stabilizer: Draw directly on a piece of wash-away stabilizer. Stick or pin it onto your fabric. Stitch right over the lines on the stabilizer. Wash it away when done.
Step 5: Start Stitching
Thread your needle with embroidery floss. Knot the end.
- Start stitching from the back of the fabric.
- Follow your design lines.
- Use simple stitches. Backstitch is good for outlines. Satin stitch fills areas with smooth color. French knots make small dots.
- Keep your stitches even.
- Change thread colors as needed.
- Take your time. DIY patch making is a relaxing hobby.
Step 6: Finish Stitching
When all parts of your design are stitched, knot your thread on the back. Take the fabric out of the hoop.
Steps to Make Embroidered Patches: Machine Method
Using an embroidery machine makes patches faster. This embroidery machine patch tutorial explains the basics.
Step 1: Design on Computer
You need a digital design file for your machine. You can buy designs or create your own using special software.
Step 2: Choose Fabric and Stabilizer
Pick your patch fabric (felt, twill, etc.). Choose the right embroidery patch stabilizer. For machine patches, you often use a cut-away or tear-away stabilizer hooped with the fabric. Or you might ‘float’ the fabric on top of the stabilizer. Follow your machine’s advice.
Step 3: Hoop Fabric and Stabilizer
Put the stabilizer in the embroidery hoop. If your machine needs it, put the fabric in the hoop too. Make it flat and tight. Load the hoop onto the machine.
Step 4: Load the Design
Put your digital design file into your embroidery machine. Select the right thread colors the machine tells you to use.
Step 5: Let the Machine Stitch
Start the machine. Watch it stitch the design. Change thread colors when the machine stops and tells you to. The machine does the embroidery for you.
Step 6: Machine Finishes
When the design is done, the machine stops. Remove the hoop. Take the fabric out of the hoop.
Adding Backing: Iron-on Patch Backing
Most patches have something on the back. This backing makes them easy to attach to clothes or bags. Iron-on patch backing is a popular choice. It has glue that melts when heated.
How to Use Iron-on Backing
You can buy special iron-on patch backing material. It often looks like a sheet of paper with a shiny, glue side.
- Cut the Backing: Cut a piece of the iron-on backing slightly smaller than your patch shape. You don’t want it sticking out the sides.
- Place on Patch: Put the glue side of the iron-on backing onto the back of your finished embroidery patch.
- Apply Heat: Place a thin cloth over the backing (like a pressing cloth). Heat your iron to the setting the backing material suggests (usually medium to hot, no steam). Press down firmly on the cloth over the backing for about 15-30 seconds.
- Let it Cool: Let the patch cool completely. The glue hardens as it cools. Now your patch has an iron-on back.
Other Backing Types
You can also use:
* Felt: Just glue or stitch a piece of felt to the back.
* Plain Fabric: Same as felt.
* Pin Backs: Glue or sew a pin to the back to make a removable pin.
* Velcro: Sew one side of Velcro to the back of the patch. Sew the other side to your garment.
Finishing Your Patch: Making Edges Nice
After stitching and adding backing, you need to finish the edges. This involves Cutting out embroidery patches and then stopping the fabric edge from fraying. Finishing embroidery patch edges makes your patch look clean and lasts longer.
Step 1: Cutting Out Embroidery Patches
Carefully cut out your patch shape.
- Leave a small border of fabric around your stitching. A border of about 1/8 to 1/4 inch (about 3-6 mm) is common.
- Use sharp scissors for a clean cut.
- Cut smoothly around curves.
Step 2: Finishing the Edges
This stops the fabric edge from fraying apart.
Method 1: Satin Stitch Border
This is a classic look. It works for both hand and machine made patches.
- Hand Stitching: Use embroidery floss (maybe 3-6 strands). Stitch close together around the edge. Your stitches go from the edge of the fabric border towards your patch design. Make the stitches thick and right next to each other. This covers the raw edge of the fabric completely.
- Machine Stitching: Many embroidery machines can do a satin stitch border. You design the border in your software. The machine stitches a dense, wide zig-zag stitch around the edge after the main design is done.
Method 2: Heat Sealing (Best for Synthetics/Blends)
This works well for fabrics with plastic fibers, like twill or some polyesters.
- Cut your patch with a small border.
- Carefully use a heat tool (like a wood-burning tool or a special heat knife) or even the tip of a soldering iron.
- Touch the hot tip to the very edge of the fabric border. It melts the fibers just enough to stop them from fraying.
- Be very careful! This is hot and can burn the fabric or you. Practice on scraps first. Do this in a well-aired place.
Method 3: Fabric Glue
You can use a strong fabric glue to seal the edge.
- Cut your patch shape neatly.
- Put a small amount of fray-checking glue or strong fabric glue along the cut edge on the back side.
- Be careful not to use too much glue. Let it dry fully.
Method 4: Sewing Machine Zig-Zag
If you have a regular sewing machine, you can use a tight zig-zag stitch right on the edge of the cut fabric border. This wraps thread around the edge and stops fraying.
Getting Your Design Ready for Stitching
Before you even stitch, thinking about your design helps a lot.
Simple Shapes are Easy
For your first patches, try simple shapes. Circles, squares, or basic outlines work well. Complex shapes with tight corners are harder to cut out neatly and finish the edges on.
Keep Colors Simple
Using too many colors can be tricky, especially when stitching by hand. Start with a few colors.
Size Matters
Think about where the patch will go. A small patch is good for a hat. A larger one works on a jacket back. Size affects how much detail you can include. Small details are hard on small patches.
Line Thickness
If drawing lines, make them clear. For hand stitching, thin lines are hard to follow. For machine stitching, line thickness is set in the design file.
More Tips for Great Patches
Here are some extra ideas to help your DIY patch making.
- Practice Stitches: Before starting your patch, practice your stitches on scrap fabric. This helps you get the feel right.
- Use Good Light: Good lighting helps you see your stitches clearly.
- Don’t Rush: Take your time. Stitching is not a race.
- Check the Back: As you stitch, look at the back of your work sometimes. Make sure knots are hidden and threads are not tangled.
- Press Your Patch: When done stitching (before cutting or adding backing), you can gently press your patch from the back side with a warm iron. Use a cloth. This can flatten the stitches nicely. Be careful with delicate threads.
- Try Different Fabrics: See which fabric you like stitching on most.
- Experiment with Stabilizers: See which stabilizer works best for your fabric and design style.
Putting Your Patch to Use
Once your patch is done, what next?
- Iron it on: If you used iron-on patch backing. Follow the heat directions carefully. Press firmly.
- Sew it on: Stitch your patch onto fabric items by hand or machine. Stitch close to the edge.
- Glue it on: Use strong fabric glue for items that won’t be washed much.
- Attach with Velcro: If you added Velcro backing.
Patches are great for fixing holes, covering stains, or just adding personal style to jackets, backpacks, hats, jeans, and more!
Common Questions About Making Patches
FAQ:
- Q: My thread keeps knotting when I stitch by hand. Why?
- A: Your thread might be too long. Use shorter pieces. Also, try letting the needle and thread dangle freely now and then. This lets the thread untwist itself.
- Q: Can I wash my handmade patch?
- A: Yes, you usually can. It depends on the fabric, threads, and how you finished the edges. If you used wash-away stabilizer, make sure it’s all gone first. If you used iron-on backing, check if that is washable. Hand washing is often gentler.
- Q: What is the best fabric for a first patch?
- A: Felt is a great start. It is easy to cut and does not fray. It holds stitches well.
- Q: Do I really need stabilizer?
- A: Yes, almost always. Embroidery pulls on fabric. Stabilizer stops the fabric from puckering or stretching out of shape. It makes your stitches look smooth and even.
- Q: How do I make my patch waterproof?
- A: Embroidery itself is not waterproof. The fabric can get wet. You could try using outdoor-specific fabrics and threads. Some sprays can add water resistance, but they might change the feel or look of the patch. Iron-on backing is usually not waterproof. Sewing is often the best way to attach outdoor patches.
Bringing Your Patch to Life
Making an embroidery patch is a rewarding project. It takes simple supplies and some patience. Whether you stitch by hand or use a machine, the steps are similar. Plan your design, prep your fabric with stabilizer, stitch carefully, add a backing like iron-on patch backing, and finish those edges nicely by cutting out embroidery patches and sealing them.
DIY patch making lets you create unique pieces of art you can wear or share. Use this hand embroidery patch tutorial or embroidery machine patch tutorial to start your patch making journey today. Have fun creating!