
Can you make patterns for sewing from scratch? Yes, absolutely! This guide shows you how. What is a sewing pattern? It is a flat paper guide. It tells you how to cut fabric pieces. You then sew these pieces into a garment. Learning to make patterns from scratch helps you create clothes that fit perfectly. It also lets you design your own unique styles. This journey starts with basic tools and simple steps. It moves to custom designs and fits. Let’s begin your exciting path to drafting sewing patterns from nothing.
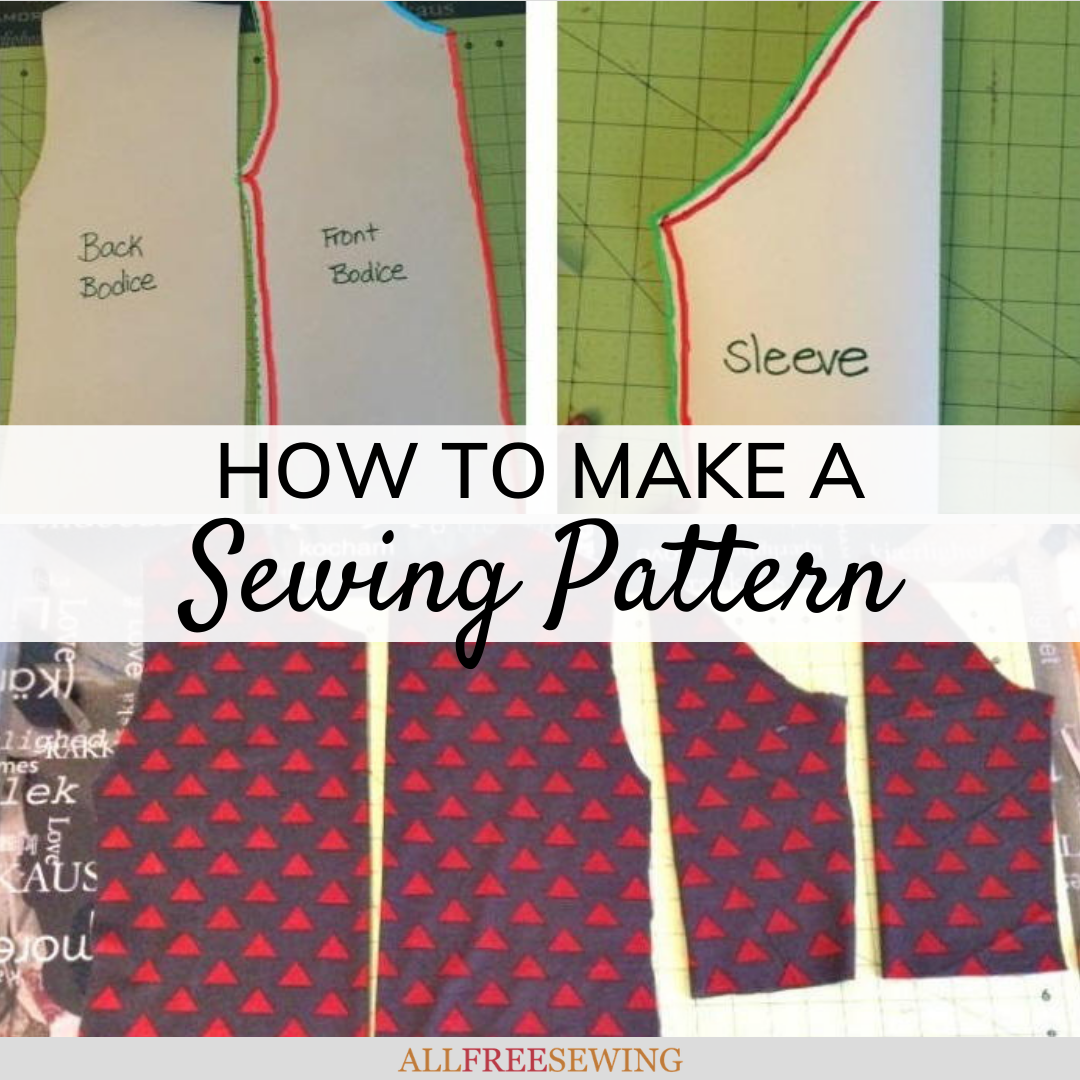
Image Source: irepo.primecp.com
Starting Your Pattern Making Journey
Making your own sewing patterns is a great skill. It lets you bring your clothing ideas to life. You can make clothes for any size. You can also fix common fit problems. This section will show you why it is worth it. It will also cover the basic ideas you need to know.
What is Pattern Making?
Pattern making is the art of turning a design into flat shapes. These shapes are then cut from fabric. It is like an architect drawing blueprints. Your pattern is the blueprint for your clothes. You start with simple shapes. You then add details. This makes the final garment look good.
Why Make Your Own Patterns?
There are many good reasons to make your own patterns.
* Perfect Fit: Store-bought patterns do not always fit well. You can make patterns just for your body. This means clothes that fit you like a glove.
* Unique Styles: You can make any design you imagine. Do not just pick from patterns already made. Create your own fashion.
* Learn More: You will learn how clothes are made. This helps you sew better. It also helps you fix clothes.
* Save Money: Once you know how, you can make many clothes. This can save you money over time.
Core Ideas in Pattern Making
Pattern making uses a few key ideas.
* Measurement: Accurate body numbers are a must.
* Sloper: This is a basic pattern. It fits your body like a second skin. You change it to make new designs.
* Dart: This is a folded tuck in the fabric. It helps give shape to clothes. It makes flat fabric fit curves.
* Seam Allowance: This is extra fabric around the edge of a pattern piece. You sew along this line. It stops the fabric from fraying.
Essential Pattern Making Supplies
You need some basic tools to start. These tools help you draw and cut patterns. Having the right pattern making supplies makes the job easier.
Here is a list of must-have items:
- Pattern Paper: This is large paper. It can be plain or gridded. Heavy paper is best. It will not tear easily.
- Rulers: You need a few types.
- Straight Ruler: Long, clear ruler for straight lines.
- L-Square Ruler: Shaped like an ‘L’. Great for making perfect right angles.
- Curved Rulers: French curve and hip curve. These help draw smooth armholes and necklines.
- Pencils and Erasers: Use sharp pencils. A good eraser is key for changes.
- Tracing Wheel: This tool makes small holes. It helps transfer lines from one paper to another.
- Awl: A sharp, pointed tool. It makes small holes for pivot points or markings.
- Paper Scissors: Use these only for paper. Fabric scissors must stay sharp for fabric.
- Measuring Tape: A flexible tape for body measurements.
- Push Pins or Weights: To hold paper still.
- Tracing Paper for Patterns: This thin, clear paper is very useful. You use it to copy parts of patterns. You can also lay it over your sloper to draw new designs.
Here is a table of common supplies:
| Item | Purpose | Tip |
|---|---|---|
| Pattern Paper | Drawing patterns, creating designs | Buy rolls for big projects. |
| L-Square Ruler | Square corners, straight lines | Essential for accuracy. |
| Curved Rulers | Drawing necklines, armholes, hips | Choose a set with different curves. |
| Tracing Wheel | Transferring markings, seam lines | Use with carbon paper for clear lines. |
| Tracing Paper for Patterns | Copying pattern pieces, adding design details | Keep a roll handy for quick changes. |
| Measuring Tape | Taking body measurements | Make sure it is flexible and accurate. |
| Paper Scissors | Cutting paper patterns | Do not use on fabric! |
| Pencils & Erasers | Drawing, marking, correcting | Keep pencils sharp. |
The Foundation: The Basic Bodice Sloper
The basic bodice sloper is your starting point. It is like a second skin. It has no style. It has no seam allowance. It simply shows the shape of your body. Think of it as a flat pattern of your torso. You will change this sloper to create any top, dress, or jacket.
Grasping the Bodice Sloper
A sloper is a custom block. It fits one person well. It is a plain, fitted pattern. It helps you draw new styles. You will use it for all future designs. If your sloper fits, your new designs will fit too.
Why a Sloper is So Important
The sloper is key for several reasons:
* Perfect Base: It gives you a perfect fit. All future designs will start from this good fit.
* Design Freedom: You can change it in many ways. You can add fullness. You can change necklines. You can make it longer or shorter.
* Problem Solver: It shows where your body needs special fit. This helps you make custom garment patterns that truly work for you.
How to Get Your Basic Bodice Sloper
You can get a sloper in a few ways:
1. Draft It Yourself: This is the best way to learn. You draw it from your own body measurements. We will cover this next.
2. Buy a Commercial Sloper: Some companies sell basic sloper blocks. You might need to adjust them.
3. Use a Close-Fitting Pattern: Find a very simple, close-fitting top pattern. Adjust it until it fits perfectly. Then remove seam allowances and design details to make it a true sloper.
Taking Accurate Body Measurements
Getting the right numbers is vital. Your pattern will only be as good as your measurements.
* Wear Tight Clothes: Wear a bra and thin clothing.
* Stand Straight: Stand in a normal, relaxed way.
* Get Help: Ask a friend to help you. It is hard to measure yourself accurately.
* Do Not Pull Too Tight: The tape measure should be snug, but not digging in.
Here are the key measurements for a bodice sloper:
| Measurement | Where to Measure | Notes |
|---|---|---|
| Bust/Chest | Around the fullest part of your bust/chest. | Keep tape level all around. |
| Waist | Around the narrowest part of your torso. | Usually near your belly button. |
| Hip | Around the fullest part of your hips/buttocks. | Keep tape level. |
| Back Waist Length | From the bone at the back of your neck to your waist. | |
| Front Waist Length | From the shoulder (next to neck) over bust to waist. | |
| Shoulder Width | From neck base to shoulder bone. | |
| Across Back | From armhole to armhole across your back. | About 4 inches down from neck. |
| Across Chest | From armhole to armhole across your front. | About 3 inches down from neck. |
| Bust Point to Point | Distance between the two fullest points of your bust. | |
| Sleeve Length | From shoulder bone to wrist (for a long sleeve). | Arm slightly bent. |
| Armhole Depth | From shoulder bone straight down to underarm level. | Hold a ruler under armpit. |
Drafting Your First Basic Bodice Sloper
Drafting sewing patterns from scratch is a step-by-step process. We will create a half-front and a half-back bodice. This is because patterns are usually symmetrical. You will then mirror them.
Tools You Need: Pattern paper, L-square ruler, straight ruler, curved rulers, pencil, eraser, measuring tape.
Steps to Draft a Basic Bodice Sloper:
- Draw a Base Line: On your pattern paper, draw a long, straight line. This will be your center front/back line.
- Mark Key Points:
- From the top of the line, measure down your Back Waist Length. Mark this point (Waist Line).
- From the top, measure down your Armhole Depth. Mark this point (Chest Line).
- Draw horizontal lines from these points, square to your center line.
- Place the Bust/Chest Measurement:
- Take your Bust/Chest measurement. Divide it by 4. Add 1/2 inch for ease (this means a little room to move). Mark this distance out from your center line on the Chest Line. This is your side seam.
- Shape the Neckline (Back):
- From the top of your center back line, measure out 2.5 inches for neck width.
- Measure down 0.75 inches for neck depth.
- Draw a gentle curve to connect these points.
- Shape the Neckline (Front):
- From the top of your center front line, measure out 2.5 inches for neck width.
- Measure down 3 inches for neck depth.
- Draw a gentle curve to connect these points.
- Draw the Shoulder Line:
- From the neck width point, measure out your Shoulder Width. Angle it slightly down (about 1 inch down from the neck point for front, 0.75 inches for back).
- Create the Armhole:
- From the end of your shoulder line, draw a curve down to the Chest Line. It should meet the side seam point you marked earlier. Use a curved ruler for a smooth shape.
- Add Waist Darts (Front and Back):
- Find the center of your waistline.
- Measure out from the center line your Waist measurement divided by 4, plus ease (maybe 1/4 to 1/2 inch).
- The difference between your bust and waist measurements creates the need for darts.
- Back Dart: Usually one dart, about 1 inch wide, centered on the back waist line. It goes up to your shoulder blade level.
- Front Darts: Usually two darts (bust dart and waist dart). The bust dart comes from the side seam towards the bust point. The waist dart goes down from the bust point. These shape the fabric over the bust.
- Connect Side Seams: Draw a slight curve from the armhole down to the waistline. Make sure it lines up with your bust and waist numbers.
- Add Seam Allowances: Once you are sure of your sloper, you will add seam allowances. This is usually 1/2 inch or 5/8 inch (1.5 cm) around all edges. The hem allowance is usually larger, like 1.5 inches (3-4 cm).
This is a simplified guide. More detailed books and courses exist. They show how to make a full sloper. The key is to start with accuracy.
From Sloper to Style: Crafting Custom Garment Patterns
Now you have a basic sloper. This is your design tool. You will use it to make custom garment patterns. This means you will change the sloper. You will add design lines. You will add fullness. You will make it into a shirt, a dress, or a skirt.
Design Elements and Style Lines
This is where your creativity comes in. You can change your sloper in many ways.
* Dart Manipulation: Darts give shape. You can move them. You can split them. You can turn them into seams or gathers. For example, a bust dart can become a gather at the shoulder.
* Adding Fullness: You can add extra fabric for gathers, pleats, or flair. This is done by cutting and spreading your pattern.
* Neckline Changes: You can make a round neck, a V-neck, a boat neck, or a square neck. Just draw the new shape on your sloper.
* Sleeve Styles: Your sloper usually has an armhole. You can draft different sleeves:
* Set-in Sleeve: The classic sleeve, sewn into the armhole.
* Raglan Sleeve: Extends from the armhole to the neckline.
* Kimono Sleeve: Cut as one with the bodice.
* Adding Details: Think about collars, cuffs, pockets, and closures (buttons, zippers). You draft these pieces separately.
Example: Making a Simple A-Line Dress
Let’s say you want to make an A-line dress.
1. Trace Sloper: Place tracing paper for patterns over your bodice sloper. Trace the front and back bodice.
2. Extend Length: Extend the side seams and center lines down to your desired dress length.
3. Add Flair: From the waist or hip, spread the side seam out. This creates the ‘A’ shape.
4. Adjust Neckline: Draw your new neckline.
5. Add Sleeves: If desired, add simple sleeves.
6. Add Seam Allowance: Add seam allowance to all edges.
7. Markings: Add grainlines (direction fabric runs), notches (matching points), and labels. This makes it a complete garment construction pattern.
Pattern Layout and Seam Allowances
Once you have your design, you must prepare the pattern.
* Grainline: Draw a straight arrow on each pattern piece. This shows how to place the pattern on the fabric. It usually runs parallel to the selvage (finished edge of fabric).
* Notches: These are small marks on the pattern edges. They help you match pieces when sewing.
* Seam Allowance: This is the extra fabric outside the stitch line. It is usually 1/2 inch (1.3 cm) or 5/8 inch (1.5 cm). Add this evenly around all edges of your pattern pieces. Do not forget the hem allowance. This is often 1.5 inches (3.8 cm) or more.
* Labels: Label each piece clearly. Write what it is (e.g., “Front Bodice”), size, and number of pieces to cut.
Making Your Patterns Fit Perfectly
Even with a custom sloper, clothes need checks. Fitting dress patterns is a must. You need to test your pattern. This ensures it fits your body well before you cut expensive fabric.
Sewing Pattern Adjustments for a Better Fit
You will make a test garment. This is often called a muslin or toile. It is made from cheap fabric.
* Pin It: Put the muslin on. Pin out any extra fabric. Pin in any areas that are too tight.
* Mark Changes: Use a marker to draw new seam lines directly on the muslin.
* Transfer Changes: Take off the muslin. Lay it flat. Transfer these new lines to your paper pattern.
Common adjustments include:
- Full Bust Adjustment (FBA): If your bust is bigger than the pattern allows. You add width and length to the bust area.
- Small Bust Adjustment (SBA): If your bust is smaller. You remove width and length.
- Sway Back Adjustment: If your lower back has a curve. You take out fabric at the lower back waist.
- Lengthening/Shortening: Change the length of the bodice or skirt.
- Widening/Narrowing: Adjust the side seams for overall fit.
- Shoulder Adjustment: Change the width or slope of the shoulder.
These sewing pattern adjustments are critical. They turn a good pattern into a perfect one.
The Muslin/Toile: Your Fitting Friend
A muslin (or toile in French) is a trial version of your garment.
* Cheap Fabric: Use inexpensive fabric. Old sheets or muslin fabric work well.
* Basic Construction: Sew the main seams only. Do not worry about hems or finishes.
* Wear It and Check: Put it on. Look in a mirror. Move around. Bend. Sit. See how it feels.
* Mark and Pin: Mark areas that pull. Mark areas that gap. Pin out excess fabric.
* Transfer to Pattern: Carefully take off the muslin. Lay it flat. Use your rulers and curves to draw the new lines on your paper pattern. You may need to cut and spread, or fold out sections of your pattern.
It is okay to make many muslins. Each one gets you closer to the perfect fit.
Growing Your Pattern: Pattern Grading Techniques
Once you have a great pattern, you might want to make it in other sizes. This is called pattern grading techniques. Grading means making a pattern larger or smaller. You keep the same shape and fit. It is not just making it bigger or smaller all over. Specific points are moved by specific amounts.
Deciphering Grading Principles
Grading rules are based on how the body changes size. For example, a size up means adding width to the side seams. It also means adding length to the waist.
* Grade Rules: These are standard amounts that patterns are increased or decreased. They vary for different body areas.
* Point-to-Point Grading: You move specific points on the pattern. This changes the overall size. For example, the bust point moves out and up for a larger size.
* Nest of Patterns: When you grade a pattern, you often get a “nest.” This is a stack of the same pattern piece in different sizes. They all sit on top of each other.
Simple Grading Principles
For simple grading, you can try:
1. Add/Subtract at Seams: For a size up, add 1/4 inch to each side seam. This means 1/2 inch total around the body. Add a bit of length.
2. Dart Adjustments: Darts might need to be wider or longer for bigger sizes.
3. Shoulder/Sleeve: Increase shoulder width a small amount. Widen the sleeve and armhole too.
Grading is a complex skill. It takes practice. There are many books and software programs for it. For home sewing, small adjustments might be enough.
The Digital Age: Digital Pattern Making Software
In today’s world, you do not have to draw patterns by hand. Digital pattern making software offers many benefits. It makes the process faster and more precise.
Why Use Digital Software?
- Speed: Make changes quickly. No need to redraw from scratch.
- Accuracy: Digital tools are very precise. No human error in drawing lines.
- Easy Edits: Change a neckline or a dart with a few clicks.
- Grading: Most software has built-in grading tools. This makes resizing patterns very easy.
- Sharing: Easily share your patterns. Print them at home or at a copy shop.
- Less Paper Waste: No need for large amounts of paper for drafts.
Popular Software Options
There are many choices. Some are free, some cost money.
* Valentina / Seamly2D: Free and open-source. Great for custom patterns from measurements. It creates “parametric patterns.” This means you input measurements, and the pattern draws itself.
* Inkscape / Adobe Illustrator: These are drawing programs. You can use them to draw patterns. They are not made just for patterns, but they work.
* CLO3D / Marvelous Designer: These are 3D clothing design programs. You can drape fabric on a virtual body. Then you export the 2D pattern. These are more advanced and often used by pros.
* PatternMaker, WildGinger Software: These are specific pattern making programs. They offer different features and ease of use.
Digital Workflow Basics
- Input Measurements: If using a parametric program, you enter your body measurements.
- Draw Digitally: Use the software’s tools to draw your pattern pieces. Use digital rulers and curves.
- Add Details: Add grainlines, notches, and seam allowances digitally.
- Test: Some software lets you “try on” the pattern in 3D.
- Print: Print your patterns on a home printer (tiled pages) or send them to a large-format printer.
Your Pattern Making Workspace
A good workspace helps you stay organized. It also makes pattern making more fun.
Setting Up Your Area
- Large Flat Surface: You need a big table. This is for laying out paper. It is for drawing patterns.
- Good Light: Make sure your area is well lit. Natural light is best.
- Storage: Keep your tools tidy. Use drawers or bins. Keep your rulers safe.
- Inspiration: Keep design books or images nearby. This helps spark ideas.
Keeping Organized
- Label Everything: Label all pattern pieces clearly. Write the style name and date.
- Folder System: Use folders or large envelopes. Store patterns flat. This stops them from creasing.
- Pattern Storage: If you have many patterns, use a hanging system. Or roll them up and store them in tubes.
Common Mistakes and How to Fix Them
Everyone makes mistakes. This is part of learning. Here are some common ones in pattern making:
- Inaccurate Measurements:
- Fix: Re-measure carefully. Ask a friend for help.
- Not Adding Ease:
- Fix: Remember clothes need space to move. Add 1/2 to 1 inch of ease around the bust and waist.
- Forgetting Seam Allowance:
- Fix: Always add seam allowance. Mark it clearly. Use a ruler to make it even.
- Poor Grainline Placement:
- Fix: Make sure the grainline is straight. It must be parallel to the fabric’s selvage.
- Skipping the Muslin:
- Fix: Always make a muslin! It saves fabric and time in the end. It helps you fit dress patterns right.
- Not Labeling Pieces:
- Fix: Label every piece. Write “Front Bodice,” “Back Sleeve,” “Cut 2,” etc. Add the pattern name and size.
- Not Using the Right Tools:
- Fix: Invest in good rulers and paper. They make a big difference.
Do not get discouraged. Each mistake teaches you something new.
Next Steps for Your Pattern Journey
You have started a great skill. Keep going!
* Practice: The more you make patterns, the better you get. Start with simple designs.
* Learn More: Read books on pattern making. Watch videos. Take a class if you can.
* Experiment: Try new designs. Change necklines. Play with dart positions.
* Join a Community: Share your work online. Ask questions. Learn from others.
Frequently Asked Questions (FAQ)
Q: How long does it take to learn pattern making?
A: Learning the basics can take a few weeks of regular practice. Becoming skilled takes months or years. It is a journey, not a race.
Q: Do I need a sewing machine to make patterns?
A: No, you do not need a sewing machine to make patterns. But you need one to sew the muslin and final garment. This tests your patterns.
Q: Can I use commercial patterns to learn pattern making?
A: Yes! Look at how commercial patterns are made. See their dart placement. Look at how pieces fit together. You can trace them to see their shapes. This helps you comprehend pattern shapes.
Q: What is a pattern block versus a sloper?
A: They are very similar terms. A “sloper” is often your personal fitted block. A “block” can also mean a basic pattern, perhaps an industry standard size.
Q: Is digital pattern making hard to learn?
A: It can seem hard at first. Like any new software, it takes time to learn. Many programs have good tutorials. Start with a free program like Valentina/Seamly2D.
Q: How can I ensure my custom patterns fit diverse body shapes?
A: The key is accurate measurements for each person. Build a separate sloper for each unique body. Then, adjust and grade patterns for that specific sloper. This is how you make truly custom garment patterns.
Q: Where can I find good pattern making resources?
A: Look for books by authors like Helen Joseph Armstrong or Teresa Gilewska. Online, websites like Threads Magazine and The Cutting Class offer great tips. YouTube has many helpful channels too.
Conclusion
You have now begun your path to mastering how to make patterns for sewing from scratch. You know about basic tools and how to create a basic bodice sloper. You have seen how to turn that sloper into unique custom garment patterns. You have learned about making sewing pattern adjustments and the value of a muslin. We touched on pattern grading techniques and the rise of digital pattern making software. Remember to use tracing paper for patterns and other key pattern making supplies. Always aim for clear garment construction patterns and do not skip fitting dress patterns.
This skill opens up a world of creative possibilities. It gives you the power to make clothes that truly fit. With practice and patience, you will soon create amazing garments from your very own patterns. Start small, be patient, and enjoy the journey!