
What is monogram embroidery and how can I do it? Monogram embroidery puts your initials, or someone else’s, onto fabric using needle and thread or an embroidery machine. It’s a lovely way to make items special and show who they belong to. You can learn to do it yourself, either by hand or with a machine. This guide shows you how, step by step.
Making things personal is nice. Adding a monogram makes an item truly yours or a thoughtful gift. It takes plain fabric and adds a touch of class and identity. Monogramming is popular for clothes, towels, bags, and gifts. It might look hard, but it’s easy to learn the basics. We will walk you through everything you need to know to start your monogramming journey.
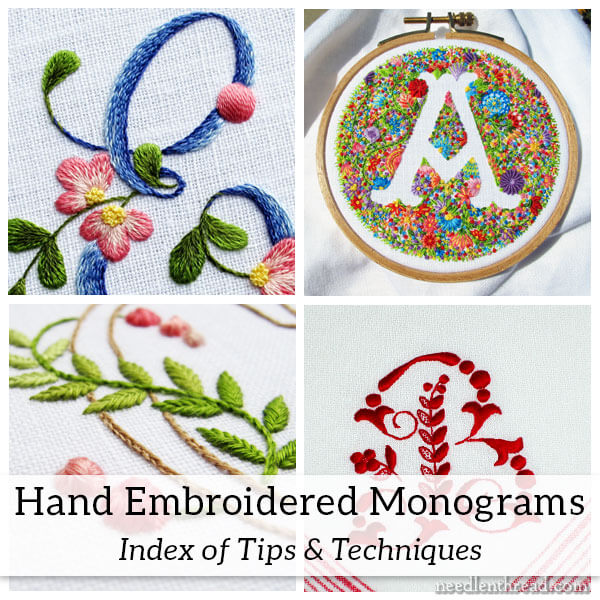
Image Source: www.needlenthread.com
Getting Started with Monogramming
First, you need to decide how you want to stitch your monogram. You can do it by hand or use an embroidery machine. Both ways make beautiful monograms. The method you pick depends on what you like and what tools you have.
Hand Embroidery or Machine Embroidery?
Both hand embroidery and machine embroidery let you add monograms.
- Hand Embroidery: This method is traditional. It uses simple tools like a needle and embroidery thread. It takes more time but gives you great control. You can use different embroidery stitches for unique looks. It’s good for small projects and beginners. You feel close to your work.
- Embroidery Machine: This method uses a special machine. The machine does the stitching for you. It is very fast and makes perfect stitches every time. You need to use stabilizer to get good results. It is great for many items or complex designs. It needs more tools and costs more to start.
Think about how much time you have. Think about how many items you want to monogram. Think about your budget for tools. This helps you pick the best way for you.
Getting Your Supplies Ready
You need the right tools to start. The tools you need are a bit different for hand versus machine work. But some things are the same.
Supplies for Hand Monogramming
You do not need much to start hand monogramming.
- Fabric: Choose fabric that is not too stretchy. Cotton, linen, or blends work well. Test on a small piece first.
- Embroidery Thread: You need good quality embroidery thread. It comes in many colors. Cotton or rayon thread is common. Use the right number of strands for your look.
- Needles: Use embroidery needles. They have a larger eye for the thread. Pick a size that works for your thread and fabric.
- Embroidery Hoops: Hoops hold your fabric tight. This makes stitching easier and smoother. Wood or plastic hoops work. Get a size that fits your design.
- Design Transfer Tools: You need a way to get your letter shape onto the fabric. This can be carbon paper, water-soluble pens, or iron-on pencils.
- Small Scissors: Sharp, small scissors are best for cutting thread.
- Stabilizer (Optional): For some fabrics, a light stabilizer can help stitches look better.
Supplies for Machine Monogramming
Machine monogramming needs more specific items.
- Embroidery Machine: This is the main tool. Machines come in different sizes and with different features. Make sure it can do monograms.
- Embroidery Thread: Machine embroidery thread is best. It is stronger than hand thread. Rayon or polyester threads are common. You also need bobbin thread.
- Stabilizer: Stabilizer is very important for machine embroidery. It supports the fabric and stitches. There are many types: cut-away, tear-away, wash-away. You pick the type based on your fabric.
- Embroidery Hoops: Your machine comes with hoops. These hold the fabric and stabilizer. Make sure your fabric fits in the hoop.
- Design Software (Optional): Some people use software to create or change embroidery fonts and designs.
- Small Scissors: Good for trimming jump stitches.
- Fabric: Like hand embroidery, choose fabric that works well.
- Marking Tools: You might need a ruler or pen to find the placement spot.
Picking Your Monogram Design
Choosing the look of your monogram is fun. You need to pick the letters and the style.
Finding Your Letters
Most monograms use initials.
- Single Letter: Often the first letter of the last name. Simple and classic.
- Two Letters: Usually the first and last name initials. Can be side-by-side or one above the other.
- Three Letters: This is most common. It is usually the first name initial, last name initial, and middle name initial. The last name initial is often larger and in the center. For example, Mary Jane Smith would be MSJ, with the S bigger in the middle. Sometimes it’s First, Middle, Last in order, all the same size (MJS).
- Couple’s Monogram: For couples, it’s often the bride’s first initial, the last name initial, and the groom’s first initial (Bride, Last, Groom). Or just the last name initial with their two first initials smaller on the sides.
Think about who the monogram is for. Think about the item you are putting it on. This helps you choose the right letters.
Selecting Embroidery Fonts and Styles
The look of your letters comes from the embroidery fonts and patterns you use.
- Embroidery Fonts: Machines come with built-in embroidery fonts. You can also buy more. Fonts change the look of the letters a lot. Some are fancy script, some are simple block letters.
- Hand Embroidery Patterns: For hand work, you can draw letters, trace existing embroidery patterns, or use stencils. The style comes from the lines you draw and the embroidery stitches you use.
Look at different styles. Think about the feeling you want the monogram to have. Is it formal? Casual? Playful? The font or pattern helps create that feeling.
Table: Monogram Styles and Feelings
| Style | Look | Feeling | Good For |
|---|---|---|---|
| Block Letters | Clean, strong | Modern, Simple | Men’s items, Bags, Towels |
| Script Letters | Flowing, connected | Classic, Fancy | Women’s items, Gifts, Linens |
| Serif Letters | Letters with small feet | Traditional, Neat | Clothing, Pillows |
| Decorative | Unique shapes, swirls | Fun, Unique | Kids’ items, Special gifts |
Figuring Out Placement
Where you put the monogram is important. It should look good on the item. Placement can be tricky, but here are some common spots.
Finding the Right Spot
Think about how the item will be used. Think about what looks balanced.
- Towels: Often centered on the bottom edge or in a corner. For hand towels, sometimes just above the hem.
- Shirts/Blouses: On the cuff, above the pocket (for men), near the collarbone (for women), or on the bottom hem.
- Bags/Totes: Centered on the front pocket or the main part of the bag.
- Pillowcases: In a corner or centered on the open edge.
- Napkins: In one corner, often so it shows when folded.
- Baby Items: Centered on a hat, blanket corner, or on a onesie chest.
Use a ruler or measuring tape to find the exact center or corner. Use pins or washable markers to mark the spot. This placement is key to a good final look.
Stitching Your Monogram by Hand
If you chose hand embroidery, here are the steps.
Getting Fabric Ready for Hand Stitching
Wash and press your fabric if needed. Make sure it is smooth. No wrinkles! This helps your stitches lie flat.
Putting the Design on Fabric
You need to get your letter shape onto the fabric.
- Draw or Trace: If you are good at drawing, you can draw the letter lightly with a water-soluble pen. Or you can trace a design. Put the fabric over the design (if the fabric is light) and trace. Or use a light box.
- Transfer Paper: Put carbon transfer paper on the fabric. Place your design on top. Trace over the design lines with a pen or pencil. This puts the line onto your fabric. Use the right color paper for your fabric.
- Iron-On Transfer: Some embroidery patterns are iron-on. Follow the package directions.
Put the design exactly where you marked the placement spot.
Using Embroidery Hoops
Place the inner ring of your embroidery hoop under the fabric. Center your marked design in the ring. Place the outer ring over the fabric. Push it down until it fits snug over the inner ring. Pull the fabric tight like a drum. Tighten the screw on the hoop. Check the fabric is smooth. The hoop holds the fabric so your stitches are even.
Picking the Right Embroidery Stitches
Different embroidery stitches make different looks. For monograms, you often need stitches for outlines and stitches for filling in areas.
Outline Stitches
These stitches create the edge of your letters.
- Backstitch: Makes a solid line. Good for clean edges. Stitch forward, then back to meet the end of the last stitch.
- Stem Stitch: Makes a rope-like line. Good for curvy letters. Stitches overlap a bit, making a twisty line.
- Outline Stitch: Similar to stem stitch but the thread loops differently. Also good for curves.
Fill Stitches
These stitches fill in the space inside the letter outlines.
- Satin Stitch: Makes a smooth, solid fill. Stitches lie side-by-side across the area. Needs stabilizer for large areas.
- Long and Short Stitch: Good for filling larger or oddly shaped areas. Stitches are different lengths and blend together. Makes a shaded look possible.
- Seed Stitch (or Rice Stitch): Small random stitches that fill an area with texture. Easy and good for beginners.
You can also leave the letters as just outlines for a simple look. Or mix fill stitches and outline stitches.
Stitching Your Monogram Step-by-Step
Now you stitch!
- Thread Your Needle: Cut a length of embroidery thread, about 18 inches (45 cm). This length is easy to handle. Separate the strands if your thread can be split (like common cotton thread). Use the number of strands you want (more strands make thicker lines, fewer make thinner). Thread the needle. Tie a small knot at the end of the longer piece of thread. Or use a knotless method.
- Start Stitching: Bring your needle up from the back of the fabric at the start of your design line. Pull the thread through until the knot is against the back of the fabric.
- Follow the Lines: Use your chosen embroidery stitches to follow the lines of your letter design. Keep your tension even. This means pull the thread snug, but not so tight it puckers the fabric. Not too loose either, or the stitches will be messy.
- Finish Stitches: When you finish a stitch or reach the end of a thread, push the needle to the back of the fabric. Run the needle under a few stitches on the back. Pull the thread through. Cut the thread close to the fabric. This secures the end without a big knot.
- Filling In: If you are filling the letter, do the outline first. Then use your fill stitch inside the outline. Work neatly to fill the whole shape.
- Change Colors (If Needed): If your design uses more than one color, finish the first color. Start the new color just like you started the first one.
Keep stitching until all the lines are covered and all areas are filled as you planned. Take your time. It is not a race.
Finishing Your Hand Monogram
Once stitching is done:
- Remove from Hoop: Take the fabric out of the embroidery hoop.
- Remove Markings: If you used a water-soluble pen, gently dab the area with water. The lines will disappear. Check the pen instructions. For iron-on, no lines to remove.
- Trim Back: On the back of the fabric, carefully trim any loose thread ends. Be careful not to cut the fabric itself.
- Press: Place the monogrammed area face down on a soft towel. Press the back of the fabric gently with a warm iron. This helps flatten the stitches.
Your hand-stitched personalized embroidery is now ready!
Stitching Your Monogram with an Embroidery Machine
If you are using a machine, the steps are different.
Prepping Fabric for Machine
Wash and press your fabric if needed. Machine embroidery works best on smooth fabric.
Using Stabilizer
Stabilizer is a must for machine embroidery. It prevents the fabric from stretching or puckering during stitching. It supports the stitches so they look clean and even.
- Cut-Away Stabilizer: Use for unstable fabrics like knits. It gives permanent support. You cut away the extra from the back after stitching.
- Tear-Away Stabilizer: Good for stable fabrics like cotton. You can tear away the extra from the back.
- Wash-Away Stabilizer: Use when you do not want any stabilizer left. Good for delicate fabrics or items like lace. It dissolves in water.
- Sticky Stabilizer: Has a sticky side. Good for items that are hard to hoop, like cuffs or collars.
Choose the right stabilizer for your fabric type and the stitch density of your design. Heavier designs need stronger stabilizer.
Hooping Fabric with Stabilizer
You need to put the fabric and stabilizer in the embroidery hoop together.
- Cut Stabilizer: Cut a piece of stabilizer larger than your embroidery hoop.
- Place Stabilizer: Lay the stabilizer flat. Place your fabric on top.
- Hoop Them: Place the inner hoop ring down. Center the fabric and stabilizer over it where your design will go. Place the outer hoop ring over them. Push down firmly. Tighten the hoop screw.
- Check Tension: The fabric and stabilizer should be smooth and tight in the hoop, like a drum. No wrinkles.
This makes a stable base for the machine to stitch on.
Getting Your Design Ready
You need your monogram design in a format your machine can read.
- Built-in Fonts: If your machine has embroidery fonts, you can just select the letters and type them in. Choose the size and font you want.
- Design Files: If you bought or created embroidery patterns, you will load the design file into your machine. This might be with a USB stick or by connecting your machine to a computer.
Place the design on the screen where you want it to stitch within the hoop area. Most machines let you move the design.
Setting Up the Machine and Thread
Put the hooped fabric on the machine. Make sure it is in the right spot. Thread the machine with your chosen embroidery thread color. Load the bobbin thread. The bobbin thread is usually a lighter weight and might be a different color (often white) unless the design shows on both sides.
Starting the Stitching
Double-check everything. Is the fabric hooped tight? Is the design in the right spot? Is the machine threaded right?
Press the start button. The machine will start stitching the design. Watch it stitch. It is normal for the machine to stop. It might need you to change thread colors. Follow the machine’s instructions on the screen.
During Stitching
Keep an eye on the machine. Look for problems like thread breaks or bird nests (tangled thread). If the machine stops for a thread break, rethread it and start again. The machine usually goes back a few stitches.
Some designs have jump stitches. These are long threads that connect parts of the design. The machine might trim them, or you might need to trim them later with small scissors.
Removing and Finishing Machine Monograms
When the machine finishes stitching:
- Take Hoop Off: Remove the hoop from the machine.
- Remove from Hoop: Take the fabric and stabilizer out of the hoop.
- Remove Stabilizer: Carefully remove the extra stabilizer. Tear-away stabilizer tears away from the stitching. Cut-away needs small, sharp scissors to trim around the design. Wash-away needs soaking. Follow the stabilizer type’s instructions.
- Trim Threads: Trim any jump stitches on the front and any loose threads on the back.
- Press: Press the monogrammed area face down on a soft towel with a warm iron. This helps smooth everything out.
Your machine-made personalized embroidery is complete!
Hints for Better Monograms
Here are some tips to help you get great results, whether you hand stitch or machine stitch.
Practice First
Do not start on your best item. Practice on a scrap piece of the same fabric you plan to use. This helps you get the feel for stitching or using the machine. You can test your tension, thread, stabilizer, and placement.
Check Your Tension
For hand stitching, keep your thread tension even. Not too tight, not too loose. For machine stitching, make sure your top thread and bobbin thread tension are balanced. Look at the back of the stitching. You should see about one-third bobbin thread and two-thirds top thread. If it looks uneven, check your machine’s settings.
Use the Right Stabilizer
Picking the right stabilizer is very important, especially for machine embroidery. The wrong stabilizer can cause puckering, poor stitch quality, or distortion. If you are not sure, check charts online or ask at a fabric store.
Test Everything
Before you commit to your final piece, test your design, thread, and stabilizer on a scrap. Stitch a small sample. See how it looks. Wash it if you need to test wash-away stabilizer or shrinkage. This step saves you from problems later.
Mark Placement Carefully
Take your time when marking where the monogram will go. Measure twice, stitch once. A well-placed monogram looks much better.
Taking Care of Your Monogrammed Items
You want your personalized embroidery to last.
- Washing: Check the fabric’s care label. Wash in cool or warm water. Hot water can sometimes make thread colors fade. Use a mild soap.
- Drying: Air dry or machine dry on a low heat setting. High heat can damage the threads or shrink the fabric around the stitches, causing puckering.
- Ironing: Iron on the back side of the monogram. Use a pressing cloth if needed. Avoid ironing directly on the stitches, especially satin stitch, as it can flatten them.
Proper care helps your beautiful stitches stay looking new.
Exploring Different Monogram Looks
Monogramming is not just about initials. You can play with styles.
- Size: Monograms can be small and subtle or large and bold.
- Color: Use one color, or multiple colors for a fun look. Match the item, or use a bright contrast color.
- Outline Only: Just stitch the outline of the letters. This is simple and clean.
- Filled In: Fill the letters with stitches for a solid look.
- Appliqué: Add fabric shapes behind the monogram outlines for extra color and texture.
- Frames: Add a stitched frame or shape around the monogram.
These choices make each personalized embroidery piece unique.
Ideas for Personalized Embroidery
What can you monogram? Almost anything made of fabric!
- Clothing (shirts, jackets, pajamas, baby clothes)
- Towels (bath, hand, tea towels)
- Bags (totes, makeup bags, backpacks)
- Linens (pillowcases, napkins, tablecloths)
- Gifts (blankets, aprons, stockings)
- Accessories (hats, scarves)
Monogrammed items make great gifts for weddings, birthdays, holidays, or new babies.
Frequently Asked Questions (FAQ)
What is the right order for initials in a monogram?
For a traditional three-letter monogram for one person, it is usually First Name Initial, Last Name Initial (larger in the middle), Middle Name Initial. Example: John Robert Smith is JSR. For couples, it is often Bride’s First Initial, Last Name Initial (larger), Groom’s First Initial. Example: Mary Smith Jones becomes MSJ. But you can use any order you like! First, Middle, Last (all same size) is also common.
What is the best thread for monogramming?
For hand embroidery, 6-strand cotton floss is very popular. You can split it to use fewer strands. Rayon is shiny. For machine embroidery, rayon or polyester machine embroidery thread works well. Polyester is often stronger and holds color better.
How do I choose the right size for a monogram?
Think about the item and where it will go. A monogram on a shirt cuff is small (maybe 1 inch). On a bath towel, it can be larger (3-4 inches). On a tote bag, it might be 4-6 inches. Hold a paper printout of the size you are thinking of on the item to see how it looks.
Why does my machine embroidery pucker?
Puckering is usually caused by not using enough stabilizer or the wrong type of stabilizer for the fabric and design. It can also happen if the fabric is not hooped correctly (too loose or too tight) or if the thread tension is off. Using stabilizer that is too small can also cause issues.
Can I monogram stretchy fabric?
Yes, but it is harder. For hand embroidery, hoop it very carefully without stretching it. For machine embroidery, you must use a cut-away or no-show mesh stabilizer that stays with the fabric forever. This gives the stitches needed support. Use a design that is not too dense.
How do I make sure my monogram is straight?
Measure from the edges of your item to find the center or desired placement. Use a ruler and washable pen or chalk to draw guide lines. Line up your design or hoop with these guide lines. For machine embroidery, most machines have guides on the screen or laser guides to help with placement.
Conclusion: Your Monogramming Journey
You now have a full guide to start monogram embroidery. Whether you pick hand stitching for its craft feel or machine embroidery for its speed, you can create beautiful personalized embroidery. Gather your supplies, pick your design, find your spot, and start stitching. With practice, you will make lovely items for yourself and for gifts. Enjoy making things uniquely yours!