
A messy sewing space can feel overwhelming. Fabric piles up, patterns get lost, and finding the right thread is a hunt. Knowing how to organise a sewing room helps you save time, reduce stress, and enjoy your craft more. It makes everything easier to find and use.
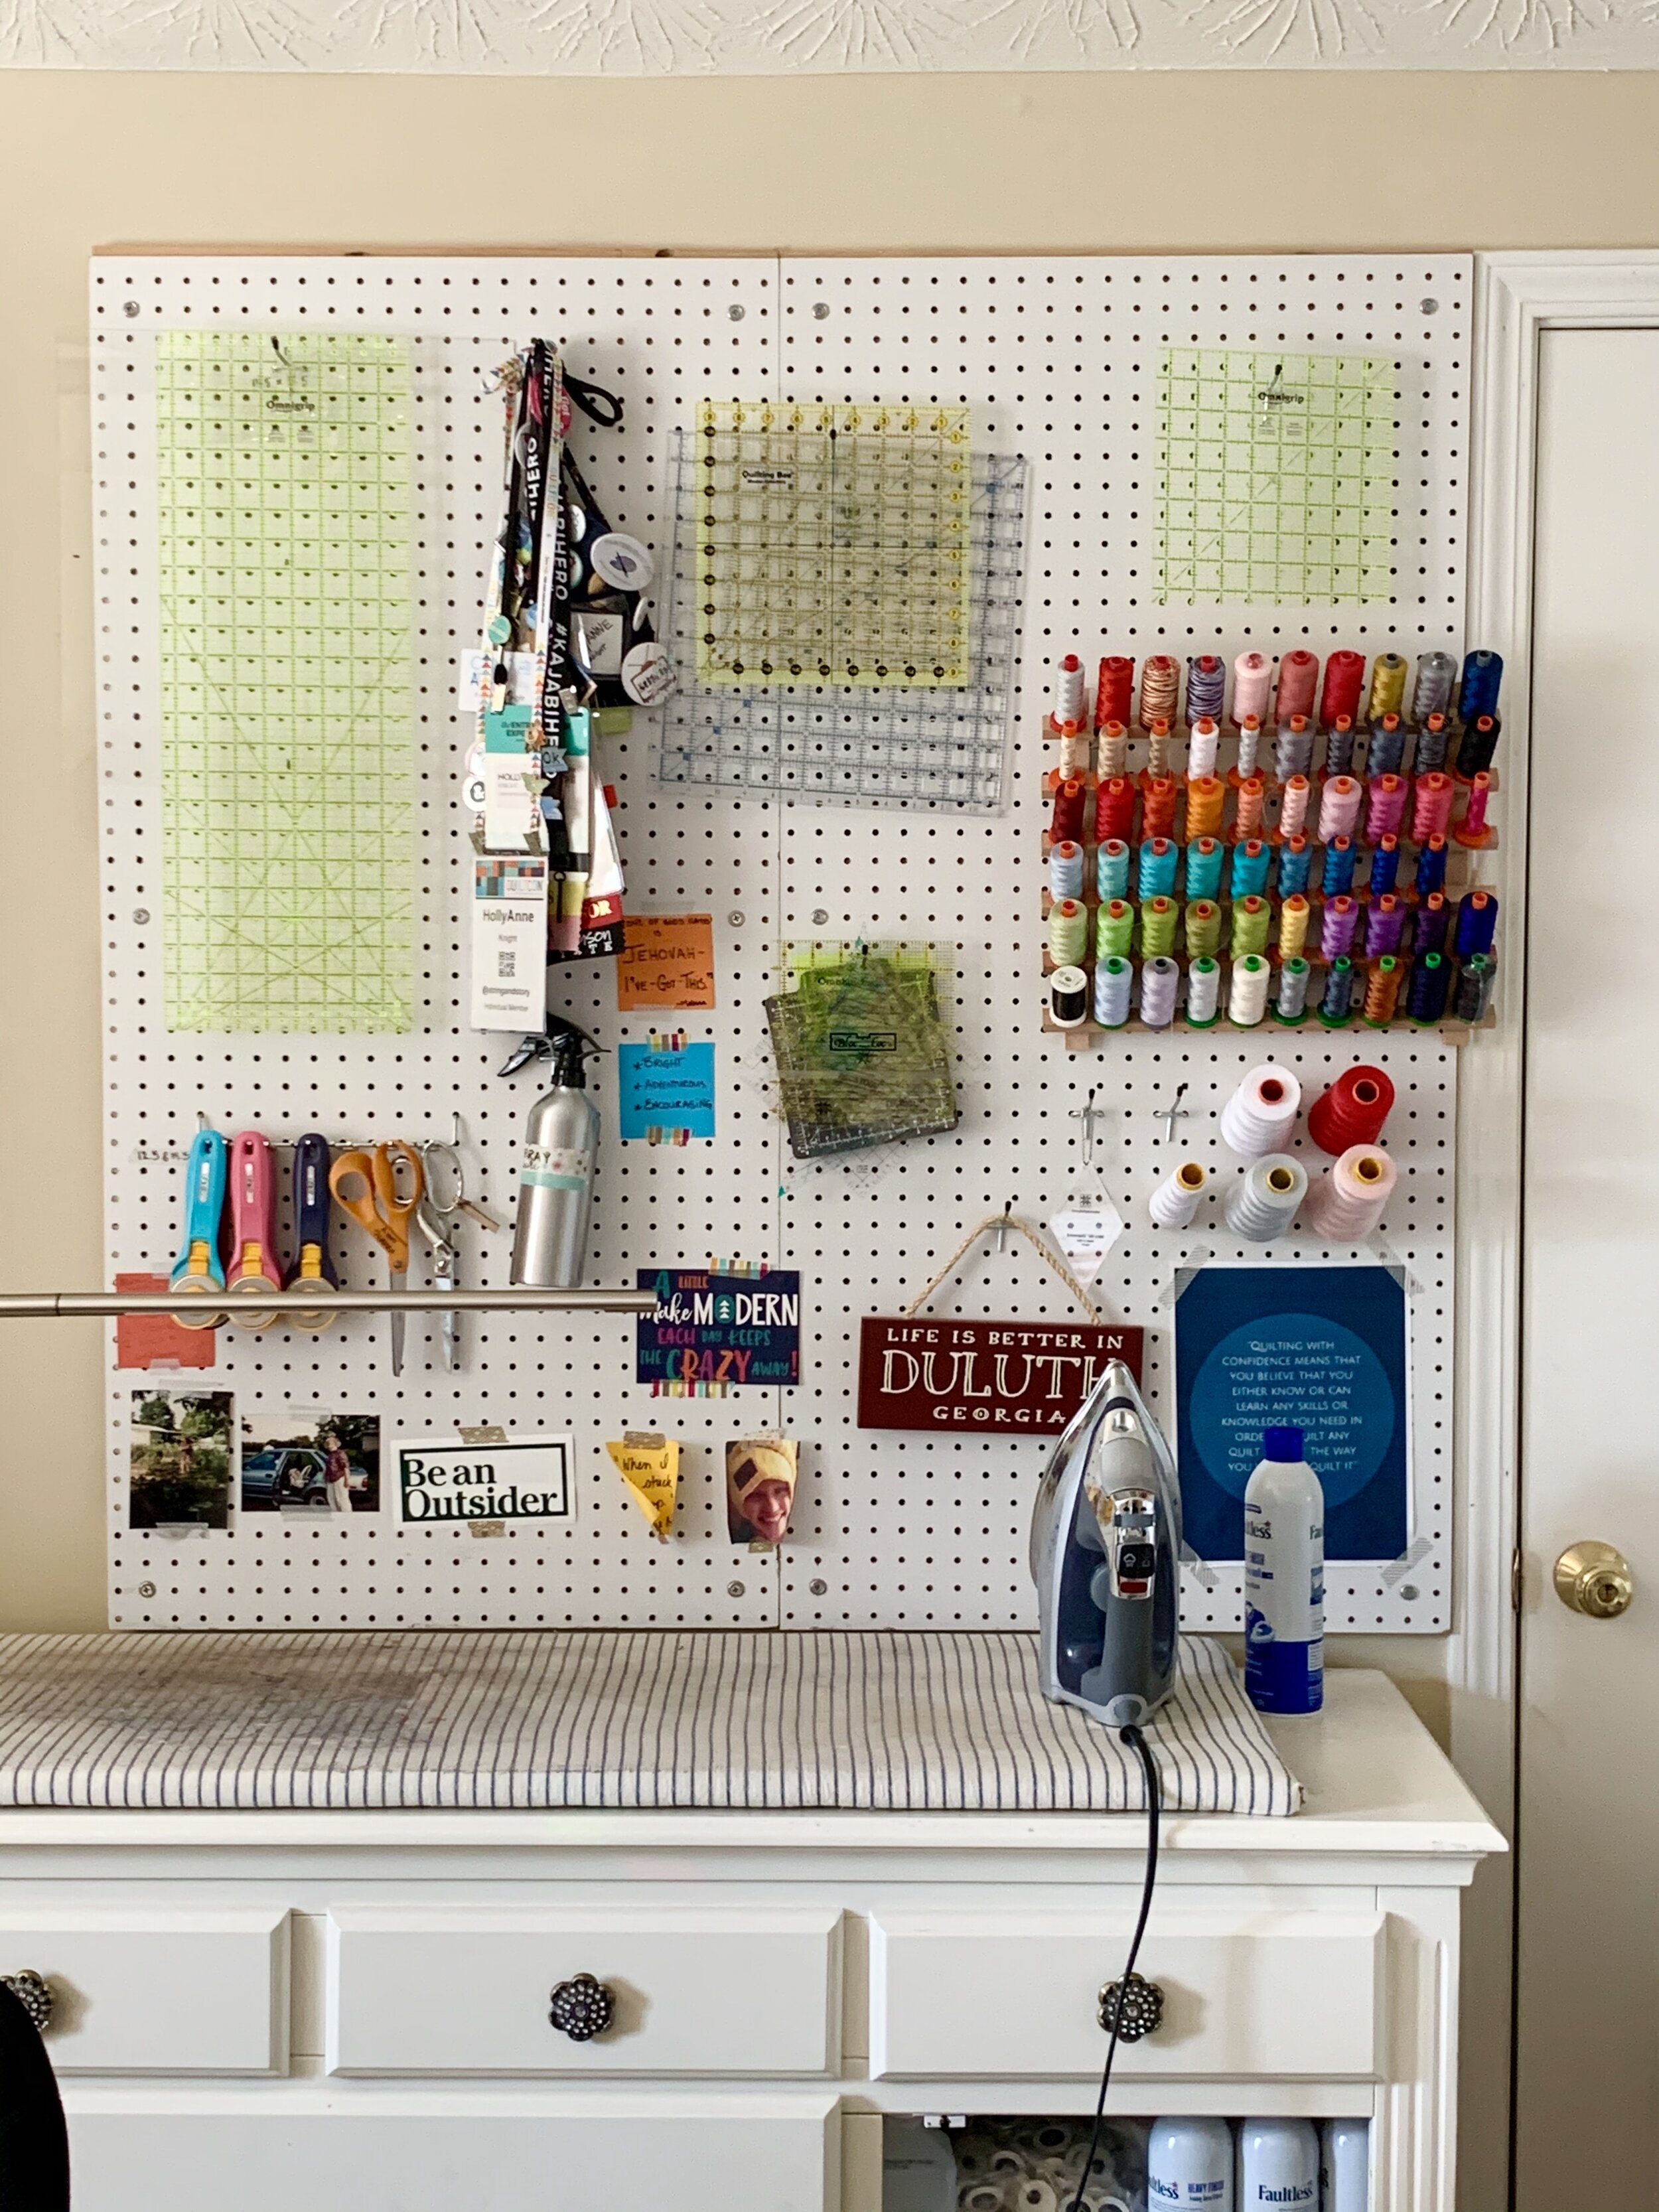
Image Source: images.squarespace-cdn.com
Declutter Your Space First
Before you organise, you need to clear things out. This step is very important. It is the core of decluttering craft space. Get rid of things you do not need, use, or love anymore.
Gather Everything
Pull out all your sewing items. Get them from every corner, closet, and box. Put them in one place. This helps you see exactly what you have.
Sort Your Items
Now, go through everything. Make piles or use boxes for different groups.
* Keep: Things you use often or plan to use soon.
* Donate: Items in good shape that you do not need. Fabric scraps too small for you might be great for a kids’ craft group.
* Discard: Broken tools, empty spools, unusable fabric scraps, old dried-up glue. Be honest with yourself.
Make Tough Choices
It can be hard to let go. Think about the future. Will you really make that project from that fabric? Do you have too many pairs of scissors? Less stuff means less to organise. It makes your space feel lighter.
Group Your Sewing Supplies
Once you know what you are keeping, group similar items together. This is the start of sewing supply organization. Put all fabrics in one area, all patterns in another, and so on.
Main Supply Categories
- Fabrics: Group by type, color, size, or project.
- Patterns: Paper patterns, digital patterns you have printed.
- Threads: All your spools and cones.
- Notions: Small things like buttons, zippers, pins, needles, elastic, trim. These are sometimes called haberdashery.
- Tools: Scissors, rotary cutters, rulers, marking tools, seam rippers.
- Works in Progress (WIPs): Projects you have started but not finished.
- Interfacing and Batting: Things used inside projects.
- Books and Magazines: Sewing guides and pattern books.
Planning Your Workspace
Think about how you sew. What steps do you take? Cutting, sewing, pressing. Your workspace setup for sewing should make these steps easy.
Set Up Zones
Divide your space into different work areas.
* Cutting Zone: Needs a large, flat surface. Keep cutting mats, rulers, and rotary cutters here.
* Sewing Zone: Your sewing machine area. Needs space for the machine and often a smaller surface next to it. Keep frequently used notions like pins and snips close by.
* Pressing Zone: Ironing board and iron. Place it near your sewing machine.
* Storage Zone: Where you keep all your supplies. This should be easy to reach from your work zones.
Consider Your Space
How much room do you have? Even a small sewing space ideas can be organized well.
* Use vertical space. Shelves and wall organizers save floor space.
* Think about the flow. Can you move from one zone to the next easily?
* Is there good light? Lighting is key for seeing your work clearly.
Choosing the Right Storage
Now that items are sorted and zones are planned, pick storage items. This is where you put your craft room organization tips into practice.
Fabric Storage Ideas
Fabric takes up a lot of space. How you store it depends on the fabric size and your space.
* Folding on Shelves: Best for medium to large pieces. Fold fabric neatly and stack on shelves. You can use comic book boards inside the folds to keep them standing straight. This looks tidy and makes fabric easy to see.
* Rolling: Good for larger cuts or delicate fabrics like knits. Roll the fabric around a tube or cardboard. Store rolls upright in bins or a basket. This prevents creases.
* In Bins or Drawers: Use clear bins for scraps or smaller pieces. Group by color or fabric type. Drawers are good for keeping fabric dust-free.
* On Bolts: For large amounts of fabric (many yards), you can put it on mini bolts. Store these on shelves like in a fabric shop.
| Fabric Size/Type | Best Storage Method | Pros | Cons |
|---|---|---|---|
| Medium to Large | Folding on Shelves | Neat, easy to see, saves space | Can get messy if not folded well |
| Large/Knit | Rolling in Bins/Baskets | Prevents creases, looks nice | Takes up more space than folding |
| Small Scraps | Clear Bins/Drawers | Contains mess, easy to sort | Can be hard to see what’s inside |
| Very Large Cuts | Mini Bolts on Shelves | Looks professional, easy access | Need specialized bolts, takes space |
Pattern Storage Solutions
Patterns can be paper or digital. Keeping them neat helps you find the one you need quickly.
* Filing Cabinet: Use hanging file folders. Put each pattern in a folder. Label the folder with the pattern number, type of clothing, or designer. This is a very popular method.
* Binders: Put pattern envelopes into clear plastic sleeves. Store sleeves in binders. You can use one binder for tops, another for dresses, etc. This works well if you do not have too many patterns.
* Boxes: Use acid-free storage boxes. File pattern envelopes upright in the boxes. Label the boxes clearly. This is a simple method if space is limited.
* Digital Patterns: Keep digital files organized on your computer or cloud storage. Use folders for different pattern types or designers. Back up your files!
Thread Organizer
Thread can be a tangled mess if not stored right. A good thread organizer keeps spools neat and tidy.
* Thread Racks: Wall-mounted or stand-alone racks hold spools by their center. This lets you see all colors at once. Great for a large collection.
* Thread Boxes: Plastic boxes with dividers keep spools separate. Some have foam inserts to hold spools firmly. These are good for keeping thread dust-free.
* Drawers: Use drawer inserts with pegs or foam to keep spools from rolling around.
* Clear Jars or Containers: Simple way to store spools. Group by color.
- Tips for Thread:
- Wrap loose ends around the spool or secure with a thread hugger (small silicone band).
- Keep specialty threads (like metallic or embroidery) separate.
Notions Storage
Notions are small but important. Notions storage needs to keep tiny items from getting lost. This falls under sewing supply organization.
* Small Drawers: Craft organizers with many small drawers are perfect for buttons, snaps, beads, safety pins.
* Divided Containers: Fishing tackle boxes or hardware organizers work well for tiny items like needles, bobbins, and presser feet.
* Jars or Tins: Clear jars let you see what’s inside. Old cookie tins or mint tins can store buttons or scraps of trim.
* Pegboard: A pegboard on the wall lets you hang small baskets, hooks, and containers for notions you use often. Pins, snips, seam rippers can go here.
* Magnetic Strips: Good for storing metal items like pins and needles safely.
Organizing Sewing Tools
Your tools help you create. Keep them sharp, clean, and easy to grab. This is about organizing sewing tools.
* Scissors: Store scissors safely. Rotary cutters need careful storage too. Use a scissor stand, a drawer insert, or hang them on a pegboard. Keep fabric scissors separate from paper scissors.
* Rulers: Store rulers upright in a container or hang them on the wall using hooks. Some tables have built-in ruler slots.
* Cutting Mats: Keep cutting mats flat. Slide them under furniture or stand them upright against a wall. Do not fold them.
* Marking Tools: Pens, chalk, markers. Keep them together in a cup, jar, or pencil case.
* Pin Cushions and Magnetic Pin Holders: Have several around your workspace so pins are always close by.
Putting It All Away
Once you have your storage solutions, put everything in its new home.
Assign a Place for Everything
Every item needs a specific spot. This makes putting things away easy. When you finish using something, put it back right away. This is a key craft room organization tips for staying tidy.
Label Everything
Label bins, boxes, drawers, and shelves. This helps you find things and reminds you where they go. Use clear labels everyone can read.
Use Vertical Space
Look up! Walls are great for storage.
* Shelves: Go floor to ceiling if possible.
* Pegboards: Hang tools, rulers, small bins.
* Wall Cabinets: Store items away from dust.
Use Under-Table Space
Add drawers or shelves under your cutting or sewing table. Store larger items or things you do not use often here.
Staying Organized
Organisation is not a one-time job. It needs ongoing effort.
The “One In, One Out” Rule
When you buy new fabric, thread, or supplies, think about getting rid of something old. This helps control the amount of stuff you have.
Regular Mini-Declutters
Spend 15-30 minutes each week or month tidying up. Put things back in their place. Clear flat surfaces. This prevents mess from building up.
Deal With Works in Progress (WIPs)
Store WIPs in project bags or boxes. Keep all pieces and patterns together for that specific project. This prevents losing parts and keeps your main workspace clear.
Ideas for Small Sewing Spaces
Having a small space does not mean you cannot be organized. You just need to be smart about it. These are specific small sewing space ideas.
Make Furniture Work Hard
- Folding Table: A table that folds up saves floor space when not in use.
- Storage Furniture: Use furniture that does two jobs. An ottoman with storage or a table with built-in drawers.
- Rolling Cart: A small cart on wheels can hold supplies and be moved out of the way easily.
Use Every Inch of Wall Space
- Hang shelves high up.
- Install a pegboard.
- Use door backs: Over-the-door organizers can hold notions, patterns, or even small fabric cuts.
Keep Surfaces Clear
In a small space, a clear surface feels much bigger. Store as much as possible off the main work area.
Go Mobile
If possible, put your machine or cutting mat on a rolling cart or a fold-down desk. This lets you set up and pack away easily.
Think Upwards
Vertical storage is your best friend in a small space. Tall, narrow shelves hold a lot without taking up much floor space.
Other Craft Room Organization Tips
These tips can help any crafting area feel more ordered and pleasant. This covers broader craft room organization tips.
Good Lighting is Key
Sewing needs good light to see colors and details. Use a mix of overhead light and task lighting (like a lamp at your machine).
Make It Comfortable
Use a comfortable chair. Make sure your table height is right for you. A comfortable space makes you want to spend time there.
Add Inspiration
Hang up pictures of finished projects, fabric swatches you love, or sewing quotes. Make the space feel like yours and inspire creativity.
Keep it Clean
Dust and fabric fibers can harm machines and supplies. Vacuum and dust your space regularly.
Deep Dive into Specific Storage Solutions
Let’s look closer at some popular ways to store different items.
More on Fabric Storage
Choosing the right fabric storage ideas is crucial for managing your stash.
* Clear Storage Totes: These are excellent for storing fabric off-season or larger amounts that you don’t need daily access to. Stack them to save space. Clear sides help you see contents.
* Wire Grid Panels: Similar to pegboards, but you can use clips and hooks to hang fabric folded over hangers or small bundles.
* Dressers or Chests of Drawers: Old dressers make great fabric storage. You can fold fabric and lay it flat in the drawers. Group by color or project type.
* Bookcases: Standard bookcases are perfect for folded fabric. Use shelf dividers to keep piles from toppling over.
- Tips for Fabric Stash:
- Measure your fabric and note the yardage on the end of the bolt or fold.
- Keep a small inventory list of your fabric stash (on paper or a simple spreadsheet).
Detailed Look at Thread Organizers
Beyond racks and boxes, there are other ways to store thread. Finding the best thread organizer depends on how much thread you have and your space.
* Bobbin Storage: Bobbins need their own spot.
* Bobbin boxes with small compartments.
* Bobbin rings or clamps that keep a bobbin with its matching spool of thread.
* Magnetic trays or strips for metal bobbins.
* Storing Cones: Large cones of thread need more space than spools.
* Store them on dowel rods mounted on a wall or stand.
* Place them in deep drawers or on deep shelves.
* Some sewing machine cabinets have pull-out drawers designed for cones.
Going Further with Notions Storage
Small items are often the hardest to keep track of. Effective notions storage is key for sewing supply organization.
* Clear Stackable Bins with Lids: Great for storing groups of items like elastic, trims, or bias tape. Stack them to use vertical space on shelves.
* Spice Racks: Can be repurposed to hold small jars of buttons, beads, or other tiny notions. Mount on a wall or inside a cabinet door.
* Magnetic Knife Strips: Good for holding metal items like snips, seam rippers, or small metal rulers near your machine.
* Desktop Organizers: Use office supply organizers for pens, scissors, rulers, and other tools you use right at your sewing desk.
* Zipper Pouches/Bags: Use small bags to keep together items needed for a specific technique or project, like bag-making hardware or quilting clips.
Better Pattern Storage Solutions
Think about how you use patterns when choosing a pattern storage solutions.
* Magazine Holders: Store pattern envelopes upright in magazine holders on a shelf. Group by pattern company or item type.
* Index Card Box (for tracing patterns): If you trace your patterns, store the traced copies folded neatly in an index card box labeled by size and pattern number.
* Hanging Garment Bags: For large format patterns or master patterns you use often, hang them in garment bags to keep them flat and dust-free.
Smart Ways for Organizing Sewing Tools
Sharp tools need safe storage. Organizing sewing tools protects the tools and keeps you safe.
* Tool Rolls or Cases: Fabric rolls or zippered cases designed for tools are good for keeping sets together and are portable.
* Desk Caddies: Use a caddy with multiple compartments for pens, marking tools, and small scissors right on your desk.
* Magnetic Pin Bowls: Essential for quickly gathering loose pins.
* Dedicated Drawer Inserts: Foam or plastic inserts in drawers can hold tools securely so they don’t rattle around or get damaged.
Creating Your Ideal Sewing Space
The most organized space is one that works for you. Craft room organization tips are useful, but tailor them to your own habits and the way you sew.
Think About Workflow
Imagine yourself making a project. Where do you start? Where do you move next? Your layout should match this flow.
* Fabric from storage to cutting table.
* Cut pieces to sewing machine.
* Sewn seams to ironing board.
* Finished piece to a ‘completed’ spot.
Make It Personal
Add things that make you happy. Pictures, plants, a comfy rug. A space you enjoy being in makes organisation easier to maintain.
Use Upward and Outward Space
Don’t just think about the floor. Look at your walls and even the back of your door. These areas are goldmines for small sewing space ideas and general storage.
Benefits of an Organized Sewing Room
Why go through all this effort?
* Save Time: No more searching for lost items. Everything is where it should be.
* Reduce Stress: A tidy space is calming. Less clutter means less visual noise.
* Sew More: When your space is ready, you are more likely to sit down and sew.
* Protect Supplies: Proper storage keeps fabric from fading, thread from tangling, and tools from getting damaged.
* Use What You Have: You can see all your supplies, so you remember to use them instead of buying new things you already own.
Step-by-Step Action Plan Recap
- Declutter: Get rid of things you don’t need.
- Sort: Group everything you keep into categories.
- Plan Zones: Decide where cutting, sewing, and pressing will happen.
- Choose Storage: Select ways to store each type of supply (fabric, thread, patterns, notions, tools).
- Put Away & Label: Place items in storage and clearly label everything.
- Maintain: Set up systems for putting things back and regular tidying.
Remember to use specific fabric storage ideas, find the right thread organizer, plan for pattern storage solutions, manage notions storage, keep organizing sewing tools in mind, apply overall sewing supply organization and craft room organization tips, and make the most of your workspace setup for sewing, especially if you are using small sewing space ideas.
Frequently Asked Questions (FAQ)
Q: Where should I start if my sewing room is a total mess?
A: Start with decluttering. Take everything out, sort it into piles (keep, donate, discard), and get rid of the unwanted items first. This makes the organizing part much easier.
Q: How often should I tidy up my sewing room?
A: It is best to do a quick tidy after each sewing session. Put tools away, clear scraps. Do a slightly longer tidying session (15-30 minutes) each week or month to put away supplies and maintain order. A big clean-up can happen a few times a year.
Q: What’s the best way to store fabric scraps?
A: This depends on the size of the scraps. Small pieces can go in clear bins sorted by color or fiber type. Larger scraps can be folded and stored on shelves or in drawers like regular fabric, perhaps in a dedicated ‘Scraps’ section.
Q: I have very little space. How can I still have a sewing area?
A: Look for multi-purpose furniture, use vertical space with shelves and wall organizers, and consider mobile storage like carts. A fold-down desk can turn a small corner into a temporary sewing station. Focus on storing things off the floor and off your main work surface.
Q: My patterns are taking over! What should I do?
A: Choose a system and stick to it. Filing cabinets with hanging folders, binders with plastic sleeves, or organized boxes are good options. Label everything clearly by type or number so you can find patterns easily. Get rid of patterns you know you will never use.
Organising your sewing room is an ongoing process, but the rewards are great. A well-ordered space is a joy to be in and helps your creativity flow without the frustration of clutter. Take it step by step, and soon you will have a functional and inspiring space.