
Getting your embroidery floss organized might seem like a big job, especially if you have a lot. But it makes stitching much more fun! No more digging through knots. No more guessing if you have a certain color. With good organization, you can easily find what you need and spend more time stitching. Let’s look at simple ways to sort and store your beautiful threads.
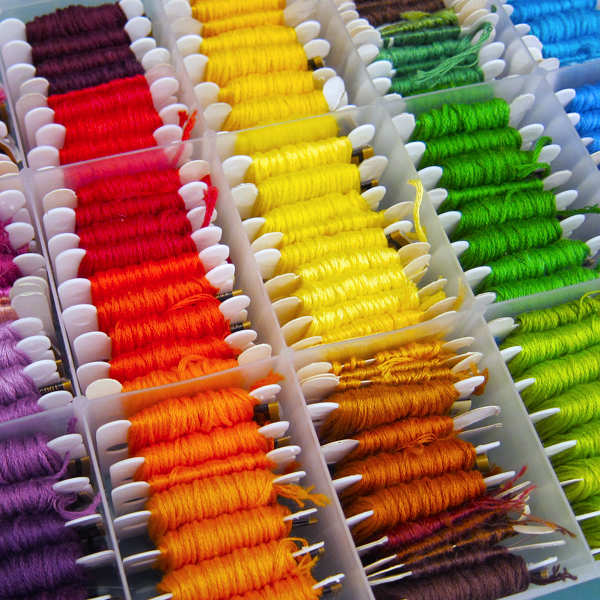
Image Source: www.redhandledscissors.com
Why Putting Your Floss in Order Helps
Think about finding a specific color of floss. Is it tucked away in a bag? Is it tangled with others? When floss is tidy, you save time. You can see all your colors quickly. This also helps you know what you have. You won’t buy the same color twice by mistake. Organized floss stays clean and neat. This keeps it in good shape for your projects.
What You Need to Get Started
First, gather all your floss in one spot. This helps you see how much you have. You might find colors you forgot about!
You will also need some tools to help you organize. What you need depends on how you want to store your floss. Common tools include:
- Floss Bobbins: These are small flat pieces, often plastic or cardboard. You wrap the floss around them.
- Storage Containers: These are boxes or bins to hold the bobbins or other organized floss. Some boxes are made just for bobbins.
- Markers or Pens: For writing color numbers on bobbins or tags.
- Scissors: To cut floss from skeins if needed.
- Floss Rings: Metal or plastic rings to hold bunches of floss or bobbins together.
Gathering everything first makes the organizing process much smoother.
Popular Floss Organization Methods
There are many different ways to store embroidery floss. The best way to store embroidery floss depends on how much floss you have, where you like to stitch, and what works best for you. Let’s look at some popular floss organization methods.
Using Floss Bobbins and Storage Boxes
This is a very common way to organize floss. Floss bobbins and storage boxes keep each color separate and tidy.
How to wind embroidery floss bobbins: To wind floss onto a bobbin, find the end of the skein. Slip the paper bands off the skein carefully. Do not pull them off hard, or the floss might tangle. Take one end of the floss. Tape it or tuck it into a small slit on the bobbin. Then, start wrapping the floss around the bobbin. Wrap it neatly and smoothly. Try not to wrap it too tight. Keep wrapping until all the floss from the skein is on the bobbin. Tuck the other end into another slit or tape it down.
Once the floss is on the bobbin, write the color number on the bobbin. DMC is a popular brand of floss, and they use numbers. Writing the DMC number on the bobbin is part of DMC floss organization. This helps you find the exact color you need for a pattern. Most bobbins have a space to write the number.
After winding, place the bobbins into a storage box. These boxes often have dividers. The dividers keep the bobbins standing up straight. This stops them from tangling. You can arrange the bobbins by color number in the box. This makes finding colors very fast. Embroidery floss storage containers like these bobbin boxes are great because they are stackable and easy to carry.
-
Pros of Using Bobbins:
- Keeps each color separate.
- Easy to see color numbers.
- Fits well in special storage boxes.
- Keeps floss neat and less likely to tangle.
- Good for medium to large floss collections.
-
Cons of Using Bobbins:
- Winding all the floss takes time, especially if you have a lot.
- Bending the floss around the bobbin can make small kinks in the thread.
Using Floss Rings for Organization
Using floss rings for organization is another simple method. This method works well for smaller collections or for keeping floss for a specific project together.
Take a skein of floss. You can leave the paper bands on or take them off. Put the whole skein, or several skeins of the same color, onto a ring. You can group the rings together. Some people put a tag on the ring with the color number. You can use a marker to write the number on the paper band if you leave it on.
These rings can then be put into a bag, a box, or even hung up. Some crafters hang the rings on a hook or a pegboard. This is a simple way to keep colors together.
-
Pros of Using Floss Rings:
- Quick and easy to set up. No winding needed.
- Less kinking of the floss compared to bobbins.
- Great for organizing floss for one project.
- Good for small to medium collections.
-
Cons of Using Floss Rings:
- Skeins can still get a bit messy or tangled on the ring.
- Finding a specific color can be harder than with bobbins in a numbered box.
- Needs a way to label the colors clearly.
Storing Floss in Bags or Pouches
Simple bags or pouches are another option for embroidery floss storage containers. Clear zipper bags, like craft bags or even sturdy food storage bags, work well.
You can put one skein or several skeins of the same color in a bag. Label the bag with the color number. You can put these bags into a larger box, a drawer, or a bin.
Small fabric pouches or clear cosmetic bags are also useful. You can group colors together, like all the blues or all the greens, into one pouch.
-
Pros of Using Bags:
- Very cheap and easy to start.
- Floss stays straight; no kinks from winding.
- Good for small collections or travel.
-
Cons of Using Bags:
- Finding a specific color can be tricky if the bags are not well organized or labeled.
- Bags can look messy if not stored in a larger container.
- Easy to forget what colors you have if you can’t see them all.
Using Drawers, Bins, and Cabinets
If you have a lot of floss, using drawers, bins, or cabinets might be the answer. These embroidery floss storage containers can hold a lot of thread.
You can use plastic drawers, small cabinets, or even a craft storage cart with drawers. Inside the drawers, you can use other organization tools. For example, you could put your bobbin boxes in a drawer. Or you could put your labeled bags of floss into bins that fit in the drawer.
Some crafters dedicate a whole set of drawers to their floss stash. They might use one drawer for reds and pinks, one for blues, one for greens, and so on.
-
Pros of Using Drawers/Bins:
- Can store a very large amount of floss.
- Keeps floss out of sight and protected from dust and light.
- Can be part of your room’s furniture or storage system.
-
Cons of Using Drawers/Bins:
- Requires dedicated space or furniture.
- Still needs an internal system (like bobbins, bags, or cards) to keep the floss neat inside the drawer/bin.
Organizing Embroidery Thread by Color or Number
Once you choose how to store your floss (bobbins, rings, bags, etc.), you need a system to arrange it. The most common ways are by color or by number.
Organizing by Color
Organizing embroidery thread by color makes it easy to pick out shades when you are designing or looking for a specific hue. You group all the reds together, all the blues together, all the greens together, and so on.
You can create sections for each color family. Within each color family, you can arrange the shades from light to dark. For example, put all the light pinks first, then the medium pinks, then the dark pinks.
If you use bobbin boxes, you can arrange the bobbins in rows by color families. If you use bags or rings, you can put the red bags/rings together, the blue bags/rings together, etc.
This method is great for visual people. It’s fun to see all the colors lined up.
-
Pros of Organizing by Color:
- Very visual and inspiring.
- Easy to choose colors for new projects.
- Simple to add new colors to the right spot.
-
Cons of Organizing by Color:
- Harder to find a specific color if a pattern calls for a number (like DMC 310). You have to know what color number 310 is.
- Colors can look different in different lights, making it tricky to place them perfectly.
Organizing by Number
Organizing floss by number is very useful if you work from patterns that list specific color numbers (like DMC, Anchor, or other brands). DMC floss organization often uses the DMC numbering system.
After winding your floss onto bobbins and writing the color number, arrange the bobbins in numerical order. Start with the lowest number you have and go up.
If you use a bobbin storage box with dividers, you can put the numbers in order row by row. Box inserts sometimes even have printed numbers to guide you.
If you use bags or rings, label each one clearly with the number. Then, arrange the bags or rings in numerical order in your bin or drawer.
This system makes it super fast to find color number 816 or 3347, for example.
-
Pros of Organizing by Number:
- Fastest way to find a specific color needed for a pattern.
- Very orderly and clear system.
- Easy to see gaps in your collection (colors you are missing).
-
Cons of Organizing by Number:
- Less visual than organizing by color. You don’t get the same “rainbow” effect.
- You need to know the color numbers to use this system well.
Combining Color and Number Organization
Many people use a mix of both systems. They might organize their main stash by number for easy pattern matching. But they might pull out floss for a specific project and organize that floss by color for easier stitching.
Or, they might organize their main storage container by color family, and within each color family, they organize the bobbins by number. This way, you see all the reds together, and then you can quickly find the exact red shade you need by number.
Managing Large Floss Stashes
If you have been stitching for a while, you might have a managing large floss stash situation! This means you have a lot of floss. Organizing a large stash can feel overwhelming.
Here are some tips for a big collection:
- Break it Down: Don’t try to organize everything at once. Start with one color family, or one box, or one drawer. Work on it for a set amount of time each day or week.
- Use Suitable Storage: Bobbin boxes are great for large collections. You can stack many boxes. Larger bins or dedicated drawers also work well. Think about the space you have.
- Use the Number System: For a large stash, organizing by number is usually the most efficient way to find specific colors quickly when you need them for patterns. DMC floss organization by number is popular for large collections.
- Create an Inventory: For a very large stash, you might want to list the colors you have. You can use a notebook, a spreadsheet on a computer, or a phone app. This helps you track what you own and what you need.
- Purge Duplicates or Damaged Floss: As you organize, you might find duplicate skeins or floss that is old, faded, or damaged. Decide if you really need multiple skeins of the same color or if the damaged floss is usable.
- Label Everything Clearly: No matter the method, clear labels are key when managing large floss stash. Make sure every bobbin, bag, or container has the correct color number or description.
Having a system for a large amount of floss saves huge amounts of time in the long run. It also makes sure you actually use the floss you have!
Looking at Different Embroidery Floss Storage Ideas
Let’s recap some embroidery floss storage ideas. There are many options beyond just bobbins and boxes.
| Storage Method | Good For | Pros | Cons | Common Materials |
|---|---|---|---|---|
| Bobbins in Boxes | Medium to Large | Neat, stackable, easy to see numbers. | Takes time to wind, can kink floss. | Plastic, Cardboard, Wood |
| Floss Rings | Small to Medium | Quick setup, less kinking, easy to grab. | Can get messy, needs good labeling. | Metal, Plastic |
| Small Bags/Pouches | Small to Medium | Cheap, easy to start, floss stays straight. | Can look messy, harder to find colors fast. | Plastic, Fabric |
| Drawers/Bins | Large Stashes | Holds a lot, protects floss, keeps tidy. | Needs space, still needs internal system. | Plastic, Wood, Fabric |
| Hanging Organizers | Small to Medium | Saves space, visual, easy access. | Can collect dust, might need protection. | Fabric, Plastic |
| Thread Racks | Small to Medium | Very visual, beautiful display. | Floss can get dusty, needs wall space. | Wood, Plastic |
These are just some popular embroidery floss storage ideas. You can mix and match methods. Maybe you use bobbins for your main colors and rings for your project floss.
Getting Your Floss Ready for Storage
Before you put your floss into storage, it’s a good idea to get it ready.
- Untangle: Gently untangle any knots. This is much easier before winding or storing.
- Check Condition: Look for any damage, fading, or dirt. Set aside any floss that isn’t usable.
- Identify Colors: If you removed the paper bands, make sure you know the color number before winding it onto a bobbin. Use a color card or the original band if possible. This is important for DMC floss organization if you rely on numbers.
- Wind or Prepare: Wind bobbins or gather skeins for rings/bags.
Taking a little time to prepare the floss makes the storage process smoother and ensures you are organizing thread that is ready to use.
Best Way to Store Embroidery Floss – Making Your Choice
As mentioned, there is no single best way to store embroidery floss for everyone. The right method depends on your needs:
- For Speed and Ease of Finding Specific Colors: Bobbins in numbered storage boxes are excellent. This is often seen as the best way to store embroidery floss if you follow patterns with color numbers.
- For Quick Setup and Less Floss Kinking: Floss rings are a good choice.
- For Budget-Friendly Options: Small bags or simple bins are great embroidery floss storage containers.
- For Large Collections: A system using drawers, bins, and potentially bobbin boxes inside is effective for managing large floss stash.
- For Visual Selection: Organizing by color, especially on racks or in clear containers, works well.
Many people evolve their system over time. They might start with bags and move to bobbins as their collection grows. Don’t feel like you have to pick one method forever. Find what works best for you right now.
Keeping Your Floss Organized Over Time
Putting your floss in order is one step. Keeping it that way is the next! Here are some tips for maintaining your organized stash:
- Put Floss Away Right After Using: When you finish with a color, put it back in its spot right away. Don’t leave it out to tangle later.
- Organize New Floss Quickly: When you buy new floss, wind it or put it on a ring and add it to your system soon after getting home.
- Use a “Project Pouch”: Pull out the colors you need for a specific project and put them together. This keeps your main stash tidy while you work. When the project is done, return the floss to its proper place.
- Regular Quick Tidy-Ups: Every so often, take a few minutes to straighten bobbins, re-label anything unclear, or smooth out any messy skeins.
Maintaining organization is much easier than re-organizing a big mess later!
A Note on DMC Floss Organization
DMC floss organization is very common because DMC is a widely used brand. Their numbering system is standard in many patterns. If you primarily use DMC floss, organizing by number is highly recommended.
DMC makes storage products designed for their floss, like plastic bobbins and storage boxes sized to hold the bobbins. Using these products makes DMC floss organization simple and efficient. Remember to always write the DMC number on the bobbin or container!
Why Organizing Floss is Worth It
Yes, organizing your floss takes time and effort upfront. But the benefits last a long time. You’ll find colors faster. You’ll waste less thread. You’ll feel more relaxed and in control of your crafting supplies. Plus, seeing your collection neatly organized can be very satisfying!
Think of it as an investment in your stitching time. The time you spend organizing is time you save later, and it leads to more enjoyable stitching sessions.
Frequently Asked Questions
Q: What is the easiest way to start organizing floss?
A: Start small. Pick one type of storage, like bobbins and a box. Gather a few colors, wind them, label them, and put them in the box. See how that feels. Then do a few more colors each day.
Q: Should I take the paper bands off the floss?
A: If you are winding onto bobbins, you must remove the bands. If you are using rings or bags, you can often leave them on, but be sure to label the color number clearly, perhaps on the ring or bag itself. The bands hold the skein shape but can slip off over time.
Q: My floss is very tangled. What should I do?
A: Try to untangle it gently. If a skein is badly tangled and you can’t save it easily, sometimes it’s better to cut your losses and discard it or use it for small, messy tasks rather than spending hours untangling. Start fresh with untangled skeins.
Q: How many bobbins do I need?
A: Count how many skeins of floss you have. Buy at least that many bobbins, plus some extras for new colors. Bobbins are sold in packs of various sizes.
Q: Can I mix different brands of floss?
A: Yes, you can store them together. However, different brands have different numbering systems. If you organize by number, it’s best to keep brands separate or use a system that notes the brand along with the number (e.g., “DMC 310”, “Anchor 403”). Organizing by color might be easier if you have many different brands.
Q: How do I keep my floss clean?
A: Storing floss in closed containers like boxes, drawers, or bins protects it from dust, dirt, and sunlight, which can fade colors. Wash your hands before stitching or handling floss.
Q: Is cardboard or plastic better for bobbins?
A: Plastic bobbins are more durable and last longer than cardboard bobbins. Cardboard is cheaper but can bend or wear out over time.
By choosing a method that fits your style and sticking with it, you can say goodbye to tangled floss and hello to more enjoyable stitching time! Pick a method, gather your supplies, and start today! Your future crafting self will thank you.