
You might ask, “Why wash fabric before sewing?” and “Does fabric need washing before cutting?” The short answers are yes, prewashing is usually a smart step before you start cutting and sewing, and you wash it for several important reasons we’ll explore. This guide will walk you through the benefits of prewashing sewing fabric and the simple steps to take, making sure your sewing projects turn out just right.
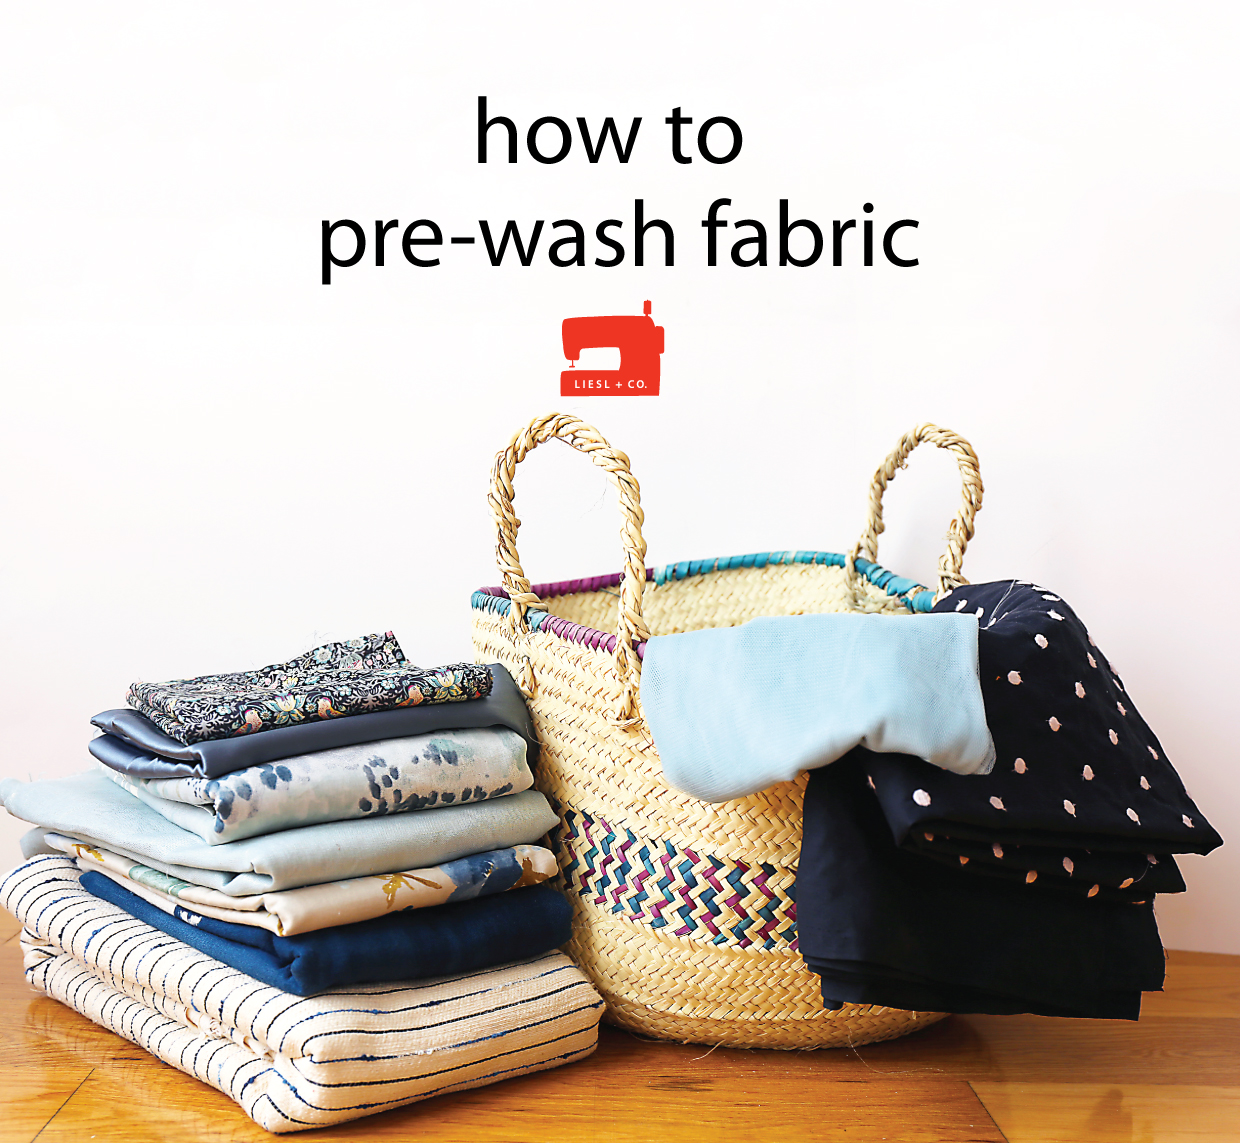
Image Source: oliverands.com
Grasping Why Fabric Needs a Bath
Let’s talk about why wash fabric before sewing. Think of new fabric like a new shirt you buy at the store. It’s often stiff, maybe a bit wrinkled, and might have a strange smell. This isn’t just from being handled; fabric mills use lots of stuff on the fabric to make it look nice and be easier to handle during manufacturing.
- Factory Stuff: Fabrics come from big factories. They use oils, starches (called sizing), and other chemicals. These make the fabric smooth and stiff for cutting and handling.
- Dirt and Germs: Fabric travels and sits in stores. It picks up dust, dirt, and who knows what else. Washing cleans this away.
- Dye Leftovers: Sometimes, there’s extra dye on the fabric. Washing helps rinse this out.
So, prepping fabric for garment making starts with getting rid of this factory stuff and making the fabric clean and ready.
Benefits of Prewashing Sewing Fabric
Washing fabric before sewing might seem like an extra step, but it has big benefits of prewashing sewing fabric. It helps you avoid problems later on, saving you time and frustration.
- Prevent Fabric Shrinkage Before Sewing: This is a major one. Most fabrics, especially those made from natural fibers like cotton, linen, and rayon, will shrink the first time they are washed and dried. If you sew first and then wash the finished item, your carefully made garment or quilt could end up too small, bumpy, or misshapen. Washing beforehand lets the fabric shrink before you cut and sew, so your project stays the size it should be.
- Prevent Color Bleeding Fabric: Have you ever washed a new red shirt with white socks and ended up with pink socks? Fabric dyes can run, especially dark or bright colors. This is called color bleeding. Prewashing helps prevent color bleeding fabric by washing away any loose dye. This protects other fabrics in your project from getting stained.
- Remove Sizing and Chemicals: As we talked about, fabric has sizing and other chemicals. These make the fabric stiff. Washing them out makes the fabric softer and behave more like it will after it’s worn and washed many times. It also removes things that could irritate your skin. This step is how to remove sizing from fabric effectively.
- Test Fabric Behavior: Prewashing shows you how the fabric acts when wet. Does it wrinkle a lot? Does it fray a lot? This information helps you choose the right sewing techniques and finishes.
- Improve Feel and Drape: Getting rid of the factory stuff makes the fabric softer and improves how it hangs or drapes, which is important for clothes.
- Get Rid of Smells: New fabric can have factory smells or store smells. Washing makes it smell fresh.
In short, prewashing fabric makes your finished project look better, last longer, and fit right. It’s a key step in prepare fabric for sewing projects.
Fathoming Fabric Shrinkage
Let’s look closer at fabric shrinkage before sewing. Why does it happen? Natural fibers like cotton, linen, wool, and silk have a bit of stretch and give when they are made into threads and then fabric. When they get wet, especially with warm water, these fibers relax and settle back into a more compact state. Drying with heat makes this even more pronounced.
Think of a spring that has been pulled out a little. When you let go, it shrinks back. Fabric fibers are a bit like that.
- Cotton: Known for shrinking. It can shrink by 5-10% or even more, depending on the weave and finish. This is why you must wash cotton fabric before sewing, especially if making clothes or quilts.
- Linen: Also shrinks quite a bit.
- Rayon/Viscose: These are made from wood pulp and are very prone to shrinkage, sometimes changing size and shape significantly.
- Wool: Shrinks, especially with heat and agitation (this is called felting).
- Silk: Can shrink and change texture.
Synthetic fabrics like polyester and nylon shrink much less, if at all. However, they might still benefit from washing to remove chemicals or excess dye.
Table: Common Fabric Types and Shrinkage Potential
| Fabric Type | Shrinkage Potential | Notes |
|---|---|---|
| Cotton | High | Shrinks most on first wash. |
| Linen | High | Becomes softer after washing. |
| Rayon/Viscose | High | Can change shape. Handle gently when wet. |
| Wool | High | Can felt with heat/agitation. Wash cool. |
| Silk | Medium | Can change texture. Wash cool, handle gently. |
| Polyester | Low | Might stretch, minimal shrinkage. |
| Nylon | Low | Minimal shrinkage. |
| Blends (Poly/Cotton) | Medium-High | Shrinkage depends on the percentage of natural fiber. |
By prewashing, you make sure all the shrinking happens before you cut your pattern pieces.
Grappling with Color Bleeding
Prevent color bleeding fabric is another big reason to prewash. Dyes used in fabric can sometimes be unstable. When the fabric gets wet, especially in warmer water, some of the dye can loosen and wash out.
- Why It Happens: Some colors, like reds, blues, and blacks, are more likely to bleed than others. Dark and vibrant colors often have more excess dye.
- The Problem: If you mix a bleeding fabric with lighter colors in the same project (like a quilt with red and white squares) and then wash the finished item, the red dye can run onto the white fabric, staining it. This is a disaster for a finished project!
- The Solution: Prewashing the bleeding fabric on its own (or with similar colors) removes the excess dye before it can harm your project.
You can test for color bleeding by wetting a small corner of the fabric and pressing it onto a scrap of white fabric or paper towel. If color transfers, it will definitely bleed in the wash.
Eliminating Sizing and Grime
How to remove sizing from fabric is simple: you wash it! Sizing is like a temporary starch applied to fabric at the factory. It makes the fabric stiff, smooth, and stable. This helps it run through machinery easily and makes it look crisp on the bolt.
While sizing helps manufacturers, it’s not good for sewing or wearing.
- Stiffness: Sizing makes fabric stiff, which changes how it drapes and feels. Removing it makes the fabric softer and more natural.
- Needle Problems: Sizing can make your sewing needle sticky.
- Finish Problems: Sizing can sometimes prevent interfacing or fusible web from sticking well. It can also make thread look dull or fuzzy.
- Allergies/Irritation: The chemicals used in sizing and other finishes can sometimes irritate sensitive skin. Washing removes these.
- Improved Absorbency: Removing sizing from towels or diapers improves their ability to soak up water.
Prewashing cleans the fabric, removing this temporary stiffness and any dirt or oils picked up along the way. This is part of prepping fabric for garment making that makes the fabric nice to work with and wear.
Your Laundry Steps for New Sewing Fabric
Ready to wash your new fabric? Here are the laundry steps for new sewing fabric. It’s not hard, but doing it right makes a difference.
Step 1: Secure the Edges
Fabric edges (the cut ends) can fray a lot in the washing machine. Loose threads can tangle together, making a mess and shrinking the size of your fabric piece.
- Serging: If you have a serger, serge the raw cut edges. This is the fastest and neatest way.
- Zigzag Stitch: On a regular sewing machine, use a wide zigzag stitch along the raw edges. Keep the stitches close together.
- Pinking Shears: Cut along the raw edges with pinking shears (those scissors with the zig-zag blades). This helps reduce fraying, though it might not stop it completely on some fabrics.
- Folding: Fold the raw edge over about 1/4 inch and sew a straight stitch close to the fold. This is more work but very secure.
- Leave as Is (Sometimes): For some very stable fabrics that don’t fray much, or if you’re washing just a small piece, you might skip this. But it’s generally safer to secure edges, especially on cotton or linen.
Step 2: Separate Your Fabrics
Wash fabrics that are similar in color and type together.
- Colors: Wash dark colors together, bright colors together, and light colors together, just like you do with your regular laundry. This is key to prevent color bleeding fabric. If you have one piece of a very dark or bright color that you suspect will bleed, wash it alone first.
- Fabric Type: Wash delicate fabrics separately from sturdy ones. Wash knits separately from wovens. This prevents damage.
- Laundry Bags: For very delicate fabrics or small pieces, use a mesh laundry bag.
Step 3: Choose Your Wash Method
How you wash depends on the fabric type and how you plan to wash the finished item. The general rule is to wash the fabric the same way you will wash the finished project.
- Machine Washing: Most common for cotton, linens, and durable synthetics.
- Use the settings you’ll use for the final garment. If it’s a cotton t-shirt you’ll machine wash and tumble dry, wash the fabric that way. If it’s a delicate blouse you’ll hand wash, hand wash the fabric.
- Water Temperature: Warm or hot water will cause the most shrinkage. If you want maximum shrinkage now, use warm or hot. If you plan to wash the finished item in cold water, washing the fabric in cold might be okay, but you risk some shrinkage later. For cotton that will be machine washed, warm or hot is usually best to get all the shrinkage out. For delicate fabrics, use cold water.
- Detergent: Use a small amount of your regular laundry detergent. Avoid fabric softener, especially for fabrics like towels where it reduces absorbency, or for quilting cottons where it can leave residue.
- Hand Washing: Best for very delicate fabrics like silk, rayon, some laces, and loosely woven materials.
- Fill a basin with cool or lukewarm water and a small amount of mild detergent (like wool wash or a detergent for delicates).
- Gently swish the fabric in the water. Don’t scrub or wring aggressively, as this can stretch or damage the fibers, especially rayon or silk.
- Rinse thoroughly in cool water until all the soap is gone.
- Special Cases:
- Wool: Requires special care. Use cool water and wool wash. Gently squeeze, don’t wring. Lay flat to dry. Prewashing wool isn’t always necessary depending on how it’s treated, but if you do, treat it very gently.
- Synthetics: Often just need a cool or warm wash cycle to remove sizing and dirt. They won’t shrink much.
Step 4: Drying Your Fabric
How you dry also affects shrinkage and fabric texture. Again, dry it the way you’ll dry the finished project.
- Machine Drying: For fabrics like cotton and durable synthetics that will be machine dried.
- Use the heat setting you plan for the finished item (usually medium or high heat for cotton). High heat causes more shrinkage.
- Dry until just damp or mostly dry. Avoid over-drying, which can set wrinkles and damage fibers.
- Air Drying/Line Drying: Good for delicate fabrics, linens, and anything you want to minimize shrinkage or wrinkles on.
- Smooth the fabric out and hang or lay flat.
- Gravity helps reduce wrinkles on hanged items. Laying flat is best for knits or anything that might stretch out of shape when hung wet.
- Pressing while Damp: For fabrics that wrinkle easily (like linen or some cottons), you can take them out of the dryer while still damp and iron them right away. This makes ironing much easier.
Step 5: Pressing
Once your fabric is dry, press it smoothly. Use the correct iron temperature for your fabric type. Pressing makes the fabric flat and easy to cut accurately. It also helps relax the fibers completely after washing and drying.
These are your key laundry steps for new sewing fabric. Following them helps you prepare fabric for sewing projects with confidence.
Washing Cotton Fabric Before Sewing
Let’s talk more about wash cotton fabric before sewing, as it’s one of the most common types used in sewing.
- Why it’s Crucial: Cotton shrinks! Quilting cotton, apparel cotton, home decor cotton – almost all of it will shrink. If you’re making a quilt with different cotton prints, and you don’t prewash, the fabrics will shrink at different rates when the finished quilt is washed, leading to puckering and distortion. For garments, a cotton shirt could become unwearable after the first wash if the fabric wasn’t prewashed.
- Best Method: Machine wash is usually fine for most cottons.
- Use warm or hot water for maximum initial shrinkage. If you plan to always wash the item in cold water, you could prewash in cold, but accept there might be slight shrinkage later. For most garments and quilts, washing in warm/hot is recommended to get the shrinkage out now.
- Use a normal wash cycle.
- Tumble dry on medium or high heat for maximum shrinkage.
- Edge Finishing: Cotton frays easily! Always secure the cut edges before washing.
- Color Bleeding: Cotton prints, especially dark reds, blues, and blacks, are notorious for bleeding. Wash dark or bright cottons separately or with similar colors. You can add a color catcher sheet to the wash as extra insurance, but prewashing is the main protection.
- Drying and Pressing: Dry cotton fully (or just until damp) and press it thoroughly. Cotton wrinkles! Pressing makes it flat and ready for cutting.
By correctly washing cotton fabric before sewing, you ensure your project dimensions stay true and the fabric behaves predictably.
Prepping Fabric for Garment Making
Prepping fabric for garment making involves more than just washing. It’s about making the fabric easy to cut and sew and ensuring the finished item will last and fit well.
- Prewash: The first and most important step, as detailed above. Wash and dry the fabric the way you plan to care for the finished garment.
- Press: Iron the fabric smoothly, removing all wrinkles. Make sure the fabric is on-grain (the crosswise and lengthwise threads are at a perfect 90-degree angle). A pressing ham or seam roll can help with knits or shaped pieces later, but for the main fabric piece, a flat ironing board is key.
- Check for Flaws: While pressing or laying out the fabric, look for any weaving flaws, dye spots, or holes. Mark them so you can avoid cutting through them.
- Determine Grainline: Find the lengthwise grain (the threads parallel to the selvage – the finished edges of the fabric). This is crucial for cutting pattern pieces correctly so the garment hangs right and doesn’t twist. The selvage is your guide here.
- Square Up Fabric (Optional but helpful): For woven fabrics, make sure the cut ends are perpendicular to the selvage. You can do this by tearing a small snip from the selvage edge and tearing the fabric across the width (works best on cotton) or by pulling a crosswise thread and cutting along the line it leaves. Then make sure the crosswise edge is square with the selvage using a large ruler or right angle. This helps ensure your pattern pieces are truly on grain.
These steps get your fabric ready. Does fabric need washing before cutting? Yes, absolutely. Prewashing must happen before you cut, otherwise, all that shrinkage and potential color bleeding will happen after your pieces are already the wrong size or shape.
Deciphering Different Fabric Types
Not all fabrics are treated the same way before sewing.
- Wovens (Cotton, Linen, Rayon, Silk, Wool, Woven Synthetics): Most wovens benefit significantly from prewashing to handle shrinkage and remove finishes. Always secure edges.
- Knits (Jersey, Fleece, Sweatshirt Fleece): Knits can shrink, especially those with natural fibers (cotton knits shrink a lot). They also can roll at the edges and stretch out of shape when wet.
- Secure edges carefully (a zigzag or serged stitch works well).
- Wash on a gentle cycle with cool or warm water.
- Avoid aggressive agitation.
- Tumble dry on low heat or lay flat to dry to prevent stretching and minimize shrinkage (depending on how you plan to care for the finished item).
- Press gently with a press cloth if needed, avoiding stretching.
- Delicates (Lace, Sheer fabrics, some Silks): These need gentle care.
- Hand wash or use a mesh laundry bag in a machine on the delicate cycle.
- Use cool water and mild detergent.
- Do not wring or twist. Gently squeeze out water.
- Lay flat to dry or hang carefully.
- Press with low heat and a press cloth.
- Synthetics (Polyester, Nylon, Acrylic): Shrinkage is minimal. Prewash mainly to remove finishes and excess dye. They dry quickly. Use moderate heat.
- Pile Fabrics (Corduroy, Velvet, Terrycloth): Prewash carefully. Machine washing is usually okay, but turn them inside out to protect the pile. Tumble dry on low or air dry. Avoid pressing the pile flat; press from the back or use a needle board.
- Home Decor Fabrics: These are often treated with stain repellents or stiffeners. They may not shrink as much as apparel fabrics, but they can still benefit from a wash to remove chemicals and check for stability. However, always check the care instructions on the bolt. Some are “dry clean only” and should not be prewashed. If you plan to wash the finished item (e.g., washable slipcovers), you must prewash the fabric first, following the recommended care instructions for the fabric type.
Knowing your fabric type helps you decide the best laundry steps for new sewing fabric.
Interpreting Special Situations
Sometimes, prewashing isn’t straightforward.
- Pre-cut Fabric (Fat Quarters, Strips, Charm Packs): These are often used by quilters. They are small pieces.
- Argument for Prewashing: To ensure all fabrics in the quilt shrink and bleed before assembly. If even one fabric bleeds onto your carefully sewn white squares, the quilt is ruined.
- Argument Against Prewashing: Small pieces can fray horribly and tangle, leading to lost size and distorted shapes. Handling and pressing many small pieces is time-consuming. Pre-cuts are sometimes cut precisely, and washing can make them uneven.
- Compromise: Some quilters accept the risk and don’t prewash pre-cuts, especially if using high-quality fabrics known for minimal bleeding (though this is never guaranteed). Others will gently hand wash small bundles or wash them in mesh bags on a delicate cycle, accepting some fraying. Using color catcher sheets in the wash is highly recommended if you don’t prewash or are unsure. It’s a personal choice, but be aware of the risks of skipping prewashing on mixed fabrics.
- Batting: The fluffy layer inside quilts or garments. Most battings (cotton, bamboo, blends) will shrink. It’s recommended to prewash batting if you are prewashing your fabrics, especially cotton batting. This helps the batting and fabric shrink together, reducing puckering in the finished item. Follow the batting manufacturer’s instructions. Polyester batting usually does not need prewashing.
- Interfacing/Lining: If the main fabric is being prewashed, should you prewash the interfacing or lining?
- Lining: Yes, if the lining fabric type is prone to shrinkage (like rayon or cotton). You want the lining to shrink the same amount as the main fabric so the finished garment hangs correctly.
- Interfacing: Usually no. Most fusibles and some sew-in interfacings can be damaged by washing. Check the product instructions. Often, you simply fuse/sew it to the prewashed main fabric. If you use a sew-in interfacing that you plan to wash repeatedly (like for a bag), you might consider washing a small sample first to see how it behaves, but generally, it’s not prewashed.
- Fabric from Stash: If fabric has been sitting in your stash for years, maybe you don’t remember if you prewashed it. If it’s a natural fiber and you aren’t 100% sure it was washed, treat it like new fabric and prewash it, especially if mixing it with known-prewashed fabrics.
These situations require a bit more thought, but applying the principles of shrinkage and color fastness helps you make the right choice.
The Risks of Skipping Prewashing
So, does fabric need washing before cutting? What happens if you skip this step? You run several risks:
- Your Project Shrinks: This is the most common problem. A garment might not fit anymore, or a quilt might become puckered and distorted, losing its shape and even tearing seams.
- Colors Bleed: Dyes run onto other fabrics in your project, staining them permanently.
- Fabric Behaves Poorly: It might be stiff, hard to press, cause needle problems, or not drape as nicely as it should.
- Allergic Reactions: Leftover chemicals might irritate the skin.
While there might be rare cases where skipping prewashing is acceptable (e.g., a wall hanging that will never be washed, or using 100% polyester for something simple), for most sewing projects, especially wearable items and quilts, the risks of skipping prewashing far outweigh the small amount of time it takes to do it. Prepare fabric for sewing projects the right way, right from the start.
Brief Mention of Prewash Alternatives
Some people look for ways around traditional washing. One common question is about using steam instead.
- Steaming: Steaming fabric can help remove wrinkles and potentially some sizing, and it might cause a small amount of shrinkage. However, it is not a substitute for a proper wash and dry cycle when dealing with natural fibers prone to significant shrinkage (like cotton or rayon) or potential color bleeding. Wetting the fabric thoroughly and exposing it to agitation and heat (if appropriate for the fiber) is what causes the fibers to relax and shrink fully. Steaming doesn’t achieve this level of fiber manipulation. Steam is great for touch-ups or preshrinking wool, but not for most cottons, linens, or rayons intended for washable items.
So, while helpful for some things, steam doesn’t replace the full laundry steps for new sewing fabric.
In Closing: Make Prewashing Your Habit
Prewashing fabric is a simple, yet critical step in the sewing process. It’s an investment of a little time upfront that protects your larger investment of time, effort, and money in your sewing projects. By taking these laundry steps for new sewing fabric, you ensure your fabric is clean, preshrunk, free of excess dye and chemicals, and ready to be cut and transformed into something beautiful and long-lasting. Prepping fabric for garment making this way sets you up for success and avoids heartbreaking problems down the line. Make prewashing a regular part of your sewing routine!
Frequently Asked Questions (FAQ)
Q: What temperature water should I use to prewash?
A: Use the same temperature you plan to use for the finished item. For maximum initial shrinkage and to remove sizing/dye from cotton, warm or hot is often best. For delicates or fabrics you’ll wash cold later, use cold water.
Q: Do I need to use detergent when prewashing?
A: Yes, use a small amount of detergent. This helps remove the sizing, oils, and dirt more effectively than plain water.
Q: My fabric frayed a lot! Is that normal?
A: Yes, fraying is very common, especially on cotton and linen wovens. That’s why securing the cut edges before washing is highly recommended.
Q: How dry should the fabric be after washing?
A: For fabrics you’ll machine dry, dry until just damp or mostly dry to make pressing easier and avoid over-drying. For air-dried fabrics, let them dry fully before pressing.
Q: Do I have to prewash every single fabric?
A: For washable projects (like garments, quilts, bags), prewashing is highly recommended for any fabric prone to shrinkage or color bleeding, especially natural fibers and rayon. Polyester shrinks minimally but still benefits from washing to remove finishes. Check care instructions for fabrics like “dry clean only” silks or rayons – don’t prewash these if you can’t wash the finished item.
Q: What about very large pieces of fabric?
A: Large pieces can tangle in the wash. Fold them neatly before putting them in the machine. You might need to run an extra rinse cycle to make sure all detergent is out.
Q: Can I skip pressing after prewashing?
A: Pressing is very important! It makes the fabric flat and on-grain, which is essential for accurate cutting. Skipping pressing can lead to distorted pattern pieces and a less professional result.
Q: Does prewashing affect how the fabric looks or feels?
A: Yes, it usually makes the fabric softer, removes the artificial stiffness from sizing, and gives it a more natural drape. Colors might look slightly different (sometimes richer, sometimes less intense depending on how much excess dye is removed).
Q: I forgot to prewash one fabric in my project. What should I do?
A: If you’ve already sewn, there’s not much you can do except accept the risk. When you wash the finished item, that one fabric will likely shrink or bleed. If you haven’t sewn the questionable fabric into the project yet, prewash it separately right away before adding it.