
Image Source: i.ytimg.com
Guide: How To Put A Bobbin Into A Sewing Machine Right
Putting a bobbin into a sewing machine is a key step for any sewing project. What is a bobbin? A bobbin is a small spool that holds the lower thread in your sewing machine. Why is it important to put it in right? Correct bobbin placement stops many sewing problems like tangled threads or broken stitches. How do you put a bobbin in? This guide will show you how to put a bobbin into a sewing machine the right way, step by step, for all common types of machines.
Grasping The Bobbin’s Role
The bobbin is a small hero in your sewing machine. It works with the top thread to make a stitch. The top needle goes down. It picks up the bobbin thread. This creates a strong, neat stitch. If the bobbin thread is not in place, your sewing will fail. It might look messy. Or it might not make a stitch at all. Knowing how to load a bobbin sewing machine properly is a basic sewing skill. It helps you avoid frustration. It also helps you make beautiful projects.
Why Good Bobbin Placement Matters So Much
Putting the bobbin in correctly is very important. It keeps your sewing machine happy. It also makes your stitches look great. Here are a few reasons why it matters:
- No Skipped Stitches: If the bobbin is wrong, the machine cannot grab the thread. This leaves gaps in your sewing.
- No Thread Nests: A common problem is a tangled mess of thread under your fabric. This is called a “bird’s nest.” It often happens when the bobbin thread is not set right.
- Strong Stitches: When both threads are set, they lock together well. This makes a strong, lasting stitch.
- Machine Safety: Wrong bobbin placement can stress machine parts. It can even break your needle. Proper setup keeps your machine safe.
- Smooth Sewing: A well-placed bobbin means smooth sewing. You will not stop and start because of thread issues.
Examining Bobbin Types and Parts
Before we place the bobbin, let’s look at what a bobbin is. We will also look at parts related to it.
What a Bobbin Is
A bobbin is a small spool. It holds the lower thread. This thread comes from the bottom of your sewing machine. Bobbins come in different sizes and materials.
- Metal Bobbins: These are strong. They are often heavier. They work well with older machines. Some new machines use them too.
- Plastic Bobbins: These are lighter. They are common in many modern machines.
- Pre-wound Bobbins: You can buy these. They come with thread already on them. They are very handy if you sew a lot. They save winding time.
Always use the bobbin type made for your machine. Check your sewing machine manual. Using the wrong bobbin can cause problems. It can damage your machine.
The Bobbin Case (For Some Machines)
Some sewing machines have a bobbin case. This is a small metal holder. The bobbin sits inside this case. The bobbin case then slides into the machine. This is common for front-loading bobbin instructions. The sewing machine bobbin case holds the bobbin tightly. It helps control the thread’s tension. It is a key part for these types of machines.
The Bobbin Winder
The bobbin winder is a small pin on your machine. It winds thread from your main spool onto an empty bobbin. This is how you prepare a bobbin for use. Every sewing machine has a bobbin winder. It is usually on the top right side.
Starting Off: Safety and Preparing Your Machine
Before you touch anything inside your sewing machine, take a moment. Make sure you are safe. Also, prepare your machine for the task.
Safety First: Turn Off the Machine
Always turn off your sewing machine before putting in a bobbin. Some machines have a main power switch. Others need you to unplug them from the wall. This stops the machine from starting by accident. It keeps your fingers safe. It also protects your machine from damage. Safety is always important.
Get Your Tools Ready
You will need a few things before you start.
- The right bobbins: Make sure they fit your machine.
- Thread: You need thread for both the bobbin and the top. Use the same type of thread for both. This helps your stitches look even.
- Your sewing machine manual: This book is your best friend. It shows exact steps for your model. Machine models can be different.
The Winding Bobbin Process
Before you can put a bobbin into your machine, it needs thread. You need to wind it. This is a simple process. It is often the first step in setting up your machine.
Why Wind a Bobbin First?
The bobbin comes empty. You need to fill it with thread. This thread will form the bottom part of your stitch. Winding it yourself lets you pick the thread color. You also make sure the thread is wound neatly. A neatly wound bobbin works best.
How to Wind a Bobbin: Step-by-Step
This process is mostly the same for all sewing machines.
- Place the Thread Spool: Put your spool of thread on the spool pin. This pin is usually on top of your machine. Make sure the thread unwinds correctly.
- Guide the Thread: Find the thread guide for winding. It looks like a small hook or clip. It might be numbered. Run the thread through this guide.
- Wrap Around Tension Disk: Next, wrap the thread around the bobbin winding tension disk. This disk puts a little pressure on the thread. It helps the bobbin wind tightly. Follow the arrows or numbers on your machine.
- Put Bobbin on Winder Pin: Take an empty bobbin. Push it onto the bobbin winder pin. This pin sticks up near the spool. It spins to wind the thread.
- Secure the Thread on Bobbin: Take the end of the thread. Push it into a small hole on the bobbin. Or, wrap it around the bobbin a few times. This holds the thread steady when winding starts.
- Slide Winder to the Right: Push the bobbin winder pin to the right. It will click into place. This means it is ready to wind. Some machines have a little lever. Others just slide. This also often disconnects the needle. The needle will not move while you wind.
- Press the Foot Pedal: Gently press your foot pedal. The bobbin will start to spin. It will fill with thread.
- Watch the Bobbin Fill: Let the bobbin fill. Most machines stop winding when the bobbin is full. Or, they slow down a lot. Stop winding when it looks full and even. Do not overfill it. An overfilled bobbin can cause problems.
- Cut the Thread: Once the bobbin is full, cut the thread. There is often a small cutter built into the machine.
- Slide Winder to the Left: Push the bobbin winder pin back to the left. Take the full bobbin off the pin.
You now have a wound bobbin. It is ready for the next step: placing it into your machine. This winding bobbin process is simple once you do it a few times.
Loading the Bobbin: Two Main Types
Sewing machines load bobbins in two main ways. The type of machine you have changes how you put in the bobbin. Most modern machines use a drop-in bobbin. Older machines often use a front-loading bobbin. It is important to know which type your machine has. This will guide your next steps. Both methods aim for correct bobbin placement.
1. Drop-In Bobbin Guide
Many new sewing machines use a drop-in bobbin system. This system is easy to use. The bobbin goes in from the top. You can often see the bobbin through a clear cover. This makes it easy to check thread levels. This is why it is often called a “top-loading” bobbin.
Here is a step-by-step drop-in bobbin guide:
- Open the Bobbin Cover: The bobbin area is usually under a clear plastic cover. This cover is on the sewing machine’s flat bed. Slide it open or pop it off.
- Get the Bobbin Ready: Take your freshly wound bobbin. Look at the way the thread unwinds. This is very important. For most drop-in systems, the thread should unwind counter-clockwise. It will look like the letter “P.” If it unwinds clockwise, it will look like the letter “q.” If you put it in wrong, your machine will not sew right. It might skip stitches. It might make a thread nest.
- Drop in the Bobbin: Carefully place the bobbin into the bobbin holder. It should sit flat and neatly.
- Insert Bobbin Thread into Guides: This is a crucial step for lower thread installation. There will be a small groove or slot. This slot guides the bobbin thread. Pull the thread from the bobbin. Slide it into this groove. It will often have arrows to show you the path. The thread might click into place. This means it is seated correctly.
- Continue Along the Path: Some machines have more than one guide. Follow the thread path marked on your machine. It might go around a corner or under a small bar. This ensures the thread has proper tension.
- Leave a Tail: Pull out about 4 to 6 inches of bobbin thread. Let this thread tail hang freely. It should extend towards the back of the machine.
- Close the Cover: Put the clear plastic bobbin cover back on. Make sure it clicks into place. It should be flat and secure.
You have now successfully loaded the bobbin using the drop-in bobbin guide method.
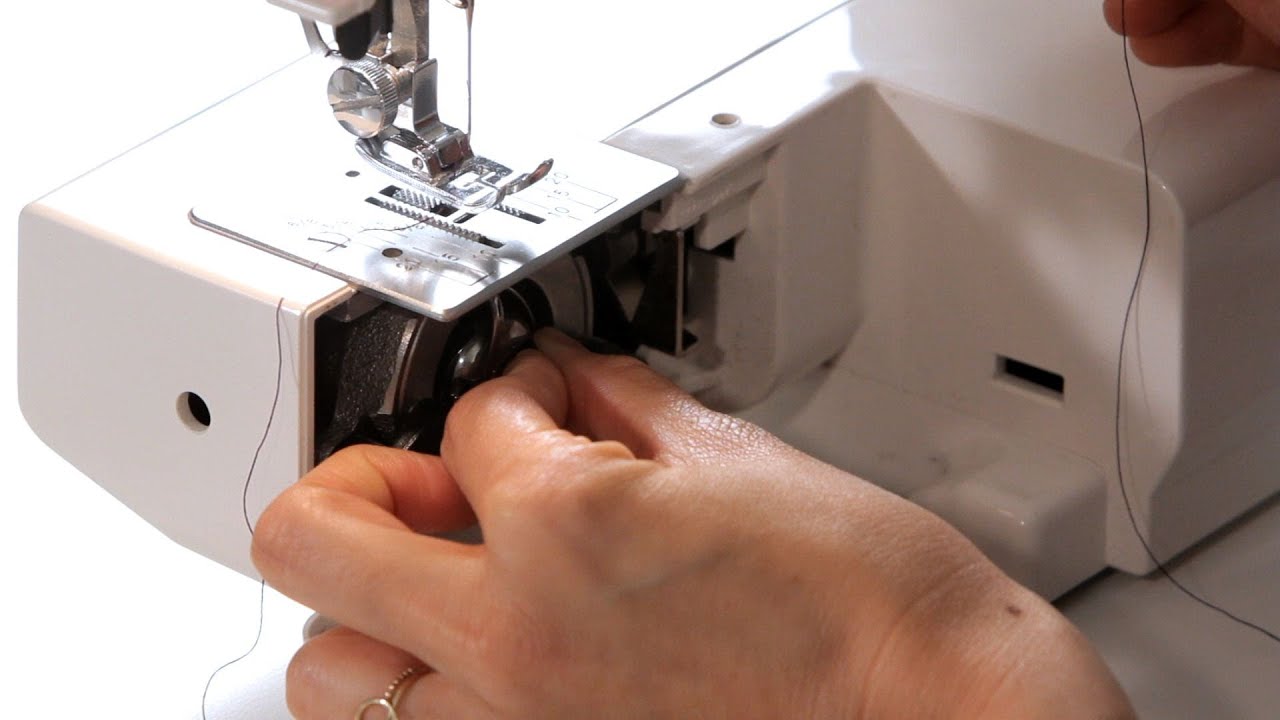
2. Front-Loading Bobbin Instructions
Older machines and some heavy-duty models use a front-loading bobbin system. This system involves a metal bobbin case. The bobbin case holds the bobbin. The bobbin case then fits into the machine from the front. This is often under a small door.
Here are front-loading bobbin instructions:
- Open the Bobbin Door: Look for a small door on the front of your sewing machine. It is usually under the needle plate. This door swings open.
- Remove the Bobbin Case: Reach inside and pull out the bobbin case. It has a small latch or lever. Press this lever to release the case.
- Get the Bobbin Ready: Take your wound bobbin. Place it into the metal bobbin case. How the thread unwinds is key here too. For most front-loading bobbin cases, the thread should unwind clockwise. It will look like the letter “q” when you hold the bobbin case.
- Insert Bobbin Thread into Slot: There is a small slot on the side of the bobbin case. Take the bobbin thread. Pull it into this slot. It should go under a small metal tension spring. You might hear a small click as it slides in. This spring provides the right tension.
- Check Tension (Optional but good): Gently pull the thread. It should pull smoothly. It should feel like it has a little bit of drag. If it pulls too easily or too hard, the tension might be off.
- Insert Bobbin Case into Machine: Hold the bobbin case by its latch. Push it firmly into the bobbin area. It will click into place. You should feel it lock in. Make sure the little finger or guide on the bobbin case lines up with the notch in the machine.
- Leave a Tail: Let about 4 to 6 inches of bobbin thread hang out. It should come out of the bobbin case.
- Close the Door: Close the bobbin door on the front of your machine. Make sure it is shut firmly.
You have now completed the front-loading bobbin instructions. This sewing machine bobbin case method is a bit different. But it is just as important for correct bobbin placement.
Lower Thread Installation: Bringing the Bobbin Thread Up
Once the bobbin is in its place, you need to bring its thread up. This step joins the bobbin thread with the top thread. This makes sure your machine is ready to sew a perfect stitch. This is a key part of lower thread installation.
- Lift the Presser Foot: Use the lever on the back of your machine. Raise the presser foot. This makes it easier to work.
- Raise the Needle: Turn the handwheel towards you. Turn it until the needle is in its highest position. This also raises the take-up lever.
- Hold the Top Thread: Hold the end of your top thread loosely. Do not pull it hard.
- Lower the Needle: Slowly turn the handwheel towards you. Watch the needle go down. It will go into the needle plate hole. It will go past the bobbin.
- Catch the Bobbin Thread: As the needle comes back up, it will catch the bobbin thread. A small loop of the bobbin thread will appear. It will come up through the needle plate hole. You might need to gently pull the top thread to help it.
- Pull Out the Loop: Take a small pair of scissors or your finger. Gently pull the loop of bobbin thread out from under the presser foot.
- Pull Both Threads Back: Now you have two threads: the top thread and the bobbin thread. Pull both of them back. They should go under the presser foot. Lay them flat towards the back of the machine.
Your machine now has both threads ready. The lower thread installation is complete.
Sewing Machine Threading Steps (The Full Picture)
Loading the bobbin and bringing up the thread are lower threading steps. But a sewing machine needs upper threading too. This is the thread that goes through the needle. Both parts must be done right for the machine to sew. We won’t go into full detail for upper threading here. But it is important to know its place in the whole setup.
- Place Top Thread: Put your main thread spool on the spool pin.
- Follow Thread Guides: Guide the thread through all the top guides. This includes tension disks and the take-up lever. Each machine has a specific path. Your manual shows this.
- Thread the Needle: The very last step is to put the thread through the eye of the needle. Most machines thread from front to back. Some thread from side to side. Many modern machines have an automatic needle threader.
Once both the upper and lower thread are in place, your machine is fully threaded. It is now ready to sew. Proper sewing machine threading steps are crucial for good results.
Fixing Common Bobbin Problems
Even when you follow the steps, problems can happen. Do not worry! Many bobbin issues have simple fixes. Knowing what to look for helps a lot.
Thread Nests (Bird’s Nest)
- Problem: A big tangle of thread forms under your fabric. It looks like a bird’s nest.
- Cause: Often, the top thread is not threaded right. Or the bobbin thread tension is wrong. The bobbin might be put in backwards.
- Fix:
- Re-thread the whole machine: Start with the top thread. Make sure it goes through all guides. Make sure the presser foot is UP when threading. Then, check the bobbin again. Ensure correct bobbin placement and unwinding direction.
- Check tension: Your bobbin case (if you have one) or your top tension dial might need adjusting.
Skipped Stitches
- Problem: Your machine misses stitches. It leaves gaps in your sewing line.
- Cause: The needle might be bent or old. The bobbin might be in wrong. The needle might not be the right size for your fabric.
- Fix:
- Replace the needle: Always try a new needle first.
- Check bobbin again: Make sure the bobbin is facing the right way. Make sure it is seated fully.
- Re-thread the machine: Go through all sewing machine threading steps for both top and bottom.
Bobbin Jamming or Freezing
- Problem: The bobbin area gets stuck. The handwheel cannot turn.
- Cause: Too much lint in the bobbin area. A thread jam. A bent bobbin.
- Fix:
- Turn off machine: Unplug it.
- Remove needle and presser foot: This gives you more room.
- Clean the bobbin area: Use a small brush. Get rid of all lint and thread scraps. Check for any jammed thread.
- Check bobbin: Is the bobbin bent or damaged? Replace it if it is.
Uneven Stitches
- Problem: Stitches look good on one side but bad on the other. Or they are too loose or too tight.
- Cause: Tension settings are off. The top and bobbin threads are not balanced.
- Fix:
- Check bobbin winding: Is the bobbin wound smoothly? If it’s lumpy, re-wind it.
- Adjust tension: Start with your machine’s default tension setting. Then, adjust the top tension. If the bobbin thread shows on top, loosen the top tension. If the top thread shows on the bottom, tighten the top tension.
Knowing these common issues helps you quickly solve problems. This saves time and frustration.
Keeping Your Bobbin Area Clean and Maintained
A clean sewing machine works better. This is very true for the bobbin area. Lint and small bits of thread build up here. This can cause problems over time. Regular care helps. It also helps with replacing sewing machine bobbin parts when needed.
Clean Out Lint Often
After every few projects, open your bobbin area. Use a small brush to sweep away lint. Some machines come with a special brush. You can also use a small vacuum cleaner meant for electronics. Do not use canned air. It can push lint deeper into the machine.
Check for Damage
Look at your bobbin case and bobbins regularly.
- Bobbin Case: Is it bent? Are there nicks or rough spots? These can snag thread. If it’s damaged, you might need a new sewing machine bobbin case.
- Bobbins: Are your bobbins bent or cracked? They should be perfectly smooth. Replace any damaged bobbins. Using damaged bobbins can cause thread jams. They can also affect stitch quality.
When to Replace Sewing Machine Bobbin Parts
- Bobbins: Replace bobbins if they are bent, cracked, or deformed. Even a tiny bend can cause issues. It’s good to have many bobbins. Then you have different colors ready.
- Bobbin Case: If your bobbin case has deep scratches or is bent, replace it. These issues can cause poor tension. They can also lead to thread breaks.
- Needles: While not a bobbin part, a dull or bent needle often causes problems blamed on the bobbin. Change your needle often. Change it for every new project. Or after about 8 hours of sewing.
Taking good care of your bobbin area means your machine will run smoothly. It will save you from many headaches. It makes sewing more fun.
Conclusion
Putting a bobbin into a sewing machine is a skill you will use every time you sew. It is not hard. But it must be done the right way. We have walked through the winding bobbin process. We have covered loading bobbin sewing machine types: the drop-in bobbin guide and the front-loading bobbin instructions. We also looked at how to insert bobbin thread correctly and lower thread installation.
Remember the key steps:
1. Always wind your bobbin neatly.
2. Pay attention to the bobbin’s unwinding direction. This is the most common mistake.
3. Follow your machine’s specific thread path for the bobbin.
4. Bring up the lower thread to meet the upper thread.
5. Clean your bobbin area often.
With this guide, you should feel confident. You can now put a bobbin into your sewing machine right. You are ready to sew beautiful projects with ease. Happy sewing!
Frequently Asked Questions (FAQ)
Q1: How do I know if my bobbin is in backwards?
A1: For drop-in bobbins, the thread usually unwinds counter-clockwise. For front-loading bobbins and their cases, the thread usually unwinds clockwise. If your machine is making tangled stitches (a “bird’s nest”) or skipping stitches, the bobbin might be backwards. Recheck its direction.
Q2: Can I use any bobbin in my sewing machine?
A2: No, you cannot. Bobbins come in different sizes and materials (metal or plastic). Using the wrong size or type of bobbin can damage your machine. Always check your sewing machine manual for the correct bobbin type for your model.
Q3: My bobbin thread keeps breaking. What should I do?
A3: Many things can cause this. Check if your bobbin is wound evenly. An uneven bobbin can cause breaks. Make sure the bobbin is inserted correctly. Check the bobbin case or bobbin area for lint or scratches. These can snag the thread. Also, check your needle. A dull or bent needle can also break threads.
Q4: How much thread should I wind onto my bobbin?
A4: You should wind the bobbin until it is full. Do not overfill it. Most sewing machines have a built-in stop or slow down when the bobbin is full. An overfilled bobbin can cause tension problems or jams.
Q5: Why do I get a “bird’s nest” of thread under my fabric?
A5: This is a very common problem. It usually means the top thread is not threaded correctly. Or the presser foot was down when you threaded the top thread. It can also happen if the bobbin is placed incorrectly. Re-thread your entire machine (top and bobbin) from scratch, making sure the presser foot is up when threading the top.
Q6: Do I need to oil my bobbin case?
A6: Most modern machines do not need oiling in the bobbin area. Some older machines do. Check your sewing machine manual. It will tell you if and where to oil your machine. Too much oil can attract lint.
Q7: How often should I clean the bobbin area?
A7: It is a good idea to clean the bobbin area after every few hours of sewing. Or after every major project. Lint builds up fast. This can affect stitch quality and machine health. Use a small brush, not canned air.