
Image Source: www.blossomheartquilts.com
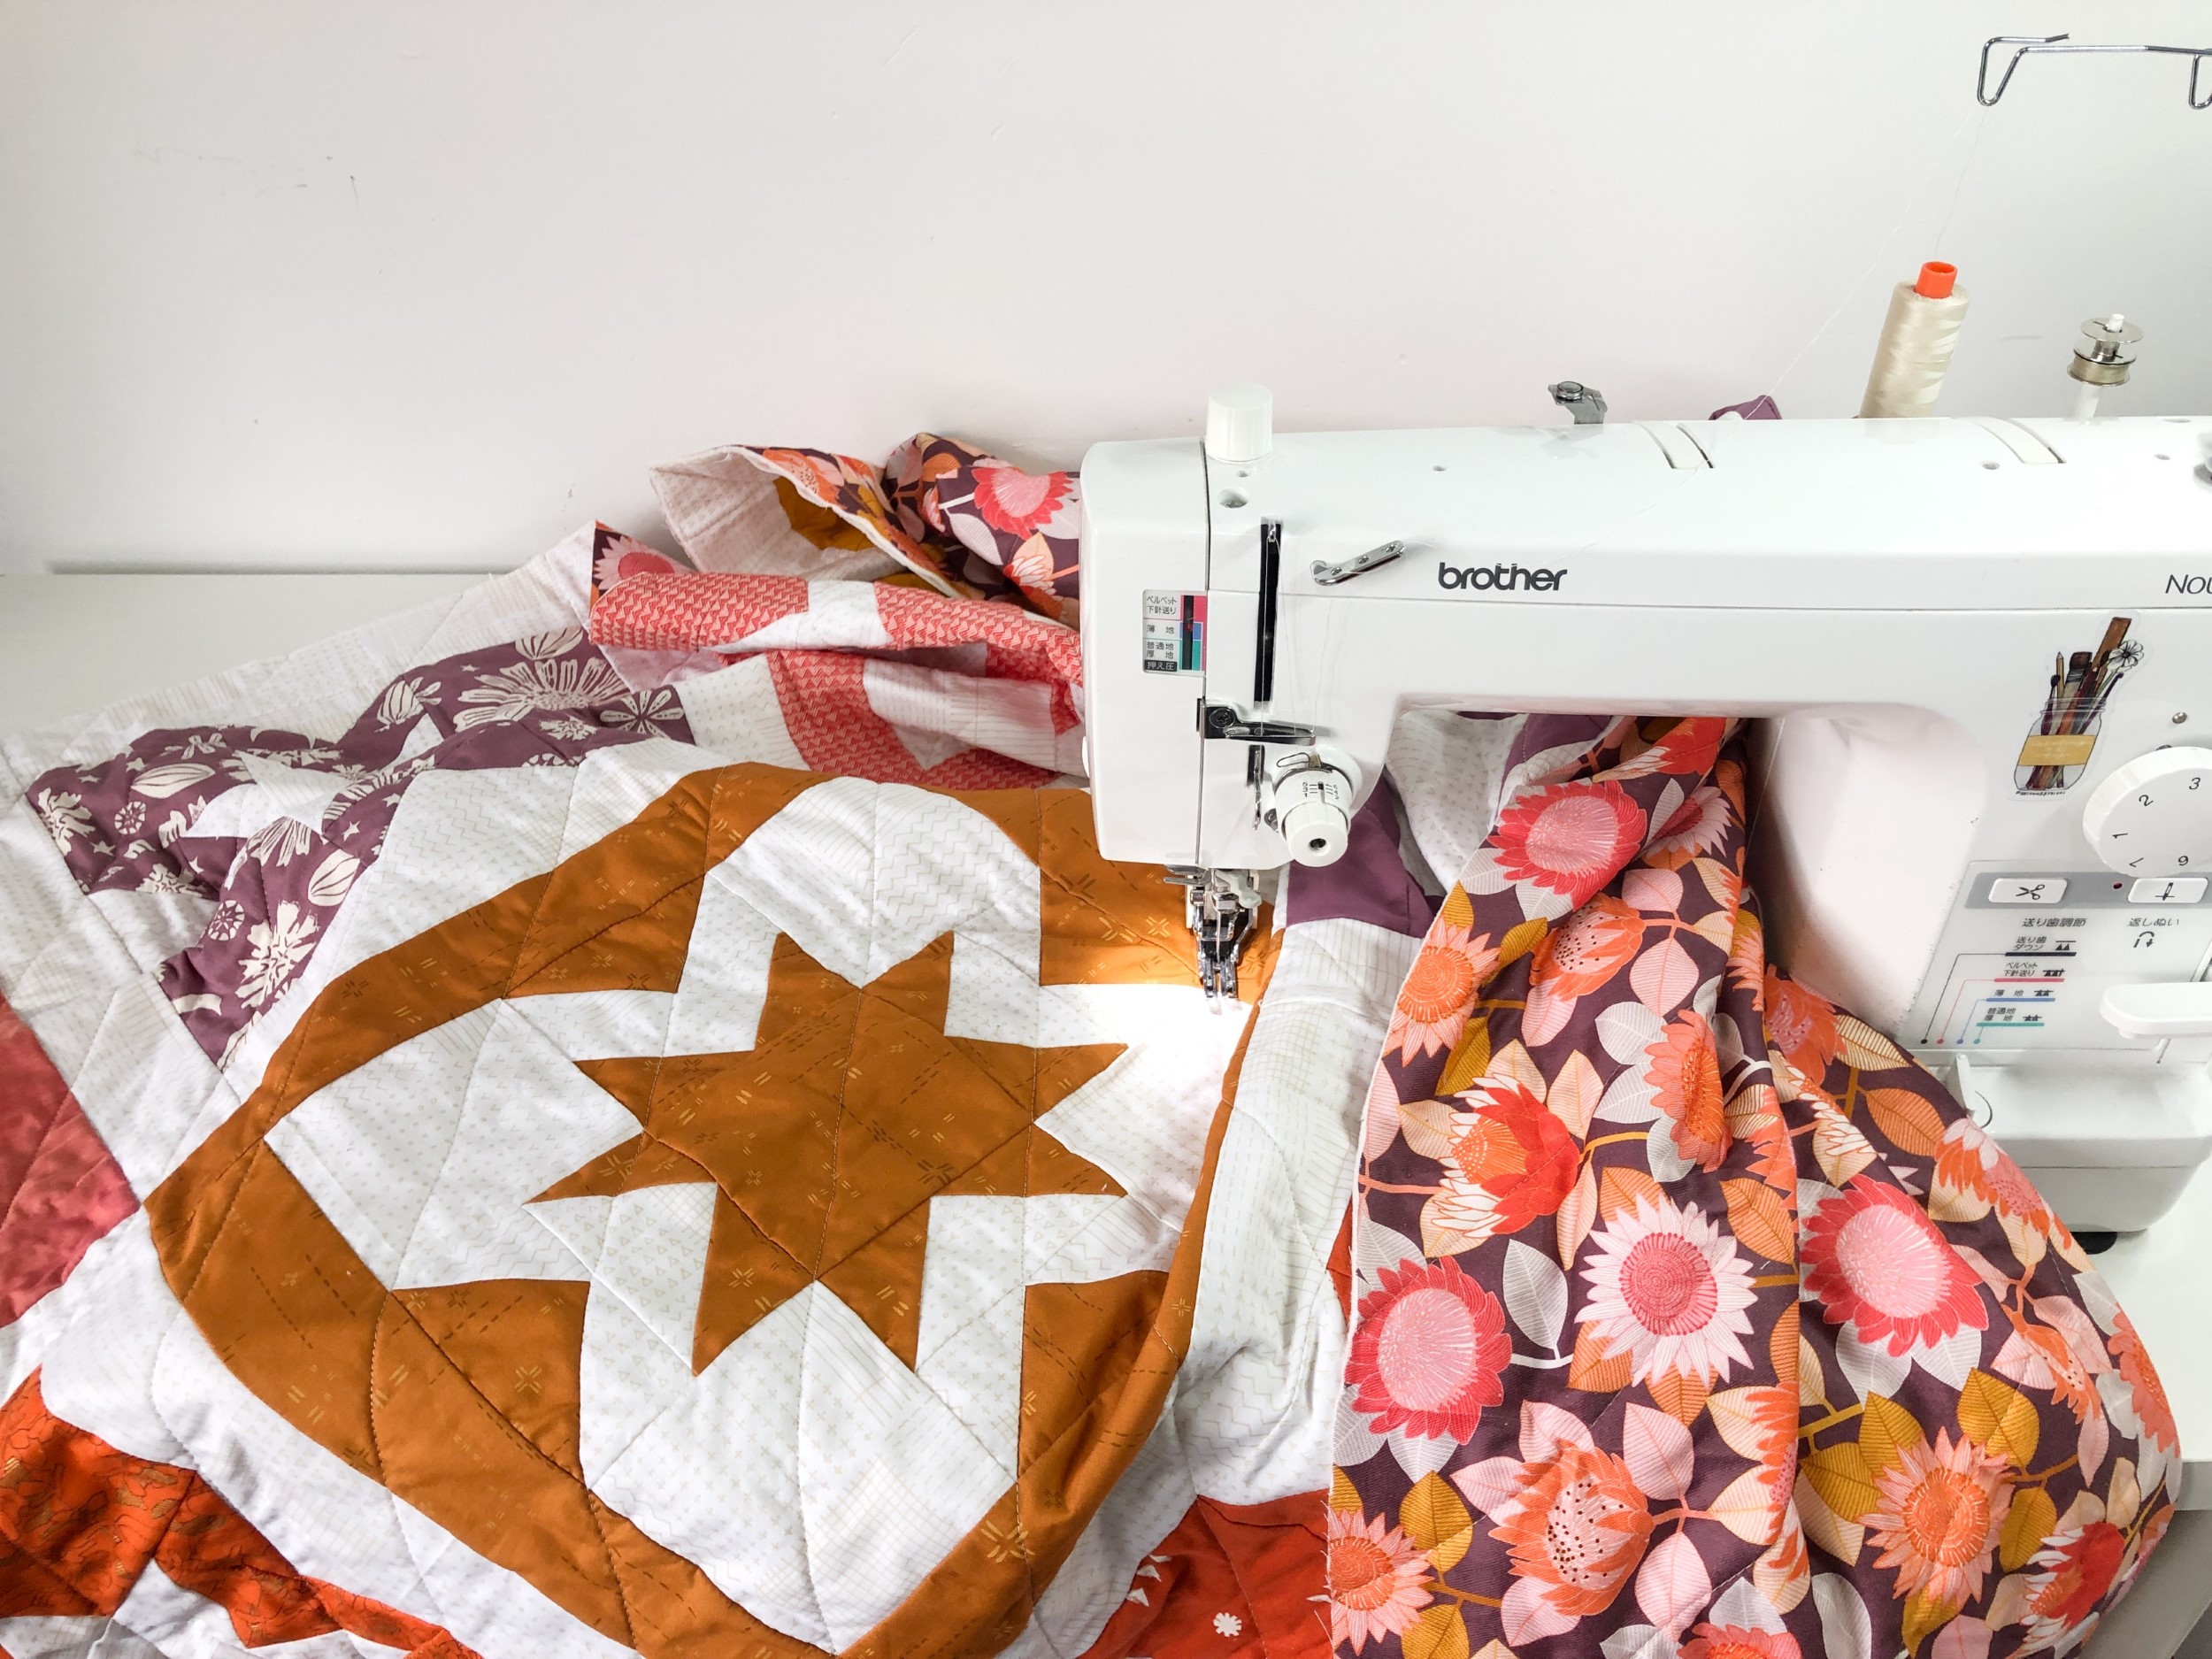
Simple Steps: How To Quilt With A Regular Sewing Machine
Yes, you absolutely can quilt on a regular sewing machine! You do not need a special, expensive longarm machine. Most home sewing machines can handle quilting with just a few simple additions or adjustments. Learning how to quilt on your familiar machine is a fun and rewarding step in your sewing journey.
Quilting is the process of sewing through three layers: the backing fabric (bottom), the batting (the fluffy middle), and the quilt top (the pretty pieced top). This sewing holds the layers together. It also adds texture and design to your quilt. With your standard sewing machine and this simple guide, you can start making beautiful quilted projects.
Gathering Your Essential Tools
You do not need a room full of gear to start quilting. Your regular sewing machine is the main thing. But a few other tools make the job easier and give better results.
Your Regular Sewing Machine
Any sewing machine that can make a straight stitch will work. You do not need lots of fancy stitch options. What matters most is that your machine runs smoothly. Make sure it is clean and oiled following your machine’s manual. A happy machine sews better.
Different Sewing Machine Feet
Sewing machine feet are small parts that clip onto your machine. They help guide the fabric or change how the stitch looks. For quilting on a regular machine, two feet are very helpful.
The Walking Foot
A walking foot is often called an even feed foot. It is like having an extra set of feed dogs on top of your fabric. Feed dogs are the little teeth under your needle that move the fabric along. A walking foot grips the top layer of fabric and moves it at the same speed as the bottom layer.
Using a walking foot for quilting is very important. It stops the three layers from shifting and causing puckers or folds. This is especially helpful for straight line quilting techniques or sewing long, even seams. It helps keep everything flat and smooth as you sew.
The Free Motion Quilting Foot
This foot is different. It is also called a darning foot or hopping foot. It does not hold the fabric down tightly. Instead, it just lightly touches the fabric as the needle goes down.
To use a free motion quilting foot, you lower or cover your machine’s feed dogs. This lets you move the fabric in any direction you want. You guide the fabric by hand to create swirls, loops, or other designs. This is how you do free motion quilting on domestic machine. It takes some practice, but it is a lot of fun!
Selecting the Right Needles
Choosing needles for machine quilting is more important than you might think. A good needle makes sewing easier and gives cleaner stitches. Needles get dull over time. They can also break. It is a good idea to start each new quilting project with a fresh needle.
Types of Needles for Quilting
- Quilting Needles: These are designed for going through multiple layers of fabric and batting. They have a strong shaft and a sharp, tapered point. This point pushes through the fabric and batting fibers easily. This makes smaller holes and helps prevent skipped stitches.
- Topstitch Needles: These also work well for quilting. They have a very sharp point. They also have a larger eye. This larger eye helps when using thicker quilting thread for regular machine. It lets the thread pass through more smoothly.
Needle Size
Needles come in different sizes. The size tells you how thick the needle is. Common sizes for quilting are 90/14 or 80/12. If you are using a thicker thread, a larger needle (like 90/14) is usually better. If you are using a thinner thread, a smaller needle (like 80/12) might work. Check your machine’s manual for what sizes it uses. Always test your needle choice on scrap fabric before starting your quilt.
Picking the Right Thread
The thread you use for quilting is important too. It needs to be strong enough to hold the layers together over time. It also shows on your quilt top, so the color matters.
Types of Quilting Thread
- Cotton Thread: This is a popular choice. It is natural and works well with cotton quilt fabric. It comes in different weights (thicknesses). A common weight is 40 or 50 weight. Thicker threads (like 30 weight) will show more and add texture. Thinner threads (like 50 or 60 weight) blend in more.
- Polyester Thread: This thread is very strong and has a little stretch. It can add durability. Look for good quality polyester thread made for quilting. Some polyester threads are shinier than cotton threads.
- Specialty Threads: You can also find threads with metallic shine or rayon threads that are very bright. These can add special touches to your quilting.
Matching Top and Bobbin Thread
Usually, you use the same type and weight of thread in the top of your machine and in the bobbin. This helps keep the stitch tension even. If you use different types or weights, you might need to adjust your machine’s tension. It is always best to test your thread on scrap layers first.
Quilting Rulers and Guides
While not strictly needed for all quilting, quilting rulers for standard sewing machine can help you sew straight lines or follow curves more accurately. These rulers are thicker than regular rulers. You use them against a special ruler foot (if your machine has one) or simply as a guide mark on your fabric.
For beginners doing straight line quilting techniques, a simple straight ruler or even painter’s tape on your quilt top can help you keep your lines straight without a special foot or ruler.
Other Helpful Supplies
- Pins or Safety Pins: For holding layers together before basting.
- Quilting Safety Pins: These have a slight bend and are used for pin basting.
- Fabric Marking Tools: Pens or pencils that wash or iron away. Use these to draw lines or designs on your quilt top to follow.
- Scissors: Sharp scissors for snipping threads.
- Quilting Gloves: These soft gloves have grippy fingertips. They help you hold and move the quilt sandwich easily during free motion quilting.
Getting Your Quilt Ready to Sew
Before you can start stitching the quilt layers together, you need to get them prepared. This part is called making the quilt sandwich and basting. Preparing quilt layers for machine quilting well makes the quilting process much smoother and more enjoyable.
Creating the Quilt Sandwich
Your quilt has three parts:
1. The Backing Fabric: This is the bottom layer. It should be a bit larger than your quilt top, maybe 4-6 inches bigger on each side.
2. The Batting: This is the middle, fluffy layer. It gives the quilt warmth and texture. It should also be larger than your quilt top, the same size as or slightly smaller than the backing.
3. The Quilt Top: This is the pieced or whole-cloth top layer. It goes on top.
Putting the Layers Together
Lay your backing fabric flat on the floor or a large table. The wrong side should face up. Tape the edges down to keep it smooth and tight.
Next, lay the batting smoothly on top of the backing. Try to avoid wrinkles or folds.
Finally, lay your quilt top on top of the batting. The right side should face up. Make sure the quilt top is centered and smooth. Work from the middle out to the edges. Smooth out any wrinkles.
Now you have a “quilt sandwich.” The next step is to hold these layers together.
Basting the Quilt Layers
Basting means temporarily joining the three layers so they do not shift while you are quilting. There are a few ways to do this. For machine quilting on a regular machine, machine basting a quilt is one option, but pin basting or spray basting are often used first to hold things in place for machine basting, or instead of machine basting.
Pin Basting
This is a common method. You use lots of safety pins to hold the layers together. Start pinning from the center of the quilt. Work your way out to the edges. Place pins about every 4-6 inches across the whole quilt. Make sure to put the pins through all three layers. This is a great way of preparing quilt layers for machine quilting.
Spray Basting
You can use a temporary fabric adhesive spray. You spray it between the backing and batting, then between the batting and top. Follow the spray can’s directions. This method leaves no pins to remove as you sew. It is very fast for small to medium projects.
Machine Basting
You can also use your sewing machine to baste. Machine basting a quilt means sewing long, temporary stitches across the quilt sandwich. You can sew lines about 4-6 inches apart, making a grid. Use a long stitch length (like 5 or 6) and a contrasting thread color. This makes the stitches easy to see and remove later. This method works well for securing the layers before you start your main quilting stitches, especially for straight line quilting techniques.
Choose the basting method that works best for you and your project size. The goal is to keep the layers smooth and together.
Quilting Your Project: Adding Stitches
Now for the fun part: adding stitches that hold everything together and create design! You have two main ways to quilt on a regular sewing machine: using a walking foot or doing free motion.
Using a Walking Foot for Quilting
This is often the easiest way to start machine quilting. The walking foot helps you sew straight lines or gentle curves.
Attaching the Walking Foot
Turn off your machine. Unscrew or unclip your regular foot. Follow your machine’s manual to attach the walking foot. It usually involves hooking it onto the needle bar screw and clipping it onto the presser foot holder.
Setting Up Your Machine
- Stitch: Use a straight stitch.
- Stitch Length: Set your stitch length a little longer than you use for piecing, maybe 2.5 to 3.5. Test on scraps to see what looks good.
- Needle: Make sure you have the right needle installed (quilting or topstitch, size 80/12 or 90/14).
- Thread: Use your chosen quilting thread for regular machine. Check your bobbin is full and threaded correctly.
Sewing with the Walking Foot
Place your basted quilt sandwich under the walking foot. Start stitching slowly. Your walking foot will help feed the fabric evenly. You just need to guide the quilt.
As you quilt, you will need to support the weight of the quilt. Let it rest on your table. Try not to pull or push the quilt through the machine. Let the walking foot and the machine do the work. You are just steering.
Straight Line Quilting Techniques
This is a perfect way to start using your walking foot. Straight lines look modern and neat. They are also easy to do.
- Stitching in the Ditch: Sew directly in the seam lines where two fabric pieces join. This hides your stitches and makes the piecing stand out.
- Parallel Lines: Sew lines spaced a certain distance apart across your quilt. You can use the edge of your walking foot as a guide or mark lines on your quilt top using a ruler and a washable marker. Quilting rulers for standard sewing machine can help with marking these lines accurately.
- Grid Quilting: Sew parallel lines in one direction, then turn the quilt and sew lines perpendicular to the first set. This makes a grid of squares or diamonds.
- Diagonal Lines: Sew lines across your quilt on a diagonal.
When doing straight line quilting techniques, start sewing from the center of the quilt and work your way out. This helps push excess fabric towards the edges and prevents tucks in the middle. Sew lines on one side of the center, then turn the quilt and sew lines on the other side. For grid quilting, sew all lines in one direction, then rotate and sew all lines in the other direction.
Free Motion Quilting on Domestic Machine
This technique lets you draw with your sewing machine needle! It is how quilters create swirls, loops, feathers, and other flowing designs.
Setting Up for Free Motion
- Lower Feed Dogs: This is the most important step. Find the lever or switch on your machine that lowers the feed dogs. If your machine does not have this, some come with a plate to cover them. Check your manual.
- Attach Free Motion Foot: Put on your darning or free motion foot.
- Stitch: Use a straight stitch.
- Stitch Length: The stitch length is not set on your machine. You control the stitch length by how fast you move the fabric and how fast the needle goes up and down. It takes practice to make your stitches even.
- Needle and Thread: Use a quilting or topstitch needle and your chosen quilting thread for regular machine.
Sewing with the Free Motion Foot
Place your basted quilt under the free motion foot. Lower the presser foot lever (even though the foot does not press down hard, this sets the tension). Start sewing slowly. As the needle goes up and down, you gently move the fabric under the needle.
- Control Speed: Practice keeping a steady speed with your foot pedal and moving your hands at an even speed. This helps make your stitches even.
- Move Smoothly: Try to move the quilt smoothly and evenly. Avoid jerky movements.
- Start Simple: Begin with simple shapes like loops, squiggles, or wavy lines. Fill a practice fabric sandwich first.
- Manage the Quilt: Free motion quilting requires you to move the entire quilt. Support its weight on your table. Roll or fold parts of the quilt to make it easier to handle in the machine’s throat space (the area to the right of the needle). Quilting gloves can help you grip the fabric.
Quilting Stitches for Beginners (Both Methods)
While free motion has many patterns, you can also keep it simple. Quilting stitches for beginners can include:
- Straight Lines: Easy with a walking foot.
- Wavy Lines: Can be done with a walking foot or free motion.
- Simple Loops: A classic free motion filler pattern. Easy to learn.
- Meandering: A free motion pattern that looks like puzzle pieces or a river. It covers space quickly.
Do not worry about perfection when you start. Quilting is about adding texture and holding the layers together. Even simple stitches look great.
Handling Larger Quilts
Quilting a large quilt on a regular sewing machine can be a challenge because of the space under the machine arm (the throat space). Here are some tips:
- Roll or Fold: Roll or gently fold the parts of the quilt that are not under the needle. Use clips or fabric ties to keep the rolls in place. This helps the quilt fit through the machine’s arm.
- Support the Weight: Use a table or chair next to your machine to support the weight of the quilt. Do not let it hang down. This pulling can cause uneven stitches or put stress on your machine.
- Quilt from the Center: For both walking foot and free motion, start quilting in the center of the quilt and work your way out towards the edges. This helps manage the bulk and prevents puckers.
Finishing Your Quilt: Adding the Binding
Once you have finished quilting all three layers together, you need to finish the edges. This is called binding. Binding covers the raw edges of the quilt layers. It also adds a nice frame to your project. You can do binding quilt by machine or by hand. Machine binding is faster and durable.
Making the Binding Strip
- Measure: Measure the distance all around the edge of your quilt. Add about 10-12 inches extra.
- Cut Strips: Cut fabric strips. A common width is 2.5 inches. Cut enough strips to equal the total length you need.
- Join Strips: Sew the strips together end-to-end to make one long strip. You can sew them straight across or on a diagonal. Sewing on a diagonal (like a 45-degree angle) makes the seams less bulky.
- Press: Press the seams open or to one side.
- Fold and Press: Fold the long binding strip in half lengthwise, with wrong sides together. Press the fold. Now you have a long, folded strip of fabric.
Attaching the Binding to the Quilt Top
- Start Sewing: Leave a tail of about 6-8 inches of the binding strip unsewn. Start sewing the raw edges of the folded binding strip to the raw edge of the quilt top. Use a 1/4-inch seam allowance.
- Go Around Corners: To turn a corner, sew to 1/4 inch from the corner. Backstitch a few stitches. Lift your presser foot. Pivot the quilt. Fold the binding strip straight up, making a 45-degree angle fold. Then fold the binding strip back down, aligning its edge with the next edge of the quilt. Start sewing again from the edge, catching the fold underneath.
- Join Ends: When you get back to where you started, stop sewing about 10-12 inches from the beginning tail. You need to join the two ends of the binding strip. There are different ways to do this. A simple way is to overlap the tails by the width of your binding strip (e.g., 2.5 inches), trim the excess, and sew the ends together flat. Then finish sewing the binding down to the quilt edge.
- Press: Press the binding away from the quilt center.
Finishing the Binding by Machine
Now the binding is attached to the front of the quilt. You need to wrap it around to the back and stitch it down.
- Wrap Around: Fold the binding strip over the edge of the quilt to the back side. The folded edge should cover your stitching line on the back.
- Secure with Clips or Pins: Use binding clips or pins to hold the folded edge in place on the back of the quilt. Work your way around the whole quilt.
- Sew from the Front: Flip the quilt back to the front side. Stitch close to the folded edge of the binding on the front of the quilt. As you sew from the front, your machine’s needle will catch the folded edge of the binding on the back, securing it in place.
- Go Slowly: Go slowly, especially at the corners. Make sure your stitches are catching the binding on the back. You can check the back often.
Once you have sewn all the way around, your binding is complete! Your quilt is finished.
More Tips for Beginning Machine Quilters
- Practice: Quilt on small projects first, like placemats or table runners. Use scrap fabric sandwiches to practice different stitches and free motion patterns.
- Relax Your Shoulders: Especially with free motion quilting, it is easy to get tense. Try to keep your shoulders and arms relaxed.
- Listen to Your Machine: If your machine is making strange noises or skipping stitches, stop. Check your needle, thread, and tension. Rethread the machine.
- Check Your Tension: Uneven stitches or loops on the top or bottom mean your tension might be off. The tension is the balance between the top thread and the bobbin thread. Test on scraps and adjust your machine’s tension dial until the stitches look the same on both sides.
- Manage the Quilt Weight: Use a large table or even an ironing board pulled up to your machine to support the quilt’s weight.
- Take Breaks: Quilting can be hard on your body and eyes. Take breaks often to stand up and rest.
- Do Not Aim for Perfect: Especially when you start, your stitches might not be perfectly straight or evenly spaced. That is okay! Handmade items show the hand of the maker. Enjoy the process.
Frequently Asked Questions (FAQ)
-
Can I use regular sewing thread for quilting?
Yes, you can use good quality regular sewing thread. However, thread made specifically for quilting is often stronger and designed to go through multiple layers. Using cotton or good quality polyester thread in a 40 or 50 weight is a good start. -
My stitches are uneven. Why?
This is often a tension issue. Test on scrap layers. Adjust your machine’s tension dial slightly until stitches look balanced on both sides. If doing free motion, uneven stitches can happen if you move the fabric too fast or too slow for your needle speed. Try to keep both speeds steady. -
My thread keeps breaking. What is wrong?
Check your needle. It might be dull or the wrong type or size for your thread and layers. Make sure your machine is threaded correctly. Check for any burrs or rough spots on your needle plate or foot. Make sure your thread is not old or poor quality. -
How do I move a large quilt through my small machine?
Roll or gently fold the parts of the quilt that are not under the needle. Support the weight of the quilt on a table or chair. Quilt from the center outward. Use quilting gloves to help grip the fabric. -
Do I really need a walking foot for straight line quilting?
A walking foot is very helpful for straight line quilting on a regular machine. It helps prevent puckers and keeps layers even. You can try sewing straight lines without it, but you might find the layers shift more. -
Is free motion quilting hard to learn?
It takes practice. It feels strange at first to control the fabric movement yourself. Start with simple shapes on scrap fabric. Do not expect perfection right away. Just have fun drawing with thread! -
What size stitch should I use for quilting?
For walking foot quilting, a stitch length between 2.5 and 3.5 often works well. For free motion, you control the stitch length. Practice on scraps to find a speed that gives you nice looking stitches (not too short or too long).
Conclusion
Quilting with a regular sewing machine is totally possible and very rewarding. You have the main tool already! By adding a walking foot, maybe a free motion foot, and choosing the right needles and thread, you are ready to go. Taking the time to prepare your quilt layers well makes a big difference. Then you can choose to sew simple straight lines with your walking foot or try the free motion technique to create your own designs. Finish it off by binding quilt by machine for a durable edge.
Start with small projects, practice, and be patient with yourself. Each stitch you make adds to the beauty and texture of your quilt. Enjoy the process of bringing your quilt top to life with thread. You can do this!