
Image Source: www.diaryofaquilter.com
How To Quilt With A Sewing Machine For Beginners: Guide
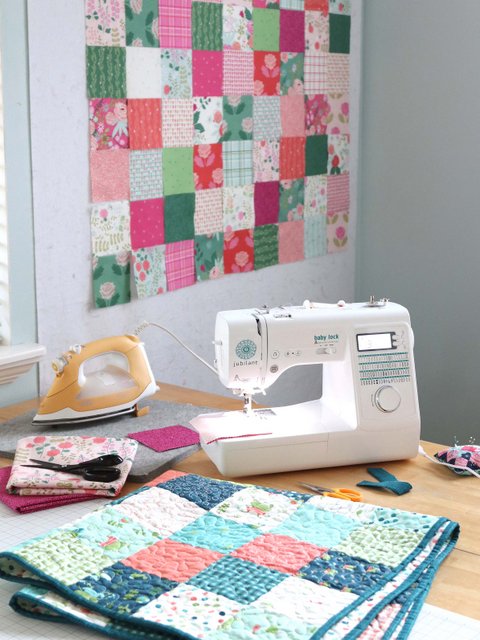
Learning how to quilt using your sewing machine is a fun and rewarding journey, even if you’re just starting out. You can definitely quilt a beautiful project on a regular home sewing machine! This guide will walk you through the steps, showing you the basic machine quilting techniques you need to know, from getting your supplies ready to finishing your project.
Supplies Needed for Machine Quilting
Before you start, you need a few key items. Having the right supplies needed for machine quilting makes the process much easier.
- Sewing Machine: A working sewing machine. Most machines can quilt.
- Quilt Top: Your pieced or whole cloth top layer.
- Batting: The middle layer that makes the quilt warm and soft. It comes in different fibers like cotton, polyester, wool, or blends.
- Backing Fabric: The bottom layer of your quilt.
- Quilting Thread: Stronger thread than standard sewing thread. Cotton, polyester, or blends work well. Choose a color that matches or contrasts nicely.
- Sewing Machine Needles: Use needles designed for quilting or topstitching. Size 90/14 is a good starting point.
- Walking Foot: This is a special presser foot. We will talk more about using a walking foot for quilting later. It helps feed the fabric layers evenly.
- Quilting Gloves (Optional): These help you grip the fabric better.
- Basting Supplies: You need a way to hold the layers together. Options include safety pins made for quilting, basting spray, or basting thread.
- Rotary Cutter, Mat, and Rulers: For cutting fabric straight.
- Fabric Scissors: For general cutting.
- Iron and Ironing Board: For pressing seams flat.
- Seam Ripper: Just in case!
- Marking Tool (Optional): Fabric-safe pens, pencils, or chalk to draw quilting lines.
Having these tools ready means you can start your quilting adventure smoothly.
The Quilting Layers: Batting, Backing, and Top
A quilt is like a sandwich. It has three main parts. Knowing about these quilting layers batting backing and the top layer is important.
- The Top: This is the pretty part you see. It’s made from fabric pieces sewn together (pieced) or a single piece of fabric.
- The Batting: This middle layer gives the quilt its warmth and loft (puffiness).
- Cotton Batting: Natural and breathable. It creates a classic, slightly flat look after washing. Needs quilting lines fairly close together (check the package).
- Polyester Batting: Often thicker and provides more loft. It’s lightweight and dries fast.
- Wool Batting: Warm and light. It has good drape.
- Blend Batting: Mixes of fibers like cotton and polyester. Offers benefits of both.
- Always check the batting package for shrinkage info and how far apart your quilting stitches can be.
- The Backing: This is the bottom fabric layer. It can be one piece of wide fabric or smaller pieces sewn together. Make sure it is a few inches larger than your top on all sides. This extra fabric helps when basting and quilting.
These three layers work together to create a finished quilt. The quilting stitches go through all three layers, holding them together and adding texture.
Getting Ready: How to Baste a Quilt for Machine Quilting
Before you sew, you need to hold the three layers together. This process is called basting. Good basting is key to preventing wrinkles or puckers when you machine quilt. Here is how to baste a quilt for machine quilting.
You have a few choices for basting:
- Safety Pin Basting:
- Lay the backing fabric flat on a large surface (floor, table), right side down. Use masking tape to secure the edges smoothly without stretching.
- Place the batting on top of the backing. Smooth it out gently.
- Lay the quilt top on top of the batting, right side up. Line up the center first, then smooth it out from the center towards the edges. Make sure it is flat and has no wrinkles.
- Start adding safety pins. Use special quilting safety pins (they have a slight bend).
- Place pins about a fist-width apart across the whole quilt. Start from the center and work your way out.
- Make sure the pins go through all three layers.
- Spray Basting:
- This uses a temporary fabric adhesive spray.
- Lay the backing fabric flat, right side down, taped securely.
- Lay the batting on top.
- Fold half of the quilt top back. Spray the exposed batting with the adhesive.
- Carefully fold the quilt top back over the sprayed batting, smoothing it down from the center.
- Repeat for the other half of the quilt top.
- Then, gently peel back half of the batting and spray the exposed backing. Smooth the batting back down. Repeat for the other half of the batting.
- Follow the spray product’s instructions carefully. Work in a well-aired space.
- Thread Basting:
- This uses long, loose hand stitches to hold the layers. It takes more time than pins or spray but is very flat.
- Layer the quilt as you would for pin basting.
- Use a needle and thread (a contrasting color is helpful). Make long running stitches across the quilt in a grid pattern, about 4-6 inches apart. Do not pull the stitches tight.
- These stitches are removed after quilting.
No matter which method you choose, make sure your quilt sandwich is flat, smooth, and secure. This step is very important for nice machine quilting.
Setting Up Your Machine: Sewing Machine Settings for Quilting
Getting your machine ready is vital for successful quilting. Here are the key sewing machine settings for quilting.
- Thread:
- Use good quality thread. Polyester or cotton quilting thread is recommended.
- Use the same type and weight of thread in the needle and the bobbin.
- Thread your machine properly.
- Needle:
- Use a new needle designed for quilting or topstitching. Size 90/14 is standard. Change your needle often, especially for larger projects. A dull needle can skip stitches or damage fabric.
- Stitch Type:
- For straight line quilting, use a straight stitch.
- For free motion quilting (which is more advanced), you will use a straight stitch but rely on moving the fabric, not the machine feed dogs, to create the stitch length.
- Stitch Length:
- For straight line quilting, a stitch length of 2.5mm to 3.5mm is common. Shorter stitches (like 2.0mm) are stronger and less likely to unravel, but too short can make the fabric pucker or feel stiff. A longer stitch is easier to remove if needed. Experiment on scraps.
- For free motion quilting, the stitch length setting doesn’t matter as much because you control the fabric movement. However, it’s still usually set to a straight stitch.
- Tension:
- Thread tension needs to be balanced so the stitches look the same on the top and the bottom.
- Sew a test piece using your quilt sandwich scraps. Check the stitches.
- If the bobbin thread shows on top, the top tension is too tight. Loosen the top tension.
- If the top thread shows on the bottom, the top tension is too loose. Tighten the top tension.
- Do not change your bobbin tension unless you know how. Adjust the top tension first.
- Feed Dogs:
- For straight line quilting with a walking foot, the feed dogs should be up. They help the walking foot move the fabric.
- For free motion quilting, the feed dogs should be down or covered. This lets you move the fabric freely in any direction. Your machine should have a way to lower the feed dogs or come with a cover plate.
Always test your settings on a small practice piece made of your quilt layers before sewing on your actual quilt.
Presser Feet: Using a Walking Foot for Quilting
The right presser foot makes a big difference. For beginners doing straight lines or gently curving lines, using a walking foot for quilting is highly recommended.
- What is a Walking Foot?
- A walking foot has its own set of feed dogs on the top.
- As your machine’s feed dogs pull the bottom layers from beneath, the walking foot’s upper feed dogs help pull the top layer from above.
- This action helps feed all three layers of the quilt sandwich through the machine at the same rate.
- Why Use a Walking Foot?
- It prevents the top layer from shifting or stretching relative to the bottom layers.
- It greatly reduces puckering, especially on larger quilts.
- It helps you achieve smoother, more even stitching lines.
- How to Install and Use:
- Make sure your machine is off.
- Remove your regular presser foot.
- Attach the walking foot. There is usually a lever on the walking foot that rests on the needle clamp screw. This lever is what makes the foot’s feed dogs move up and down with the needle. Follow your machine’s manual for specific instructions.
- Make sure the walking foot is securely attached and the lever is positioned correctly.
- Use a normal straight stitch.
- Keep the feed dogs up.
- Guide the quilt gently. Do not push or pull hard. The foot and feed dogs do the work of moving the fabric. You just guide it in the direction you want to sew.
Other useful feet for quilting:
- 1/4-inch Seam Foot: Helpful for piecing the top accurately.
- Free Motion or Darning Foot: Required for free motion quilting (where you move the fabric freely). It doesn’t hold the fabric down firmly, allowing you to move in any direction. This foot requires the feed dogs to be down.
For your first machine quilting project, starting with a walking foot and straight lines is the easiest way to get good results.
Basic Machine Quilting Techniques
With your machine set up and the quilt basted, you’re ready to start sewing! Here are some basic machine quilting techniques to get you going.
- Starting and Stopping:
- To start a line of quilting, lower your needle into the fabric at your starting point.
- Take one or two stitches forward, then sew a couple of stitches backward to lock the stitch.
- Then sew forward along your quilting line.
- To end a line, sew a couple of stitches backward over your last stitches to lock them.
- Cut your threads, leaving tails about 3-4 inches long. You can bury these tails later using a needle, pulling them into the batting layer.
- Managing the Quilt’s Bulk:
- A large quilt can be heavy and hard to move under the machine.
- Roll or fold the parts of the quilt you are not actively quilting. Keep the bulk to the left of the needle or supported on your sewing table.
- Use a larger surface if possible. Sewing machine extension tables help support the weight.
- Go slow and take breaks. Reposition the quilt often to keep the area you are sewing flat.
- Guiding the Fabric:
- With a walking foot, your hands are mainly guiding the fabric direction, not pushing or pulling it through.
- Keep your hands flat on the quilt surface on either side of the presser foot. Gently guide the quilt along your desired path.
- Avoid stretching or forcing the fabric. Let the machine feed the layers.
- Quilting Direction:
- When doing straight lines, start quilting from the center of the quilt and work your way outwards towards the edges. This helps push any fullness or wrinkles towards the outside where they can be trimmed away later.
- Quilt lines in one direction first (e.g., all horizontal lines), then rotate the quilt and quilt lines in the other direction (all vertical lines). This helps keep the quilt square.
- Staying Straight (for straight lines):
- Use the edge of your walking foot, the edge of the quilt top, or seams as a guide.
- Mark lines with a fabric-safe tool if needed.
- Quilting rulers can be used with a ruler foot (often a special foot for free motion quilting, check your machine). For walking foot quilting, you can use the edge of the foot along a ruler placed on the fabric.
Practice these techniques on scrap quilt sandwiches before working on your main project. Getting a feel for how the fabric moves under the machine is important.
Simple Stitches: Machine Quilting Stitches for Beginners
When you are starting out, you do not need fancy stitches. The most common and easiest of the machine quilting stitches for beginners is the straight stitch.
- The Straight Stitch:
- This is the stitch you use for piecing.
- With a walking foot, you create lines by sewing straight across the quilt.
- You can sew straight lines in many ways:
- Stitch in the Ditch: Sewing directly on top of the seam lines that connect your fabric pieces. This makes the quilting less visible and helps blocks stand out.
- Parallel Lines: Sewing lines a set distance apart (e.g., 1/2 inch, 1 inch) across the quilt. You can use the edge of your walking foot or a quilting guide bar attached to the walking foot to keep lines evenly spaced.
- Crosshatching: Sewing parallel lines in one direction, then rotating the quilt and sewing parallel lines across the first set, creating a grid of squares or diamonds.
- The straight stitch is strong, effective, and looks great on many quilt styles.
- Other Simple Stitches (Check your machine):
- Some machines have decorative stitches. While not essential for beginners, a simple wave stitch or large zig-zag can be used with a walking foot. Always test first!
- However, for your first project, master the straight stitch. It offers endless design possibilities.
Focusing on the straight stitch allows you to practice fabric handling and tension without worrying about complex stitch patterns.
Focusing on Straight Line Machine Quilting
Let’s look closer at straight line machine quilting. It’s a perfect starting point. It works with a walking foot and provides a clean, modern look.
- Planning Your Lines:
- Decide where your lines will go. Will you follow the seams? Go straight across? Create a grid?
- Simple plans are best for beginners. Stitching 1/2 inch or 1 inch apart in a grid is popular and easy.
- Tools for Straight Lines:
- Walking Foot: Essential for even feeding.
- Quilting Guide Bar: Many walking feet come with a metal bar that can be inserted into the back of the foot. You adjust the bar to the distance you want your next line to be from the line you just sewed. You run the guide bar along the previous stitch line or a seam.
- Masking Tape: Place lines of masking tape on your quilt top to use as a temporary guide. Sew next to the tape, then remove it. Use low-adhesive tape.
- Marking Tools: Draw lines with a fabric-safe pen or chalk. Test the tool on a scrap first to make sure it removes easily.
- Sewing the Lines:
- Start in the center and work your way out.
- Sew the longest lines first if possible.
- Sew all lines in one direction before rotating the quilt to sew lines in the other direction. This helps maintain the quilt’s shape.
- Maintain a consistent speed. Sudden stops and starts can make stitches uneven.
- Let the walking foot and feed dogs move the fabric. Gently guide it.
- If your lines aren’t perfectly straight, don’t worry! It’s handmade, and slight variations are part of its charm.
Straight line quilting is versatile. You can quilt simple grids, lines that follow a pattern in the fabric, or lines radiating from a central point. It’s a great way to get comfortable with machine quilting.
Beginner Machine Quilting Projects
Choosing the right project makes learning easier and more fun. Look for beginner machine quilting projects that are small and manageable.
- Placemats: Small and flat. Great for practicing straight lines or simple grids.
- Table Runners: A bit longer than placemats but still easy to handle. Practice quilting longer lines.
- Pot Holders / Hot Pads: Very small. Perfect for practicing dense quilting or different patterns on a tiny scale.
- Pillow Covers: Quilt the top panel before making it into a pillow. Easier than managing a full quilt.
- Baby Quilts / Lap Quilts: These are larger but still easier to handle than a queen or king size quilt. They offer more space to practice guiding the quilt.
Starting small helps you gain confidence without being overwhelmed by a large amount of fabric. As you get more comfortable, you can move up to larger throws and then full-size quilts.
For your very first project, consider making a “practice sandwich” using leftover fabrics and batting. This is a piece about 18×18 inches where you can try out stitches, test tension, and practice guiding the fabric without worrying about messing up a finished quilt top.
Finishing Your Quilt: Binding a Quilt by Machine
Once your quilting is done, the last step is binding the edges. Binding neatens the raw edges and adds a finishing touch. You can do binding a quilt by machine.
- Prepare the Quilt:
- Trim the edges of your quilt so they are straight and square. Use a rotary cutter, mat, and ruler. Trim all three layers together, using the quilt top or a border as your guide.
- Prepare the Binding Strips:
- Binding is typically made from fabric strips cut 2.5 inches wide (though other widths are used).
- Cut enough strips to go all the way around your quilt’s perimeter, plus about 10-12 inches extra.
- Sew these strips together end-to-end using diagonal seams. This makes the joins less bulky.
- Press the seams open or to one side.
- Fold the long binding strip in half lengthwise, wrong sides together, and press.
- Attaching Binding to the Front:
- Place the raw edge of the folded binding strip even with the raw edge of the quilt top.
- Start somewhere along one side of the quilt, not in a corner. Leave about a 6-8 inch tail of the binding strip hanging free.
- Using your walking foot (or a regular presser foot) and a straight stitch, sew the binding to the quilt edge with a 1/4-inch seam allowance.
- Stop 1/4 inch away from the first corner. Backstitch. Remove the quilt from the machine.
- Making the Corner Miter:
- Fold the binding strip straight up, creating a diagonal fold. The raw edge of the binding should line up with the edge of the quilt.
- Fold the binding strip back down along the next edge of the quilt. The fold should be even with the top edge you just sewed along. This creates a neat diagonal fold (a miter).
- Starting at the top edge, right at the fold you just made, begin sewing again with a 1/4-inch seam allowance. Sew down the next side.
- Repeat for all four corners.
- When you reach the side where you started, stop sewing about 10-12 inches before you meet your starting point. Leave a tail.
- Joining the Binding Ends:
- Overlap the two raw ends of the binding strips. You need to join them so the binding lies flat. There are several methods; a simple one is to lay the ends flat, overlap them by the width of your binding strip (e.g., 2.5 inches), trim the excess, and sew the ends together with a straight seam. Then fold and finish sewing down the remaining section. Another method involves opening the folds, placing the ends right sides together at a right angle, drawing a diagonal line, sewing on the line, trimming, and pressing. Look up tutorials online for visual help.
- Finish sewing the last section of binding to the front of the quilt.
- Finishing the Binding by Machine:
- Wrap the folded binding strip around to the back of the quilt, covering the line of stitching you just made.
- You can hold it in place with clips or pins.
- From the front of the quilt, stitch in the ditch (sew exactly in the seam line between the quilt top and the binding). Your stitch will catch the back of the binding.
- Alternatively, stitch very close to the folded edge of the binding on the front of the quilt. Aim to catch the binding fabric on the back. Use thread that matches your binding fabric.
Machine binding is faster than hand binding. It gives a durable finish, perfect for beginner projects or quilts that will be used and washed often.
Maintaining Your Sewing Machine
A well-kept machine works best. Regularly clean lint from the bobbin area and oil your machine according to the manual. Use the right needles and change them often. This helps prevent problems when quilting.
Practicing and Learning
The best way to get good at machine quilting is to practice. Start with small projects or practice pieces. Try different stitches or patterns. Do not be afraid to try. Your first projects might not be perfect, and that is okay! Every stitch you make is a step in learning.
Frequently Asked Questions
Here are some common questions beginners ask about machine quilting.
- Can I quilt on any sewing machine?
Yes, most home sewing machines can be used for quilting. You need a straight stitch and the ability to lower your feed dogs (or cover them) for free motion quilting if you want to try that later. A machine with adjustable speed is also helpful. - What size needle should I use?
For quilting, a size 90/14 quilting or topstitching needle is a good standard. If you are using very thick batting or thread, you might go up to a 100/16. Change your needle for every project or after about 8-10 hours of sewing time. - What type of thread is best?
Beginners often use 40 or 50 weight cotton or polyester thread. Cotton is traditional and less likely to melt from ironing. Polyester is strong and has less lint. Use good quality thread to avoid shredding or breaking. - How do I stop the fabric from puckering?
Good basting is the most important step to prevent puckering. Using a walking foot helps feed the layers evenly. Make sure your thread tension is balanced. Do not push or pull the fabric too hard. - How do I choose batting?
Consider the desired look and feel. Cotton is flat and drapes well. Polyester is puffier and lighter. Check the packaging for the recommended quilting distance – this tells you how far apart your lines of quilting can be to keep the batting stable. - Do I have to use a walking foot?
For straight line quilting or any quilting where you want even stitches and minimal puckering, a walking foot is highly recommended for beginners. It makes a big difference in getting good results. You don’t strictly have to, but it makes it much easier. - How do I mark my quilting lines?
Use fabric-safe markers that will disappear with heat or water. Test the marker on a scrap first! You can also use masking tape, a Hera marker (which leaves a crease), or simply follow seams or the edge of your presser foot/guide bar. - My stitches on the back don’t look right. What’s wrong?
This is usually a thread tension problem. Re-thread your machine carefully (top and bobbin). Make sure the bobbin is wound evenly. Test on a scrap and adjust the top tension. Also, ensure you are using the right needle and it’s inserted correctly.
Conclusion
Machine quilting with a sewing machine is a skill anyone can learn. Start with simple projects and straight lines. Get comfortable with your machine settings and using a walking foot. Practice your basting. With each project, you will gain confidence and improve your skills. Soon you’ll be creating beautifully quilted items you can be proud of! Enjoy the process and happy quilting!