
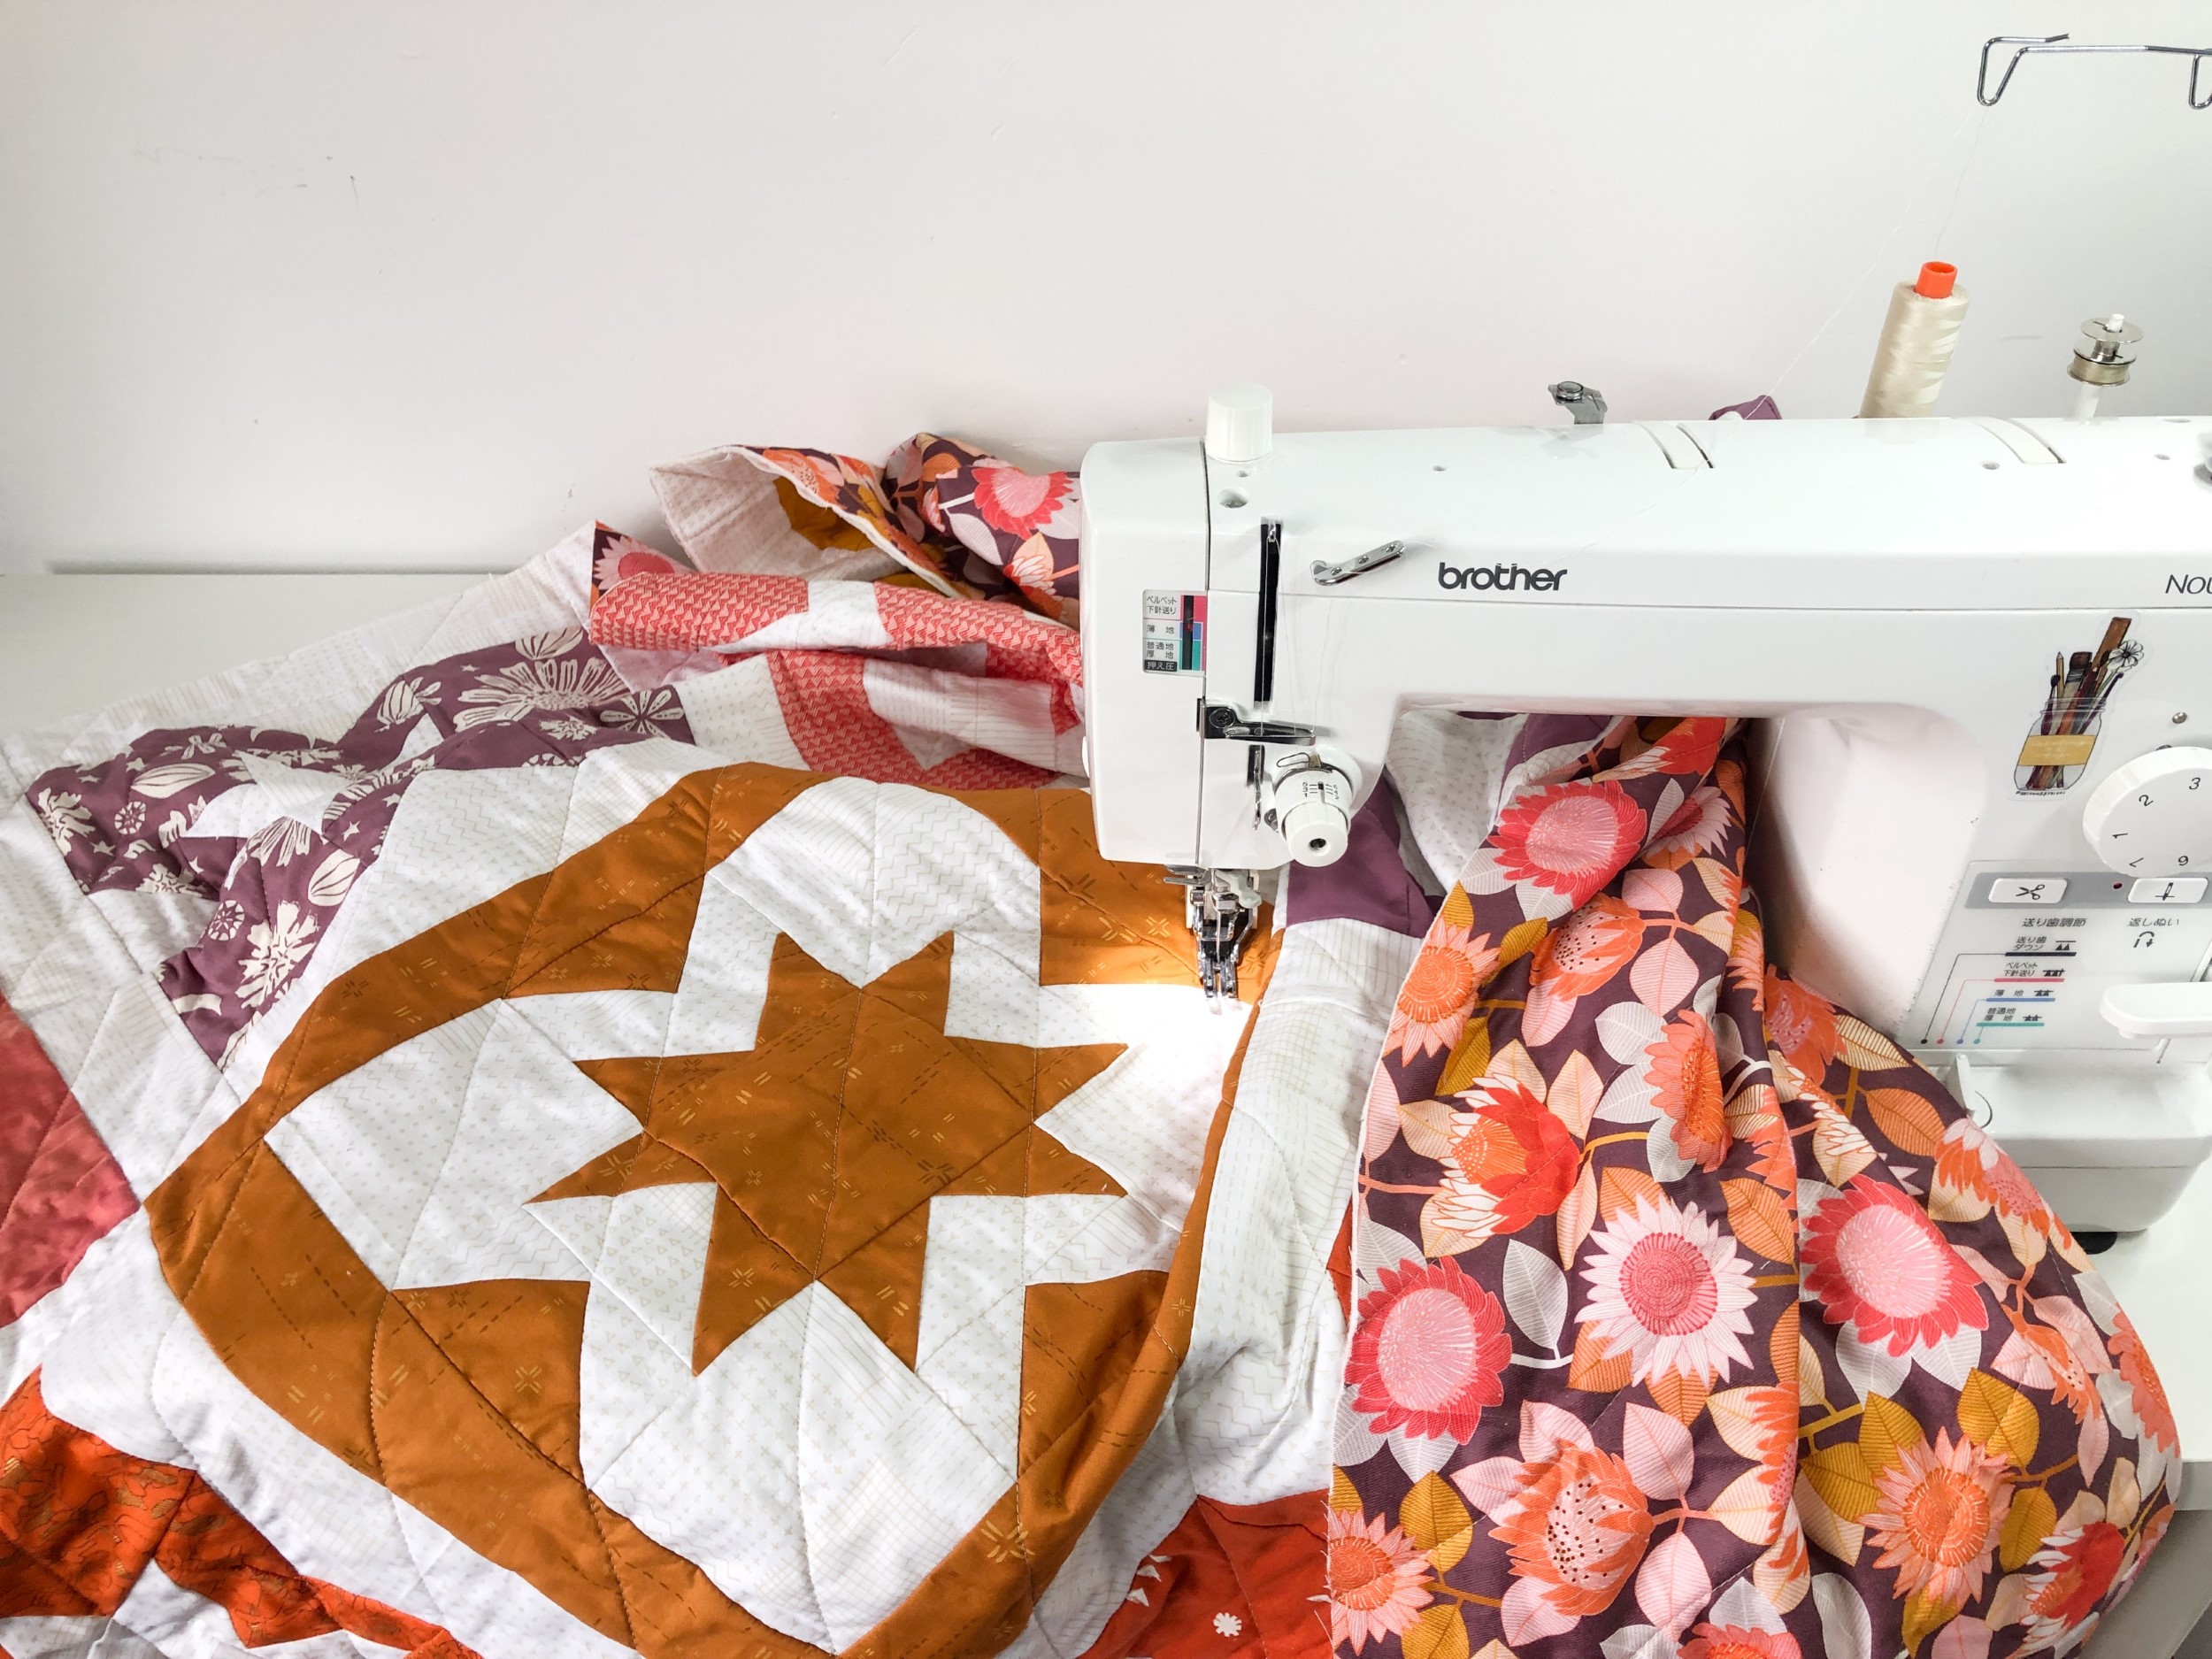
Image Source: www.blossomheartquilts.com
How To Quilt With Regular Sewing Machine: Beginner’s Guide
Can you quilt with a regular sewing machine? Yes, absolutely! You do not need a special, expensive machine to start quilting. You can use the sewing machine you already have at home. This guide will show you how to turn fabric layers into a beautiful quilt using your standard domestic sewing machine. It is a fun craft you can learn step by step.
Getting Started Quilting at Home
Quilting joins three layers of fabric together. These layers are the quilt top (your pieced design or whole cloth), a middle layer called batting, and the backing fabric. Sewing stitches go through all three layers. This holds them together. It also adds texture and design to the quilt.
Your home sewing machine is perfect for this. It just needs to make a simple straight stitch. Many machines do much more, but a basic machine is all you need to start.
Essential Tools for Machine Quilting at Home
Having the right tools makes quilting easier. You might have some of these already.
- Your Sewing Machine: Make sure it is clean and oiled. Check the manual for care.
- Quilting Needles: These needles are strong and sharp. They go through many fabric layers. Use a size 80/12 or 90/14 for most quilting. Change your needle often. A new needle works best.
- Thread: Use good quality cotton or polyester thread. Cotton is popular for piecing and quilting. Polyester is strong. Match the thread weight to your needle and fabric. Start with a medium weight, like 40 or 50 weight.
- Rotary Cutter, Mat, and Rulers: These help cut fabric quickly and accurately.
- Fabric Scissors: Keep sharp scissors just for fabric.
- Pins or Basting Spray: You need something to hold the three layers together before sewing.
- Safety Pins: Curved safety pins are great for basting layers together.
- Walking Foot: This is a special presser foot. It helps move the top and bottom fabric layers evenly. This stops fabric layers from shifting.
- Free Motion Quilting Foot (or Darning Foot): This foot is often open or has a circle shape. It lets you move the fabric freely in any direction for free motion quilting. Your machine may have come with one.
- Quilting Gloves: These help you grip the fabric. They make moving the quilt easier.
- Fabric Markers or Chalk: Use these to mark quilting lines if needed.
Table: Basic Quilting Tool List
| Tool | Use | Why it Helps |
|---|---|---|
| Sewing Machine | Makes stitches | Joins layers, adds design |
| Quilting Needles | Sew through thick layers | Prevents skipped stitches, breaks |
| Quality Thread | Joins fabric layers | Strong seams and stitches |
| Rotary Cutter, Mat, Ruler | Cut fabric pieces | Accurate and fast cutting |
| Fabric Scissors | Cut fabric only | Keeps blade sharp |
| Pins or Basting Spray | Hold layers together | Stops fabric from shifting while sewing |
| Walking Foot | Moves layers evenly for straight lines | Prevents puckering and wrinkles |
| Free Motion Foot | Allows free movement of fabric | For free motion designs |
| Quilting Gloves | Grip fabric | Makes moving large quilts easier |
| Fabric Marker | Mark lines on fabric | Follow lines for quilting patterns |
Preparing Your Quilt Layers
Every quilt starts with three layers. These layers must be cut to size and made ready for sewing.
The Quilt Top
This is the finished front of your quilt. It can be one piece of fabric, or many pieces sewn together. Make sure it is pressed flat. Trim any loose threads. This makes the next steps smoother.
Quilting Batting Selection for Regular Machine
The batting is the middle layer. It gives the quilt its warmth and puffiness (loft). Batting comes in different types and thicknesses.
- Cotton Batting: A very popular choice. It is natural and soft. It makes the quilt feel a little heavier. It gives a classic look.
- Polyester Batting: Lightweight and warm. It comes in many thicknesses. It keeps its shape well. It is often cheaper than cotton.
- Blend Batting: Mixes fibers, often cotton and polyester. Offers benefits of both types. A common blend is 80% cotton, 20% polyester.
- Wool Batting: Very warm and lightweight. It breathes well. It costs more than cotton or poly.
- Bamboo Batting: Eco-friendly and soft. Drapes well.
For a regular machine, most batting types work well. Thin to medium thickness batting is easiest to sew through. Look for batting labeled “needle-punched” or “with scrim.” These types are more stable. They are less likely to stretch or pull apart while you sew.
Check the batting package. It will tell you how far apart your quilting stitches can be. This is important. If stitches are too far apart, the batting might bunch up or fall apart inside the quilt over time.
The Backing Fabric
This is the fabric for the back of the quilt. It can be one wide piece or several pieces sewn together. Make the backing fabric and the batting a few inches bigger than the quilt top on all sides. This extra size gives you something to hold onto. It also makes sure your batting and backing do not run short as you quilt.
How to Layer and Baste a Quilt for Machine Sewing
Putting the three layers together is called making the quilt sandwich. Holding them together is called basting. Basting stops the layers from shifting while you quilt. This is a very important step. Poor basting can cause puckers and folds on the back of your quilt.
There are different ways to baste.
- Pin Basting: This uses safety pins. Lay the backing fabric flat, face down. Tape it to the floor or a large table. Make it smooth and tight, like a drum. Place the batting smoothly on top of the backing. Get out any wrinkles. Place the quilt top smoothly on top of the batting, face up. Get out any wrinkles here too. Start in the middle. Put safety pins through all three layers. Place pins about a hand width apart. Put them closer together if your design has open areas. Work your way out to the edges. Make sure the layers stay smooth as you add pins.
- Spray Basting: This uses a special fabric glue spray. It is temporary. Lay the backing fabric flat, face down. Smooth it out. Lay the batting on half of the backing. Fold the other half of the backing back. Spray the exposed batting lightly. Unfold the backing onto the sprayed batting. Smooth it down well. Fold back the other half of the batting. Spray the exposed backing lightly. Flip the batting back onto the sprayed backing. Smooth it down. Now, repeat the process with the quilt top and the batting. Work in sections. Spray one half of the batting, lay the quilt top on it. Spray the other half, lay the rest of the quilt top on it. Smooth everything very well. Follow the spray can directions. Make sure you are in a well-aired space.
- Thread Basting: This uses a long needle and thread. Make big, loose stitches that go through all three layers. Start from the middle and work out. Make lines of stitches about 4-6 inches apart. This method takes more time. Some quilters prefer it for large quilts.
Handling Large Quilts on a Standard Sewing Machine During Basting
Working with a big quilt sandwich is tricky on a small table or floor space.
* Clear Your Space: Move furniture. Make a large, flat area.
* Use Tables: Push tables together to make a bigger surface.
* Tape it Down: Use painter’s tape to hold the backing fabric edges to the floor or table. This keeps the bottom layer smooth.
* Work in Sections: If spray basting, only spray one part at a time. Smooth that part before moving on. If pin basting, start in the middle and work outwards, smoothing constantly.
* Roll or Fold: Once basted, you may need to roll or fold parts of the quilt to manage it at the sewing machine. Roll up the edges neatly. Do not just stuff it through the machine arm.
Setting Up Your Machine for Quilting
Getting your machine ready is key to good stitches.
Sewing Machine Tension Settings for Quilting
Tension is how tight the top and bottom threads are. Correct tension makes stitches look the same on both sides of the fabric.
* Start Simple: Use a scrap piece of your quilt sandwich (all three layers).
* Test Stitch: Sew a straight line on the scrap. Look at the stitches.
* Top Thread Too Loose: The bottom thread will lie flat on the fabric. The top thread will look like loops on the bottom. Turn the top tension dial to a higher number (tighter).
* Bottom Thread Too Loose: The top thread will lie flat on the fabric. The bottom thread will look like loops on the top. This usually means the top tension is too tight. Turn the top tension dial to a lower number (looser). Sometimes, the bobbin tension is the issue, but start with the top tension dial.
* Perfect Tension: The threads meet perfectly in the middle of the batting. You will see a straight line of stitches on top and bottom. They look the same.
* Keep Testing: Fabric, batting, and thread choices affect tension. Always test on a scrap piece before quilting your real project.
Needle and Thread Choices
We talked about needles (quilting needle 80/12 or 90/14) and thread (cotton or polyester, 40 or 50 weight).
* Change Needles: Change your needle often. A good rule is after every quilt or every 8-10 hours of sewing. A dull needle can skip stitches or damage fabric.
* Matching Thread: You can match thread color to your fabric, or use a contrast color to make the quilting stand out. Invisible thread (nylon or polyester) is an option, but it can be tricky for beginners.
Presser Feet for Quilting
Your regular machine likely came with a few feet. Two are very helpful for quilting.
- Using a Walking Foot for Quilting: This foot has built-in feed dogs on the top. As your machine’s feed dogs move the bottom fabric, the walking foot’s feed dogs move the top fabric at the same time. This is super helpful for straight line quilting or stitching in the ditch. It helps prevent fabric layers from shifting and puckering. Install it according to your machine manual. Use it with your machine’s feed dogs engaged (up).
- Free Motion Quilting Foot (or Darning Foot): This foot does not touch the fabric when the needle is up. It only touches when the needle is down. This allows you to move the fabric freely in any direction. To use this foot, you must drop your machine’s feed dogs. Find the switch or lever on your machine that lowers the feed dogs. If your machine does not drop feed dogs, you might have a plate to cover them.
Machine Quilting Stitches for Beginners
You do not need fancy stitches to quilt. A simple straight stitch works great.
- Straight Stitch: This is the most common stitch for quilting. It is strong and simple. You can sew straight lines, curves, or shapes with it. When using a walking foot, the machine’s stitch length setting controls how long the stitches are. For quilting, a stitch length between 2.5 and 3.0 mm is common. Test on your scrap piece to see what you like. Shorter stitches are harder to unpick!
- Simple Zig-Zag: You can use a wide, short zig-zag stitch for a different texture. This is less common for beginners but is an option.
Quilting Techniques on a Regular Machine
Now for the fun part: sewing the layers together! Here are some simple techniques perfect for beginners.
Tips for Straight Line Quilting With Sewing Machine
Straight line quilting is a great way to start. It looks modern and is easy to do with a walking foot.
- Use Your Walking Foot: This is essential for straight lines.
- Marking Lines: You can mark lines on your quilt top using a ruler and fabric marker. Mark lines parallel to seams or edges. Mark them any distance apart you like (1 inch, 2 inches, etc.).
- Using Seams as Guides: You can also stitch a set distance away from existing seams without marking every line. Use the edge of your walking foot or markings on your machine’s needle plate as a guide. Sew a line, then use that line or a seam as a guide for the next line.
- Start in the Middle: When quilting lines across the whole quilt, start quilting lines in the center of the quilt. Work your way out to one edge. Then go back to the center and work your way out to the other edge. This helps spread the fabric out evenly and prevents folds.
- Manage the Bulk: As you quilt, the parts of the quilt not under the needle will hang or rest on your machine table. Roll or fold the edges of the quilt neatly and place them on your table or a nearby chair. Do not let the quilt hang off the table. The weight will pull and distort your stitches. Handling large quilts on a standard sewing machine means managing the fabric around the machine.
- Consistent Speed: Try to sew at a steady speed. This helps keep your stitches even.
Stitch in the Ditch Technique on Home Machine
Stitch in the ditch means sewing right next to or exactly on top of existing seams in your quilt top. This technique makes the quilting stitches less visible. It makes the piecing design stand out more.
- Use Your Walking Foot: Again, the walking foot is your friend here. It helps guide the fabric and keeps your stitches straight along the seam.
- Find the “Ditch”: The ditch is the tiny groove where two pieces of fabric are joined by a seam. You want your needle to fall right into this groove.
- Adjust Your Needle Position: Some machines let you move the needle slightly to the left or right. You might need to do this to get the needle exactly in the ditch. Sew slowly and watch where the needle goes.
- Start and Stop: Sew from one end of a seam to the other. You can tie off threads at the start and end, or overlap stitches slightly if they will be covered later.
- Plan Your Path: Think about which seams you will stitch first. Stitching major seam lines first can help stabilize the quilt sandwich. Work from the center out if possible.
Free Motion Quilting with Domestic Machine
Free motion quilting (FMQ) allows you to draw with your stitches. You can make curves, loops, swirls, or specific designs. This is where you drop the feed dogs.
- Drop the Feed Dogs: This is required for FMQ. It lets you move the fabric in any direction.
- Attach the Free Motion Foot: This foot hovers slightly above the fabric.
- Reduce Stitch Length to Zero: Because you are moving the fabric, not the machine feed dogs, the machine’s stitch length setting does not control stitch length anymore. Set it to zero or turn off feed dogs completely if your machine has that option. You control the stitch length by how fast you move the fabric and how fast the needle bobs up and down.
- Practice First: Practice on scrap quilt sandwiches. Move the fabric to make simple shapes like loops, circles, or wavy lines. Try to make your stitches an even length. If you move the fabric too fast, stitches will be long. If you move too slow, they will be short. It takes practice to find a good rhythm.
- Use Quilting Gloves: These help you grip the fabric and move it smoothly.
- Handling Large Quilts: For FMQ, you still need to support the weight of the quilt. Use tables or chairs around your machine. Roll or fold the edges neatly so they fit through the machine’s arm space. Use your hands (with gloves!) to guide the fabric under the needle.
- Simple Designs for Beginners:
- Stippling: This is a popular filler design. You sew wavy lines that do not cross each other. It looks like puzzle pieces. Keep the lines close together to make the areas around them puff up more.
- Loops: Sew continuous loop shapes across an area.
- Wavy Lines: Simple back and forth wavy lines or serpentine lines.
- Plan or Go Random: You can draw your design on the quilt top first, or just move the fabric and see what happens (meandering).
- Breaks are Good: Take breaks often. FMQ uses different muscles and needs focus.
The Quilting Process Step-by-Step
- Set Up: Clean your machine. Put in a new quilting needle. Insert a full bobbin of thread. Thread the top thread. Install the right presser foot (walking foot for straight lines/stitch in the ditch, FMQ foot for free motion).
- Adjust Settings: Set your stitch length (for walking foot) or drop feed dogs and set stitch length to zero (for FMQ). Check your tension on a scrap sandwich.
- Start Quilting:
- Walking Foot: Place the quilt sandwich under the foot. Bring the bobbin thread up to the top (hold the top thread, turn the handwheel to lower and raise the needle, pull the top thread loop to bring up the bobbin thread, pull both threads out). Start sewing from the center or a planned starting point. Sew a few stitches, then sew back over them (backstitch) to lock the stitch, or leave long thread tails to bury later. Follow your marked lines or seam guides. Manage the bulk of the quilt around the machine.
- Free Motion: Drop feed dogs. Put on the FMQ foot. Bring up the bobbin thread. Hold both threads. Sew a few tiny stitches in place to lock them. Then begin moving the fabric in your design. Try to find a steady speed for moving the fabric and pressing the pedal. Manage the quilt’s weight.
- Work Across the Quilt: Quilt in sections. Work from the center out helps keep things smooth. For straight lines, complete all lines in one direction, then turn the quilt and sew lines in the other direction if making a grid.
- Handle Large Quilts: Remember to roll or fold the quilt edges neatly. Support the weight on your machine table or a separate table. Take your time. Do not let the quilt pull itself through the machine. You must guide and support it.
- Stopping: When you reach the end of a line or finish a section, stop sewing. Leave long thread tails or backstitch a few stitches.
- Finish Threads: Trim threads. If you left long tails, you can pull the top thread to bring the bobbin thread loop up, pull the bobbin thread to bring the top thread to the back, and tie them off in the batting. Or use a self-threading needle to pull threads to the back and bury them.
Finishing Your Quilt
Once all your quilting stitches are done, you are almost finished!
- Remove Basting: Take out all your safety pins or check that the spray glue is no longer holding tight (it should release over time or with washing).
- Square Up: Lay the quilt flat. Use a large ruler and rotary cutter to trim the edges. Make them straight and square. Trim away the extra batting and backing.
- Add Binding: Binding is fabric sewn around the edges of the quilt. It covers the raw edges and makes a nice finish. There are many ways to make and attach binding. This is another skill in itself!
Tips for Success and Enjoyment
- Start Small: Your first project does not need to be a king-sized quilt. Start with a placemat, a table runner, or a baby quilt. This lets you practice the steps without feeling overwhelmed by the size.
- Practice: Quilting takes practice. Your first stitches or FMQ loops may not be perfect. That is okay! Keep practicing on scraps.
- Go Slow: There is no rush. Sew at a comfortable speed. This helps you control the fabric and the stitches.
- Take Breaks: If your hands or back hurt, or you feel frustrated, take a break. Stand up, stretch, walk around. Quilting should be fun, not painful.
- Ask for Help: Join a local quilt group or online community. Watch videos. Quilters love to help each other.
- Embrace Imperfection: Handmade quilts are not meant to look like they were made in a factory. Little wobbles or uneven stitches add to the charm.
Frequently Asked Questions (FAQ)
Q: What is the best stitch length for machine quilting with a walking foot?
A: A stitch length between 2.5 and 3.0 mm is a good starting point. Test on a scrap piece to see what looks best with your fabric and batting.
Q: Do I need special thread for quilting?
A: Use good quality thread, either cotton or polyester, in a weight like 40 or 50. Avoid very cheap thread, as it can break or create lint.
Q: My stitches look different on the top and bottom. What is wrong?
A: This is usually a tension issue. Check your sewing machine tension settings for quilting on a scrap piece. Make sure the top and bottom threads are threaded correctly. Make sure your bobbin is wound evenly.
Q: How often should I change my needle when machine quilting?
A: Change your quilting needle after every quilt project or after about 8 to 10 hours of sewing. A sharp needle makes a big difference.
Q: How do I handle a large quilt when machine quilting at home?
A: Handling large quilts on a standard sewing machine requires managing the fabric bulk. Roll or neatly fold the parts of the quilt that are not under the needle. Support the weight of the quilt on your machine table or nearby tables or chairs. Do not let it hang and pull.
Q: Can I do free motion quilting if my machine does not have a “drop feed dogs” switch?
A: Some machines have a plate that covers the feed dogs instead of a switch to drop them. Check your machine’s manual to see if this is an option. If not, some quilters manage by setting the stitch length to zero and using a free motion foot, but it is harder to get smooth movement.
Q: Is a walking foot really necessary for straight line quilting?
A: Using a walking foot for quilting is highly recommended for straight lines and stitch in the ditch on a home machine. It helps the layers move evenly, preventing puckers and wrinkles. You can try without, but you will likely get better results with the walking foot.
You can absolutely quilt with your regular sewing machine. With some basic tools, careful preparation, and practice with simple techniques like straight lines, stitch in the ditch, or simple free motion designs, you can make beautiful quilted projects right at home. Happy quilting!