
Removing embroidery can seem hard. But it is not. This guide will show you how to remove it without harm. We will cover how to remove logo embroidery. We will also show the best way to remove stubborn embroidery. You can make old items look new. You can fix mistakes. Let’s start this journey together.
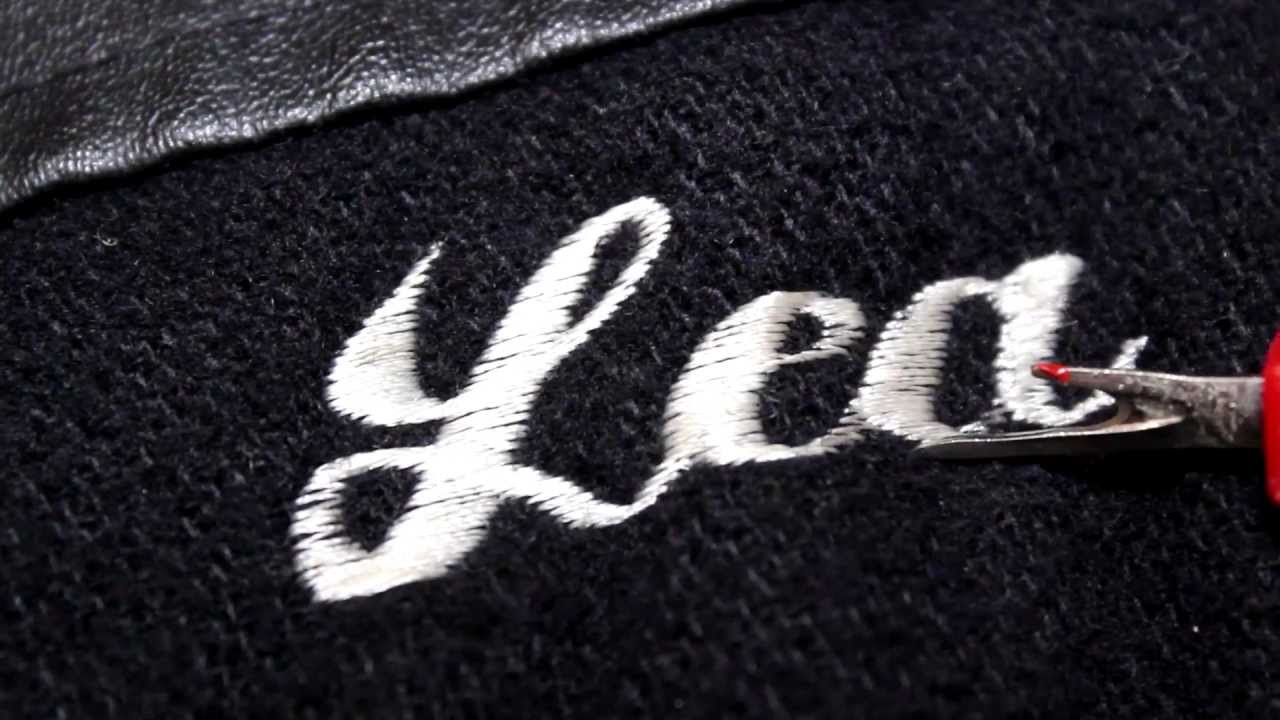
Image Source: i.ytimg.com
Reasons For Removing Embroidery
People remove embroidery for many reasons. Sometimes, a logo is old. It might not fit a brand anymore. Other times, clothes are bought used. They have names or designs you do not want. Maybe you made a mistake on a new project. You might not like the design anymore. Or, you want to reuse fabric. Removing stitches lets you do all these things. It saves items from the trash. It gives them a new life.
Salvaging Items
Many clothes are good. They just have an old design. Or a company logo. Removing these makes the item wearable again. This saves money. It helps the planet. Less goes to waste.
Correcting Mistakes
Even experts make mistakes. A stitch might go wrong. A color might be off. Removing the bad part fixes it. You do not need to start over. This saves time and effort.
Reusing Fabric
Old embroidered items have good fabric. Maybe it is a thick jacket. Or a soft blanket. If you remove the stitches, you can use the fabric. You can make something new. This is a great way to recycle.
Essential Tools For The Task
You need the right tools. They make the job easy. They also keep your fabric safe. Using the wrong tool can rip the cloth. So, get the proper tools before you begin.
Seam Ripper For Embroidery
The seam ripper is your main tool. It is small. It has a sharp hook. This hook slides under stitches. It cuts them easily. Always use a sharp one. A dull one can pull threads. It can damage your fabric. Some rippers have a small ball. This ball helps slide under stitches without harming the fabric. This is key for unpicking embroidery stitches.
Small Scissors
You will need small, sharp scissors. Pointy ones work best. They help cut loose threads. They trim very close to the fabric. They are good for tiny spots.
Tweezers
Tweezers are very useful. After you cut stitches, small pieces are left. Tweezers grab these tiny threads. They pull them out cleanly. They are great for fine work.
Lint Roller Or Tape
After removal, many tiny threads will stick. A lint roller picks them up fast. Strong tape also works. Wrap it around your hand. Press it on the fabric. It pulls off the fuzz.
Bright Light
Good light is a must. You need to see every stitch. A bright lamp helps. A magnifying lamp is even better. It shows small details. This stops you from cutting the fabric by accident.
Fabric Brush
A soft fabric brush can help. It gently lifts loose threads. It helps clean the area. It is good for thick fabrics.
Iron And Ironing Board
After removing stitches, the fabric might look messy. An iron helps smooth it out. It can close tiny holes. It makes the fabric look new.
Table: Tools To Take Out Stitches
| Tool | Purpose | Best Use For |
|---|---|---|
| Seam Ripper | Cuts individual stitches swiftly | Main tool for unpicking stitches |
| Small Scissors | Trims loose threads and fine cuts | Finishing touches, tight spots |
| Tweezers | Removes tiny, cut thread pieces | Cleaning up after cutting |
| Lint Roller/Tape | Picks up loose threads and debris | Final clean-up, removing fuzz |
| Bright Light | Improves visibility for precise work | Seeing small stitches, avoiding fabric damage |
| Fabric Brush | Gently removes surface threads | Loosening stuck threads |
| Iron & Ironing Board | Smooths fabric, reduces stitch marks | Finishing step, restoring fabric look |
Preparing For Stitch Removal
Before you cut any thread, prepare your item. This step is important. It protects your fabric. It makes the job easier.
Clean The Item
Wash the item first. Make sure it is clean. Dirt and oils can make stitches harder to see. They can also transfer to your tools. A clean surface is easier to work on.
Choose A Flat Surface
Work on a flat, steady table. This gives you good support. It keeps the fabric still. Do not work on your lap. It is too unsteady.
Set Up Good Lighting
Place your light source correctly. It should shine directly on the embroidery. Shadows make it hard to see. Good light prevents mistakes.
Gather All Tools
Have all your tools ready. Place them within reach. This saves time. It keeps you focused.
The Step-by-Step Process: Unpicking Embroidery Stitches
Removing embroidery takes time. It needs patience. Do not rush. Go slow. This helps prevent fabric damage. This method works for most designs. This is how to remove embroidery without fabric damage.
Examining The Embroidery
First, look closely at the embroidery. Notice how it is made. Most embroidery has two parts. The top thread is called the “needle thread.” The bottom thread is called the “bobbin thread.” The bobbin thread is often thinner. It is usually the same color as the fabric. It is on the back side.
Starting From The Back: Machine Embroidery Removal
For machine embroidery, start from the back. The bobbin thread is usually less dense. It is easier to cut.
1. Turn the item inside out: Lay the item flat. The back of the embroidery should face up.
2. Locate the bobbin thread: This is the thread on the back. It holds the design down. It often looks like small, short stitches.
3. Cut the bobbin threads: Use your seam ripper. Slide the sharp hook under a few bobbin threads. Pull up gently. Cut them. Do this in small sections. Cut many threads. Do not cut the fabric. This is very important.
4. Repeat: Move across the entire design. Cut all the bobbin threads. Be careful around edges.
Working From The Front
Once the bobbin threads are cut, the top threads are loose.
1. Turn the item right side out: Lay the item flat again. The front of the embroidery should face up.
2. Brush the top threads: Use a fabric brush or your fingers. Gently rub over the design. The top threads should loosen. They may even pop up.
3. Pick out loose threads: Use tweezers. Grab any loose threads. Pull them out. Do this gently. Do not pull hard. Pulling too hard can stretch or damage the fabric.
4. Use tape or a lint roller: Once many threads are out, use a lint roller. Or wrap tape around your hand. Press it firmly onto the design. It will pull off many remaining threads.
5. Repeat as needed: Go back and forth. Cut more bobbin threads if needed. Brush the top. Pick out more threads. Keep going until all threads are gone.
Special Cases For Unpicking Embroidery Stitches
Some stitches are trickier. Satin stitch is dense. Fill stitches cover large areas.
- Satin Stitch: This stitch is thick. It covers a lot. You might need to cut more on the back. Then, use the seam ripper on the front. Gently pry up the edges. Snip small sections.
- Small Lettering: For tiny letters, use tiny snips. A very sharp, small pair of scissors can help here. Be extra careful not to snip the fabric.
How To Remove Logo Embroidery And Name Embroidery
Removing specific items like logos or names is common. The method is the same. But focus on the details. This is especially true for removing name embroidery from clothing.
Focus On Density
Logos and names are often dense. They have many stitches. They might have a backing material.
- Check for backing: Many logos have a stabilizer. This is a paper or fabric material. It is ironed or hooped behind the embroidery. This backing adds stiffness. It helps the stitches lay flat.
- Remove backing first (if possible): If the backing is tear-away, gently rip it off. If it is cut-away, you might need to trim it. If it is wash-away, wash the item after the stitches are out.
- Use the back-to-front method: Always start from the bobbin thread. Cut many small threads on the back. This makes the top stitches loose.
- Work in small sections: Do not try to remove the whole logo at once. Pick a small area. Remove those stitches. Then move to the next area. This gives you more control.
- Be patient with details: Letters have curves and tight spots. Use the tip of your seam ripper. Or use small scissors. Go slowly.
Dealing With Different Fabrics
Different fabrics react differently.
* Stretchy fabrics: Be very gentle. They can distort. Use a hoop if possible. This keeps the fabric flat and still.
* Delicate fabrics: Silk or chiffon need extreme care. Use only very sharp tools. Work under a strong light. Cut only one or two threads at a time.
* Thick fabrics: Denim or canvas are tougher. They can handle more pressure. But still, be careful. The threads can be deeply set.
Best Way To Remove Stubborn Embroidery
Some embroidery is very stubborn. It might be old. It might be very dense. Or it might have strong thread. Do not give up. There are ways to handle it. These are tips for unstitching designs that are tough.
Use Heat
Heat can sometimes loosen old threads.
* Steam: Hold the embroidered area over steam. A clothes steamer works well. Or use an iron on a steam setting. The steam softens the threads. It makes them easier to cut. Be careful not to burn the fabric.
* Ironing: Iron the back of the embroidery before you start. This can also help loosen the bobbin threads.
Dampen The Fabric
A little moisture can help.
* Lightly mist: Use a spray bottle. Lightly mist the embroidered area. Do not soak it. Just a little dampness helps. Then try to remove the stitches.
Work In Layers
Some designs have layers of stitches. One design might be on top of another. Or a fill stitch has a border.
* Identify layers: Try to see which stitches are on top. Remove those first. Then work on the layer underneath. This is like peeling an onion.
* Use the seam ripper for each layer: You might need to go over the same area multiple times. Each time, you cut a different layer of thread.
Use Different Tools
If your seam ripper is not working well, try another tool.
* Embroidery scissors: Very tiny, sharp scissors can get into small spaces.
* Razor blade (with extreme care): A single-edge razor blade can work. Lay it flat on the back of the embroidery. Gently scrape over the bobbin threads. This cuts them. This is very risky. Use it only as a last resort. Always have a guard or be very, very careful. It is easy to cut the fabric. This is for experienced users only.
Freezing
For very old, stiff embroidery, freezing can sometimes help.
* Place in freezer: Put the item in a sealed plastic bag. Place it in the freezer for a few hours. The cold can make threads brittle. This might make them easier to break and remove. Let it warm up a bit before working.
Repairing Fabric After Embroidery Removal
After the stitches are gone, the fabric might show marks. There might be tiny holes. Or stretched areas. Do not worry. You can often make the fabric look good again. This is about repairing fabric after embroidery removal.
Ironing And Steaming
This is the most important step.
1. Use steam: Lay the item flat on an ironing board. Use a lot of steam. Press down firmly. Move the iron over the area. The heat and moisture help the fibers relax. They close the tiny holes.
2. Add pressure: Press down hard with the iron. Hold it for a few seconds. Lift. Move to the next spot. Repeat this over the whole area.
3. Iron from both sides: Iron the front and the back. This gives the best results.
Using A Fabric Brush Or Coin
If holes are still visible:
* Fabric brush: Use a stiff fabric brush. Gently rub the area in a circular motion. This fluffs up the fibers. It can help fill small holes.
* Coin trick: Take a coin (like a quarter). Place it on the area. Rub it in circles. The edge of the coin helps push fibers back into place. This is good for tight weaves.
Shrinking The Fabric (For Natural Fibers)
For cotton or linen, you can try to shrink the area.
* Targeted heat and water: Wet the specific area with hot water. Then iron it dry with high heat. The hot water and heat can make the fibers shrink a little. This can close larger holes. Be careful with synthetics. They might melt.
Patches Or Appliques
If the damage is too much to hide:
* Sew on a patch: A decorative patch can cover the spot. Choose one that matches the item’s style.
* Applique over the area: You can embroider a new design over the old spot. This is a creative way to hide damage.
* Fabric glue: For non-wearable items, fabric glue can hold down loose threads. It can also help close small holes.
Tips For Unstitching Designs
Here are more general tips for success. These make the whole process smoother.
- Patience is key: This job takes time. Do not rush. Rushing leads to mistakes.
- Good lighting: Always work under a bright light. It helps you see small stitches. It prevents cuts to the fabric.
- Sharp tools: A dull seam ripper or scissors will pull threads. They will not cut cleanly. This can damage fabric. Always use sharp tools.
- Work in small sections: Do not try to remove a whole design at once. Break it into small parts. This makes it less overwhelming.
- Check often: Look at both sides of the fabric. Make sure you are only cutting threads. Do not cut the fabric.
- Use a magnifying glass: For very fine stitches, a magnifying glass helps a lot. It shows you exactly where to cut.
- Save the threads (optional): Sometimes, you might want to match the thread color. Keep a small piece of the removed thread. This helps for future repairs or projects.
- Do not pull too hard: When pulling out cut threads, be gentle. Pulling hard can stretch the fabric. It can also pull threads that are not cut.
- Keep the fabric taut: If possible, put the embroidered area in a hoop. This holds the fabric flat and tight. It makes cutting easier. It reduces fabric distortion.
Common Mistakes To Avoid
Even with good tools, mistakes can happen. Know what to avoid.
- Cutting the fabric: This is the biggest mistake. Always check where your seam ripper is going. Angle it parallel to the fabric. Never point it into the fabric.
- Pulling threads too hard: This can distort the fabric. It can leave stretched marks. Always pull gently after cutting.
- Not using enough light: Working in dim light is a sure way to make mistakes. You cannot see what you are doing.
- Using dull tools: Dull tools are not safe. They require more force. This increases the risk of slipping and cutting fabric.
- Rushing the process: Impatience causes errors. Take breaks if you get tired or frustrated.
- Not cleaning up: Leaving small thread bits on the fabric can make it look messy. Use a lint roller.
- Ignoring backing/stabilizer: Some embroidery has a heavy backing. If you do not deal with it, it makes removal harder. It can also leave residue.
Frequently Asked Questions (FAQ)
Q: Can I remove any type of embroidery?
A: Most types of embroidery can be removed. But dense machine embroidery is harder. It needs more time and care. Hand embroidery is often easier to remove. This is because its stitches are usually looser.
Q: Will removing embroidery leave a hole?
A: It might leave tiny needle holes. Especially if the embroidery was dense. Or if the fabric is loosely woven. But usually, steaming and ironing the area helps close these holes. It makes the fabric look smooth again.
Q: Is it easier to remove machine embroidery or hand embroidery?
A: Machine embroidery often uses denser stitches. It also uses stabilizer. This can make it tougher. But the bobbin thread on the back is a key weakness. Hand embroidery stitches can be looser. They are often easier to pull out. But if they are very tight, they can be hard too.
Q: How do I remove embroidery from delicate fabrics like silk?
A: Use extreme care. Use only very sharp, fine tools. Work very slowly. Use a magnifying lamp. Consider having a professional do it if you are unsure. Delicates can easily snag or rip.
Q: What if I accidentally cut the fabric?
A: Do not panic. For small snips, you might be able to mend it. Use fabric glue for tiny cuts. Or sew it shut with matching thread. For larger cuts, you might need to patch the area. Or cover it with a new embroidery design.
Q: Can I re-embroider over the same spot?
A: Yes, you can. After removing the old design and preparing the fabric, you can embroider a new one. This is a good way to cover any small marks left from the old design. Make sure the fabric is smooth and flat first.
Q: How long does it take to remove embroidery?
A: It depends on the size and density of the design. A small logo might take 15-30 minutes. A large, dense design can take several hours. Patience is more important than speed.
Conclusion
Removing embroidery stitches is a skill. It takes time. It needs the right tools. But it is very rewarding. You can save clothes. You can fix projects. You can give items a new life. Remember to be patient. Work slowly. Use bright light. And always aim to protect your fabric. With these steps, you can remove embroidery flawlessly. Happy unpicking!