
An embroidery hoop is a simple tool. It holds fabric tight for stitching. This helps make stitches even and neat. Can I use any fabric in an embroidery hoop? Yes, you can use almost any fabric. But some fabrics, like stretchy ones, need extra care. This guide is for everyone. It helps new crafters and those with experience. Correct hooping makes your embroidery look good. It stops many common problems.
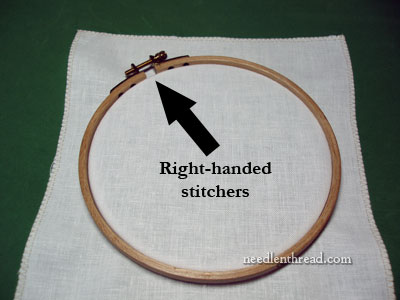
Image Source: www.needlenthread.com
Why Good Hooping Matters
Good hooping is very important. It sets your project up for success. When your fabric is in the hoop correctly, it stays flat. This helps you make even stitches. It stops your fabric from moving around. This also prevents fabric puckering. Puckering means your fabric gets wrinkles or gathers. A well-hooped fabric leads to neat, smooth embroidery. It makes your finished piece look much better.
Picking the Right Hoop
Choosing the right hoop helps a lot. Hoops come in different types and sizes.
Kinds of Hoops
- Wood Hoops: These are classic. They often give a good grip on fabric. Many crafters like their natural feel.
- Plastic Hoops: These are light. They are often cheaper. They are easy to clean.
- Spring Tension Hoops: These hoops are fast to use. They have a spring that holds the fabric. They are good for quick projects or small pieces.
Hoop Size Choices
Hoops come in many sizes. They go from small ones (3 inches) to very large ones (12 inches or more). The best size depends on your design. It also depends on the fabric you are using. A good rule is to pick a hoop that is bigger than your design. This way, your whole design fits inside the hoop. You do not need to move the hoop as you stitch.
Let’s look at common hoop sizes and what they are good for. This is your Embroidery hoop size guide:
| Hoop Size (approx.) | Best For |
|---|---|
| 3-5 inches (7.5-12.5 cm) | Small designs, lettering, practice pieces |
| 6-8 inches (15-20 cm) | Most common designs, general embroidery projects |
| 9-12+ inches (23-30+ cm) | Larger designs, clothing pieces, bigger areas |
When you choose a hoop, think about your project. Will the design fit? Will it be easy to hold the hoop?
Tools You Will Need
Before you start, gather your tools. Having everything ready makes the process smooth.
- Embroidery Hoop: Pick the right size for your project.
- Your Fabric: The fabric you will stitch on.
- Stabilizer: You might need this. We will talk more about it.
- Scissors: For cutting fabric or threads.
- A Pen or Marker: This should be a fabric marker. It helps mark your design area.
- Iron and Ironing Board: To make your fabric smooth.
Getting Your Fabric Ready for Hooping
Readying your fabric is a key first step. It makes sure your design turns out well. This is Preparing fabric for hooping.
Cleaning Your Fabric
Always wash and dry your fabric first. Do this even if it is brand new. Fabric can shrink when washed. If you wash it after stitching, your embroidery might get crooked. Washing it first stops this.
Pressing It Smooth
After washing, iron your fabric. Iron out all wrinkles. Your fabric needs to be very flat. Wrinkles in the hoop can cause problems. They can lead to uneven stitches. They can also make the fabric pucker. A flat surface is much easier to work on.
Marking the Center
Find the middle of your design area. Lightly mark it on your fabric. You can use a fabric pen or pencil for this. Some people fold the fabric and press creases to find the center. This mark helps you center your design in the hoop. It makes sure your embroidery is where you want it to be.
Figuring Out Stabilizer Use
Stabilizer is a very helpful tool. It gives your fabric extra support. This helps your stitches look better. This section covers the Stabilizer hooping method.
What is Stabilizer?
Stabilizer is a material. It goes behind your fabric. It stops your fabric from stretching. It also prevents it from puckering. It is like a strong foundation for your stitches. Think of it as a backbone for your fabric.
Types of Stabilizer
There are a few main types of stabilizer. Each one works best for different projects.
- Tear-Away Stabilizer: This kind is easy to use. You simply tear it away after you finish stitching. It is good for most fabrics. It is also good for designs that do not have too many stitches.
- Cut-Away Stabilizer: You do not tear this one. You cut it away from your fabric after stitching. It stays on the back of your fabric. This type is best for stretchy fabrics. It also works well for very dense designs. It gives strong, lasting support.
- Wash-Away (Water Soluble) Stabilizer: This stabilizer dissolves in water. You soak your finished piece, and it disappears. It is great for delicate fabrics. It is also good for designs with open areas. This type leaves no stabilizer on the fabric.
When to Use Stabilizer
You do not always need stabilizer. But it often makes your work better.
- Stretchy Fabric: Always use stabilizer with stretchy fabrics. This includes t-shirts, knit fabrics, and some blends. Stabilizer stops them from stretching out of shape.
- Many Stitches: If your design has a lot of stitches, use stabilizer. Heavy designs can pull and distort fabric. Stabilizer gives it strength.
- Thin Fabrics: Very thin fabrics, like silk or sheer materials, benefit from stabilizer. It stops them from puckering. It also helps the stitches stand out.
- Machine Embroidery: For machine embroidery, stabilizer is almost always needed. It holds the fabric very still.
Sometimes, you will hoop the stabilizer with your fabric. Other times, you will hoop only the stabilizer. We will look at these ways next.
The Main Hooping Method: Fabric in Hoop
This is the most common way to hoop fabric. It is often the Best hooping technique for many projects. It ensures Securing embroidery fabric properly. It also helps you achieve good Fabric tension in hoop. This method involves putting both your fabric and stabilizer into the hoop together.
Step-by-Step Guide
Follow these steps for Inner and outer hoop placement and getting perfect tension.
- Separate the Hoops: Your embroidery hoop has two parts. There is an inner ring and an outer ring. The outer ring has a screw. Loosen the screw on the outer hoop. Then, gently pull the two rings apart.
- Place Inner Hoop: Take the inner hoop. This is the ring without the screw. Place this ring under your fabric. Make sure it is centered where your design will be.
- Lay Fabric Over Inner Hoop: Now, lay your fabric smoothly over the inner hoop. The right side of your fabric should face up. Make sure there are no wrinkles or folds. Your marked center point should be in the middle of the inner hoop. If you are using stabilizer, place it under your fabric, on top of the inner hoop. So, it goes: inner hoop, stabilizer, then fabric.
- Put Outer Hoop On Top: Take the outer hoop. Place it over the fabric and the inner hoop. You will need to press down firmly. Push the outer hoop down until it sits over the inner hoop. You might hear a “pop” as it locks into place. Make sure the screw part of the outer hoop is at the top. This makes it easy to reach.
- Tighten the Screw Gently: Turn the screw on the outer hoop. Turn it just a little. Do not make it too tight yet. The fabric should be held, but still a bit loose.
- Pull Fabric Evenly: This step is very important for good Fabric tension in hoop. Hold the hoop with one hand. With your other hand, gently pull the edges of the fabric. Pull from all sides. Pull a little at a time. Work your way around the hoop. Pull from the top, then the bottom, then the sides. Then pull from the diagonal corners. Do this until the fabric looks smooth.
- Check Fabric Tension in Hoop: Once you have pulled the fabric, check its tension. Gently tap the fabric in the middle. It should sound like a drum. If it sounds dull, it’s too loose. If it feels like it might rip, it’s too tight. The fabric should be smooth and tight, with no ripples or slack areas.
- Tighten the Screw Fully: When the fabric feels just right (drum-tight), tighten the screw all the way. Turn it as much as you can by hand. This makes sure your fabric is very secure. It will not move while you stitch.
Tips for Best Tension
- Pull Gently from All Sides: Do not pull hard on just one side. This can stretch the fabric unevenly.
- Work Your Way Around: Pull a little, then move to the next section. Keep going around the hoop.
- Look for Ripples: If you see small ripples, gently pull the fabric at that spot.
- Practice Makes Perfect: The more you hoop, the easier it gets to feel the right tension.
Other Ways to Hoop: Stabilizer Hooping Methods
Sometimes, you cannot hoop your fabric directly. Or your fabric is very delicate. In these cases, you can use different hooping methods. These methods often involve hooping the stabilizer first. This is another Stabilizer hooping method.
Floating Method
The floating method is good for tricky items. It works for things too thick to fit in a hoop. It also works for finished items, like a small part of a shirt or a hat.
- When to Use It:
- Thick fabrics (quilts, heavy denim).
- Finished items that are hard to get into a hoop.
- Items you do not want hoop marks on.
- How to Do It:
- First, hoop only your stabilizer. Make sure the stabilizer is drum-tight in the hoop.
- Place your fabric on top of the hooped stabilizer. Center your design.
- Secure the fabric to the stabilizer. You can use fabric spray adhesive. Or you can use temporary basting stitches. You can also use pins around the edges. Make sure the fabric is flat against the stabilizer.
- Now you can stitch your design. The stabilizer gives the support. The fabric floats on top.
Hooping Stabilizer Only (for Delicate Fabrics)
This method is similar to floating. But you use it for delicate fabrics. It stops the hoop from leaving marks on your special fabric.
- When to Use It:
- Very thin fabrics (silk, organza, chiffon).
- Fabrics that could get damaged by direct hooping.
- How to Do It:
- Hoop only a piece of cut-away or wash-away stabilizer. Make it very tight.
- Lay your delicate fabric flat on top of the hooped stabilizer.
- Pin the fabric to the stabilizer around the edges. Use small, fine pins. Or use basting stitches to hold it. Make sure the fabric lies very flat.
- Stitch your design carefully. The stabilizer takes the stress of the hoop. Your delicate fabric stays safe.
Common Mistakes and How to Fix Them
Even experienced crafters make mistakes. Knowing how to fix them saves time and frustration. Preventing fabric puckering and Troubleshooting loose hoop fabric are key here.
Fabric is Too Loose
- Problem: If your fabric is too loose, it will sag. Stitches might look uneven. The fabric might shift while you work. This is a common Troubleshooting loose hoop fabric issue.
- Fix: Take your hoop apart slightly. Loosen the screw a bit. Pull the fabric evenly from all sides again. Make sure it is drum-tight. Then, tighten the screw firmly. It is better to re-hoop than to stitch on loose fabric.
Fabric is Too Tight
- Problem: Fabric that is too tight can stretch. It might also leave permanent hoop marks. Some fabrics can even rip if pulled too tight. This can also lead to puckering.
- Fix: Loosen the screw on your hoop. Gently pull the fabric edges out from under the outer hoop. This releases some of the tension. Then, slowly tighten the screw again. Check the tension often. Aim for drum-tight, not stretched-tight.
Fabric Not Straight
- Problem: You might start stitching and see your design is crooked. This happens if the fabric was not straight in the hoop.
- Fix: You need to take the fabric out of the hoop. Re-center it carefully. Use your marked center lines. Then, re-hoop it. Take your time to align everything.
Fabric is Puckering
- Problem: Puckering means the fabric gathers or wrinkles. This often happens around dense stitched areas. It can be due to wrong tension. It can also be due to not using stabilizer.
- Fix:
- Check Tension: Make sure your fabric is drum-tight, but not overstretched.
- Use Stabilizer: If you are not using stabilizer, try adding one. A cut-away stabilizer often helps prevent puckering, especially with heavy designs.
- Adjust Stitch Density: Sometimes, a design has too many stitches for the fabric. You might need to change the design or use a stronger stabilizer. This is all part of Preventing fabric puckering.
Hooping Advice for New Crafters
Starting embroidery is fun! Here are some special tips for Embroidery hoop for beginners.
- Start Simple: Use plain, non-stretchy cotton fabric first. This makes learning to hoop easier.
- Practice Hooping Empty: Get a feel for your hoop. Practice separating the rings. Practice putting them back together. Try to get a good, even pull. Do this without any fabric first.
- Do Not Be Afraid to Redo: If your fabric is not right, take it out. Re-hoop it. It takes more time, but the end result will be much better.
- Watch Videos: Seeing someone hoop can be very helpful. Look up videos online. They can show you the pulling and tightening steps clearly.
- Be Patient: Hooping takes a little practice. Do not get discouraged if it is not perfect at first. Every stitcher learns over time.
Beyond the Basics: Other Hooping Tips
Once you master the basic hooping, try these ideas.
- Use Non-Slip Hoops: Some hoops have a rubbery or silicon coating on the inner ring. This helps grip the fabric better. It stops slipping.
- Wrap the Inner Hoop: If your hoop does not have a non-slip grip, you can add one. Wrap fabric strips or bias tape around the inner ring. This gives the fabric more to hold onto. It stops it from slipping.
- Clean Your Hoops: Dust and lint can build up on hoops. This can make them slippery. Wipe wood hoops with a dry cloth. You can wipe plastic hoops with a damp cloth. Make sure they are dry before use.
- Store Hoops Right: Keep your hoops in a place that is not too hot or too cold. Extreme temperatures can warp wood hoops. Do not leave fabric in hoops for long periods. This can cause marks.
Frequently Asked Questions (FAQ)
Here are some common questions about hooping.
How tight should fabric be in a hoop?
It should be drum-tight. When you tap it, it should make a sound like a small drum. It should not be loose or saggy. But it also should not be so tight that the fabric is stretched thin or looks like it will tear.
Can I leave fabric in the hoop when I am done?
It is best not to. Take your fabric out of the hoop when you finish stitching. Leaving fabric in the hoop for a long time can leave marks. It can also stretch your fabric. This can be hard to get out later.
What if my fabric slips out of the hoop?
If your fabric slips, it means the hoop is not tight enough. Or your fabric might be very slippery. First, try to re-hoop it. Make sure you pull the fabric very tight and evenly. Then, tighten the screw firmly. If it still slips, try wrapping the inner hoop with fabric strips. Or use a non-slip hoop. Adding stabilizer can also help.
Do I always need to use stabilizer?
No, not always. For simple designs on sturdy, non-stretchy cotton, you might not need it. But stabilizer is very helpful for many fabrics. It is good for stretchy fabrics, thin fabrics, or designs with many stitches. It helps prevent puckering and keeps your stitches neat. It is a good habit to use it if you are unsure.
How do I clean my embroidery hoop?
For wood hoops, use a dry, soft cloth to wipe away dust. Do not use water, as it can damage the wood. For plastic hoops, you can use a damp cloth. Make sure the hoop is fully dry before you use it again.
Setting up your embroidery hoop correctly is a skill. It gets easier with practice. A well-hooped fabric is the start of beautiful embroidery. Take your time, follow these steps, and enjoy your stitching!