
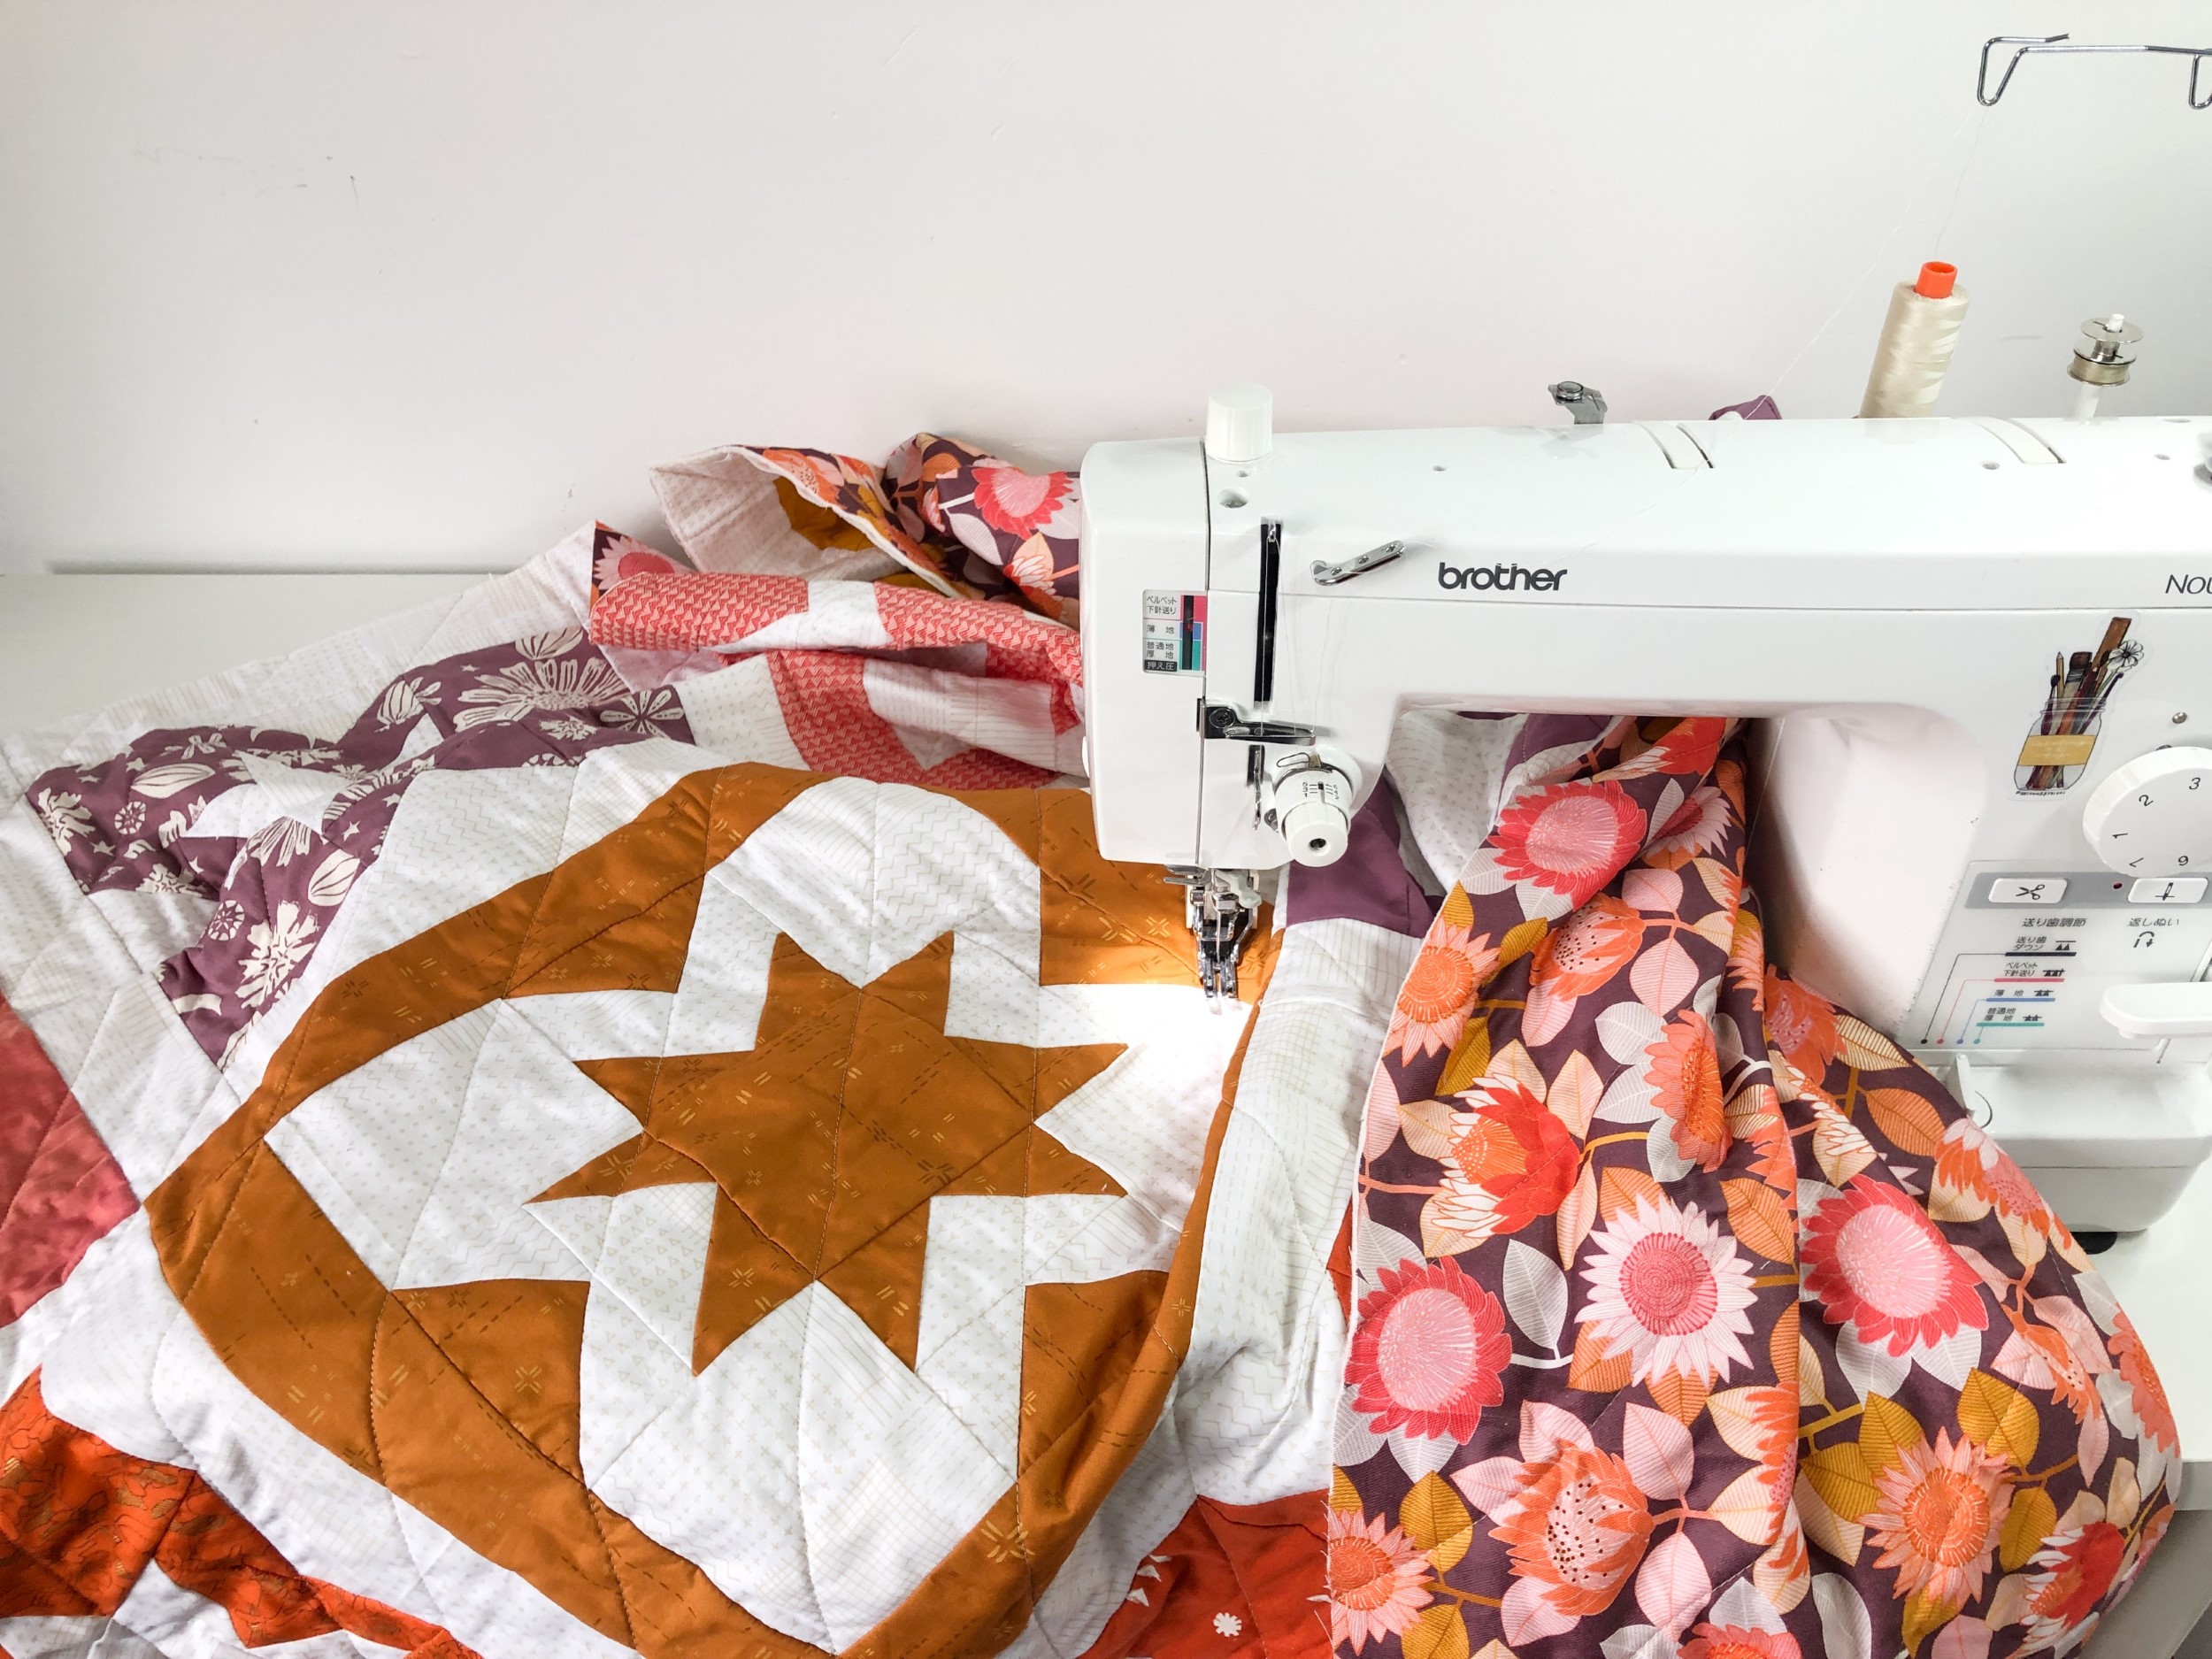
Image Source: www.blossomheartquilts.com
Easy Steps: How To Sew A Quilt On A Regular Sewing Machine
Making a quilt is a fun project. You can use your everyday sewing machine. You do not need a special one. A standard home sewing machine works well. It can handle piecing quilt blocks. It can also do the actual quilting part. People often ask, “Can I sew a quilt on a regular machine?” The answer is yes. Your machine is likely perfect for it. You just need to know a few tips and tricks. This guide shows you how.
Making a quilt takes steps. First, you gather things. Then you get fabric ready. You cut it and sew it into blocks. These are the piecing quilt blocks steps. You put blocks together. You make the quilt top. Next, you make a fabric sandwich. This involves layering quilt sandwich parts. You need fabric for the back. You need soft quilt batting in the middle. The top goes on top. You stick them all together. This is basting quilt layers. After that, you sew through all layers. This is called quilting. We will look at different machine quilting techniques. These can be straight line quilting or using a free motion quilting machine setup. This part is for beginner machine quilting. Last, you finish the edges. This is the binding. We will cover a quilt binding tutorial.
This post helps you make a quilt start to finish. You will use the machine you already have. Get ready to make something beautiful!
Gather Your Quilt Making Stuff
You need some things to start. Having the right tools helps a lot. You do not need fancy things. But some tools make it easier.
Essential Supplies
- Sewing Machine: Your regular one is fine.
- Fabric: You need fabric for the top, back, and binding.
- Quilt Batting: This goes in the middle. It makes the quilt warm and soft.
- Thread: Get good thread. Cotton or polyester thread works. Choose a color that matches or blends.
- Scissors: Sharp ones for fabric.
- Rotary Cutter, Mat, and Ruler: These help cut fabric straight and fast.
- Pins or Clips: To hold fabric pieces together.
- Sewing Needles: Use new needles for your machine. A size 80/12 or 90/14 works well.
- Seam Ripper: For when you make mistakes. Everyone does!
- Iron and Ironing Board: Pressing is very important in quilting.
- Safety Pins, Spray Baste, or Basting Thread: For holding the quilt layers together.
- Walking Foot: This special foot helps move layers evenly. It is good for quilting.
- Basic Presser Foot: This comes with your machine. Use it for piecing blocks.
Choosing Your Fabric and Batting
Fabrics come in many kinds. Cotton fabric is best for quilts. It is easy to work with. It washes well. Cotton comes in many colors and patterns. Choose fabrics you love. Think about colors and how they look together.
Quilt batting comes in different fibers.
* Cotton batting: It is natural. It makes the quilt lie flat. It is good for wall hangings or thin quilts.
* Polyester batting: It is fluffy. It keeps you warm. It is good for cozy bed quilts.
* Blend batting: This is often cotton and polyester. It has good points from both.
* Wool batting: It is warm but light. It drapes nicely.
* Bamboo batting: It is soft and good for the earth.
Batting also comes in different thicknesses. This is called loft. Thicker batting makes puffier quilting lines. Thinner batting is flatter. Pick batting based on how you want the quilt to feel and look.
Getting Your Fabric Ready
You need to get your fabric ready before you cut it. This makes sure your quilt turns out right.
Pre-Washing Fabric
Some people wash their fabric before sewing. This is called pre-washing.
Why pre-wash?
* It can stop colors from running. Dark red or blue fabrics might bleed color onto lighter ones.
* It makes all fabrics shrink the same amount. Fabrics can shrink a little when washed. If you don’t pre-wash, your quilt might get bubbly after the first wash.
* It washes away chemicals. New fabric can have finishes on it.
Wash fabrics like you will wash the finished quilt. Use the same soap. Dry them like you will dry the quilt.
After washing, iron your fabric smooth. Fold it neatly. Now it’s ready to cut.
Cutting Fabric Pieces
Cutting needs to be exact. This is very important for piecing quilt blocks. If pieces are cut wrong, blocks won’t fit together.
Use your rotary cutter, mat, and ruler.
* Place the fabric flat on the mat.
* Line up a straight edge of the fabric with a line on the mat or ruler.
* Put the ruler on the fabric. Press down firmly.
* Cut along the ruler’s edge with the rotary cutter. Be careful! Rotary cutters are very sharp. Always cut away from yourself.
* Cut all the pieces you need for your blocks and border fabrics. Keep pieces for each block or section together.
Use a pattern for cutting sizes. Patterns tell you how big to cut each piece. They also tell you how many pieces you need.
Making the Quilt Top: Piecing Blocks
Now you sew your fabric pieces together. This is called piecing. You sew small pieces to make bigger shapes. These shapes become your quilt blocks. This is the core of piecing quilt blocks.
Sewing with a Quarter-Inch Seam
Quilters use a special seam size. It is a quarter-inch seam. This is very important. If your seams are not all the same size, your blocks won’t fit together right.
How to sew a quarter-inch seam:
* Find the quarter-inch mark on your machine’s needle plate. It might be a line or a mark.
* If your machine does not have one, put a piece of tape on your machine bed. Place the tape a quarter-inch from where the needle goes down.
* Line up the edge of your fabric with this mark or the tape.
* Sew with your machine’s normal foot. Keep the fabric edge right on the mark as you sew.
Always test your seam size. Cut two small fabric strips. Sew them together using your guide. Measure the seam allowance. It should be exactly a quarter-inch. Adjust if needed.
Sewing Blocks Together
Follow your quilt pattern. Patterns show you how to sew pieces to make blocks.
* Put two pieces right sides together.
* Line up the edges.
* Sew them with a quarter-inch seam.
* Sew all the small pieces needed for one block.
Pressing Seams
After sewing pieces, press the seams. Pressing is important. Do not iron back and forth. Just lift the iron and place it down.
* Press seams flat first.
* Then, press seams to one side. This means pushing the fabric from the seam allowance to one side under the top fabric.
* Sometimes you press seams open. The pattern will tell you what to do. Pressing to one side is common. It helps seams “nest” when joining blocks.
Pressing makes your blocks lie flat and look good. It also helps pieces fit together better later.
Putting Blocks and Rows Together
Once you have blocks made, you sew them together.
* Lay out your blocks. Follow your pattern design. Make sure they look good.
* Sew blocks together in rows. Put two blocks right sides together. Sew them with a quarter-inch seam. Add the next block.
* Press seams for each row. Often, you press row seams in opposite directions. If row 1 seams go right, row 2 seams go left. This helps seams nest when you join rows.
* Sew the rows together. Pin rows at the seam lines. This makes sure the seams meet up perfectly. Sew rows with a quarter-inch seam.
* Press the final row seams.
Adding Borders
Many quilts have borders. Borders frame the quilt top. They can be simple fabric strips.
* Measure your quilt top. Measure the middle and the sides. Take the average length. Cut border strips to this size.
* Sew borders onto the sides first. Press seams.
* Measure the quilt top again with the side borders on. Measure the top, middle, and bottom width. Take the average width. Cut top and bottom border strips to this size.
* Sew top and bottom borders on. Press seams.
Your quilt top is now done! It’s time to make the quilt sandwich.
Making the Quilt Sandwich
This step puts the three layers together. It is called a quilt sandwich because it has a back fabric (bottom layer), quilt batting (middle layer), and the quilt top (top layer). This is all about layering quilt sandwich parts.
Cutting the Layers
You need three pieces:
* Backing fabric: Cut this bigger than your quilt top. Make it about 4-6 inches longer and wider on all sides. This gives you room for quilting.
* Quilt batting: Cut this piece the same size as your backing fabric. It also needs to be bigger than the top.
* Quilt top: This is the finished pieced top you just made.
Layering Quilt Sandwich
Find a large, flat surface. The floor or a big table works well.
1. Lay the backing fabric: Put the backing fabric face down on your surface. Smooth it out completely. Make sure there are no wrinkles. Use tape (like painter’s tape) to tape the edges down if on a hard floor. This keeps it smooth.
2. Add the batting: Lay the quilt batting on top of the backing fabric. Center it. Smooth it out gently. Do not stretch the batting. Smooth it from the center out to the edges.
3. Place the quilt top: Put the quilt top face up on top of the batting. Center it nicely. Smooth it out starting from the middle. Move your hands out to the edges. Make sure there are no wrinkles or bumps. Check the back and batting too.
Now you have your layering quilt sandwich ready for basting.
Basting Quilt Layers
Basting is like temporary stitching. It holds the three layers together so they don’t shift when you quilt. There are a few ways to do this. This is key to basting quilt layers.
- Safety Pins: This is a common method. Use special curved safety pins if you have them. They are easier to use. Start pinning from the center of the quilt. Work your way out to the edges. Place pins every 4-6 inches in a grid pattern. Make sure you grab all three layers with each pin. Smooth the fabric before adding each pin.
- Spray Baste: This uses a temporary fabric glue spray. Lay the backing face down. Fold back half of the batting and top. Spray glue on the exposed backing. Smooth down the batting and top onto the glue. Do the other side. Then lift the whole thing gently. Fold back half of the batting and top from the other direction. Spray glue on the exposed batting. Smooth down the top onto the batting. Read the spray can instructions. Make sure to spray in a well-aired area.
- Thread Basting: You can sew long, loose stitches through all layers by hand or machine. Make big stitches, maybe 4-5 inches long. This is more work but holds layers well. Machine basting uses a long stitch length (5.0 or higher). Sew rows about 4-6 inches apart.
Choose the method you like best. The goal is to keep the layers from moving while you quilt.
Quilting on Your Regular Machine
Now for the fun part! You sew through all three layers. This stitching holds the layers together. It also adds design to the quilt. This is where you learn machine quilting techniques and get into beginner machine quilting.
Preparing Your Machine
- Clean your machine. Remove lint from the bobbin area.
- Put in a new needle. A quilting needle or a size 90/14 universal needle is good.
- Wind a few bobbins with your chosen thread. You will use a lot of thread.
- Set your stitch length. For quilting, you often use a slightly longer stitch. Maybe 2.5 to 3.0. Test on a small sandwich piece.
Grasping the Walking Foot
A walking foot for quilting is very helpful. It is a special presser foot. It has its own set of “feed dogs” on top.
* Normal presser feet only let the bottom feed dogs move the fabric. This can make the top fabric shift or not feed at the same speed as the bottom layers.
* A walking foot moves the top layer of fabric at the same time as the bottom layer. This helps feed all three thick layers evenly. It reduces puckers and wrinkles on the back of the quilt.
If you plan to do straight line quilting, a walking foot is a great investment. Attach the walking foot to your machine. Follow your machine’s manual.
Straight Line Quilting
This is a simple and common machine quilting technique. It is great for beginner machine quilting.
* You sew straight lines across the quilt.
* Lines can be parallel. They can go corner to corner. They can make a grid.
* Use your walking foot for this.
* You can mark lines with a ruler and washable marker. Or you can use the edge of your walking foot or machine plate as a guide. Sew a line, then line up the edge of the foot with that line for the next row.
* Start quilting from the center of the quilt. Work your way out to the edges. This helps push excess fabric towards the edges, not trapping it in the middle.
* You can quilt lines close together or far apart. Closer lines make the quilt stiffer. Farther lines make it softer. How far apart depends on your batting. The batting package tells you the maximum distance between quilting lines.
Tips for Straight Line Quilting:
* Go slow and steady.
* Gently guide the fabric. Do not push or pull hard. Let the walking foot do the work.
* Smooth the fabric in front of the foot as you sew.
* Bury your thread tails later. Or start/end with a few small stitches sewn on top of each other (backstitching). Backstitching is faster but can look messy. Burying tails is neater.
Fathoming Free Motion Quilting
Free motion quilting machine work lets you draw with thread. You can make curves, loops, swirls, or specific designs.
* For free motion quilting, you need to drop your machine’s feed dogs. This means the machine no longer moves the fabric for you. You move the fabric yourself.
* You also need a darning foot or a free motion quilting foot. This foot hovers just above the fabric. It does not press down.
* You move the quilt sandwich under the needle. The speed you move the fabric and the speed of your needle need to match. This makes your stitches even. Practice this!
* You control the stitch length by how fast you move the fabric. Move too fast, stitches are long. Move too slow, stitches are short.
Getting Started with Free Motion:
* Lower your feed dogs. Check your machine manual.
* Put on the free motion foot.
* Set your machine to a straight stitch.
* Practice on small quilt sandwiches first. Draw designs on paper. Then try to “draw” them with thread on your practice piece. Move the fabric in circles, loops, or squiggles.
* Hold the quilt sandwich with both hands. Keep your hands flat and spread out. Guide the fabric smoothly.
* Again, start from the center and move outwards.
Free motion quilting machine setup and practice take time. Do not expect perfection at first. Just have fun trying different designs! This is a key machine quilting technique.
Beginner Machine Quilting Tips
- Start small. Your first machine-quilted project could be a placemat, a table runner, or a baby quilt. It is easier to handle on your machine.
- Practice on scrap fabric sandwiches. Don’t start on your finished quilt top.
- Keep your sewing machine clean and oiled. A well-running machine helps a lot.
- Use good quality thread. Cheap thread breaks easily.
- Take breaks. Quilting can be tiring. Stand up and stretch.
- Manage the weight of the quilt. As you quilt, the quilt will hang off your machine. Use a table or chair to support the weight. This stops the quilt from pulling on the needle and fabric.
Choose a quilting design that feels right for your quilt and your skill level. Straight line quilting is a great place to begin beginner machine quilting. Free motion comes with more practice.
Squaring Up and Trimming
Once all your quilting stitches are done, the quilt might look a bit wavy or uneven. That’s normal. You need to trim it.
- Lay the quilted quilt flat.
- Use a large ruler and rotary cutter.
- Find a straight line on the quilt (like a seam or a quilted line). Line up your ruler with it.
- Trim off the excess backing fabric, batting, and quilt top edge. Cut about a quarter-inch or half-inch from the quilt top edge. You want a nice, straight edge all around.
- Trim all four sides. Use the ruler to make sure corners are square (90 degrees).
This step prepares the quilt for binding.
Adding the Quilt Binding
The binding finishes the edge of the quilt. It covers the raw edges of the three layers. It also adds a nice frame. This is where you use a quilt binding tutorial.
Making Binding Strips
- Binding is made from fabric strips. They are usually cut 2.5 inches wide.
- Cut strips from your binding fabric. You can cut them straight across the fabric (crossgrain) or on an angle (bias). Bias strips are good for curved edges. Straight strips are fine for straight edges.
- How long do you need the strips to be? Measure the total distance around your quilt’s edge. Add about 10-15 inches extra. This is the length you need for the binding.
- Sew the strips together end-to-end to make one long strip. Sew them with a diagonal seam. This makes the joins less bulky. Trim the excess fabric from the seams to a quarter-inch. Press seams open.
- Fold the long binding strip in half lengthwise. Press it. Your binding strip is now ready. It should be about 1.25 inches wide.
Attaching Binding by Machine
You will sew the binding to the front of the quilt first.
* Start partway down one side of the quilt (not at a corner). Leave about 6-8 inches of the binding strip unfolded at the start. You will use this to join the ends later.
* Line up the raw edge of the folded binding strip with the raw edge of the quilt top.
* Sew the binding to the quilt edge with a quarter-inch seam. Use your machine’s normal foot.
* For Corners: Stop sewing a quarter-inch away from the corner of the quilt. Backstitch a few stitches. Cut the thread. Take the quilt out of the machine. Fold the binding strip straight up, making a triangle. Then fold the strip back down along the next edge of the quilt. This makes a neat mitered corner fold. Start sewing again from the very edge of the quilt, a quarter-inch from the new edge.
* Sew around all four sides. Stop sewing a few inches before you get back to where you started.
Joining Binding Ends
You have two loose ends of binding strip. You need to join them to make a circle of binding around the quilt.
* Overlap the two ends. Figure out how much overlap you need. It should be the width of the binding strip when it’s unfolded (usually 2.5 inches). Mark where they meet.
* Open up the ends. Place them right sides together at a 90-degree angle. Draw a line from corner to corner across the join.
* Sew on the line.
* Trim excess fabric from the seam, leaving a quarter-inch. Press seam open.
* Fold the binding back in half. It should now fit perfectly along the remaining gap on the quilt edge.
* Sew this last section down with a quarter-inch seam.
Finishing Binding by Hand or Machine
Now the binding is sewn to the front. You wrap it around to the back.
* Fold the binding over the edge of the quilt to the back.
* The folded edge should cover your line of stitching on the back.
* You can hold it in place with pins or clips.
* Finishing by Hand: This gives a clean, invisible look. Use a needle and thread to sew the folded edge of the binding to the back of the quilt. Use small stitches that don’t show on the front.
* Finishing by Machine: This is faster. From the front of the quilt, “stitch in the ditch” along the seam line where the binding meets the quilt top. Your machine needle should fall into the seam line. This catches the folded binding on the back. Or, sew very close to the folded edge of the binding on the front.
Choose the finish you like. Machine finishing is sturdy and fast. Hand finishing looks very neat. Either way, your quilt binding tutorial is complete!
Caring for Your Quilt
You finished your quilt! Great job! Now you want to keep it nice.
* Wash your quilt gently. Use cool water. Use a mild soap.
* You can put it in the dryer on low heat. Or hang it to dry.
* The first wash can make the quilt look a bit crinkly. This is normal. It gives the quilt a soft, old-fashioned look.
* Store quilts flat or rolled up. Do not store them in plastic bags for a long time. Fabric needs to breathe.
FAQs About Sewing a Quilt
Here are some common questions people ask about quilting on a regular machine.
h4 Is a special machine needed for quilting?
No, your regular sewing machine is just fine for most quilting. You can do piecing quilt blocks, basting quilt layers, and basic machine quilting techniques like straight line quilting. For free motion quilting machine work, you just need to drop your feed dogs and use a special foot.
h4 What is quilt batting?
Quilt batting is the soft middle layer of a quilt. It goes between the quilt top and the backing fabric. It provides warmth and gives the quilt structure. It is the layer you sew through when you do the quilting stitches.
h4 What is a walking foot for quilting?
A walking foot for quilting is a presser foot. It has extra grippers or “feed dogs” on top. These help move the top layer of fabric evenly with the bottom layers. This stops the quilt from shifting or puckering when you are sewing through all three layers, especially helpful for straight line quilting.
h4 How do I keep the quilt layers from shifting?
You keep layers from shifting by basting quilt layers. This means using safety pins, spray glue, or large stitches to hold the backing, batting, and quilt top together. This step is done after layering quilt sandwich components and before you start the actual machine quilting techniques.
h4 Can I do free motion quilting on my home machine?
Yes, you can do free motion quilting machine work on most home machines. You need to be able to drop the feed dogs (check your machine manual). You also need a darning foot or free motion quilting foot. It takes practice, but it is possible!
h4 What is the easiest quilting design for beginners?
Straight line quilting is usually the easiest design for beginner machine quilting. You can sew simple lines or a grid pattern. It works well with a walking foot for quilting.
h4 How do I finish the edge of my quilt?
You finish the edge by adding binding. This involves making fabric strips, sewing them together, and attaching them around the edge of the quilt. You can then finish the binding by hand sewing it to the back or machine sewing it down. This is what a quilt binding tutorial teaches you.
h4 Do I need special thread for quilting?
You do not need special thread, but good quality thread helps. Cotton or polyester thread made for sewing is fine. Choose a thread weight that works with your machine and needle. Using the same thread in the bobbin and top is often best.
In Conclusion
Sewing a quilt on your regular machine is very doable. It is a rewarding craft. You learned the steps:
* Getting your supplies ready.
* Preparing your fabric by washing and cutting.
* Piecing quilt blocks accurately with a quarter-inch seam.
* Putting the blocks together to make a top.
* Creating the layering quilt sandwich with quilt batting and backing.
* Basting quilt layers to hold them still.
* Quilting the layers together using machine quilting techniques like straight line quilting with a walking foot for quilting or trying free motion quilting machine styles. These are all part of beginner machine quilting.
* Trimming the quilt square.
* Adding the binding using a quilt binding tutorial.
Take your time. Follow the steps. Do not worry about being perfect. Every stitch is part of your quilt’s story. Enjoy the process of making something warm and beautiful with your own hands and your trusty sewing machine!