
Yes, you can absolutely sew beautiful embroidery using your regular sewing machine! While a dedicated embroidery machine offers advanced features, a standard sewing machine can still create stunning embroidery stitches with the right techniques and a little practice. This guide will walk you through the easy steps to bring the art of embroidery to your sewing projects.
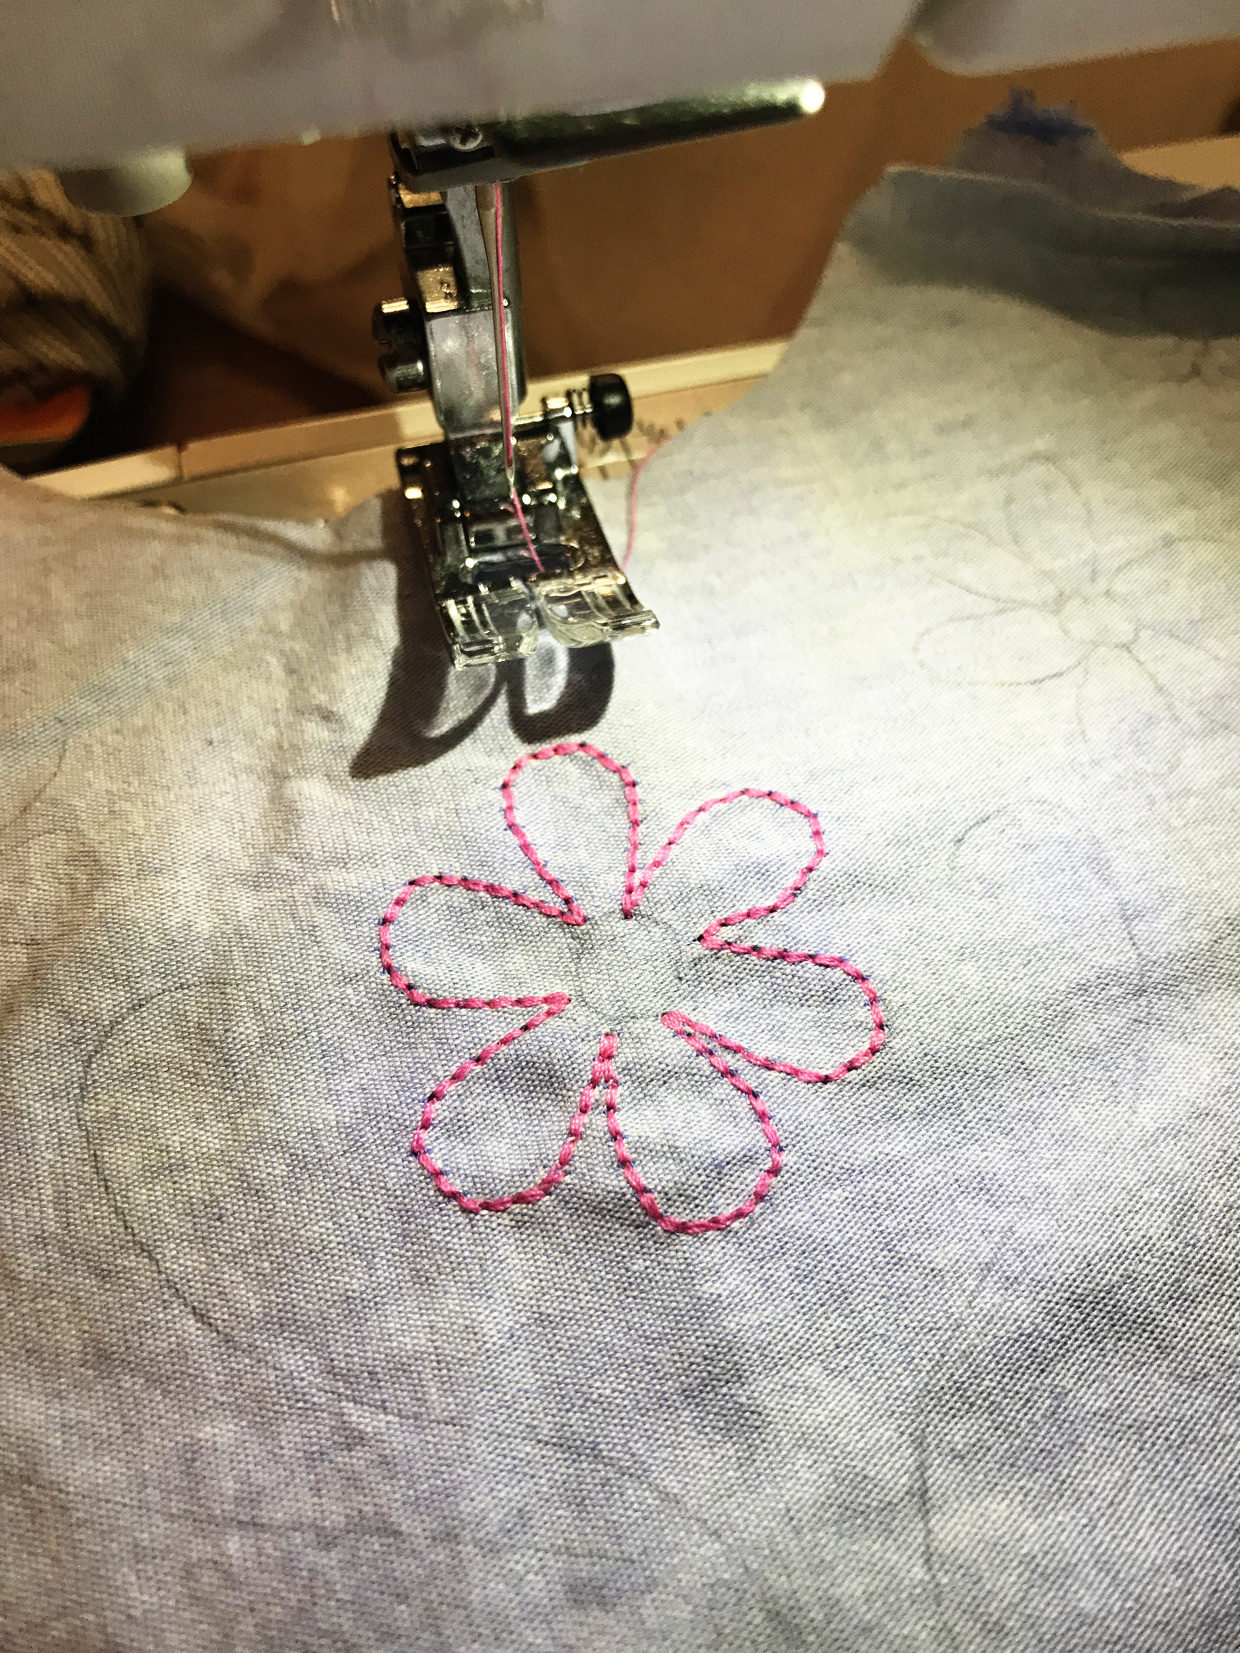
Image Source: oliverands.com
Getting Started with Machine Embroidery
Embroidery with a sewing machine involves transforming simple stitches into decorative designs. It’s a fantastic way to personalize clothing, accessories, and home décor. You might wonder if there’s a difference between an embroidery machine vs sewing machine for this purpose. While embroidery machines are built specifically for complex designs and larger hoop sizes, many modern sewing machines have built-in embroidery functions or can be adapted for it. The key is to have a machine that allows you to drop the feed dogs and offers a zigzag stitch or a specific embroidery stitch.
Essential Supplies for Sewing Embroidery
Before you begin, gather these crucial items:
- Sewing Machine: Ensure your machine can drop its feed dogs (the little teeth that move fabric) and has a zigzag stitch.
- Embroidery Hoop: This is vital to hold your fabric taut. Hoops come in various sizes. For beginners, a medium size (around 4×4 inches or 5×7 inches) is ideal.
- Embroidery Thread: This is different from regular sewing thread. Embroidery thread is often shinier, stronger, and comes in a vast array of vibrant colors. Rayon and polyester are common choices for machine embroidery.
- Stabilizer: This is a backing material that supports your stitches, preventing puckering and stretching. There are several types:
- Cutaway: Permanent and provides strong support.
- Tearaway: Removed by tearing it away from the fabric.
- Water-soluble: Dissolves in water.
- Washaway: Washes away in water.
- Heat-activated: Melts with heat.
- Embroidery Needles: These have a larger eye for thicker embroidery thread and a sharper point to pierce the fabric and stabilizer cleanly.
- Fabric: Choose stable fabrics like cotton, linen, or denim. Very stretchy or thin fabrics can be challenging for beginners.
- Embroidery Patterns/Designs: You can find free embroidery patterns online, purchase them, or even create your own through digitizing embroidery software if you’re ambitious.
- Appliqué Scissors (Optional but Recommended): These have a small, curved blade for precise trimming in applique with a sewing machine.
- Embroidery Foot: Many sewing machines come with a special foot that has a larger opening to accommodate thicker stitches and allow for smooth movement during free motion embroidery.
Preparing Your Sewing Machine
Proper machine preparation is the first step to successful embroidery.
1. Lowering the Feed Dogs
This is the most critical step. Your feed dogs normally move the fabric forward as you sew. For embroidery, you need the fabric to stay still so the needle can move in different directions to create the design. Locate the lever or switch on your sewing machine that controls the feed dogs and lower them completely. Consult your sewing machine manual if you’re unsure where this is.
2. Selecting the Right Needle and Thread
- Needle: Use a sharp, fine-point embroidery needle. A size 75/11 or 80/12 is a good starting point. Ensure the needle is new for the best results.
- Thread: Wind your bobbin with bobbin thread, which is usually thinner and more economical than top embroidery thread. For the top, use your chosen embroidery thread. Make sure it’s threaded correctly through your machine.
3. Adjusting Sewing Machine Settings for Embroidery
While your sewing machine doesn’t have specific “embroidery settings” like a dedicated machine, you’ll need to adjust a few things:
- Stitch Width: For designs with satin stitches or fills, you’ll need a wider zigzag stitch. Experiment on a scrap piece of fabric to find a width that looks good for your design. A width of 1.0 to 3.0 mm is common.
- Stitch Length: For satin stitches, a shorter stitch length is needed (around 0.2 to 0.5 mm). For decorative stitches that mimic hand embroidery, you might use longer lengths. Again, test on scraps.
- Tension: Embroidery stitches are denser, so you might need to slightly loosen your top tension. Start with your machine’s default and adjust as needed. If your stitches are looping on the back, loosen the top tension. If they are flat and tight, you might need to tighten it slightly or check your bobbin tension. Always test tension on a scrap with your chosen stabilizer and thread.
Understanding Stabilizers and Their Uses
Stabilizers are the unsung heroes of machine embroidery. They prevent your fabric from stretching or distorting, ensuring your stitches lie flat and crisp. Choosing the right stabilizer depends on your fabric and design.
| Stabilizer Type | Best For | How to Use |
|---|---|---|
| Cutaway | Stable fabrics (cotton, denim), designs with dense stitching | Hooped with fabric, trimmed close to the design after stitching. Permanent. |
| Tearaway | Lightweight to medium-weight fabrics, less dense designs | Hooped with fabric, carefully torn away from the back of the design. |
| Water-Soluble | Delicate fabrics (lace, velvet), freestanding embroidery | Hooped with fabric or used as a topping, dissolves completely in water. |
| Washaway | Sheer fabrics, knits, nap fabrics (velvet) | Hooped with fabric or used as a topping, washes away in water. |
| Heat-Activated | Fabrics that can withstand heat, often temporary backing | Applied with an iron, can be removed by re-heating. Useful for basting. |
Topping: Sometimes, especially on fabrics with a pile or texture (like velvet or terry cloth), you might need a “topping” stabilizer. This is a thin layer of water-soluble or tearaway stabilizer placed on top of the fabric before stitching. It prevents the stitches from sinking into the fabric pile, ensuring a clear design.
Step-by-Step Guide to Sewing Embroidery
Now that your machine is prepped and you have your supplies, let’s dive into the sewing process.
Step 1: Prepare Your Fabric and Stabilizer
- Cut Fabric: Cut your fabric to the desired size, adding a little extra around the area where you’ll be embroidering.
- Prepare Stabilizer: Choose your stabilizer based on your fabric and design.
- For hooping: If your stabilizer is a tearaway or cutaway, you’ll likely hoop it with your fabric. Place the fabric right side up on top of the stabilizer.
- For topping/backing: If using a water-soluble or washaway as a topping, lay it on top of the fabric. If using it as a backing for delicate fabrics, place it underneath.
Step 2: Hoop Your Fabric and Stabilizer
This is a crucial step for good results.
- Separate Hoops: Loosen the screws on your embroidery hoop and separate the inner and outer rings.
- Position Fabric: Place the inner hoop with the fabric (right side up) over the outer hoop.
- Secure Fabric: Snap the outer hoop down over the inner hoop, sandwiching the fabric and stabilizer between them. The fabric should be taut, like a drum. You shouldn’t have any wrinkles or loose areas. If it’s not tight enough, gently pull the fabric taut around the hoop while pressing the outer hoop down. Make sure the fabric edges aren’t caught in the tension mechanism.
- Trim Excess Stabilizer (Optional): For cutaway stabilizer, you can trim the excess around the hoop once it’s secured.
Step 3: Transfer Your Embroidery Pattern
If you’re not using a pre-digitized design, you’ll need to transfer your embroidery patterns.
- Pencil/Fabric Pen: For simple designs, you can draw directly onto the fabric with a fabric marker or pencil.
- Water-Soluble Stabilizer: Print your pattern onto water-soluble stabilizer paper. Stick the printed stabilizer onto your hooped fabric with temporary adhesive or a few stitches, then embroider directly over it. The paper will dissolve later.
- Carbon Paper: Place carbon paper between your pattern and fabric, then trace the design.
Step 4: Stitching Your Embroidery
This is where the magic happens!
- Attach Embroidery Foot: Remove your regular sewing foot and attach the embroidery or zigzag foot.
- Position Hoop: Place the hooped fabric under the presser foot, aligning the needle with the starting point of your design.
- Start Sewing: Begin sewing slowly. Guide the fabric gently; do not push or pull it. The machine’s feed dogs are down, so you need to move the hoop to guide the stitching.
- Free Motion Embroidery: For designs that require movement in all directions, you’ll essentially be doing free motion embroidery. This means you’ll be controlling the direction of your stitches by turning the hoop. Keep your movements smooth and consistent.
- Following Embroidery Stitches: Work your way through the design, following the lines or fills of your chosen embroidery stitches.
- Outline Stitches: Use a straight stitch for outlines.
- Satin Stitches: Use a zigzag stitch with a narrow width and short length for smooth, dense fills.
- Other Decorative Stitches: Explore your machine’s built-in decorative stitches for various effects.
Step 5: Applique with a Sewing Machine
Applique with a sewing machine is a great way to add fabric shapes to your projects.
- Prepare Applique Piece: Cut your appliqué fabric shape. You can use a fusible web to temporarily attach it to your project before stitching.
- Fuse or Pin: Fuse or pin the appliqué piece onto your hooped fabric.
- Stitch Around: Use a zigzag stitch or a satin stitch to secure the edges of the appliqué. Stitch slowly and carefully around the shape, turning the hoop to follow the curves.
Step 6: Finishing Your Embroidery
Once your design is complete:
- Remove Hoop: Take the hoop off your machine.
- Remove Stabilizer:
- Tearaway: Carefully tear the stabilizer away from the back of the design.
- Cutaway: Trim the excess stabilizer close to the stitches with sharp scissors or a seam ripper.
- Water-soluble/Washaway: Rinse the fabric in cool water until the stabilizer dissolves. You can also use a soft brush to help remove it.
- Pressing: Iron your embroidered piece on the back, using a pressing cloth if necessary, especially if you used rayon thread which can be sensitive to high heat.
Advanced Techniques and Tips
As you get more comfortable, try these advanced tips:
Using Pre-Digitized Embroidery Designs
If you have a sewing machine with embroidery capabilities or are using a computer-interfaced machine, you can load pre-digitized machine embroidery designs.
- Format: Designs come in various formats (e.g., .PES, .DST, .JEF). Ensure your machine or software can read the format.
- Transfer: Transfer designs to your machine via USB drive, memory card, or direct connection.
- Stitching: Load the design and let your machine do the work! You’ll still need to hoop and stabilize correctly.
The Art of Digitizing Embroidery
Digitizing embroidery is the process of creating your own designs for machine embroidery. This involves using specialized software to convert images or artwork into stitch data that a machine can read. It’s a more complex skill but allows for endless creative possibilities.
Troubleshooting Common Issues
| Problem | Possible Cause | Solution |
|---|---|---|
| Thread Breaking | Wrong needle, dull needle, lint in tension discs, wrong thread | Use a fresh embroidery needle, clean machine, use appropriate embroidery thread, check thread path. |
| Skipped Stitches | Wrong needle, lint, incorrect tension | Use a new embroidery needle, clean machine, adjust tension, ensure bobbin is inserted correctly. |
| Fabric Puckering | Insufficient stabilizer, fabric not hooped tightly | Use a heavier-weight stabilizer, ensure fabric is taut in the hoop, loosen top tension slightly. |
| Loopy Stitches (Back) | Top tension too loose, bobbin wound incorrectly | Tighten top tension, check bobbin winding and insertion, ensure bobbin thread is not catching on anything. |
| Stitches Too Flat/Tight | Top tension too tight | Loosen top tension slightly. |
| Design Distortion | Fabric shifting during stitching, not enough stabilization | Ensure fabric is firmly hooped and doesn’t shift. Use appropriate stabilizer. Keep movements smooth and avoid pulling the fabric. |
Machine Embroidery vs. Sewing Machine Embroidery
It’s important to clarify the distinction between using a dedicated embroidery machine vs sewing machine.
- Embroidery Machine: Designed solely for embroidery. Features include:
- Large embroidery area (hoops).
- Pre-loaded embroidery designs.
- Automatic thread cutters.
- Color changers.
- Higher stitch speeds for embroidery.
- Often uses a bobbin winder that stops automatically.
- Sewing Machine with Embroidery Capabilities: A regular sewing machine that can be adapted or has built-in features for embroidery.
- Smaller embroidery areas.
- May require manual thread changes.
- May not have automatic thread cutters.
- Slower stitching speeds for embroidery.
- Requires manual feed dog lowering.
While an embroidery machine offers more convenience and advanced features, a standard sewing machine can achieve beautiful results with patience and practice.
Frequently Asked Questions
Here are some common questions about sewing embroidery with a sewing machine:
Q1: Can I use my regular sewing machine for embroidery?
A1: Yes, if your sewing machine allows you to lower the feed dogs and has a zigzag stitch. Many modern sewing machines are also equipped with basic embroidery functions.
Q2: What kind of thread should I use for machine embroidery?
A2: It’s best to use embroidery thread, which is specifically designed for this purpose. It’s typically shinier and stronger than regular sewing thread. Rayon and polyester are popular choices.
Q3: What is the purpose of a stabilizer in embroidery?
A3: A stabilizer is essential as it supports the fabric and stitches, preventing stretching, puckering, and thread breakage. It ensures your embroidery design looks clean and professional.
Q4: How do I hoop the fabric for embroidery?
A4: Place the fabric right side up on the inner hoop, then position the outer hoop over it and snap them together. The fabric should be taut and smooth, like a drum.
Q5: What does it mean to “drop the feed dogs”?
A5: The feed dogs are the metal teeth under the presser foot that move the fabric forward. For embroidery, you need to lower them so the fabric stays in place while the needle moves to create the stitches in different directions.
Q6: Can I embroider on any fabric?
A6: It’s best to start with stable fabrics like cotton, linen, or denim. Very stretchy or delicate fabrics require more careful stabilization and technique.
By following these steps and practicing regularly, you can master the art of sewing embroidery with your sewing machine and add a beautiful, personalized touch to all your sewing projects. Happy stitching!