
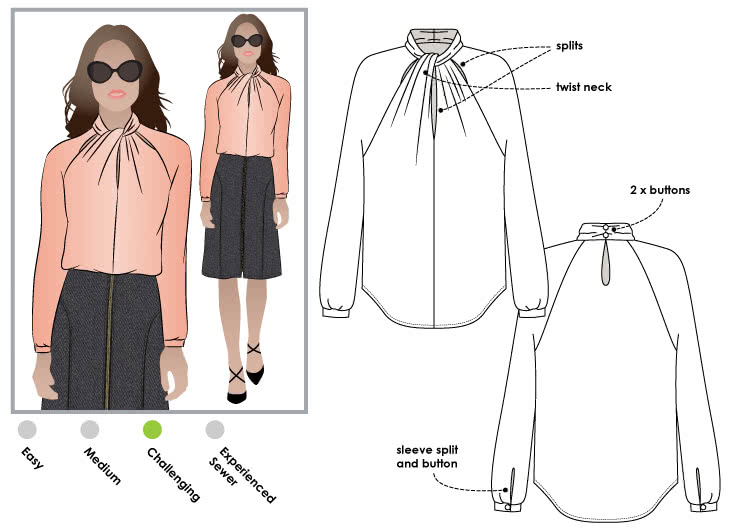
Image Source: www.stylearc.com
Mastering Basics: Easy Guide on How To Sewing Blouse
Do you want to know how to sew a blouse? Sewing a blouse yourself is a great project for anyone starting to sew. It lets you make clothes that fit you perfectly. You will learn many helpful sewing skills along the way. This guide will walk you through each simple step.
Getting Ready to Sew Your Blouse
Before you start sewing, you need some important things. Having the right tools and materials makes the job much easier. Think of this as getting your workspace ready.
Picking Sewing Patterns
The first thing you need is a plan. A sewing pattern is your guide. It shows you how to cut the fabric pieces. It also tells you how to put them together.
- What is a pattern? It’s like a map for your blouse. It has paper pieces that are the shape of your blouse parts.
- Where to find patterns? You can buy patterns at fabric stores. Many websites also sell digital patterns you can print at home.
- Choosing a pattern: Look for patterns marked “beginner” or “easy.” These patterns often have fewer pieces and simpler steps. Choose a style you like! Maybe a simple top with short sleeves.
- Reading the pattern envelope: The pattern envelope tells you:
- What fabric to use.
- How much fabric you need.
- What other things you need (like buttons, zippers, sewing interfacing).
- What sizes the pattern comes in.
Knowing Fabric Types for Blouses
Picking the right fabric is key. Some fabrics are easier to work with than others. Fabric types for blouses change how your blouse looks and feels.
- Good fabrics for beginners:
- Cotton: This is a great choice. It is stable and does not slip much. It is easy to cut and sew. Poplin, broadcloth, or quilting cotton work well for simple blouses.
- Linen: This fabric is nice and breathable. It can wrinkle easily, but it is still pretty simple to sew.
- Rayon/Viscose (some types): These fabrics have a nice flow or “drape.” Some are slippery, which is harder. Look for ones that feel a bit more stable for your first try.
- Fabrics that are harder for beginners:
- Silk: Very slippery and hard to cut straight.
- Chiffon/Georgette: See-through and hard to handle.
- Knits (stretchy fabrics): Need special needles and sewing machine stitches.
- Fabric tips:
- Always check the pattern envelope for suggested fabrics.
- Buy a little extra fabric just in case.
- Pre-wash your fabric before you cut it. This helps stop shrinking later.
Taking Body Measurements
Your pattern needs to be the right size. You need to know your size based on your body. This is called taking body measurements.
- What measurements do you need? Most patterns need your bust, waist, and hip measurements.
- How to measure:
- Use a soft tape measure.
- Stand up straight.
- Have someone help you if you can.
- Bust: Measure around the fullest part of your chest. Keep the tape level across your back.
- Waist: Measure around the smallest part of your waist. This is usually above your belly button.
- Hips: Measure around the fullest part of your hips. This is usually around your bottom.
- Choosing your size: Compare your measurements to the size chart on the pattern envelope. If you are between sizes, it is usually better to pick the larger size. You can always make it smaller later.
Other Helpful Tools
You will need a few other things besides fabric and a pattern.
- Sewing machine: Make sure it works.
- Thread: Match your fabric color. Get good quality thread.
- Scissors: Sharp scissors for cutting fabric only. Use different scissors for paper.
- Pins: To hold fabric pieces together.
- Measuring tape: You already used this for your body. You need it for fabric too.
- Fabric markers or chalk: To mark lines on your fabric. These wash out.
- Iron and ironing board: Pressing your seams makes a big difference!
- Seam ripper: To undo stitches if you make a mistake. Everyone uses one!
- Needles: For your sewing machine and for hand sewing (if needed). Make sure the machine needle is right for your fabric.
Preparing Your Fabric
Okay, you have your pattern, fabric, and tools. Now get the fabric ready.
Pre-washing Your Fabric
This is a very important step. Put your fabric in the washing machine and dryer just like you will wash the finished blouse.
- Why pre-wash? Fabric can shrink when you wash it the first time. If you don’t pre-wash, your finished blouse might not fit after you wash it. It also removes extra dye and factory stuff.
- How to wash: Follow the washing instructions for your fabric type. Use the same setting you plan to use later.
Cutting Out Your Pattern Pieces
Your fabric is clean and dry. Now you cut!
- Iron the fabric: Make sure the fabric is flat and smooth.
- Fold the fabric: Most patterns tell you to fold the fabric. They will show you how on the instructions. Often you fold it in half lengthwise.
- Lay out the pattern pieces: Place the paper pattern pieces on the fabric. The pattern instructions show you the best way to do this. This saves fabric. Look for the “grainline” arrow on the pattern piece. Make sure this arrow is parallel to the edge of the fabric (the selvedge).
- Pin the pattern pieces: Pin the paper pieces firmly to the fabric. Use plenty of pins so the fabric doesn’t shift.
- Cut carefully: Use your fabric scissors. Cut smoothly around the edge of each pattern piece. Do not lift the fabric while you cut.
- Transfer markings: Patterns have dots, notches, or other marks. These help you match pieces later. Use your fabric marker or chalk to put these marks on your fabric pieces.
Getting Your Sewing Machine Ready
Your sewing machine is your main tool. Make sure it is ready to go.
Sewing Machine Basics
- Threading: Learn how to thread your machine correctly. Both the top thread and the bobbin thread need to be right. Check your machine’s manual.
- Needle: Use a new needle. Make sure it is the right type for your fabric. A universal needle works for many fabrics.
- Test stitch: Always sew on a scrap piece of your fabric first. Check the stitch length and tension. Make sure it looks good on both sides.
- Presser foot: Use the correct foot for what you are doing. The “standard” or “all-purpose” foot is used most often.
Choosing Sewing Machine Stitches
Your machine has different stitches. For most of your blouse, you will use one main stitch.
- Straight stitch: This is the most common stitch. It is used to sew pieces together.
- You can change the length of the stitch. A medium length (like 2.5 mm) is good for general sewing.
- Zigzag stitch: This stitch is good for finishing edges. It stops the fabric from coming apart (fraying).
- Other stitches: Your machine might have many stitches. You probably won’t need them for a basic blouse.
Building Your Blouse Step by Step
Now you start sewing the fabric pieces together. Follow the order in your pattern instructions. Here are some common steps.
Sewing Darts
Many blouses have sewing darts. Darts shape the fabric to fit curves, like around the bust or waist.
- What is a dart? A dart is a folded point of fabric sewn flat.
- Finding darts: Darts are marked on your pattern pieces. They look like triangles or diamond shapes.
- Marking darts: Use your fabric marker to put the dart lines onto your fabric pieces. Mark the dots at the wide end and the point.
- Folding the dart: Fold the fabric piece right sides together. Line up the marked lines of the dart. The lines should lay on top of each other.
- Pinning the dart: Pin along the marked line from the wide end towards the point.
- Sewing the dart: Start sewing at the wide end of the dart. Sew along the marked line to the point. When you get close to the point (the last few stitches), sew right on the fold. This makes the dart lay flat.
- Finishing the dart end: Do NOT backstitch at the point of the dart. Instead, leave the threads long (about 3-4 inches). Tie a knot close to the fabric edge. This makes the point look smooth.
- Pressing the dart: Press the dart flat with an iron. For bust darts, press them down. For waist darts, press them towards the center of the garment.
Sewing Seams
Putting fabric pieces together means sewing seams. A seam is the line of stitches joining two pieces.
- What is a seam? Where two edges of fabric meet and are sewn.
- Seam allowance: Your pattern includes extra fabric around each piece. This is the seam allowance. It is usually 5/8 inch (1.5 cm) wide. This is the distance you sew from the raw edge of the fabric.
- Putting pieces together: Place two fabric pieces right sides together. “Right sides” are the sides that will show on the outside of your blouse.
- Pinning seams: Line up the edges you want to sew. Use pins to hold them together. Place pins across the seam line, not along it. Space them every few inches.
- Sewing the seam: Put the fabric under the presser foot. Line up the raw edge of the fabric with the correct mark on your machine’s plate or presser foot (this marks the seam allowance). Start sewing.
- Backstitching: Sew a few stitches forward, then a few backward. This locks your stitches so they don’t come undone. Do this at the start and end of every seam.
- Removing pins: Take pins out as you sew. Do NOT sew over pins. This can break your needle or machine.
- Pressing seams: After sewing a seam, always press it flat. This is very important! Press the seam the way the pattern tells you (usually open, or sometimes to one side). Pressing makes your sewing look professional.
Adding Sewing Interfacing
Some parts of your blouse need extra support. This is where sewing interfacing helps.
- What is interfacing? It is a special fabric you put behind another fabric piece. It makes that piece stiffer or stronger.
- Where to use it? You often use it on necklines, collars, cuffs, and button areas.
- Types of interfacing:
- Fusible: Has glue on one side. You iron it onto the fabric. This is often easiest for beginners.
- Sew-in: You sew it to the fabric piece.
- Using fusible interfacing:
- Cut the interfacing piece the same size as the fabric piece it goes with.
- Place the interfacing on the wrong side of your fabric piece. The glue side is usually bumpy or shiny.
- Cover it with a pressing cloth (a scrap of cotton fabric).
- Press with a warm iron according to the interfacing directions. Hold the iron down; do not slide it. Let it cool completely. It should be stuck firm.
Attaching Sleeves
Putting the sleeves into the armholes is a common step. This is called attaching sleeves.
- Matching points: Both the sleeve and the armhole have marks (notches or dots) on the pattern. These help you line up the sleeve correctly. There is usually a mark for the top of the sleeve (“cap”) and marks for the front and back.
- Right sides together: Place the sleeve fabric piece and the blouse body piece right sides together. Match the raw edges of the armhole and the top curve of the sleeve.
- Pinning: Start by pinning the key matching points (top shoulder point, front, back). Then pin all around the armhole edge. The sleeve cap often has a little extra fabric or “ease.” You might need to gently ease this fabric in so it fits the armhole curve. Do not create puckers.
- Sewing: Sew slowly around the armhole curve following your seam allowance.
- Finishing the seam: The armhole seam can fray. You can finish this edge with a zigzag stitch or other method (like an overlocker if you have one).
- Pressing: Press the seam allowance towards the blouse body.
Finishing Neckline
The neckline is a key part of your blouse. It needs to look neat. This is finishing neckline.
- Common ways to finish a neckline:
- Facing: This is a common method. You sew a shaped piece of fabric (the facing) to the neckline edge. Then you turn it to the inside of the blouse.
- Bias binding: A strip of fabric cut on the bias (diagonal to the grain). This strip is sewn to the edge and turned to the inside or left showing as a design detail.
- Collar: Some blouses have collars attached to the neckline.
- Using a Facing (basic method):
- Sew the facing pieces together (if the facing is in more than one piece). Press seams open.
- Finish the outer edge of the facing (the edge that will be inside the blouse) using a zigzag stitch or other method to stop fraying.
- Pin the facing to the neckline edge of the blouse. Place them right sides together. Match any seams or marks.
- Sew around the neckline curve following the seam allowance.
- Clip the curves: Cut small snips into the seam allowance of the neckline seam. Do not cut the stitches! This helps the curve lay flat when you turn it.
- Turn the facing to the inside of the blouse.
- Press the neckline edge flat.
- “Understitch” the facing: Sew a line of stitches through the facing and the seam allowance close to the seam line. This stitching is done on the wrong side and keeps the facing from rolling to the outside.
- Secure the facing: You can tack (hand sew a few stitches) the facing to the shoulder seams inside the blouse. This stops the facing from flapping around.
Hemming Techniques
The bottom edge of your blouse needs a nice finish. This is called hemming techniques. The sleeves might need hemming too.
- What is a hem? The finished edge at the bottom of a garment or sleeve.
- Pattern guide: Your pattern will tell you how much fabric to turn up for the hem allowance.
- Simple Hem:
- Press up the raw edge of the hem allowance by the amount the pattern tells you (e.g., 1/4 inch or 1 cm). Press it all around the bottom.
- Press it up again by the remaining hem allowance amount (e.g., 3/4 inch or 2 cm if the total is 1 inch). This hides the raw edge inside the fold.
- Pin the folded hem in place.
- Sew close to the folded edge (about 1/8 inch or 3mm) all the way around. Use a straight stitch.
- Other Hemming ideas:
- Narrow hem: Good for lightweight fabrics. Fold edge up very narrowly, press, fold again, press, then sew.
- Rolled hem: Done with a serger or a special machine foot. Makes a tiny, neat hem.
- Blind hem: A machine stitch that is mostly hidden. Takes practice.
Finishing Up Your Blouse
You are almost done!
Finishing Seam Edges
Raw fabric edges inside your blouse can fray. You need to finish them. This is part of sewing seams.
- Why finish edges? It makes your garment look better and last longer. It stops threads from coming loose inside.
- How to finish edges:
- Zigzag stitch: Sew a zigzag stitch close to the raw edge of each seam allowance. Do this after sewing the seam but before pressing it open. Or you can press the seam open and zigzag each edge separately.
- Pinked edges: Use pinking shears (scissors with a zigzag blade) to cut the raw edge. This is fast but less secure for fabrics that fray a lot.
- Serger/Overlocker: A special machine that cuts the edge and wraps thread around it. Gives a very neat finish.
- French seam: This hides the raw edge inside the seam itself. It is a bit more complex and uses two lines of sewing. Great for sheer fabrics.
- Bound edge: Wrap the raw edge with a strip of bias fabric.
Adding Closures (If Any)
Does your blouse have buttons, snaps, or a zipper? The pattern instructions will guide you.
- Buttons and buttonholes: Your machine might have a buttonhole foot to help make buttonholes. Sewing on buttons can be done by machine or hand.
- Snaps or hooks and eyes: These are usually hand-sewn onto the fabric.
- Zippers: Zippers go into a seam. There are different ways to insert a zipper. The pattern will show you.
The Final Press
Give your finished blouse a good press with an iron. This makes all your stitches and seams lay flat and look tidy.
Tips for Sewing Beginners
- Read the pattern fully first: Before you cut or sew, read through all the instructions. Make sure you understand the steps.
- Cut accurately: Cutting carefully makes sewing easier.
- Press often: Pressing each seam after you sew it makes a huge difference in how professional your blouse looks.
- Test on scraps: Practice new steps or stitches on extra fabric before sewing on your blouse.
- Go slowly: Don’t rush! Sewing is not a race.
- It’s okay to make mistakes: Everyone does! Use your seam ripper and try again.
- Fit as you go: Pin or baste (sew with long, loose stitches) seams together and try the blouse on before you do the final sewing. This helps check the fit.
Frequently Asked Questions
Q: What if my sewing machine doesn’t work right?
A: Check the threading first. Make sure the needle is new and put in correctly. Is the bobbin full and in right? Check the manual for help. If it still doesn’t work, take it to a repair shop.
Q: My fabric is fraying a lot. What can I do?
A: Use a zigzag stitch or a serger to finish your seam edges right away after sewing. You can also try a French seam if your fabric is not too thick. Pick fabrics that don’t fray much for your first projects.
Q: How do I choose the right size pattern?
A: Measure your body (bust, waist, hips). Compare these numbers to the size chart on the pattern envelope. Pick the size that matches your biggest measurement best, or blend between sizes if your measurements are very different.
Q: Can I sew a blouse without a pattern?
A: Yes, but it is much harder for a beginner. A pattern gives you the shapes and instructions you need. Starting with a pattern makes learning easier.
Q: My stitches look messy. What’s wrong?
A: Check your tension settings on the machine. Re-thread the machine completely, top and bobbin. Make sure you are using the right needle for your fabric. Test on a scrap to adjust before sewing on your blouse.
Sewing a blouse might seem like many steps, but each step is simple on its own. Just take it one part at a time. Choose an easy pattern and a simple fabric. Use this guide to help you through the process. Soon you will have a blouse you made yourself! Happy sewing!