
You can fix many common sewing machine problems right at home! This guide will show you how to do simple repairs yourself. Fixing your machine helps it work better and last longer. It saves you money too. Let’s get started on how to sewing machine repair basic issues.
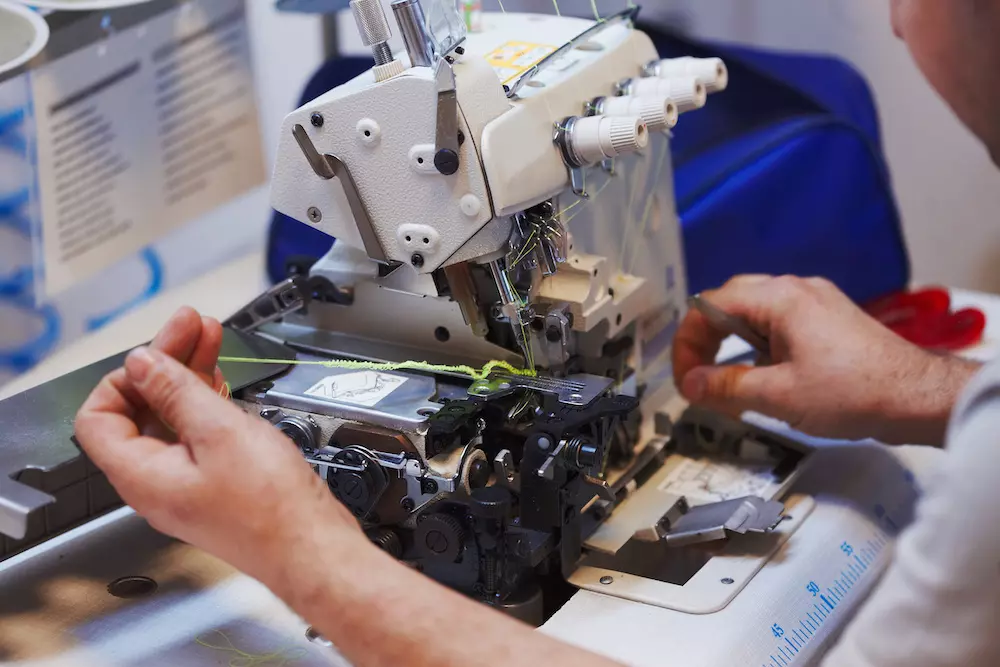
Image Source: www.goldstartool.com
Why Fix Your Machine Yourself?
Fixing your own sewing machine can feel good. It helps you learn how it works. Many small issues are easy to fix. You do not always need a pro. Doing it yourself is faster and costs less. But be safe! Always turn off and unplug your machine before you start. Keep little parts safe so you do not lose them.
Get Your Tools Ready
You will need a few simple tools. Most machines come with some.
- Small screwdrivers (flat and Philips head)
- Tweezers
- Small brush (like an old toothbrush or the one that came with your machine)
- Lint-free cloth
- Good quality sewing machine oil (check your manual for the right type)
- New needles (always have extras!)
- Extra thread (good quality)
- Small container for screws and parts
- Your machine’s manual (it’s very important!)
Basic Machine Checks
Before you fix anything, do a quick check. Is the machine plugged in? Is the power switch on? Is the light on? Is the presser foot down? Is the bobbin in right? Is the thread path correct? Many problems come from simple mistakes like these.
Facing Common Sewing Machine Problems
Many things can go wrong with a sewing machine. But most problems are common. You can often fix them easily. Let’s look at some of the most common sewing machine problems.
h4 Bobbin Problems
Bobbin problems sewing machine issues are very common. They can stop your machine from working.
* Issue: Thread bird’s nest on the bottom fabric.
* Fix: This often means the top thread is not right. Check how you threaded the top. Make sure the presser foot is down when you sew.
* Issue: Bobbin thread breaks often.
* Fix: Is the bobbin wound correctly? Is it full? Is it in the bobbin case the right way? Is there lint in the bobbin area?
* Issue: Bobbin case is jammed.
* Fix: Something is stuck. Turn off the machine. Take out the bobbin case. Clean out any thread bits or lint. Check the bobbin case for damage.
h4 Thread Breaking
Thread keeps breaking sewing machine owners face this a lot. Many things can cause this.
* Check the Thread: Is the thread old or bad quality? Cheap thread breaks easily. Use good thread.
* Check the Needle: Is the needle bent or dull? Is it the right size for your fabric and thread? A bad needle cuts thread. Change the needle often.
* Check Threading: Is the machine threaded right? Is the thread catching on anything? Re-thread the machine slowly.
* Check Tension: Is the top thread tension too tight? We will talk more about tension later.
* Check for Snags: Is there a tiny burr or rough spot on the machine? Check the thread path, needle plate, and bobbin area.
h4 Skipped Stitches
Having stitches that are not there is called skipped stitches. How to fix skipped stitches is a common question.
* Check the Needle: This is the main reason for skipped stitches. Is the needle put in right? Is it facing the correct way? Is it the right type for your fabric? Is it bent or dull? Change the needle! This fixes skipped stitches most times.
* Check Threading: Re-thread the machine completely.
* Check Tension: Top or bobbin tension might be off.
* Check Fabric: Is the fabric very stretchy or very thick? Use the right needle and maybe a special foot for these fabrics.
h4 Fabric Not Moving
If your fabric stays in one place, the feed dogs are not working.
* Check Feed Dogs: Are the feed dogs up? Some machines let you lower them for free motion sewing. Make sure they are not set to down. Look for a switch or button.
* Check Presser Foot Pressure: Is the presser foot pushing down enough? Some machines let you change the pressure.
* Clean: Lint and thread can build up under the needle plate and around the feed dogs. This stops them from gripping the fabric. Clean this area well.
h4 Machine is Loud or Stuck
Odd noises or the machine not turning can be scary.
* Clean and Oil: Lack of oil or lots of lint can make parts stick. Clean and oil your machine.
* Thread Jam: A big jam of thread, especially in the bobbin area, can stop the machine. Turn off and unplug it. Carefully remove the jam. You might need tweezers and small snips.
* Bent Needle: A bent needle can hit other parts and stop the machine. Check and change the needle.
Getting Into Sewing Machine Troubleshooting
When your machine acts up, you need to figure out why. This is sewing machine troubleshooting. It means looking at the problem and finding the cause. Always start with the simple things first.
Troubleshooting Steps:
1. Stop: Turn off the machine. Unplug it.
2. Look: See what is happening. Where is the bad stitch? Where is the thread breaking?
3. Listen: Does it make a strange noise? When does it make the noise?
4. Feel: Does the machine turn by hand easily? Is anything stiff?
5. Check Basics: Needle, thread, threading, bobbin. These fix many problems.
6. Clean: Remove lint and old thread.
7. Oil: Add oil where your manual says.
8. Test: Try sewing on a scrap piece of fabric.
9. Adjust: If still not right, try adjusting tension or other settings based on the problem.
Keeping Your Machine Clean
Cleaning a sewing machine is super important. Lint and dust are enemies of sewing machines. They get into moving parts and cause problems. You should clean your machine often. How often depends on how much you sew. A good rule is after every big project or every few months if you sew little.
h4 Steps for Cleaning a Sewing Machine
Follow these steps to clean your machine.
1. Turn Off and Unplug: Always do this first!
2. Take Off the Needle: This keeps you safe while cleaning near the needle area.
3. Remove Presser Foot: This gives you more room to work.
4. Open Bobbin Area: Remove the bobbin and bobbin case. Take off the needle plate (use your screwdriver).
5. Brush Away Lint: Use your small brush to gently sweep out all the lint and thread bits you see. Get into the bobbin area, under the needle plate, and around the feed dogs. Be very careful not to push lint further in.
6. Use Tweezers: Pull out any stubborn thread ends or large clumps of lint.
7. Clean Outside: Wipe the outside of the machine with a soft, dry cloth. You can use a slightly damp cloth, but do not let water get inside.
8. Clean Tension Discs (Carefully): For the top tension, raise the presser foot. This opens the tension discs a little. Take a folded piece of thread or a thin piece of cloth and slide it between the discs. This pulls out lint stuck there. Do this gently.
9. Put Parts Back: Put the needle plate, bobbin case, and presser foot back.
10. Change Needle: Always put in a new needle after cleaning.
Giving Your Machine Oil
Oiling a sewing machine is just as important as cleaning. Oil keeps the metal parts moving smoothly. It stops them from wearing out too fast. Not all machines need oiling (some new ones are self-oiling). Check your manual! If your machine needs oil, the manual shows you where to put it. Use only sewing machine oil. Other oils can damage the machine.
h4 Steps for Oiling a Sewing Machine
Check your manual for exact spots. Here are general steps.
1. Clean First: Always clean the machine before oiling. Oil on top of lint makes a gummy mess.
2. Turn Off and Unplug: Safety first!
3. Find Oil Points: Look in your manual for diagrams showing where to put oil. It’s usually on metal parts that rub together. Common spots are in the bobbin area, parts under the needle plate, and sometimes points under the top cover (if you can open it easily).
4. Add One Drop: Put just one drop of oil on each oil point. Do not use too much! Too much oil attracts more lint.
5. Turn Wheel by Hand: Slowly turn the handwheel a few times. This helps the oil spread.
6. Sew on Scrap Fabric: Sew on a scrap piece of fabric for a minute or two. This spreads the oil more and soaks up any extra oil. You do not want extra oil getting on your project fabric later.
Changing Tension
Sewing machine tension adjustment sets how tight the threads are. There is top thread tension and bobbin thread tension. They need to be balanced for good stitches.
h4 Grasping Tension Adjustment
- Top Tension: Controlled by a dial or buttons on the outside of your machine. Higher numbers mean tighter tension.
- Bobbin Tension: Controlled by a small screw on the bobbin case (for drop-in or front-load bobbins). This is more tricky to adjust. It is best not to change this screw unless you are sure it is the problem. Most tension problems are with the top thread.
h4 How to Set Tension
- Use Scrap Fabric: Always test tension on the same type of fabric you will use for your project. Use two layers.
- Sew a Test Line: Sew a straight line.
- Look at the Stitches:
- Perfect Stitch: The stitches look the same on the top and bottom. The threads meet in the middle of the fabric layers.
- Top Thread Loop/Loose: The top thread looks straight on top, but loops are hanging on the bottom fabric.
- Fix: Top tension is too loose. Make the top tension number higher. Or bobbin tension is too tight (less likely).
- Bottom Thread Loop/Loose: The bottom thread looks straight on the bottom, but loops are hanging on the top fabric.
- Fix: Top tension is too tight. Make the top tension number lower. Or bobbin tension is too loose (less likely).
- Both Threads Straight but Fabric Pulls: Tension might be too tight overall. Lower both if you know how to adjust bobbin tension, or just lower top tension and see if it helps.
- Adjust and Test Again: Change the top tension dial a little (1 number at a time). Sew another line on the scrap fabric. Look again. Keep doing this until the stitches look right.
h5 Checking Bobbin Tension (Advanced)
For drop-in or front-load bobbins, you can do a simple test. Hold the bobbin case by the thread. It should hang for a moment, then slowly drop an inch or two with a little jerk. If it drops fast, it’s too loose. If it does not drop, it’s too tight. Use a tiny screwdriver to make very small turns to the screw on the bobbin case to fix this. A quarter turn is a big change!
Specific Sewing Machine Brands
Different brands like Singer and Brother are popular. They work much the same way for basic things. But how you open them or where the oil points are can be different.
h4 Singer Sewing Machine Repair
Singer sewing machine repair often involves older models. These are often simple and strong. They might need cleaning and oiling more often. Check your Singer manual for specific steps. Parts for older Singers are often easy to find. Newer Singer machines are like other modern machines.
h4 Brother Sewing Machine Repair
Brother sewing machine repair for home models usually involves similar issues. Threading problems and bobbin problems are common. Brother manuals are usually very good and have clear pictures. Always check your Brother manual first for cleaning and oiling spots and troubleshooting tips.
A Few More Simple Fixes
- Bent Needle: Change it right away! A bent needle can damage your machine.
- Dull Needle: Change it! Needles get dull after sewing for 8-10 hours. A dull needle causes skipped stitches, pulls fabric, and breaks thread.
- Wrong Needle: Use the right needle type for your fabric (e.g., ballpoint for knits, denim needle for jeans). Use the right size for your fabric and thread.
- Lint in Feed Dogs: Clean under the needle plate.
- Poor Quality Thread: Use good thread from a sewing store. Cheap thread causes many problems.
- Machine Jams: Often caused by thread getting pulled into the machine’s inner workings. Turn off, unplug, and carefully cut and pull out the jammed thread. Sometimes you might need to take off covers (check your manual!).
When to Get Help From a Pro
Sometimes, you cannot fix the machine yourself. This is okay! Know when to stop and take it to a repair shop.
- Machine is completely stuck and you cannot find a jam.
- It makes loud grinding or knocking noises you cannot fix with cleaning/oiling.
- You need to take apart parts you are not comfortable with (like timing or motor issues).
- The problem is still there after you tried all the basic fixes.
- Your manual says a pro should fix it.
Professional repair costs money, but it can save your machine and keep you from doing more damage.
Summary of Quick Checks
Here is a quick list to check when your machine acts up.
h5 Quick Check List
- Is it plugged in and turned on?
- Is the presser foot down?
- Is the needle new, straight, and put in right?
- Is it threaded right (top thread)?
- Is the bobbin wound right and put in right?
- Is the bobbin area clean?
- Is the thread good quality?
- Is the right needle used for the fabric?
- Is the machine clean?
- Does it need oil (if your manual says yes)?
Use this list first. It will solve many sewing machine troubleshooting issues.
Table of Common Problems and Fixes
Here is a table to quickly find help for issues.
| Problem | What It Looks Like | Possible Simple Fixes |
|---|---|---|
| Thread Breaking | Thread snaps while sewing | Change needle, re-thread, check tension, check for snags, use good thread |
| Skipped Stitches | Gaps in stitching | Change needle, re-thread, check needle position, check tension |
| Thread Looping (Bottom) | Loops on bottom fabric | Top thread tension too loose, wrong threading (top) |
| Thread Looping (Top) | Loops on top fabric | Top thread tension too tight, bobbin tension too loose (less common) |
| Fabric Not Feeding | Fabric stays still or moves slowly | Check feed dogs setting, clean under needle plate, check presser foot pressure |
| Bobbin Jammed | Machine stuck, won’t sew, noise in bobbin area | Turn off/unplug, clean bobbin area well, remove thread jam |
| Machine is Loud/Stiff | Grinding sounds, hard to turn wheel | Needs cleaning, needs oiling, check for thread jam |
| Needle Breaking | Needle snaps | Needle is bent/dull/wrong size, machine is jammed, pulling fabric too hard |
| Stitches are Uneven/Messy | Stitches not neat, inconsistent | Check tension (top and bottom), re-thread, change needle, clean machine |
This table helps with common sewing machine problems.
Taking Apart Parts
For basic cleaning and oiling, you usually only need to remove the needle plate and access the bobbin area. Do not take apart more of the machine than your manual tells you to for normal care. If you need to go deeper, take pictures as you go. This helps you remember how to put it back. Keep all screws in a little dish.
Reading Your Manual
Your sewing machine manual is your best friend for repairs. It shows you:
* How to thread your machine.
* How to wind and put in the bobbin.
* Where to clean.
* Where to oil (if needed).
* Basic troubleshooting steps.
* What kind of needles to use.
Always look at your manual first when you have a problem.
Keeping Your Machine Happy
To stop problems before they start:
* Clean your machine often.
* Oil it when the manual says to.
* Use good quality thread and needles.
* Change your needle often.
* Cover your machine when you are not using it.
* Do not force the machine if it gets stuck.
Good care means less need for sewing machine troubleshooting!
Deciphering Different Thread Types
Using the right thread is important.
* Polyester thread is strong and good for most sewing.
* Cotton thread is good for cotton fabric, but can create more lint.
* Special threads like metallic or heavy duty need special needles and might need tension changes.
Make sure your thread is smooth and strong. If it looks fuzzy or breaks easily by hand, it’s not good thread for your machine. This can be why your thread keeps breaking sewing machine issues pop up.
Mastering Bobbin Winding
Winding the bobbin correctly matters a lot for good stitches.
* Wind it evenly. It should look smooth, not lumpy.
* Do not wind it too fast. This can stretch the thread.
* Do not wind it too full. It can jam the bobbin case.
* Make sure the thread goes through the little guide on the machine made for winding.
Poorly wound bobbins cause bobbin problems sewing machine users face.
Final Thoughts on DIY Repair
Doing your own sewing machine repair feels good. It saves time and money for simple issues. Start with the easy checks: needle, thread, threading, bobbin. Then clean and oil. Most common sewing machine problems are fixed this way. Be patient, read your manual, and do not force anything. With a little care, you can keep your machine running well for many years!
Frequently Asked Questions (FAQ)
h4 How often should I clean my sewing machine?
It is best to clean it after finishing a big project. If you sew often, clean it every few months. If you sew less, once or twice a year might be okay. But more cleaning is better than less!
h4 How often should I oil my sewing machine?
Check your manual. Some need oil every time you sew, some only after many hours of use. Some new machines do not need oil at all. Follow what your manual says.
h4 What kind of oil should I use?
Use only sewing machine oil. It is light and made for these machines. Do not use cooking oil, WD-40, or bike oil. They will harm your machine.
h4 My thread keeps breaking. What is the most likely reason?
The most common reason is a bent, dull, or wrongly inserted needle. Change the needle first! Then check your threading and tension.
h4 I get skipped stitches. What should I do?
Change the needle! This fixes skipped stitches almost every time. Make sure the new needle is put in correctly and is the right type for your fabric.
h4 Why is my bobbin making a nest of thread on the bottom?
This usually means the top thread is not threaded right or the top tension is too loose. Make sure the presser foot was down when you threaded the top thread. Re-thread the top completely. Check the top tension setting.
h4 When should I take my machine to a professional repair shop?
If the machine is fully stuck, makes bad noises after cleaning and oiling, or you cannot find the problem after trying basic fixes, it’s time for a pro. Do not try to fix complex internal parts yourself.