
Many people ask, “What is a sewing machine stitch?” It is simply how threads join fabric. Can you learn to stitch fast? Yes, anyone can learn to stitch with a machine. This guide will show you how. It is a simple process. Soon, you will sew like a pro. This beginner sewing machine guide helps you step by step.
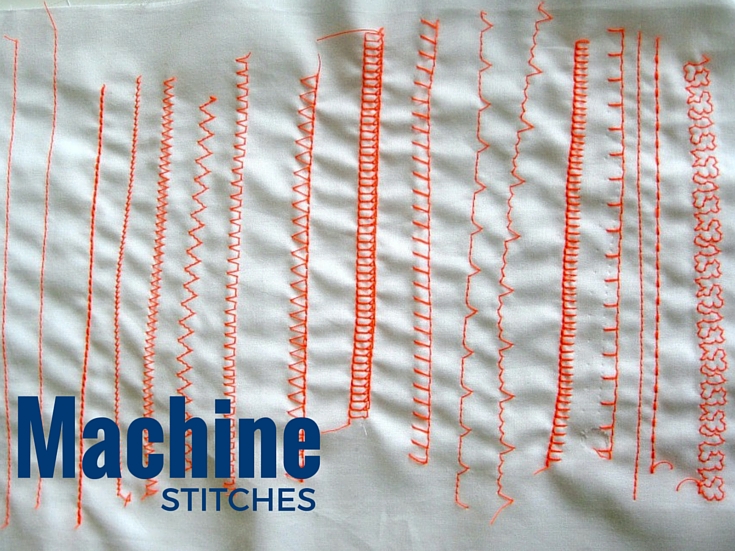
Image Source: thesewingloftblog.com
Getting Started with Your Sewing Machine
Before you stitch, set up your machine. This part is easy. Follow these steps carefully. Safety first is very important.
Powering On and Safety Checks
First, find a good spot. Make sure it has light. Plug in your machine. Most machines have a foot pedal. This pedal controls speed. Push it down gently. The machine should hum. If it does not, check the plug. Always keep fingers away from the needle. This is very important for safety.
Choosing the Right Needle
A needle helps your stitches look good. Different fabrics need different needles. Picking the right one matters. This is about sewing machine needle types. Look at the needle’s size. Smaller numbers mean thinner needles. Bigger numbers mean thicker needles.
Here is a simple guide for needles:
| Fabric Type | Needle Type | Needle Size (Example) |
|---|---|---|
| Light fabrics | Universal | 60/8, 70/10 |
| Medium fabrics | Universal | 80/12, 90/14 |
| Heavy fabrics | Denim, Leather | 100/16, 110/18 |
| Knit fabrics | Ballpoint, Stretch | 75/11, 90/14 |
Always use a sharp needle. A dull needle can harm your fabric. Change your needle often. Change it after every 8 hours of sewing. Or change it if it bends.
Loading the Bobbin
The bobbin holds the bottom thread. You need to load the bobbin. This is a key step. It helps your stitches look nice. First, find your bobbin winder. It is usually on top. Put an empty bobbin on the winder.
Next, get a spool of thread. Place it on the spool pin. Guide the thread through the machine’s path. This path helps fill the bobbin evenly. Wrap the thread a few times on the bobbin. Push the bobbin winder into place. It should click. Then, press your foot pedal gently. The bobbin will spin. It will fill with thread. Stop when the bobbin is full. Cut the thread. Take the full bobbin off.
Now, place the bobbin into its case. Some machines have a front-loading case. Others have a drop-in case. Drop-in cases are on top. Front-loading cases are at the front. Follow your machine’s manual. Make sure the thread feeds out correctly. It should feed in the right direction. This step for loading bobbin sewing machine must be done right.
Top Threading Your Machine
This part is very important. It is about sewing machine threading. If done wrong, your stitches will not work. First, lift the presser foot. This little foot holds the fabric. Place your spool of thread on the spool pin. Guide the thread through the machine’s path. Your machine has numbers or arrows. Follow these marks.
The thread goes through several guides. It goes through tension disks. These disks control thread pull. Then, it goes through the take-up lever. This lever moves up and down. Make sure the thread is in it. Finally, thread the needle. Push the thread through the eye of the needle. Push it from front to back. Pull a few inches of thread through. Pull it under the presser foot.
Now, you need to bring up the bobbin thread. Hold the top thread loosely. Turn the handwheel toward you. Do it one full turn. The needle will go down. It will pick up the bobbin thread. It will bring it up in a loop. Pull the loop gently. You will see both threads. Put both threads under the presser foot. Pull them to the back.
Getting Ready to Sew
Your machine is threaded. Now, you must prepare to stitch. This involves placing fabric. You will also set the stitch type. And you will adjust the thread tension.
Placing Fabric Correctly
Place your fabric under the presser foot. The presser foot holds the fabric down. It keeps it flat. Lower the presser foot. Do this with the lever. The lever is usually on the machine’s side. Make sure the fabric edge lines up. Line it with a seam guide. Seam guides are markings on the metal plate. These guides help you sew straight. They keep your seam allowance even. This is key for good sewing. The sewing machine presser foot keeps fabric steady.
Adjusting Stitch Settings
Your machine has many stitch choices. For beginners, start simple. A straight stitch is best. This is the straight stitch technique. Your machine also has stitch length. This means how long each stitch is. A longer stitch length is for basting. This is temporary sewing. A shorter stitch length is strong. It is good for seams.
Most machines have a dial for stitch length. Or they have buttons. For general sewing, a length of 2.5 mm is good. This is a common sewing machine stitch length. Test it on scrap fabric first. See how it looks. Adjust it if you need to.
Tension Tweaks
Thread tension controls how threads join. It controls how tight or loose they are. Both top and bobbin threads need balance. If tension is off, stitches look bad. They might loop or pucker. This is about adjusting sewing machine tension.
Signs of Wrong Tension:
- Too Tight Top Tension: The bobbin thread shows on top. It looks like little dots.
- Too Loose Top Tension: The top thread shows on the bottom. It looks like loops.
- Too Tight Bobbin Tension: Top thread shows on the bottom.
- Too Loose Bobbin Tension: Bobbin thread shows on top.
Most machines have a tension dial. It has numbers. A common setting is 3 or 4. If your stitches look bad, adjust this dial. Try changing it by one number at a time. Sew a test seam. See how it changes. Keep trying until stitches look even. Both top and bottom threads should meet in the middle of the fabric layers.
Stitching Your First Seams
Now you are ready to stitch. This is the exciting part!
The Straight Stitch
The straight stitch is your first friend. It is simple. It is strong. It is used for most sewing. Use the foot pedal to sew. Push gently to go slow. Push more to go faster. Always watch the needle. It goes up and down.
Steps for Straight Stitch:
- Lower the needle: Turn the handwheel. Bring the needle down into the fabric.
- Start stitching: Push the foot pedal. The machine will sew.
- Guide the fabric: Use your hands. Guide the fabric gently. Do not push or pull hard. The feed dogs move the fabric. These are little teeth under the presser foot.
- Watch the seam guide: Keep your fabric edge straight. Follow the lines on the needle plate. This helps make a straight line of stitches. This is the essence of straight stitch technique.
- Practice: Sew many lines on scrap fabric. This helps you get a feel for it.
Starting and Ending a Seam
You cannot just sew off the fabric. Your stitches would come undone. You need to lock them in place. This is done by backstitching on sewing machine.
Steps for Backstitching:
- Start sewing: Sew a few stitches forward. About three or four stitches.
- Backstitch: Press the reverse lever or button. It is usually near the needle area. Sew backward for three or four stitches.
- Sew forward again: Release the reverse lever. Continue sewing forward.
- End of seam: When you reach the end, sew backward again. Do three or four stitches. Then sew forward to the very end.
- Lift and cut: Lift the presser foot. Pull the fabric out. Cut the threads. Leave a tail of a few inches.
Backstitching makes your stitches strong. They will not unravel. Use it at the start and end of every seam.
Guiding Your Fabric
Do not push or pull your fabric. The machine moves it for you. Your hands just guide it. Keep your fingers flat. Place them on both sides of the needle. Guide the fabric gently. Keep your eyes on the seam guide. This helps you sew a straight line. If you pull, the needle can break. The stitches can also look wavy.
Solving Common Problems
Even experienced sewers have problems. Do not worry. Most problems are easy to fix.
Fixing Skipped Stitches
Sometimes, your machine skips stitches. It leaves gaps in the seam. This is common. It needs quick fixing. This is about troubleshooting skipped stitches.
Common Causes and Fixes for Skipped Stitches:
| Problem | Cause | Solution |
|---|---|---|
| Gaps in stitches | Wrong needle type | Use the right needle for your fabric. |
| Dull or bent needle | Change the needle. | |
| Incorrect threading | Re-thread the machine completely. | |
| Incorrect bobbin placement | Check bobbin. Make sure it spins right. | |
| Low-quality thread | Use better thread. | |
| Too fast sewing | Slow down your sewing speed. | |
| Presser foot not down | Make sure presser foot is fully down. | |
| Thread bunches up | Tension is off | Adjust tension dial. Test it. |
| Lint in bobbin case | Clean bobbin case often. |
Other Simple Fixes
- Thread breaks often: Check threading again. Make sure thread is not caught. Use a new needle. Adjust tension.
- Fabric puckers: Tension might be too tight. Loosen it a bit. Use a walking foot for tricky fabrics.
- Stitches are too loose: Tension might be too loose. Tighten it. Check if bobbin is in right.
Always clean your machine. Lint builds up. It can cause problems. Use a small brush. Clean the bobbin area often. This helps your machine run well.
Practice Makes Perfect
Sewing is a skill. It gets better with practice. Do not expect perfect stitches right away. That is okay. Start with simple projects.
* Sew straight lines on paper without thread. This builds muscle memory.
* Sew on scrap fabric. Try different stitch lengths. Test tension.
* Make simple items. Try a pillowcase. Or a simple tote bag. These use straight lines.
Every stitch you make teaches you something. Enjoy the process. Do not be afraid to make mistakes. Mistakes help you learn.
Caring for Your Sewing Machine
A well-kept machine works best. Think of it like a car. It needs care.
- Clean it often: Remove lint. Use a small brush. Clean the bobbin area. Clean under the needle plate.
- Oil it: Some machines need oil. Check your manual. Use special sewing machine oil. Do not use other oils.
- Cover it: When not in use, cover your machine. This keeps dust out.
- Regular check-ups: If you sew a lot, get it serviced. A pro can clean and fix things.
Good care makes your machine last. It makes your sewing smooth.
Frequently Asked Questions (FAQ)
Q1: My machine sounds loud. Is this normal?
A: A slight hum is normal. A loud grind or bang is not. Stop sewing. Check for jammed threads. See if the needle is bent. Clean the machine. If it keeps making noise, call a repair person.
Q2: What is the best thread for beginners?
A: All-purpose polyester thread is best. It is strong. It works on most fabrics. It is easy to find. Cotton thread is also good. It is nice for cotton fabrics.
Q3: How do I know if my tension is correct?
A: Your tension is correct when stitches look the same on both sides of the fabric. The top thread and bobbin thread meet in the middle. They do not pull fabric. They do not form loops.
Q4: Can I use any needle in my sewing machine?
A: No, you need the right type and size. Using the wrong needle can damage your machine. It can also damage your fabric. Always match the needle to the fabric.
Q5: My fabric is not moving. What is wrong?
A: Make sure the presser foot is down. The feed dogs should be up. Feed dogs are little teeth that move fabric. Check your machine’s settings. Sometimes, a lever lowers the feed dogs.
Q6: How often should I change my sewing machine needle?
A: Change your needle often. Change it after every 8 hours of sewing. Or change it for each new project. Change it if it sounds dull. Change it if it bends. A fresh needle makes sewing easier.
Q7: Is it okay to use cheap thread?
A: Cheap thread often causes problems. It can break easily. It can leave lint. It can cause skipped stitches. It is best to use good quality thread. It makes sewing much smoother.
Your Sewing Journey Begins!
Stitching with a sewing machine opens a new world. You can make so many things. This guide gives you the basics. Remember the steps. Practice often. Soon, you will sew beautiful things. Enjoy your new hobby!