
Image Source: www.doinaalexei.com
Secrets On How To Stop Material From Fraying Without Sewing
Can you stop fabric from fraying without sewing? Yes, you absolutely can! You don’t always need a needle and thread or a sewing machine to keep fabric edges neat and prevent them from unraveling. There are many clever methods and special products designed for no-sew fabric finishing. These methods are great for crafts, quick fixes, and projects where sewing isn’t possible or wanted.
Why Fabric Edges Pull Apart
Before we stop fraying, let’s grasp why it happens.
Fabric is made of threads woven together. When you cut fabric, you cut these threads. The threads at the edge are no longer held tight by other threads. They become loose. When you move the fabric or wash it, these loose threads can pull away. This causes the edge to look fuzzy or come undone. We call this fraying.
Different fabrics fray differently. Some fabrics, like cotton or linen, fray a lot. Others, like felt or fleece, do not fray at all. Woven fabrics fray more than knit fabrics.
Different Ways to Stop Fraying Without Stitching
You have several choices for stopping fabric edges from fraying without sewing. Each way works differently. Some use liquid or sticky stuff. Some change the edge itself.
Let’s look at the main ways you can do this:
- Using special liquids
- Using sticky tapes or webs
- Using special scissors
Using Liquids to Seal Edges
One common way is to use liquids that soak into the fabric edge and make the threads stick together. This creates a sort of seal that stops threads from coming loose.
What Are Fabric Edge Sealants?
Fabric edge sealant is a general term for liquid products made to stop fabric from fraying. These liquids are usually clear. You put them on the cut edge of the fabric. When they dry, they make the edge stiff and sealed. They often dry clear and stay flexible.
Specific Liquid Sealants
Two popular names you might hear are Fray Check and Liquid seam sealant. These are types of fabric edge sealants.
h4: Grasping How Fray Check Works
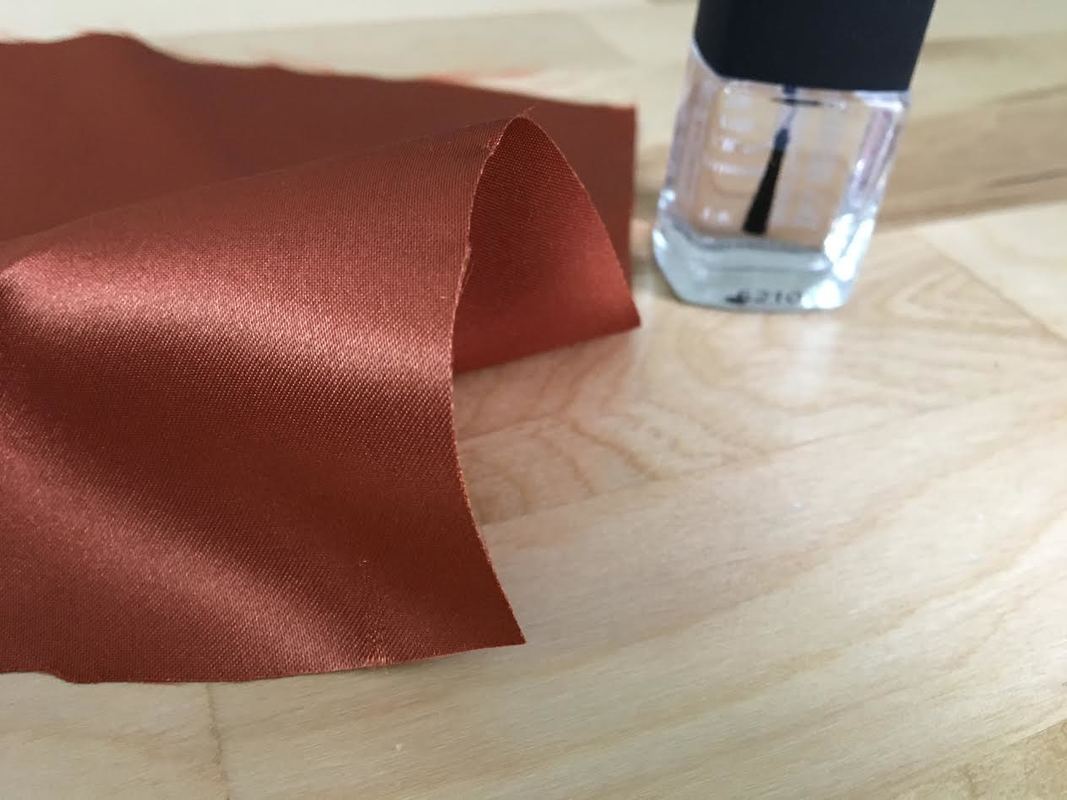
Fray Check is a very well-known brand name for a liquid seam sealant. It’s a clear liquid. You apply it right onto the cut edge of your fabric. The liquid soaks in slightly. It coats the individual fibers and threads. As it dries, it creates a strong, clear bond. This bond holds the threads in place. It stops them from pulling away from the edge.
-
How to Use Fray Check:
- Cut your fabric edge cleanly.
- Lay the fabric flat.
- Put a small amount of Fray Check on the cut edge.
- Use the bottle tip or a small brush to spread it evenly along the very edge.
- Let it dry fully. This can take a few hours.
- Test a small piece of scrap fabric first to see how it looks and feels when dry.
-
Pros of Fray Check:
- Very effective at stopping fraying.
- Dries clear on most fabrics.
- Easy to use.
- Good for small areas or curves.
-
Cons of Fray Check:
- Can make the fabric edge a bit stiff.
- Might show as a slightly darker line on some very light fabrics.
- Has a strong smell until it dries.
- Not ideal for very long edges or large projects.
-
When to Use Fray Check:
- Buttonholes to keep threads from coming out.
- Cut ribbon ends to stop them from fraying.
- Small fabric appliques before attaching them.
- Edges of craft projects that won’t be washed often.
h4: What About Other Liquid Sealants?
Besides Fray Check, other brands make liquid seam sealant. They work in a similar way. They often use different chemical formulas. Some might be softer when dry. Some might be better for different fabric types. Always read the product label to see what fabrics it works best on.
- Tips for Using Any Liquid Sealant:
- Always test on a scrap piece of the same fabric first. This shows you how it dries and if it changes the color or feel.
- Use just a little bit. Too much can make the fabric very stiff and noticeable.
- Let it dry completely before you handle the fabric much.
- Work in a place with fresh air because of the smell.
Using Sticky Stuff to Hold Edges
Another way is to use adhesives. These are glues or tapes that stick fabric layers together. This covers the cut edge and keeps it safe from fraying. This creates bonded fabric edges.
Types of Fabric Adhesives
You can use liquid glues or iron-on materials.
h4: Deciphering Fabric Glues
Fabric glue is a type of textile adhesive. It is made to stick fabric to fabric. It is different from regular glue. It usually stays flexible when dry. It can often be washed. Some fabric glues can be used to fold an edge over and glue it down, making a neat, non-fraying hem. This is a great no-sew fabric finishing method.
-
How to Use Fabric Glue for Hems:
- Cut your fabric edge.
- Fold the edge over once (e.g., 1/4 inch).
- Fold it over one more time (e.g., another 1/2 inch). This hides the raw edge inside the fold.
- Put a thin line of fabric glue in the fold.
- Press the folded edge down firmly.
- Let the glue dry completely based on the product directions.
-
Pros of Fabric Glue:
- Creates a clean, finished edge like a sewn hem.
- Usually stays soft.
- Good for hemming clothing items quickly.
- Can be strong enough for washing.
-
Cons of Fabric Glue:
- Can be messy if you use too much.
- Takes time to dry.
- Might not hold up as well as sewing over many washes, depending on the glue.
- Needs careful folding to hide the edge well.
-
When to Use Fabric Glue:
- Quickly hemming pants or skirts.
- Creating simple placemats or table runners.
- Adding trims or appliques without sewing.
- Craft projects where you want a soft edge.
h4: Exploring Iron-On Materials
Iron-on materials use heat to create a bond. They often involve a thin layer of adhesive or a web of sticky fibers that melts when heated with an iron. This sticks two pieces of fabric together.
h5: What is Iron-On Hemming Tape?
Iron-on hemming tape is a common product for creating no-sew hems. It’s usually a strip of material with adhesive on both sides. You place it between the folded edge of your fabric and the main fabric body. Then you press it with a hot iron. The heat melts the adhesive. This sticks the fold down firmly. This makes a neat, finished edge with bonded fabric edges.
-
How to Use Iron-On Hemming Tape:
- Cut your fabric edge.
- Fold the edge over once (e.g., 1/4 inch) and press it with an iron to make a crisp fold.
- Fold it over a second time to the desired hem width (e.g., 1/2 inch to 1 inch). Press this fold too. The raw edge is now hidden inside this double fold.
- Open up the second fold. Place the iron-on hemming tape along the edge of the first fold.
- Fold the hem back down over the tape.
- Press firmly with a hot iron according to the tape’s instructions. Hold the iron in place for the time given (e.g., 10-15 seconds).
- Let the hem cool completely before moving it.
-
Pros of Iron-On Hemming Tape:
- Creates a clean and strong hem.
- Faster than sewing for long hems.
- No sewing skills needed.
- Washes well if applied correctly.
-
Cons of Iron-On Hemming Tape:
- Can sometimes come undone after many washes or if not applied correctly.
- Can make the hem feel a bit stiff or thick.
- Requires an iron and ironing board.
- Less flexible than a sewn hem.
-
When to Use Iron-On Hemming Tape:
- Hemming curtains or drapes.
- Quickly adjusting the length of pants or skirts.
- Craft projects like banners or table cloths.
- Repairing a hem that has come undone.
h5: What is Fusible Web?
Fusible web is similar to hemming tape but often comes as a sheet or a wider roll. It’s a thin web of adhesive fibers. Like hemming tape, you place it between two layers of fabric. Heat from an iron melts the web, sticking the fabrics together. It’s great for larger areas or applique. You can also use it to create a faced edge without sewing.
-
How to Use Fusible Web for an Edge:
- Cut your fabric.
- Cut a strip of fusible web slightly narrower than your desired finished edge width.
- Place the fusible web on the wrong side of the fabric along the edge.
- Fold the fabric edge over the web, or place another piece of fabric over the web (like for a facing).
- Press with a hot iron according to the fusible web instructions. The web will melt, bonding the layers.
-
Pros of Fusible Web:
- Versatile for different uses (hems, applique, bonding layers).
- Creates a strong bond.
- Comes in different weights for different fabrics.
-
Cons of Fusible Web:
- Can add stiffness to the fabric.
- Might need careful cutting to avoid it showing.
- Requires heat and ironing.
-
When to Use Fusible Web:
- Applying appliques without sewing.
- Making patch pockets without stitching.
- Bonding fabric pieces together for structure.
- Creating simple fabric edges that won’t be heavily washed.
Using Fabric Adhesive Sprays or Sheets
Some adhesives come as sprays or sticky sheets. These are often used for temporary placement or for bonding larger areas for crafts. While they can help stop fraying by sticking layers together, they might not be as durable for edge finishing as liquid sealants or iron-on tapes, especially after washing.
Using Special Scissors
Sometimes, you don’t add anything to the fabric. You change the cut edge itself.
Interpreting Pinking Shears
Pinking shears are scissors with a zig-zag cutting edge. When you cut fabric with pinking shears, you don’t get a straight edge. You get a wavy, zig-zag line. This zig-zag shape helps reduce fraying.
-
How Pinking Shears Stop Fraying:
- When you cut straight, the threads that run along the edge are long and easy to pull.
- When you cut with pinking shears, each little point of the zig-zag creates a very short section of edge.
- The threads are now cut into many very short pieces.
- Short threads have less chance to unravel over a long distance. They are less likely to pull out of the weave.
-
How to Use Pinking Shears:
- Lay your fabric flat.
- Cut along the edge using the pinking shears. Make sure you cut cleanly.
- That’s it! The edge now has a finished look that resists fraying more than a straight cut.
-
Pros of Pinking Shears:
- Very fast and simple.
- No added products needed.
- Keeps the fabric soft and flexible.
- Works instantly.
-
Cons of Pinking Shears:
- Does not stop fraying completely, especially on fabrics that fray a lot or after heavy washing.
- The zig-zag edge might not be the look you want for all projects.
- Works best on fabrics that don’t fray too much naturally.
-
When to Use Pinking Shears:
- Finishing seam allowances inside garments (where the edge is hidden).
- Edges of simple craft items like banners or felt shapes (felt doesn’t fray, but it adds a decorative edge).
- Fabrics that don’t fray much, like some linens or stable cottons.
- Quick finishes where a little fraying is acceptable.
Combining Methods
You can also combine methods for better results. For example, you could cut an edge with pinking shears and then apply a thin line of fabric edge sealant like Fray Check to the points of the zig-zag. This adds extra protection.
Another combination is to use fusible web or iron-on hemming tape to fold and bond the edge, and then add a tiny bit of liquid seam sealant to the very corners of the hem for extra strength.
Choosing the Right Method
The best way to stop fraying depends on several things:
- Your Fabric: Does it fray a lot or a little? Is it thick or thin? What is it made of? (Cotton, silk, polyester, etc.)
- Your Project: Is it clothing that will be washed often? Is it a wall hanging? Is it a small craft item?
- The Edge: Is it a straight edge, a curve, or a corner? Is it a raw edge you want to hide or one that will show?
- How you want it to look: Do you want a clean, straight edge? A soft, flexible edge? A slightly stiff edge? A decorative zig-zag edge?
- How strong does it need to be? Will it get pulled or washed a lot?
- How fast do you need to finish it? Some methods are quicker than others.
h4: Fabric Types and Fraying
Here’s a simple guide on how some common fabrics might work with no-sew methods:
| Fabric Type | How Much it Frays | Best No-Sew Methods (Often) | Notes |
|---|---|---|---|
| Cotton (Quilting) | Medium to High | Sealants, Iron-on Tape, Fabric Glue | Frays easily, methods work well. |
| Linen | High | Sealants, Fabric Glue | Can fray a lot, need strong methods. |
| Silk | Very High | Sealants (test first!), careful folding | Frays very easily, can stain with liquids. |
| Polyester (Woven) | Medium | Sealants, Iron-on Tape | Varies, test methods on scraps. |
| Rayon | High | Sealants, careful folding | Can be delicate, test carefully. |
| Felt | None | Pinking Shears (for look), No finishing | Doesn’t fray, just needs cutting. |
| Fleece | Very Low / None | No finishing needed, Pinking Shears | Doesn’t fray, quick cuts are often fine. |
| Knit Fabrics | Very Low (Rolls) | Sealants (stops rolling) | Doesn’t fray like woven, might curl/run. |
This table is a general guide. Always test on a scrap piece of your specific fabric before putting any product on your project.
Step-by-Step Guide: Using a Liquid Sealant
Let’s walk through using a liquid like Fray Check or other liquid seam sealant.
h5: Getting Ready
- Get your supplies: Fabric edge sealant, fabric item, scrap fabric for testing, maybe paper towels or a cloth.
- Work area: Find a flat surface. Protect it with something you don’t mind getting messy, like newspaper or an old cloth. Make sure the area has good air flow.
- Read instructions: Read the instructions on the sealant bottle. Different products might have slightly different steps or drying times.
h5: The Steps
- Cut the edge: Make a clean, straight cut on the fabric edge you want to seal.
- Test first: Find a small piece of the same fabric you are using. Cut an edge on the scrap. Put a tiny bit of the sealant on this scrap edge. Let it dry fully. Check how it looks (is it visible?), how it feels (is it stiff?), and if it stops the fraying. This step is very important!
- Apply the sealant: If the test was good, lay your fabric item flat. Carefully put a thin line of the liquid sealant right on the cut edge.
- Spread evenly: Use the tip of the bottle or a small tool (like a toothpick or craft stick) to gently spread the liquid along the very edge. Don’t let it soak too far into the fabric away from the edge.
- Use just enough: Don’t use too much. A little bit goes a long way. Too much can make the edge too hard or noticeable.
- Let it dry: Lay the fabric flat in a safe spot. Let the sealant dry completely. This takes time, maybe 2 to 4 hours or more, depending on the product and how much you used. Check the bottle for drying times.
- Check the edge: Once it’s dry, gently feel the edge. It should feel slightly stiff but not hard like a rock. The threads should be held in place.
Step-by-Step Guide: Using Iron-On Hemming Tape
Here are the steps for creating a hem using heat and adhesive tape. This is a great no-sew fabric finishing method for straight edges.
h5: Getting Ready
- Get your supplies: Fabric item, iron-on hemming tape, iron, ironing board, ruler or measuring tape, scissors, pins (optional).
- Work area: Set up your ironing board.
- Check your iron: Make sure your iron works and you know how to set the heat. Check the hemming tape package for the right heat setting for your fabric.
h5: The Steps
- Cut the edge: Make a clean, straight cut. Decide how wide you want your finished hem to be. Add about 1/2 inch to 1 inch to this amount for the folds. For example, for a 1-inch finished hem, you need about 1.5 to 2 inches of extra fabric at the edge.
- First fold: Fold the raw edge over by about 1/4 to 1/2 inch towards the wrong side of the fabric. Press this fold with the iron. This hides the raw edge inside the hem.
- Second fold: Fold the edge over again, this time by the amount you want for your finished hem width (e.g., 1 inch). Press this second fold. The raw edge is now tucked inside this double fold.
- Measure and check: Use your ruler to make sure the folded hem is the same width all the way across. Press it well so the folds are crisp.
- Place the tape: Open up the second fold you just made. Place the iron-on hemming tape along the edge of the first fold (the one with the raw edge tucked under). Place the tape on the wrong side of the fabric. Make sure the tape is inside the hem area you folded.
- Fold again: Fold the hem back down along the second fold line you made earlier. The tape is now between the two layers of fabric in your hem. Pin in place if needed to keep it straight.
- Iron the hem: Press the hem with the hot iron. Important: Do not slide the iron. Lift the iron and press down firmly on each section of the hem. Hold the iron in place for the amount of time listed on the hemming tape package (e.g., 10-15 seconds). Make sure to press the whole hem, overlapping your presses slightly.
- Let it cool: Leave the fabric item flat and let the hem cool down completely. The bond gets stronger as it cools. Do not touch or move the hem until it is cool.
- Check the hem: Gently lift the fabric to see if the hem is fully stuck down. If there are any spots that didn’t stick, press that area again with the iron.
This process creates strong, bonded fabric edges without any sewing.
Step-by-Step Guide: Using Fabric Glue for a Simple Hem
Here’s how to use fabric glue (a type of textile adhesive) to make a simple, no-sew hem.
h5: Getting Ready
- Get your supplies: Fabric item, fabric glue, scrap fabric for testing, ruler, scissors, pins (optional), maybe some clips (like binder clips or clothespins) to hold the fabric.
- Work area: Find a flat surface. Protect it from glue spills.
h5: The Steps
- Cut the edge: Make a clean, straight cut. Decide how wide you want the finished hem. Add fabric for a double fold hem, like with iron-on tape (about 1.5 to 2 times the finished hem width).
- First fold: Fold the raw edge over by about 1/4 to 1/2 inch to the wrong side. Press it lightly with an iron or just finger-press it to make a line.
- Second fold: Fold the edge over again to the width of your finished hem. Press this fold too. The raw edge is now tucked inside.
- Test first: Take a scrap of your fabric. Fold an edge like you did in steps 2 and 3. Put a small line of glue inside the fold. Press and let it dry. Check how it looks and feels when dry. Does the glue show through? Is it too stiff?
- Apply the glue: If the test is good, open up the second fold of your hem on your main fabric item. Apply a thin, even line of fabric glue along the edge of the first fold (the one with the raw edge). Do a small section at a time so the glue doesn’t dry before you press it.
- Press the hem: Fold the hem back down along the second fold line. Press firmly along the glued area. You can use your fingers, or use clips or pins to hold the hem in place while the glue dries.
- Wipe away extra: If any glue squeezes out, quickly wipe it away with a damp cloth before it dries.
- Let it dry: Lay the fabric flat and let the glue dry completely. Drying times vary by product, but it often takes several hours, maybe even 24 hours for a strong bond. Read the glue bottle!
- Check the hem: Once dry, remove any clips or pins. Check that the hem is securely glued down.
This method creates a soft, flexible, bonded fabric edge suitable for many uses.
Using Pinking Shears
This is the simplest method.
h5: Getting Ready
- Get your supplies: Fabric item, pinking shears.
- Work area: A flat surface to cut on.
h5: The Steps
- Lay fabric flat: Put your fabric item on a flat surface.
- Cut with pinking shears: Simply cut along the edge where you want to stop fraying. Cut smoothly. The scissors will create the zig-zag edge.
- Done! The edge is now less likely to fray than a straight cut.
Remember, pinking shears reduce fraying, but don’t completely stop it, especially on fabrics that fray a lot. They are best used when a little fraying is okay or the edge is hidden.
Important Tips for No-Sew Finishing
- Always Test: This was mentioned before, but it’s worth saying again. Always test any product on a small, hidden area or a scrap of the same fabric first. This lets you see how the product changes the fabric’s look, feel, and color when dry. It helps you avoid mistakes on your main project.
- Use Sparingly: Whether it’s liquid sealant, glue, or iron-on tape, use only the amount needed. Too much can make the fabric stiff, visible, or even messy.
- Clean Edges: Start with a clean, smooth cut. Ragged cuts are harder to seal or hem neatly.
- Pressing Helps: For iron-on methods, pressing with the correct heat and time is key to a strong bond. For glued hems, pressing the folds first helps create a crisp line to follow.
- Follow Instructions: Always read and follow the specific instructions on the product packaging. Drying times, heat settings, and application methods can differ between brands.
- Consider Washing: Think about how the item will be used and washed. Some no-sew finishes are more durable in the wash than others. Liquid sealants might hold up well, while some glues or tapes might weaken over many washes.
- Fabric Weight: Consider your fabric’s weight. Thick fabrics might need more adhesive or might be harder to fold for hemming. Very thin fabrics might show liquid sealants or glues more easily.
Are No-Sew Finishes as Good as Sewing?
For stopping fraying, no-sew methods can be very effective. Fabric edge sealants and liquid seam sealants create a strong barrier against unraveling threads, sometimes even better than a simple sewn edge (like a zig-zag stitch) on some fabrics.
For creating a finished edge like a hem, iron-on hemming tape and fabric glue can look very neat. However, a sewn hem is generally considered more durable over the long term, especially for clothing that is washed often and handled roughly. Sewing creates a flexible stitch that moves with the fabric, while adhesives create a more rigid bond.
Pinking shears are the least effective at stopping fraying completely, but they are the fastest and keep the fabric most flexible.
For many craft projects, temporary fixes, or areas that won’t see heavy use or washing, no-sew methods are perfect! They are easy, quick, and do the job well. For durable clothing construction, sewing is usually the preferred method for hems and seams, but no-sew options are great for finishing raw edges inside seams or for quick repairs.
Creating bonded fabric edges with adhesives offers a clean look similar to sewing, making them a popular choice for visible hems. No-sew fabric finishing gives you many choices beyond the sewing machine.
Frequently Asked Questions (FAQ)
h4: What is the best product to stop fabric from fraying without sewing?
There isn’t one “best” product for everyone. It depends on your fabric and project.
* For sealing a raw edge that will show or is small (like a buttonhole), Fray Check or a similar liquid seam sealant is often best.
* For creating a neat, flat hem on straight edges, iron-on hemming tape or fabric glue are great choices.
* For a quick edge finish that stays soft, pinking shears work on some fabrics.
Testing on scrap fabric is always the best way to find out what works for your specific need.
h4: Will these methods work on all types of fabric?
Most no-sew methods work well on many woven fabrics like cotton, linen blends, and some synthetics. However, results can vary greatly.
* Very sheer or delicate fabrics (like fine silk) might show sealants or glues easily.
* Thick or heavy fabrics might need a stronger adhesive or longer pressing time for iron-on tape.
* Fabrics that fray very heavily might still show some slight fraying even with a sealant.
Fabrics like felt, fleece, or stable knits often don’t need fray prevention as much as woven fabrics. Always test first!
h4: Can I wash fabric after using no-sew fray stop methods?
Most quality fabric edge sealants, fabric glues, and iron-on hemming tape are designed to be washable. However, the durability can depend on the specific product, how it was applied, the fabric type, and how the item is washed (gentle cycle, cold water, air drying is usually best). Pinking shears don’t add anything, so washing just depends on the fabric itself. Check the product label for washing instructions and durability claims.
h4: Do no-sew finishes make the fabric stiff?
Some methods can add stiffness. Liquid seam sealants like Fray Check can make the very edge slightly stiff, especially if too much is used or on thin fabrics. Iron-on hemming tape and fusible web also add a layer that can make the bonded area feel stiffer or thicker than the rest of the fabric. Fabric glue can range from very flexible to slightly stiff depending on the type. Pinking shears add no stiffness.
h4: Can I use regular glue instead of fabric glue?
No, it is usually not a good idea to use regular craft glue or paper glue on fabric. These glues often dry hard and brittle. They can crack when the fabric moves. They are also usually not washable. Fabric glue and textile adhesive are made to stay flexible and withstand washing and bending.
h4: Are these methods permanent?
They are generally considered permanent for craft use or light wear. For items that get heavy use, stretching, or frequent washing, a sewn finish is often more durable over many years. Adhesives can sometimes loosen over time or with repeated stress. Sealants can sometimes wear away slightly at the very edge. For long-term durability on clothing, sewing is typically preferred, but no-sew methods are excellent for many other uses and quick fixes.