
Image Source: i.ytimg.com
Step-by-Step: How To Thread A Simple Singer Sewing Machine
Can you thread a Singer sewing machine easily? Yes, absolutely! Threading a Singer sewing machine is a fundamental skill for any beginner sewing enthusiast. This guide will walk you through the process of threading your simple Singer sewing machine, covering both the upper thread and the bobbin, so you can start creating!
Why Proper Threading Matters
Getting your Singer sewing machine threaded correctly is the first and most crucial step before you can start sewing. If the upper thread and lower thread aren’t in the right place, you’ll likely encounter problems like skipped stitches, thread breakage, or uneven stitching. It’s all about how the stitch formation works, and that relies on both threads working together perfectly. This guide will help you master threading a sewing machine for smooth and successful sewing projects.
Getting to Know Your Singer Sewing Machine Parts
Before you begin manual threading, it’s helpful to familiarize yourself with the main sewing machine parts involved in the threading process. While specific names might vary slightly between models, the core components are generally the same.
Key Components for Threading:
- Spool Pin: This is where you place your spool of thread.
- Thread Guide: A series of hooks and loops that guide the thread from the spool to the needle.
- Tension Discs: These discs control how tightly the thread is pulled.
- Take-Up Lever: This lever moves up and down, pulling the thread through the machine.
- Needle Clamp Screw: This holds the sewing machine needle in place.
- Presser Foot: This holds the fabric down while you sew.
- Bobbin Winder: Used to wind thread onto the sewing machine bobbin.
- Bobbin Case: Holds the wound sewing machine bobbin.
Threading the Upper Thread: A Clear Path
Threading a sewing machine correctly starts with guiding the upper thread from the spool to the sewing machine needle. Follow these steps carefully.
Step 1: Prepare Your Spool
- Place the spool of thread onto the spool pin. Ensure it’s facing the correct direction as indicated in your machine’s manual. Some machines have horizontal spool pins, while others have vertical ones.
- Secure the spool with a spool cap if your machine provides one. This helps prevent the thread from unraveling too quickly.
Step 2: Guide the Thread Through the Guides
- Bring the thread towards the front of the machine.
- Locate the first thread guide, usually a small hook or eyelet near the spool pin. Pass the thread through it.
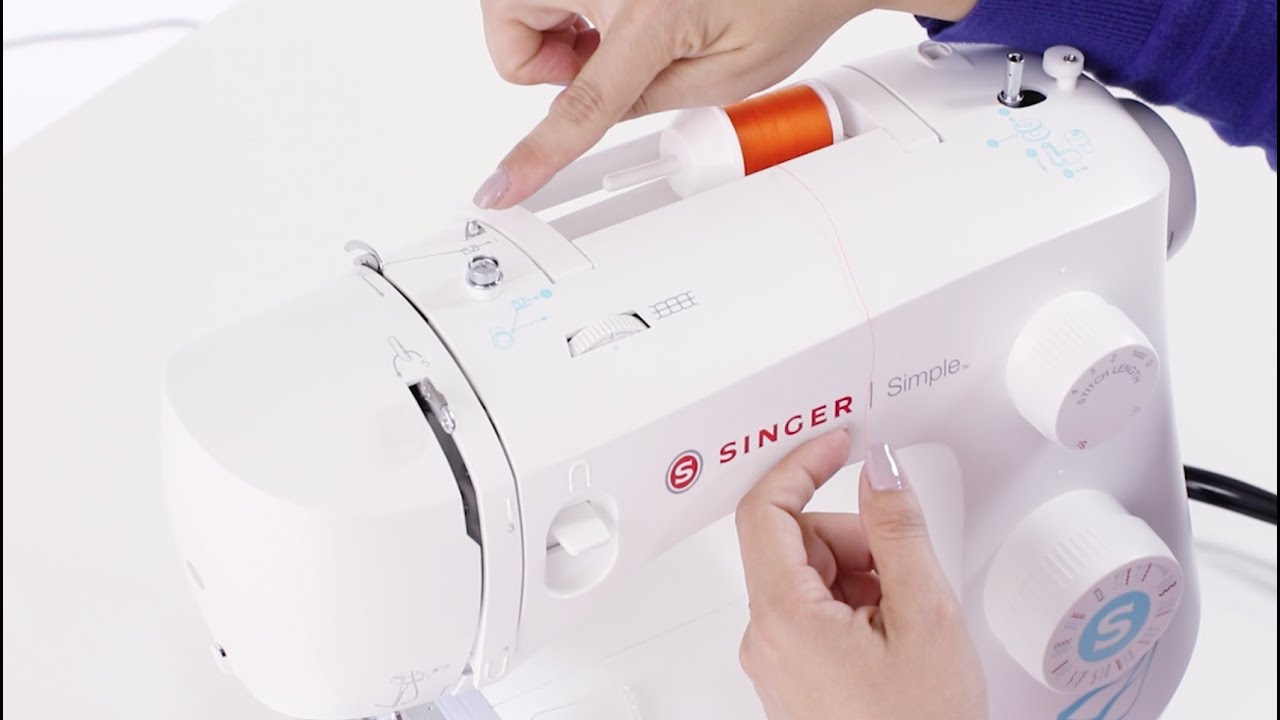
- Follow the numbered path indicated on your Singer sewing machine. Most machines have numbers printed directly on the casing to show the thread’s route. These numbers are your best friends for manual threading.
- Pass the thread down through the tension discs. This is often a U-shaped slot or two metal plates. Make sure the thread is firmly seated between these discs.
- Guide the thread upwards to the take-up lever.
- Thread the take-up lever through the eyelet on the lever. It’s crucial that the thread goes through the eyelet, not around it.
- Continue guiding the thread downwards, following the path.
- Pass through any additional thread guides or tension slots as indicated by the numbers.
Step 3: Threading the Needle
- Bring the thread down to the needle.
- Position the thread so it goes through the eye of the sewing machine needle. For most Singer machines, the needle should be in its highest position.
- Thread the needle from front to back or back to front, depending on your machine’s design. Check your machine’s manual for the specific direction. For many simple Singer machines, you’ll thread the needle from the front.
- Pull a few inches of thread through the needle’s eye. This extra thread will be used to create the stitch.
Tip: If you find it difficult to thread the needle, use a needle threader if your machine has one. Otherwise, snip the end of the thread at an angle with sharp scissors to create a firmer point, or moisten the thread end slightly.
Winding the Bobbin: The Lower Thread Foundation
The sewing machine bobbin holds the lower thread, which works with the upper thread to create a stitch. Proper bobbin winding is essential.
Step 1: Prepare the Bobbin and Thread
- Place a new spool of thread on the spool pin (you might need to use a second spool pin or a horizontal shaft depending on your machine).
- Find the bobbin winder spindle. This is often a separate small spindle, sometimes with a spring-loaded top.
- Place an empty bobbin onto the bobbin winder spindle. Push it firmly until it clicks or is held securely.
- Guide the thread from the spool to the bobbin.
Step 2: Start the Winding Process
- Take the end of the thread from your spool and guide it through the bobbin winder’s tension guide (this is often a small metal disc or slit).
- Insert the thread tail into one of the holes in the bobbin.
- Hold onto the thread tail that you just inserted into the bobbin.
- Push the bobbin winder spindle towards the flywheel (the large wheel on the side of the machine). This engages the bobbin winder.
- Hold the thread tail securely and sew a few stitches by turning the handwheel towards you. This anchors the thread to the bobbin.
- Trim the excess thread tail close to the bobbin surface.
- Begin winding by turning the handwheel towards you. The machine will start winding thread onto the bobbin.
Step 3: Ensuring Even Winding
- Keep an eye on the bobbin as it winds. Guide the thread back and forth across the bobbin to ensure even winding. Some machines have a thread guide that moves automatically; if yours doesn’t, use your finger gently to guide the thread.
- Stop winding when the bobbin is full. It should be full, but not overflowing, to prevent issues when sewing. Most machines will stop automatically or become harder to turn when the bobbin is full.
- Disengage the bobbin winder by pushing the spindle back away from the flywheel.
- Remove the wound bobbin. Cut the thread from the spool.
Important Note: Always use the correct type of bobbin for your Singer sewing machine. Using the wrong bobbin can damage your machine and affect stitch formation.
Inserting the Bobbin: Setting Up the Lower Thread
Now that your bobbin is wound, it needs to be placed correctly in the bobbin case to provide the lower thread.
Step 1: Locating the Bobbin Area
- Lift the presser foot.
- Open the bobbin cover. This is usually a flap on the front or bottom of the machine.
- Remove the bobbin case if your machine has a removable bobbin case. Many simple Singer machines have a drop-in bobbin system where the bobbin is inserted directly into the machine without a separate case.
Step 2: Inserting the Bobbin (Drop-in System)
- Place the wound bobbin into the bobbin holder.
- Ensure the thread is coming off the bobbin in the correct direction. For most drop-in systems, the thread should unwind counter-clockwise. Look for an arrow on the bobbin case or the machine showing the correct path.
- Pull the thread up through the slot in the bobbin case. There’s usually a small cut-out or notch to guide the thread.
- Leave a few inches of thread hanging.
Step 3: Inserting the Bobbin (Removable Bobbin Case System)
- Take the wound bobbin and place it into the bobbin case.
- Make sure the thread is unwinding in the correct direction. For most machines, this is counter-clockwise, with the thread coming off the front of the bobbin.
- Pull the thread through the small slot at the front of the bobbin case.
- Leave a few inches of thread hanging.
- Insert the bobbin case back into the machine. It usually only fits one way, so don’t force it. There’s often a small hook or latch that needs to catch the bobbin case.
Bringing Up the Bobbin Thread: Completing the Circuit
This step connects the upper thread and the lower thread, allowing for proper stitch formation.
- Hold the tail of the upper thread loosely with one hand.
- Use the handwheel to turn the sewing machine needle downwards into the fabric (or where the fabric would be).
- As the needle goes down and then starts to come back up, you will see a loop of the bobbin thread appear.
- Catch this loop of bobbin thread with your fingers or tweezers.
- Pull the loop of bobbin thread up through the hole in the needle plate.
- Pull about 4-6 inches of bobbin thread through.
- Remove the bobbin case (if applicable) and place the bobbin back inside, ensuring the thread is seated correctly in any guides.
- Now you should have both the upper thread and the lower thread tails hanging from the needle area.
Final Checks and Getting Ready to Sew
Before you start sewing, a few final checks will ensure everything is ready.
Securing the Threads
- Place both thread tails (upper and lower) under the presser foot and towards the back of the machine.
- Lower the presser foot.
Testing Your Threading
- Manually sew a few stitches by turning the handwheel towards you.
- Check the stitches on a scrap piece of fabric. The stitches should look consistent on both the top and the bottom. If you see loops on the top, the upper thread tension might be too loose. If you see loops on the bottom, the bobbin tension might be too loose, or the upper thread tension might be too tight.
Troubleshooting Common Threading Issues
Even with careful manual threading, you might encounter some common problems. Here are solutions for the most frequent issues:
| Problem | Possible Cause | Solution |
|---|---|---|
| Thread breaks frequently | Lint in tension discs, needle is bent or blunt, incorrect needle size, thread snagged. | Clean tension discs, replace the needle, ensure correct needle size for fabric and thread, check spool for snags. |
| Skipped stitches | Needle inserted incorrectly, needle is bent, wrong needle for fabric, machine needs oiling. | Re-insert the needle correctly, replace the needle, use the appropriate needle type, oil your machine according to the manual. |
| Thread bunching under fabric | Bobbin not threaded correctly, upper thread tension too loose, or bobbin tension too tight. | Re-thread the bobbin and bobbin case/holder, adjust upper thread tension (tighten), or adjust bobbin tension (loosen). |
| Thread bunching on top of fabric | Bobbin thread tension too loose, or upper thread tension too tight. | Re-thread the bobbin and bobbin case/holder, adjust bobbin tension (tighten), or adjust upper thread tension (loosen). |
| Uneven stitches (tight on one side) | Uneven bobbin winding, incorrect tension settings for both threads. | Rewind the bobbin evenly, adjust both upper and bobbin thread tensions incrementally until stitches are balanced. |
| Upper thread not pulling through needle | Thread not seated in tension discs, take-up lever not threaded, needle eye blocked. | Ensure thread is firmly between tension discs, re-thread the take-up lever, clean the needle eye. |
| Bobbin thread not coming up | Bobbin not inserted correctly, thread not caught in the bobbin case guide, machine not engaged. | Re-insert bobbin, ensure thread is in the bobbin case groove, ensure handwheel is turned correctly to bring up the loop. |
Frequently Asked Questions (FAQ)
Q1: Do I need to thread the machine every time I sew?
A1: Yes, you should thread the machine with the specific thread you intend to use for each new project or color change. It’s also a good practice to re-thread if you encounter persistent stitching problems.
Q2: What is the difference between threading the upper thread and the lower thread?
A2: The upper thread comes from the spool on top of the machine and goes through various guides to the needle. The lower thread comes from the bobbin, which is usually located beneath the needle plate, and is brought up to meet the upper thread for stitch formation.
Q3: Can I use any brand of thread with my Singer sewing machine?
A3: Generally, yes, but it’s best to use good quality sewing thread. Very cheap or old thread can be brittle and break easily. Also, ensure the thread weight is appropriate for your fabric and needle.
Q4: My Singer sewing machine is a different model. Will this guide still work?
A4: This guide covers the general principles of threading a simple Singer sewing machine. While specific paths for the thread might vary slightly between models, the core steps of guiding the thread through tension discs, the take-up lever, and the needle, as well as winding and inserting the bobbin, remain largely the same. Always refer to your specific Singer sewing machine manual for model-specific instructions.
Q5: How do I know if my bobbin is wound correctly?
A5: A correctly wound bobbin will have an even distribution of thread with no loose or tangled sections. It should be full but not overflowing, allowing the thread to unwind smoothly.
Q6: What does “tension” mean in sewing?
A6: Tension refers to how tightly the thread is pulled through the machine. Both the upper thread and the lower thread have tension settings. When balanced, they create a neat, interlocking stitch. Incorrect tension is a common cause of sewing problems.
By following these detailed steps, you’ll be well on your way to mastering threading a sewing machine and enjoying successful beginner sewing projects with your Singer sewing machine. Happy sewing!