
The best ways how to transfer an embroidery pattern on fabric depend on your fabric, your design, and your tools. Common embroidery pattern transfer methods include tracing, using special papers, using stabilizers that wash away, and using marking tools like pens and chalk. Picking the right method helps your stitching look neat and ensures your design stays put until you are done, then disappears cleanly if needed.
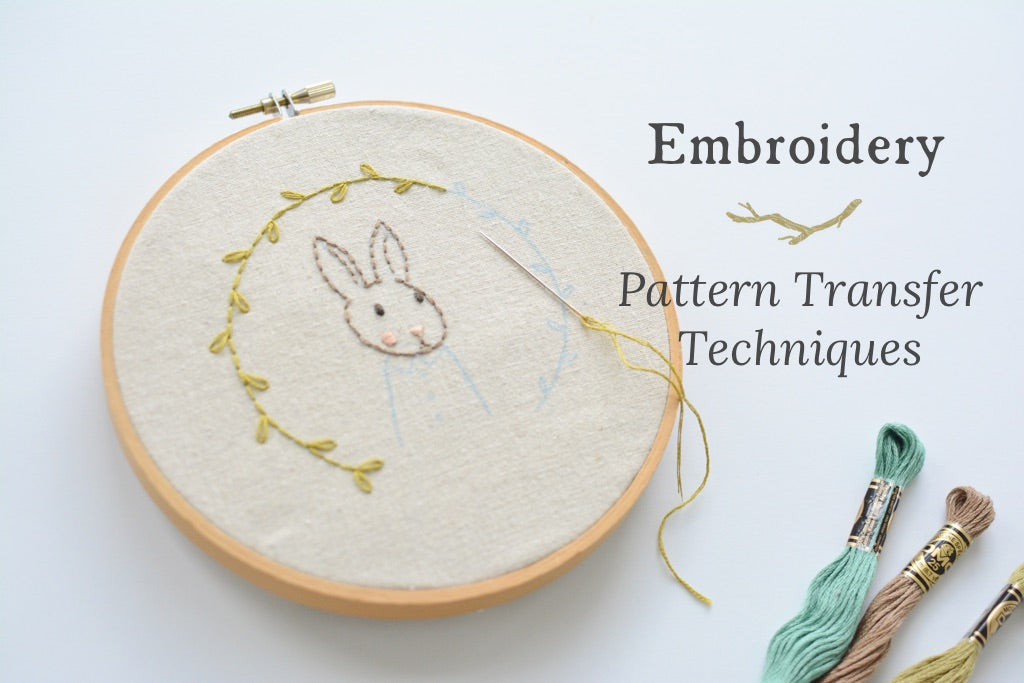
Image Source: www.twigandtale.com
Exploring Transfer Methods
There are many ways to get your lovely design onto your fabric so you can stitch it. Each way works best for different kinds of fabric or different styles of patterns. Let’s look at some popular choices.
Tracing Your Design
Tracing is a simple way to move a picture from paper onto fabric. You need the pattern printed on paper and something to help you see it through the fabric.
Using Light to Trace
This method works well for fabrics that are light in color and not too thick.
How it works:
* Get your pattern ready. Print it clearly.
* Put your fabric over the pattern paper. Make sure the fabric is smooth and flat.
* Place both the fabric and the pattern on a light source. This could be a window during the day or a special light box for tracing fabric. The light shines through the fabric, showing you the lines of your pattern underneath.
* Use a special fabric marking pen or pencil to draw the lines of the pattern onto the fabric.
* Trace carefully! Go over each line of your design.
Tools you need:
* Your pattern printed on paper.
* Your fabric.
* A light source (window or light box).
* A fabric marking tool (pen or pencil that washes away).
Why it’s good:
* It’s simple and does not need many special things.
* It’s good for detailed patterns on light fabrics.
* You can use any pattern you print out.
Things to watch out for:
* It’s hard to see the lines on dark or thick fabrics.
* The lines might smudge if you touch them before stitching.
* Make sure your marking tool comes off the fabric easily.
Using Transfer Paper
Special transfer paper, sometimes called carbon paper fabric transfer, helps you put a design onto fabric without needing a light source. It uses a colored layer to leave marks.
How it works:
* You need special paper made for transferring designs to fabric. It looks like carbon paper but is designed for fabric and usually washes away.
* Put your fabric down flat.
* Put the transfer paper on top of the fabric. Make sure the colored side of the paper is facing down onto the fabric.
* Put your pattern paper on top of the transfer paper.
* Use a pen or pencil with a hard tip, or a tool called a tracing stylus. Trace over all the lines of your pattern. Press down firmly enough to make the color from the transfer paper move onto your fabric.
* Lift the papers carefully. Your design should be on the fabric.
Tools you need:
* Your pattern printed on paper.
* Your fabric.
* Special fabric transfer paper (carbon paper style).
* A pen, pencil, or tracing stylus.
Why it’s good:
* It works well on dark fabrics where tracing with light is hard.
* It can give a clear line.
* It’s useful if you don’t have a light box or a sunny window.
Things to watch out for:
* The marks from the transfer paper can sometimes be hard to remove completely. Always test on a scrap of fabric first!
* It can be messy. The color can rub onto your fabric if you are not careful.
* It’s not great for very fine details. The lines can look a bit thick.
* You need to make sure you use fabric transfer paper, not regular carbon paper, which will not wash out.
Using tracing paper for embroidery can also be part of this. You might draw or trace your design onto tracing paper for embroidery first, then use that paper on top of the transfer paper on your fabric. This is good if your original pattern is on thick paper or in a book.
Transferring with Stabilizers
Stabilizers are materials you use with your fabric to make it easier to stitch. Some stabilizers are special because you can print your pattern right onto them. They stick to your fabric and wash away when you are done stitching. This is great for many fabric types and complex designs.
Using Water Soluble Stabilizer
Water soluble stabilizer embroidery uses a thin material that feels a bit like plastic film or paper. You print your design onto it.
How it works:
* Print your pattern directly onto the water soluble stabilizer embroidery material using a computer printer. Make sure you get the kind that works with your printer (inkjet or laser).
* Cut out the printed design.
* Place the stabilizer with the pattern on top of your fabric where you want the design to be.
* Hoop the fabric and the stabilizer together, or if it’s a sticky kind, just stick it to the fabric. The stabilizer acts like a guide and also helps support the fabric, especially stretchy ones.
* Stitch your design right over the lines printed on the stabilizer. Your needle goes through both the stabilizer and the fabric.
* Once you are finished stitching, cut away any extra stabilizer from around your design.
* Rinse the stitched area under water. The stabilizer will dissolve and wash away completely, leaving only your stitches on the fabric.
Tools you need:
* Your design on a computer.
* A printer.
* Water soluble stabilizer embroidery sheets that work with your printer.
* Scissors.
* Your fabric.
* Embroidery hoop (optional, but helpful).
Why it’s good:
* Excellent for dark fabrics where tracing is impossible.
* Perfect for complex or very detailed patterns.
* Supports stretchy or thin fabrics while you stitch.
* Leaves no marks on the fabric when washed away.
* Easy to position the design exactly where you want it.
Things to watch out for:
* You must wash your piece after stitching to remove the stabilizer. Make sure your thread and fabric can handle washing.
* Some stabilizers are stickier than others. Make sure the sticky side goes against the fabric if it’s a stick-on type.
* Might feel a little strange stitching through two layers at first.
Trying Stick and Stitch Patterns
Stick and stitch embroidery patterns are a type of water soluble stabilizer. They come with an adhesive back, like a sticker. This makes them super easy to use. Sometimes you can buy these with patterns already printed on them. Other times, you print your own pattern onto special sticker-like water soluble stabilizer embroidery sheets.
How it works:
* Get your stick and stitch embroidery patterns. This could be a pack of pre-printed designs or sheets you print yourself.
* If printing yourself, print your pattern onto the special stick-and-stitch sheet.
* Cut out the pattern following the edge.
* Peel off the backing paper from the sticker sheet.
* Carefully stick the design onto your fabric where you want it. Press it down smoothly.
* The sticker acts as your pattern guide and stabilizer. Stitch directly over the lines and shapes on the sticker.
* When your stitching is done, trim away any large bits of the sticker that are not stitched through.
* Soak or rinse the fabric in water. The sticker will dissolve completely, leaving only your stitches.
Tools you need:
* Stick and stitch embroidery patterns (pre-printed or printable sheets).
* Printer (if printing your own).
* Scissors.
* Your fabric.
Why it’s good:
* Incredibly easy to use – just peel and stick!
* Great for tricky fabrics or places that are hard to hoop.
* Holds the fabric steady while you stitch.
* Perfect for intricate designs.
* Washes away cleanly.
Things to watch out for:
* Make sure your fabric and thread can be washed.
* Can be a bit more expensive than plain water soluble stabilizer embroidery.
* Sometimes the adhesive can be very strong, so make sure it’s positioned correctly before pressing down hard.
Marking Directly on Fabric
Sometimes the simplest way is just to draw the pattern right onto the fabric using special marking tools.
Using Pens and Pencils
There are pens and pencils made just for marking fabric for embroidery. They come in different types based on how the mark goes away.
Types of pens/pencils:
* Heat erasable pen fabric (like Frixion pens): These marks disappear when heat is applied, usually with an iron or even just rubbing quickly (friction creates heat).
* Air-erasable pens: The ink disappears on its own after a few hours or days, just from being in the air.
* Water-erasable pens: The ink disappears when you touch it with water.
* Fabric pencils: These are like colored pencils but made for fabric. The marks usually rub or wash away.
How it works:
* Place your fabric on a flat surface.
* Put your pattern underneath the fabric if it’s light enough to see through.
* Or, if using a darker fabric, you might use tracing paper first (drawing the pattern on tracing paper for embroidery), then placing the tracing paper on the fabric and tracing over it with the fabric pen/pencil.
* Carefully draw your design directly onto the fabric using the marking tool.
Tools you need:
* Your pattern.
* Your fabric.
* A fabric marking pen or pencil (heat, air, or water erasable).
* Maybe tracing paper for embroidery.
Why it’s good:
* Quick and easy for simple designs.
* Good for lighter fabrics.
* Pens offer fine tips for detail.
* Marks disappear, so you don’t see them in the finished piece.
Things to watch out for:
* Heat erasable pen fabric marks (like Frixion) can sometimes reappear if the fabric gets very cold, like in a freezer. Be careful if your embroidered item will be in a cold place.
* Always test the pen/pencil on a scrap of your fabric first! Make sure the mark disappears completely without leaving a shadow or damaging the fabric.
* Air-erasable pens might disappear before you finish stitching if you are slow.
* Water-erasable pens can smudge easily if your hands are damp.
* Pencils can be harder to sharpen to a fine point and might leave behind tiny bits.
Using Tailor’s Chalk
Tailor’s chalk fabric marking uses a solid piece of chalk, usually in a triangle shape or a pencil form, to draw lines on fabric.
How it works:
* Get your tailor’s chalk fabric marking tool. It comes in different colors, like white, blue, or pink. White is good for dark fabrics.
* Place your fabric flat.
* Either draw freehand if the pattern is simple, or place tracing paper for embroidery with your pattern on it over the fabric. Use a tracing wheel or the chalk pencil to go over the lines, transferring the chalk. Or, use carbon paper fabric transfer underneath your pattern and trace with a blunt tool to transfer the chalky line.
* Carefully draw the lines of your pattern onto the fabric with the chalk.
Tools you need:
* Your pattern.
* Your fabric.
* Tailor’s chalk fabric marking (block or pencil).
* Maybe tracing paper for embroidery or carbon paper fabric transfer and a tracing wheel/stylus.
Why it’s good:
* Works well on dark fabrics.
* Easy to brush off the marks when you are done.
* Chalk marks are usually temporary and don’t soak into the fabric like some inks.
Things to watch out for:
* Chalk lines can rub off easily while you are stitching, especially if you handle the fabric a lot. You might have to redraw parts.
* It’s harder to get very fine, detailed lines with chalk compared to a pen.
* Some chalk can be greasy and leave a slight mark, especially on delicate fabrics. Test first!
* Brushing off too hard can sometimes damage stitches or the fabric weave.
Using Iron-On Transfers
Iron on transfer patterns are designs that are printed with a special ink that moves onto the fabric when you press it with a hot iron. You can buy sheets of patterns like this, or you can make your own with special paper.
How it works:
* Get your iron on transfer patterns. If it’s a sheet you bought, you might cut out the part you want.
* Place the printed side of the transfer paper down onto your fabric where you want the design.
* Make sure your iron is hot (usually cotton setting, no steam).
* Press the iron firmly and evenly onto the back of the transfer paper for a short time (check the instructions for your specific transfer paper). Do not move the iron around like you are ironing clothes. Just press straight down.
* Lift the iron and carefully lift the paper. The design should have transferred onto your fabric.
Tools you need:
* Iron on transfer patterns (bought or printed yourself).
* Special iron-on transfer paper (if making your own).
* An iron.
* Your fabric.
Why it’s good:
* Very fast and easy way to get a design onto fabric.
* Good for repeating patterns.
* Can work on many fabric types (though testing is key).
Things to watch out for:
* The transferred line might fade or get less clear with handling or washing.
* The ink might not transfer perfectly, leaving patchy lines.
* It can be hard to remove the transferred line if you make a mistake or if you don’t stitch over it completely.
* The pattern is usually backwards on the paper so it comes out facing the right way on the fabric. Remember this if your design has words!
* Transfers can sometimes leave a slight residue on the fabric.
Other Embroidery Design Transfer Tools
Beyond the main methods, there are many helpful embroidery design transfer tools that make the job easier.
- Tracing Paper: Thin paper you can see through easily. Good for drawing your design first or for using with transfer paper. Helps keep your original pattern clean.
- Pounce Pads: A little bag filled with powder (chalk or charcoal). You put your pattern on the fabric, poke holes along the lines of the pattern, then pat the pounce pad over the holes. The powder goes through the holes and leaves dots on the fabric. You then connect the dots with a pen or pencil. Good for large patterns or textured fabric.
- Transfer Pens/Pencils (Permanent): Some pens are made for permanent transfer, often used for specific techniques where the line becomes part of the design. Be very careful not to use these by mistake if you want the line to disappear! Always read the packaging.
- Light Box: As mentioned before, an essential light box for tracing fabric makes seeing your pattern through fabric much easier, especially indoors or on cloudy days.
- Stylus: A tool with a blunt tip used for tracing over patterns when using carbon paper fabric transfer or some types of tracing paper. It helps make a clear line without tearing the paper.
Picking the Right Way
With so many choices, how do you know which embroidery pattern transfer methods are best for your project? Think about these things:
Think About Your Fabric
The fabric you are using makes a big difference.
- Color: Is it light or dark?
- Light fabrics: Tracing with light, pens, pencils, iron-on, and stabilizers all work. Tracing with light is often the easiest.
- Dark fabrics: Tracing with light won’t work well. You need carbon paper fabric transfer, tailor’s chalk fabric marking, or water soluble stabilizer embroidery (like stick and stitch). Stabilizers are often the cleanest option for dark fabrics.
- Thickness: Is it thin or thick?
- Thin fabrics: Easy to see through for tracing with light. May need a stabilizer to prevent puckering.
- Thick fabrics: Hard to see through for tracing with light. Carbon paper, chalk, or stabilizers are better.
- Texture: Is it smooth or bumpy?
- Smooth fabrics: Most methods work well.
- Textured fabrics: Tracing can be hard. Water soluble stabilizer embroidery or stick and stitch works very well because you stitch through the smooth surface of the stabilizer. Pounce pads can also be good.
- Stretch: Does it stretch?
- Stretchy fabrics: Stabilizers (especially stick-on ones like stick and stitch embroidery patterns) are the best because they hold the fabric still and flat while you stitch. Tracing lines can get distorted on stretchy fabric.
- Washability: Can the fabric be washed?
- If yes: You can use methods that require washing away marks or stabilizers (water soluble pens, water soluble stabilizer, stick and stitch).
- If no: You must use marks that disappear on their own (air erasable) or marks that can be brushed off gently (some chalk), or methods where you stitch through a guide that is later removed without water (less common, but some tear-away stabilizers could theoretically be traced on and then torn, though this is messy). Heat erasable pens can work if you can iron the finished piece, but remember the cold issue. For non-washable items, stick and stitch is often the safest as the residue is water soluble and can often be gently dabbed or rinsed only in the stitched area, but it’s risky. Chalk is the safest bet for truly non-washable items, despite its drawbacks.
Think About Your Design
The look and size of your pattern also helps you choose.
- Detail: Is the pattern simple lines or very detailed?
- Simple lines: Pens, pencils, chalk, or simple tracing work fine.
- Detailed/Complex: Water soluble stabilizer embroidery (printable or stick and stitch) is usually best for capturing fine lines and shapes accurately. Tracing with a fine-tip pen on a light box is also good if the fabric allows. Carbon paper can make fine lines blurry.
- Size: Is it small or large?
- Small designs: Most methods work. Pens and pencils are quick.
- Large designs: Carbon paper fabric transfer, iron on transfer patterns, or using a projector (another advanced method not detailed here but exists!) might be faster for large areas. Stick and stitch or large sheets of water soluble stabilizer also work.
Think About Your Thread Color
If you are using very light-colored thread (like white or pale yellow), any leftover transfer mark will show up easily.
- Use methods that disappear completely and easily, like water-erasable pens or water-soluble stabilizers.
- Test your chosen method carefully on a scrap with your thread color to make sure no ghost marks are left behind.
- Be extra careful with carbon paper fabric transfer or some chalk colors, as they can be stubborn.
Think About How Permanent You Want the Mark
Do you need the mark to stay until the last stitch, or is it okay if it fades a bit as you work?
- Marks that fade easily (air-erasable pens, some chalk) might frustrate you on a long project.
- Marks that stay put (water-erasable pens until washed, lines on water-soluble stabilizer, iron-on transfers) are better for long projects.
- Heat erasable pen fabric marks stay until heat is applied, which is good, but remember the cold risk.
Getting Ready
Before you start transferring your pattern, a little prep helps everything go smoothly.
Prepare Your Fabric
- Wash and Iron: For most fabrics, it’s a good idea to wash and iron them before transferring the pattern. This removes any sizing or finish that might keep the transfer method from sticking or washing away properly. It also pre-shrinks the fabric, so your design doesn’t get distorted after you stitch and wash it later.
- Cut to Size: Cut your fabric large enough for your design, plus plenty of extra room around the edges to fit in your hoop and handle easily.
Prepare Your Pattern
- Print Clearly: Make sure your pattern is printed or drawn clearly on paper.
- Size Check: Check the size of your printed pattern against your project space. Does it fit?
- Consider Tracing Paper: If your original pattern is precious or hard to work with, trace it onto simple tracing paper for embroidery first. This gives you a clean copy to use for transferring.
Fixing Problems
Sometimes things don’t go as planned. Here are solutions for common issues:
- The design won’t show up on the fabric:
- Is the fabric too dark or thick for tracing with light? Try carbon paper, chalk, or a stabilizer.
- Are you pressing hard enough with carbon paper or chalk? Try pressing a little firmer (but not so hard you tear the paper or fabric).
- Is your pen/pencil too light? Try a darker color or a different type of marking tool.
- Is the transfer paper or stabilizer correct for your printer? Check the instructions.
- The marks won’t disappear:
- Did you test the marking tool first? This is why testing on scrap fabric is so important!
- Did you use the right removal method (water, heat, brushing)? Try the correct method again, perhaps for longer.
- For carbon paper, sometimes dabbing gently with a damp cloth is better than rubbing.
- For heat erasable pens, ensure the iron is hot enough. If marks reappear in the cold, warming them slightly should make them vanish again.
- If marks are permanent, you might need to stitch over them completely or find a creative way to cover them.
- The fabric is shifting while I trace:
- Tape your fabric and pattern securely to the light box or table.
- Use a hoop or frame to hold the fabric taut if tracing by hand.
- The lines rubbed off while stitching:
- You used a marking tool that rubs off easily (like chalk or air-erasable pen) on a project that takes a long time or involves a lot of handling. Next time, use a method that stays put longer, like a water-erasable pen or a stabilizer.
- You can try to redraw the missing lines carefully.
- The fabric is stretchy or slippery:
- Use a stabilizer! Water soluble stabilizer embroidery or stick and stitch embroidery patterns are designed to help with tricky fabrics.
Helpful Hints
Here are some extra tips using various embroidery design transfer tools to help you get great results:
- Always Test: I can’t say this enough! Always test your chosen transfer method on a small scrap of the exact fabric you plan to use. Make sure the line shows up clearly and, more importantly, disappears completely the way it’s supposed to.
- Use Fine Tools: For detailed designs, use a marking tool with a fine tip (a fine fabric pen, a sharp tailor’s chalk pencil, or trace carefully with a fine stylus over carbon paper).
- Don’t Press Too Hard: When tracing with light or transfer paper, don’t press so hard you make marks that are hard to remove or damage the fabric fibers. Just enough pressure to make the line appear.
- Mark Lightly: Draw your lines as lightly as possible while still being able to see them. This makes them easier to remove later.
- Remove Marks Carefully: Follow the removal instructions for your specific tool. Don’t rub too hard, as this can damage your stitches or the fabric. Some marks need gentle dabbing or soaking.
- Stitch Over Marks Promptly: Don’t leave your transfer marks on the fabric for weeks or months, especially with pens. Some inks can become harder to remove over time.
- Consider Your Hoop: If your design is larger than your hoop, plan how you will transfer it in sections or use a method like stabilizer that doesn’t rely on seeing through the fabric inside a small hoop area.
Questions People Ask
Here are answers to some common questions about transferring embroidery patterns:
- Can I use a regular pen or pencil to transfer my design?
No! Regular pens and pencils use inks and lead that are permanent or very hard to remove from fabric. They will likely leave marks that you cannot get out, ruining your stitching project. Always use marking tools made specifically for fabric that are labeled as washable or erasable. - How do I remove the transfer marks when I’m done?
It depends on the method you used.- Water-erasable pens/pencils, water soluble stabilizer, stick and stitch: Use water. You might soak the area or rinse it under the tap.
- Heat erasable pens: Apply heat, usually by gently ironing the back of the fabric (test first!). Friction from rubbing can also work, but be careful not to damage stitches.
- Air-erasable pens: The marks disappear on their own with time.
- Tailor’s chalk: Brush gently with a soft brush or lint-free cloth. Some chalk also washes away.
- Carbon paper fabric transfer: Usually washes away with water, but some colors can be stubborn. Test!
- Is one transfer method best for beginners?
Tracing with light (if your fabric is suitable) is very simple and requires minimal special tools. Stick and stitch embroidery patterns are also very beginner-friendly because they are easy to place and stitch through, and they wash away cleanly. - Can I transfer a design printed from my computer?
Yes! You can trace a computer printout using light or carbon paper fabric transfer. You can also print directly onto special water soluble stabilizer embroidery sheets (including stick and stitch types) using your home printer. - How do I transfer a pattern from a book?
You can’t put the book page under the fabric. Instead, trace the pattern from the book page onto tracing paper for embroidery. Then, use that tracing paper copy to transfer the design onto your fabric using light, carbon paper fabric transfer, or by drawing over the tracing paper onto the fabric with a marking pen underneath (if the fabric is light). - What if my fabric is too dark or thick to see through?
You cannot use tracing with light. Your best options are carbon paper fabric transfer, tailor’s chalk fabric marking, or printing the design onto water soluble stabilizer embroidery (like stick and stitch) and stitching through that. Stabilizers are often preferred for detailed work on dark or thick fabrics. - Can I reuse an iron-on transfer pattern?
Usually, no. The special ink on iron on transfer patterns is meant to be used once. Once the heat transfers the ink to the fabric, there is usually not enough left on the paper to get a good second transfer. - Do I need special needles for tracing methods?
No, you use your regular embroidery needles. The transfer method just puts the lines on the fabric; you stitch with your standard tools. However, when using water soluble stabilizer embroidery, you are stitching through two layers (fabric plus stabilizer), which can feel a little different. A slightly sturdier needle might be helpful for very thick stabilizers, but often your regular needle is fine.
Getting your design onto fabric is a key first step in embroidery. By exploring the different embroidery pattern transfer methods and choosing the one that fits your fabric, design, and comfort level, you set yourself up for a fun and successful stitching project. Don’t be afraid to try a few methods on scrap fabric to see which one you like best. Happy stitching!