
What is a sewing pattern? A sewing pattern is a set of paper templates or instructions used to cut and assemble fabric pieces for a garment or project. Can I use a sewing pattern even if I’m a beginner? Absolutely! Sewing patterns are designed for all skill levels, with many beginner-friendly options available. Who is a sewing pattern for? Anyone who wants to create their own clothing, accessories, or home décor items from fabric!
Embarking on the journey of sewing your own creations can be incredibly rewarding. At the heart of every successful sewn project lies a well-chosen and expertly used sewing pattern. For many, the initial encounter with a sewing pattern can seem a bit daunting, filled with unfamiliar lines, symbols, and terminology. However, with a little guidance, you’ll soon find that patterns are your best friend in achieving professional-looking results. This guide is designed to demystify the process, taking you from deciphering the envelope to confidently cutting and sewing your fabric.
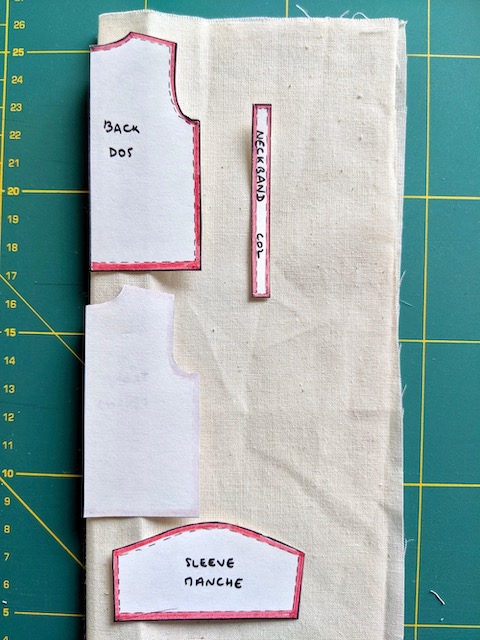
Image Source: camimade.com
Choosing the Right Sewing Pattern
The first step in mastering sewing with a pattern is selecting the right one for your skill level and desired outcome. This is a crucial stage that sets the foundation for your sewing adventure.
Factors to Consider When Choosing Sewing Patterns:
- Skill Level: Patterns are typically labeled with skill levels such as “Beginner,” “Easy,” “Intermediate,” or “Advanced.” Always start with a pattern that matches your current sewing abilities. Don’t be tempted by a complex design if you’re just starting out, as this can lead to frustration.
- Fabric Type: The pattern envelope will usually suggest suitable fabric types. Different fabrics behave differently when cut and sewn. Using the recommended fabric will greatly increase your chances of success. For instance, a flowing dress pattern might call for rayon or silk, while a sturdy tote bag might suggest canvas or denim.
- Design and Fit: Browse through pattern books or online catalogs. What styles do you like? Consider your body shape and what silhouettes are most flattering. Many patterns offer a range of sizes, but you might also need to think about how the garment will fit.
- Project Complexity: Some projects involve many pieces and intricate details like zippers, buttons, or darts. Others are much simpler, perhaps just a few main pieces sewn together. For your first few projects, opt for designs with fewer pieces and simpler construction.
Deconstructing the Sewing Pattern Envelope
Once you’ve chosen your pattern, the next step is to get familiar with the information provided on the envelope. This “instruction manual” for your project is packed with vital details.
Essential Information on the Envelope:
- Front View: Shows an illustration or photograph of the finished garment. This is your visual goal.
- Back View: Often displays variations of the design or shows the back of the garment.
- Line Drawings: These are simple diagrams illustrating different views and sometimes key features like closures or seam types.
- Size Chart: Crucial for determining which size to cut. Always measure yourself and compare with the pattern’s specific measurements, not just your ready-to-wear clothing size. Ready-to-wear sizing can vary wildly, while pattern sizing is more standardized.
- Yardage/Material Requirements: This tells you how much fabric you’ll need, based on the size you’re making and the width of the fabric. It’s important to note that these are usually estimates and can vary slightly based on pattern matching or directional prints.
- Notions: This lists all the other items you’ll need, such as zippers, buttons, thread, interfacing, elastic, and hook-and-eye closures.
- Suggested Fabrics: As mentioned earlier, this guides you toward fabrics that will work best with the design.
- Skill Level: Reiterates the difficulty of the project.
Key Sewing Pattern Terminology:
Fathoming sewing patterns involves learning a specific language. Here are some common terms you’ll encounter:
- Grainline: A long, straight arrow indicating how to place the pattern piece on the fabric’s grain. This is critical for how the fabric hangs and drapes.
- Notches: Small triangles or marks along the edges of pattern pieces. These are guides for matching seams and aligning pieces accurately.
- Darts: Triangular or V-shaped folds sewn into fabric to give shape and fit to a garment, usually around the bust, waist, or hips.
- Seam Allowance: The extra fabric extending beyond the stitching line. This is usually included in the pattern pieces and is typically 5/8 inch (1.5 cm) unless otherwise specified.
- Fold Line: Indicates that the pattern piece should be placed on a fold of the fabric.
- Cutting Line: The outermost line on the pattern piece, representing where you will cut the fabric.
- Stitching Line: The line indicating where to sew the seams.
- Place on Fold: This instruction means you’ll align the indicated edge of the pattern piece with the folded edge of your fabric, so you only need to cut one side.
- Bias: Cutting fabric diagonally across the weave. This allows fabric to stretch and drape.
- Selvage: The finished edge of woven fabric.
Deciphering Sewing Pattern Pieces
Inside the envelope, you’ll find your pattern pieces. These are printed on thin paper and usually contain a lot of information.
What You’ll Find in Your Pattern Pieces:
- Pattern Piece Name: Identifies what the piece is (e.g., Front Bodice, Sleeve, Waistband).
- Pattern Piece Number: A unique identifier for each piece.
- Size Lines: Multiple lines may be printed on a single pattern piece, each representing a different size. You’ll trace or cut along the line that corresponds to your chosen size.
- Grainline Arrow: As described above, this shows how to align the piece with the fabric grain.
- Notches and Dots: These are crucial for matching seams.
- Lengthen/Shorten Lines: These horizontal lines allow you to adjust the pattern’s length if needed.
Adjusting Sewing Patterns for a Perfect Fit
A significant advantage of sewing your own clothes is the ability to customize the fit. Adjusting sewing patterns is a common practice.
Common Adjustments You Might Make:
- Lengthening or Shortening: If the pattern is too long or too short in the torso, sleeves, or hem, use the “lengthen/shorten” lines. To lengthen, cut along the line and insert a strip of paper. To shorten, fold the pattern piece along the line and tape it.
- Full Bust Adjustment (FBA) or Small Bust Adjustment (SBA): These are common adjustments to make the bodice fit your bust better. They involve adding or removing fabric in specific areas of the pattern.
- Taking in Side Seams: If the garment is too wide overall, you can often take in the side seams by a small amount.
- Adjusting Sleeve Width: Similar to the bodice, you might need to adjust the width of the sleeve cap or the bicep area.
Tip: It’s highly recommended to make a muslin (a practice garment made from inexpensive fabric like muslin) before cutting into your fashion fabric. This allows you to test your adjustments and ensure a good fit without risking your good fabric.
The Crucial Step: Sewing Pattern Layout
This is where many beginners feel a bit lost. The sewing pattern layout diagram is your guide for placing the pattern pieces onto your fabric. Getting this right is essential for both fit and fabric conservation.
How to Interpret the Sewing Pattern Layout:
The layout diagrams are printed on the tissue paper and usually on the instruction sheet. They show you the most efficient way to arrange all your sewing pattern pieces on the fabric to minimize waste.
- Fabric Grain: Pay close attention to how the grainline on each pattern piece aligns with the fabric’s grain. Usually, the grainline is parallel to the selvage. If a piece is to be placed on the fold, it will have a specific marking.
- Single vs. Double Fabric: Layouts often show options for fabric folded in half lengthwise or widthwise.
- Placement of Pieces: The diagrams show the exact positioning of each pattern piece. Smaller pieces are often tucked into larger ones to maximize fabric usage.
- “Cut 2,” “Cut 4,” etc.: These indicate how many of that specific pattern piece you need to cut.
- “On Fold”: This means the edge of the pattern piece should align with the fold of the fabric.
- “Cut on Fold”: Similar to “On Fold,” but you cut along the fold line to create two symmetrical pieces.
- “Cut with Nap” or “Cut with Design”: If your fabric has a pile (like velvet) or a directional print, you’ll need to ensure all pieces are cut facing the same direction. The layout will indicate this.
Tips for Effective Sewing Pattern Layout:
- Pre-Wash Your Fabric: Always wash and dry your fabric according to its care instructions before cutting. This prevents shrinkage after you’ve sewn the garment.
- Press Your Fabric: Iron your fabric smoothly. Wrinkles can distort the pattern placement.
- Fold Fabric Correctly: Fold your fabric according to the layout diagram, ensuring it’s as smooth and even as possible. Double-check that the fold is straight.
- Pin Pattern Pieces Carefully: Pin the pattern pieces onto the fabric precisely as shown in the layout diagram. Pinning inside the seam allowance is best to avoid leaving permanent holes.
- Check Grainlines: Ensure all grainline arrows are parallel to the fabric selvage or fold. This is critical for the garment’s drape.
Cutting Fabric with Patterns: Precision is Key
Once your pattern pieces are laid out, it’s time for cutting. This step requires patience and accuracy.
Best Practices for Cutting Fabric with Patterns:
- Use Sharp Scissors or a Rotary Cutter: Dedicated fabric scissors or a sharp rotary cutter with a mat are essential for clean cuts. Never use these tools for paper, as it will dull them quickly.
- Cut Smoothly and Accurately: Follow the cutting lines precisely. Avoid jagged cuts, as these can affect the final seam.
- Cut Notches Outward (or Mark Them): It’s generally recommended to cut small notches outward from the seam allowance. Alternatively, you can mark notches with tailor’s chalk or a fabric pen within the seam allowance.
- Transfer Markings: Transfer any dots, darts, or other markings from the pattern to the fabric using tailor’s chalk, a fabric pen, or by snipping small notches at the end of lines.
- Keep Fabric Flat: Try to keep the fabric as flat as possible while cutting. Avoid shifting or bunching.
- Remove Pins as You Go: Remove pins just before you reach them with your scissors to avoid cutting them.
Important Note: If your fabric has a directional print or nap, ensure that when you lay out your pattern pieces, all pieces are oriented in the same direction. The layout diagram will usually show a small arrow or symbol indicating the direction of the nap or print.
Navigating Sewing Pattern Instructions
Every sewing pattern comes with a set of instructions, usually printed on a separate sheet. These are your step-by-step guides to assembling the garment.
Key Sections in Sewing Pattern Instructions:
- Step-by-Step Assembly: Instructions are numbered and broken down into manageable steps, often accompanied by diagrams.
- Stitch Types and Sizes: Recommendations for stitch length and type for different seams.
- Seam Finishes: Suggestions on how to finish raw edges to prevent fraying (e.g., serging, zigzag stitch, French seams).
- Pressing Instructions: Guidance on when and how to press seams. Pressing is as important as sewing for a professional finish.
- Special Techniques: Instructions for applying zippers, buttons, buttonholes, elastic, or other closures.
Tips for Following Sewing Pattern Instructions:
- Read Through First: Before you start sewing, read all the instructions from beginning to end. This gives you an overview of the entire process.
- Follow the Order: The steps are usually in a logical sequence. Don’t skip steps or change the order unless you’re very experienced and understand the implications.
- Identify Pattern Pieces: Refer to the pattern piece names and numbers to ensure you are using the correct pieces for each step.
- Pay Attention to Diagrams: The diagrams are there to clarify the written instructions.
- Mark Completed Steps: Tick off each step as you complete it to avoid confusion.
- Don’t Be Afraid to Unpick: If you make a mistake, carefully unpick the stitches and try again. It’s better to unpick than to have a finished garment that isn’t right.
Grading Sewing Patterns: When Sizes Don’t Quite Fit
Grading sewing patterns refers to the process of creating different sizes from a master pattern. While you usually buy a pattern in your size, sometimes you might need to blend sizes or adjust for unique measurements.
Blending Sizes:
It’s common for sewers to have measurements that fall between standard sizes. For example, you might have a size 10 bust but a size 12 waist and hips. In this case, you would:
- Trace: Trace the pattern pieces onto tracing paper or Swedish tracing paper.
- Blend: Draw smooth lines connecting the corresponding points of the different sizes on your traced pieces. For example, connect the size 10 shoulder to the size 12 side seam.
- Cut: Cut out the blended pattern piece.
This ensures a more custom fit without altering the fundamental design of the pattern.
Frequently Asked Questions (FAQ)
Q: What is the difference between cutting and stitching lines on a pattern?
A: The cutting line is the outermost edge of the pattern piece, indicating where you cut the fabric. The stitching line is inside the cutting line, showing exactly where you should sew your seams. The space between them is the seam allowance.
Q: Why is the grainline so important?
A: The grainline ensures that the fabric drapes and hangs correctly. If a pattern piece is cut off-grain, the garment can twist, pull, or hang unevenly.
Q: Can I use a pattern for a different fabric than what’s recommended?
A: Yes, but with caution. If you use a fabric with very different properties (e.g., a stiff fabric for a pattern designed for a drapey fabric), the final garment might not look or fit as intended. Research how different fabrics behave.
Q: How do I know if I need to adjust a pattern?
A: Measure yourself accurately and compare your measurements to the pattern’s size chart. Consider your body’s proportions – if you have a longer torso, wider shoulders, or fuller bust than the standard pattern block, you’ll likely need adjustments. Making a muslin is the best way to test for fit issues before cutting your fashion fabric.
Q: What are pattern notches used for?
A: Pattern notches are small marks or triangles along the edges of pattern pieces. They act as guides to help you match and align corresponding pieces correctly when sewing, ensuring seams meet up precisely.
By approaching each step with attention to detail and a willingness to learn, you’ll find that using sewing patterns becomes an intuitive and enjoyable part of the creative process. Each pattern is a roadmap to a finished project, and with this guide, you’re well on your way to mastering sewing with them. Happy sewing!