
Can you use a sewing pattern easily? Yes, absolutely! With a little practice and guidance, anyone can learn to use sewing patterns and create beautiful garments. Commercial sewing patterns are your roadmap to garment construction, transforming flat fabric into wearable art. This comprehensive guide will walk you through every step, from selecting the right pattern to the final stitch.
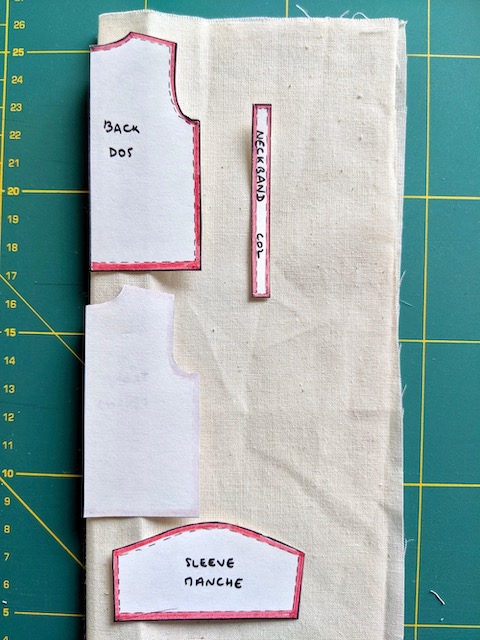
Image Source: camimade.com
Fathoming Sewing Patterns: Your First Steps
Sewing patterns are printed on thin paper and come with a wealth of information. They are designed to be a guide, providing precise shapes and instructions to help you create a specific garment. When you first look at a sewing pattern, it can seem a bit overwhelming, but let’s break it down into manageable steps.
Choosing the Right Pattern
The first step to successful sewing is picking a pattern that suits your skill level and your style.
Skill Level Considerations
Commercial sewing patterns typically indicate a skill level:
- Beginner: These patterns are for simple projects with few pieces and straightforward techniques. Think basic tops, elastic-waist skirts, or simple pajamas.
- Easy: Slightly more complex than beginner, these might involve a few more pattern pieces or simple closures like zippers or buttons.
- Intermediate: These patterns often include more fitting adjustments, set-in sleeves, collars, or more complex seams.
- Advanced: For experienced sewers, these patterns might involve intricate details, tailoring techniques, or challenging fabrics.
Style and Fit
Consider what you want to make. Do you need a new blouse for work? A comfortable dress for the weekend? Look at the envelope for images of the finished garment. Also, pay attention to the size chart.
What’s Inside the Envelope?
When you open a sewing pattern envelope, you’ll find several key components:
- Pattern Pieces: These are the paper templates you’ll use to cut your fabric. They come in different sizes and are marked with symbols and lines.
- Sewing Pattern Instructions: This is your step-by-step guide. It details how to prepare the fabric, cut the pieces, and sew them together.
- Envelope Front: This shows you the finished garment in various views and often includes sizing information.
- Envelope Back: This is crucial! It lists:
- Body Measurements: A chart to help you choose the correct size.
- Finished Garment Measurements: The actual dimensions of the finished item.
- Fabric Recommendations: What types of fabric will work best.
- Yardage Chart: How much fabric you’ll need based on your size and the fabric width.
- Notions: A list of extra items you’ll need, such as thread, zippers, buttons, or interfacing.
Deciphering Sewing Patterns: Grasping the Basics
Sewing patterns are full of symbols and lines, each with a specific meaning. Learning to interpret these markings is key to accurate cutting and sewing.
Key Markings on Pattern Pieces
- Grainlines: These are long, straight lines with arrows at both ends. They show you how to place the pattern piece on the fabric’s grain. The grainline should be parallel to the selvage (the finished edge of the fabric).
- Cutting Lines: These are solid lines around the outer edge of the pattern piece. You’ll cut along these lines. Different lines might indicate different sizes if the pattern includes multiple sizes.
- Seam Lines: These lines are usually inside the cutting lines, indicating where you will sew. The distance between the cutting line and the seam line is your seam allowance.
- Darts and Pleats: These are triangular or shaped markings that help give the garment shape. They are often shown as solid or dashed lines with dots.
- Notches: These are small marks (often triangles or squares) on the cutting lines. They help you match up corresponding pieces of the garment, like the front bodice to the side bodice.
- Dots and Symbols: These can indicate where to place pockets, buttonholes, fold lines, or other construction details.
- Bust/Waist/Hip Lines: These horizontal lines help you check the fit of the garment on your body.
Understanding the Sewing Pattern Instructions
The sewing pattern instructions are your best friend. Read them thoroughly before you begin.
Step-by-Step Guidance
The instructions are broken down into numbered steps, detailing each stage of garment construction. They will guide you through:
- Preparing the Pattern: Cutting out your chosen size from the tissue paper.
- Preparing the Fabric: Pre-washing and pressing your fabric.
- Layout: How to arrange the pattern pieces on the fabric for cutting.
- Cutting: Cutting out the fabric pieces.
- Marking: Transferring pattern markings to the fabric.
- Sewing: Stitching the fabric pieces together, often with specific sewing techniques.
- Finishing: Adding details like hems, closures, and pressing.
Preparing for Success: Fabric and Notions
Before you can cut into your fabric, you need to choose the right materials and gather your sewing notions.
Selecting the Right Fabric
The pattern envelope will suggest suitable fabrics. Generally, consider:
- Fiber Content: Cotton, linen, silk, wool, polyester, and blends all behave differently. Cotton and linen are often good choices for beginners.
- Weave: Stable weaves like quilting cotton or poplin are easier to handle than slippery silks or drapey rayons.
- Fabric Width: Patterns are usually designed for standard fabric widths (e.g., 44/45 inches or 58/60 inches). Always check the yardage chart based on your chosen width.
Essential Sewing Notions
These are the supporting cast to your fabric and pattern:
- Thread: Choose a good quality all-purpose polyester thread that matches your fabric.
- Sewing Machine Needles: Use the correct needle type and size for your fabric. Sharps are good for woven fabrics, while ballpoints are for knits.
- Scissors: Fabric shears are essential for clean, accurate cuts.
- Pins: Straight pins to hold pattern pieces to fabric and fabric pieces together.
- Measuring Tape: For taking body measurements and checking fabric width.
- Seam Ripper: For correcting mistakes (everyone makes them!).
- Marking Tools: Tailor’s chalk, fabric pens, or tracing wheels and paper to transfer pattern markings.
- Interfacing: Used to stabilize areas like collars, cuffs, and button bands.
- Closure: Zippers, buttons, snaps, hooks and eyes, as specified by the pattern.
- Elastic: If the pattern calls for it.
Fabric Cutting Layout: The Blueprint for Success
This is where your pattern pieces meet the fabric. Following the fabric cutting layout is crucial for using your fabric efficiently and ensuring the grainlines are correctly placed.
Reading the Layout Diagram
The sewing pattern instructions will include a diagram showing how to arrange the pattern pieces on the fabric.
- Fabric Fold: Diagrams usually indicate where the fabric should be folded, often on the bias or lengthwise.
- Grainline Alignment: Pay close attention to how the grainlines on the pattern pieces align with the supposed grain of the fabric in the diagram.
- Piece Placement: The diagram shows the most efficient way to place all the pattern pieces to minimize fabric waste.
Cutting Techniques
- Pre-wash and Press Fabric: Always wash and dry your fabric before cutting. This preshrinks it and removes any finishes. Press it smooth.
- Prepare the Pattern: Carefully cut out your size from the tissue paper pattern. If you want to preserve the pattern for future use, trace your size onto tracing paper.
- Lay Out the Fabric: Fold your fabric according to the layout diagram, ensuring the grain is straight. Pin the fabric layers together to prevent shifting.
- Place Pattern Pieces: Lay the pattern pieces onto the fabric as shown in the layout diagram.
- Grainlines: Ensure all grainlines are parallel to the fabric’s selvage or fold.
- Align Notches: Make sure any notches that need to match are placed correctly.
- Consider Fabric Design: If your fabric has a nap (like velvet) or a directional print, ensure all pieces are laid out in the same direction.
- Pin Pattern Pieces: Securely pin each pattern piece to the fabric, placing pins perpendicular to the cutting line.
- Cut Accurately: Use sharp fabric shears to cut precisely along the cutting lines. Cut notches outward from the seam allowance, or mark them with a small snip.
Sewing Machine Basics: Your Stitching Companion
A basic knowledge of your sewing machine is essential for using sewing patterns effectively.
Essential Machine Functions
- Threading: Properly threading your machine (top thread and bobbin) is the first step to sewing.
- Bobbin Winding: A full bobbin ensures you can sew a continuous seam.
- Needle Insertion: Make sure the correct needle type and size is inserted properly.
- Stitch Selection: Most projects will use a straight stitch. You may also need a zigzag stitch for finishing seams.
- Tension Adjustment: The correct thread tension ensures neat stitches on both sides of the fabric.
- Presser Foot: The presser foot holds the fabric in place as you sew.
- Handwheel: Use the handwheel to manually lower or raise the needle. Always turn it towards you.
Sewing Techniques for Beginners
The sewing pattern instructions will specify techniques, but here are a few basics:
- Straight Stitching: Sew along the seam line, keeping your stitching consistent.
- Backstitching: At the beginning and end of a seam, sew a few stitches forward and then backward to secure the stitching.
- Seam Allowances: Most patterns have a standard seam allowance (e.g., 5/8 inch or 1.5 cm). Keep your stitching line this distance from the raw edge.
- Pivot and Turn: When you reach a corner, stop with the needle down, lift the presser foot, pivot the fabric, lower the presser foot, and continue sewing.
Garment Construction: Bringing it All Together
This is the core of using a sewing pattern – assembling the cut fabric pieces into a finished garment.
Following the Sewing Pattern Instructions (Step-by-Step)
The instructions will guide you through:
- Marking Notches and Darts: Transfer all markings from the pattern to the fabric.
- Sewing Darts and Shaping: Create darts for shaping the garment.
- Joining Seams:
- Place fabric pieces right sides together.
- Align raw edges and notches.
- Pin securely.
- Sew along the seam line.
- Pressing Seams: Pressing seams open or to one side as you go makes a huge difference in the final look.
- Attaching Sleeves, Collars, and Facings: These are often the more complex steps, so follow the pattern instructions carefully.
- Inserting Closures: Sewing in zippers, buttons, or other fasteners.
- Hemming: Finishing the bottom edge of the garment.
Pattern Adjustments: Achieving the Perfect Fit
Commercial sewing patterns are made for average figures. You may need to make pattern adjustments to achieve a perfect fit.
Common Adjustments
- Length Adjustments:
- Shortening: If the garment is too long, add a horizontal line across the pattern piece in the middle of the largest part of the leg or torso and redraw the side seams.
- Lengthening: If the garment is too short, cut the pattern piece in the middle and insert a strip of paper, redrawing the side seams.
- Fullness Adjustments:
- Bust/Hip: If you need more or less room in the bust or hip, you can add or subtract width by slashing and overlapping or spreading the pattern pieces.
- Shoulder Adjustments: If your shoulders are narrower or broader than average.
- Armhole Adjustments: To ensure a comfortable fit for the sleeve.
Tip: Always make adjustments to a paper copy of the pattern or trace your size onto new paper before cutting your fabric.
Table: Common Sewing Pattern Symbols and Their Meanings
| Symbol | Meaning |
|---|---|
| Solid Line | Cutting line |
| Dashed Line | Seam line |
| Arrowed Line | Grainline – align parallel to selvage/fold |
| Triangle/Square | Notches – used to match pattern pieces |
| Dots | Placement points (e.g., pockets, buttonholes) |
| Fold Line | Indicates where the fabric should be folded |
| Dart Lines | Markings for darts to create shape |
| Button/Buttonhole Mark | Placement for buttons and buttonholes |
Frequently Asked Questions (FAQ)
Q1: What is the difference between a sewing pattern and a template?
A sewing pattern is a detailed guide for creating a garment, including cutting lines, seam lines, and construction instructions. A template is usually a simpler shape used as a guide for cutting a specific part.
Q2: Can I use the same pattern for different fabrics?
Yes, but you may need to adjust the size or technique depending on the fabric’s drape and stretch. Always check the pattern’s fabric recommendations.
Q3: How do I know which size pattern to use?
Refer to the body measurement chart on the pattern envelope. Measure yourself accurately and choose the size that corresponds to your body measurements, not your ready-to-wear clothing size.
Q4: What does “seam allowance” mean in sewing patterns?
Seam allowance is the distance between the cutting line and the seam line on a pattern piece. It’s the extra fabric you sew with, and it’s usually included in the pattern. Most patterns use a 5/8 inch (1.5 cm) seam allowance.
Q5: My pattern pieces don’t seem to match up at the seams. What did I do wrong?
This often happens if the grainlines weren’t followed correctly, or if notches weren’t matched precisely. Double-check your cutting and seam placement.
By following these steps and paying close attention to the sewing pattern instructions, you’ll be well on your way to mastering the art of using sewing patterns. Happy sewing!