
Have you ever seen a beautiful embroidered picture and wished you could make one? Starting embroidery might seem tricky, especially when looking at a pattern. But don’t worry! Using an embroidery pattern is the main way people create stitched designs. This guide will show you step-by-step how to take a pattern and turn it into stitches on fabric. It’s made just for beginners, helping you pick your first pattern, gather your tools, get the design onto your fabric, and start stitching.
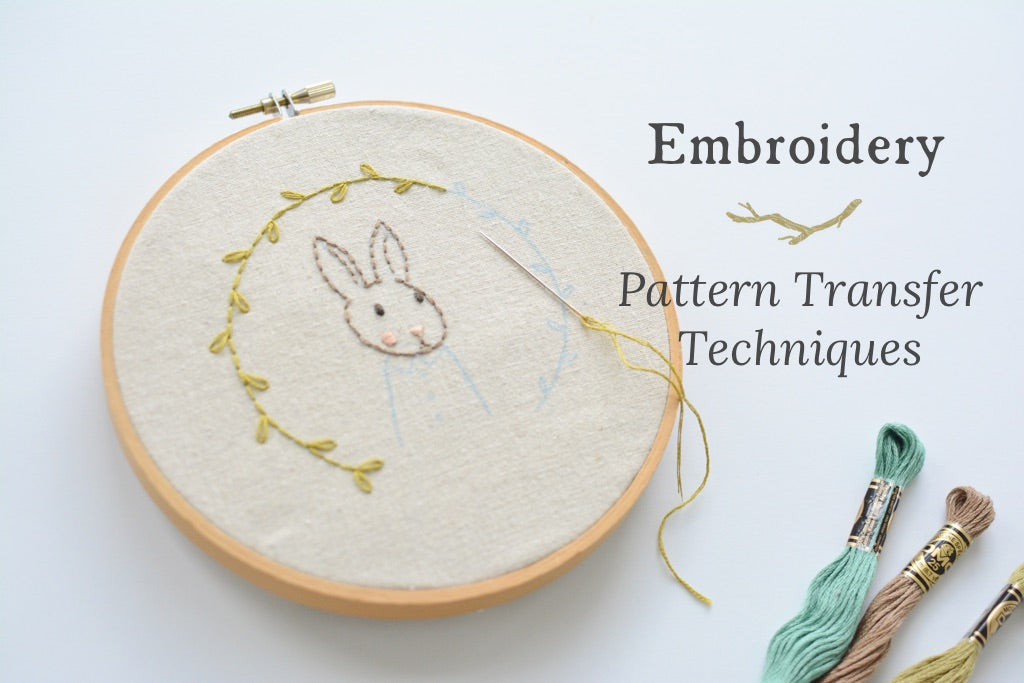
Image Source: www.twigandtale.com
Picking Your First Picture
When you start embroidery, pick an easy embroidery pattern for beginners. Look for simple shapes and lines. Patterns with just a few colors are also good. You can find free patterns online or buy them. Starting simple makes learning much more fun. A small pattern is a good size to start with.
Getting Your Tools Ready
Before you start stitching, you need some basic supplies. Choosing embroidery supplies that work well makes everything easier.
Here is a list of things you will need:
- Your chosen embroidery pattern.
- Fabric (cotton or linen works well for beginners).
- Embroidery hoop.
- Embroidery needles (different sizes).
- Embroidery floss (thread).
- Small sharp scissors.
- A way to get the pattern onto the fabric (see below for different ways).
- A pencil or pen made for fabric.
Selecting Fabric
Cotton or linen fabric is best for beginners. It is easy to stitch through. Choose fabric that is not too thin. A medium weight is good. Make sure the fabric is clean and pressed flat. This is part of preparing embroidery fabric.
Picking Needles
Embroidery needles have a bigger eye than sewing needles. This lets the thicker embroidery floss go through easily. Get a pack with different sizes. Match the needle size to how many strands of floss you are using.
Choosing Floss
Embroidery floss is usually made of cotton. It comes in many colors. Each strand of floss is made of six smaller strands twisted together. You will often use only two or three strands at a time. Get colors the pattern suggests or pick your own!
Getting the Design on Your Fabric
This step is very important. You need to transfer embroidery pattern to fabric. There are several ways to do this. The goal is to get the lines of your pattern onto the cloth so you know where to stitch. We will look at different embroidery pattern transfer methods. This includes tracing embroidery design and using iron on embroidery patterns.
Way 1: Tracing with Light
This is a popular method for beginners. It works best with lighter colored fabrics.
How to trace embroidery using light:
- Put your pattern on a flat surface. A window or a light box works well. Tape it down so it doesn’t move.
- Place your fabric over the pattern. Line it up where you want the design to be. Tape the fabric down too.
- Turn on the light (if using a light box) or let the light from the window shine through. You should see the pattern lines through the fabric.
- Use a fabric pencil or pen to draw over the lines you see. Make sure the pencil or pen is made for fabric. Some wash away with water. Some disappear with heat from an iron. Some stay forever, so test it first!
- Trace all the lines of the pattern carefully.
- When you are done, take the fabric off. The pattern is now on your fabric, ready to be stitched.
This method is simple and doesn’t cost much. It’s a great way to start.
Way 2: Carbon Paper for Fabric
This method is good for darker fabrics where tracing with light is hard.
- Get special carbon paper for fabric. Do not use regular carbon paper! It will stain your fabric.
- Place your fabric flat.
- Put the carbon paper on top of the fabric. Make sure the colored side is facing down onto the fabric.
- Place your pattern on top of the carbon paper.
- Use a pencil or pen to draw over the lines of your pattern. Press down firmly. The pressure will transfer the carbon color from the paper onto the fabric.
- Lift the pattern and the carbon paper carefully. The design should be on your fabric.
Make sure the carbon lines will wash out later. Always test on a scrap piece of fabric first!
Way 3: Iron-On Patterns
Some patterns come as iron on embroidery patterns. This is often a quick way to transfer a design.
- Make sure your fabric can handle heat from an iron.
- Place the iron-on pattern face down on your fabric where you want it.
- Follow the pattern’s instructions for heating. Usually, you press a warm iron onto the back of the pattern for a short time.
- The heat transfers the ink from the pattern paper to the fabric.
- Lift the paper carefully. The design should be on your fabric.
Iron-on patterns can sometimes be faint. They also sometimes can’t be used again. Always check the instructions that come with the pattern.
Way 4: Water-Soluble Stabilizer
This method is great for any fabric color, even dark ones. It’s also good for fabrics that are hard to trace on, like fuzzy ones.
- Print or draw your pattern onto a special material called water-soluble stabilizer. This material looks like paper or fabric but dissolves in water.
- Stick or sew the stabilizer onto your fabric where you want the pattern.
- Stitch right through the stabilizer and the fabric, following the lines you drew on the stabilizer.
- When you are finished stitching, soak the fabric in water. The stabilizer will dissolve away, leaving just your stitches and the fabric.
This method is a bit more costly because you need the special stabilizer. But it is very useful for many projects.
Choosing the Right Transfer Method
Think about your fabric color and type. Think about the pattern itself. Think about what tools you have.
Here is a simple guide:
| Fabric Color | Fabric Type | Best Method(s) | Notes |
|---|---|---|---|
| Light | Smooth | Tracing with light, Carbon paper | Pencil lines show easily |
| Dark | Smooth | Carbon paper, Water-soluble | Light method won’t work |
| Any | Fuzzy | Water-soluble | Hard to trace directly on fuzzy fabric |
| Any | Any | Iron-on (if pattern is iron-on) | Quick, but check if lines are clear |
No matter which method you pick, take your time to get the pattern lines onto the fabric clearly. These lines are your guide for stitching.
Getting the Fabric in the Hoop
Now that your design is on the fabric, you need to put it in the hoop. This step is called hooping embroidery. The hoop holds the fabric tight like a drum. This makes stitching much easier and helps keep your stitches even.
An embroidery hoop has two parts: an outer ring with a screw and an inner ring.
Steps for Hooping Embroidery:
- Loosen the screw on the outer ring. Separate the two rings.
- Place the inner ring on a flat surface.
- Lay your fabric over the inner ring. Center your design in the middle of the hoop.
- Place the outer ring over the fabric and push it down over the inner ring. The fabric should be caught between the two rings.
- Gently pull the edges of the fabric outwards while pushing the outer ring down. This makes the fabric tight.
- Tighten the screw on the outer ring. Make the fabric very tight. It should make a drum sound if you tap it.
- Check the back of the hoop. Make sure the fabric is smooth and has no big wrinkles inside the stitching area.
- If the fabric is not tight, loosen the screw, pull the fabric tighter, and tighten the screw again.
Your fabric is now ready to be stitched!
Starting to Stitch: First Steps
With your pattern transferred and fabric hooped, you are ready to start stitching. An embroidery pattern for beginners often uses just a few simple stitches.
You don’t need to know many stitches to start. Learning a few basic embroidery stitches is enough. Two very common ones are the back stitch and the straight stitch.
- Back Stitch: This stitch makes a solid line. It’s great for outlining shapes or writing letters.
- Straight Stitch: This is just a single stitch going from one point to another. It’s used for details or filling small areas.
Most patterns will tell you which stitches to use for different parts of the design. If a pattern doesn’t say, you can choose stitches you like.
How to Start Stitching (General Steps):
- Choose the color of floss the pattern suggests (or your own).
- Cut a length of floss. About 18-24 inches is a good length. Longer pieces can get tangled.
- Separate the number of strands you need (usually 2 or 3 for beginners).
- Thread your needle.
- Start stitching from the back of the fabric. You can use a small knot or hold the end of the thread on the back with your thumb for the first few stitches. Later stitches will hold it down.
- Follow the lines of your pattern, making stitches as shown or as you choose.
- When you finish a color or section, end your thread on the back. Weave the needle through the back of a few stitches you already made. Cut the thread close to the fabric. Do not make a big knot on the back if you can avoid it. It can make the fabric bumpy.
Take your time with each stitch. Try to make your stitches a similar size. This helps your work look neat. Don’t worry if it’s not perfect at first. Your stitches will get better with practice!
Taking a Closer Look at Transfer Methods
Let’s go a bit deeper into the different ways to transfer embroidery pattern to fabric. Knowing the pros and cons helps you choose the best way for each project.
Tracing Embroidery Design: More Details
Tracing is very direct. You see the pattern and draw it.
Pros:
* Cheap: You only need the pattern and a fabric pen or pencil.
* Simple: The steps are easy to follow.
* Control: You can choose where exactly on the fabric the design goes.
* Reusable: The paper pattern stays good to use again.
Cons:
* Needs light: Doesn’t work well on dark fabrics.
* Can be hard on thick fabric: Light might not shine through well.
* Might rub off: Pencil or pen lines can sometimes rub away before you stitch them, especially if you handle the fabric a lot.
Tips for Tracing:
* Use a very fine-tipped fabric pen for thin lines.
* Trace on a hard surface like a table with a light pad or against a sunny window.
* Tape your fabric and pattern down really well so they don’t shift. Even a small shift can make your design look wrong.
* Trace just before you plan to stitch that part of the design. This stops the lines from rubbing off.
Comprehending Carbon Paper Method
Using carbon paper for fabric (sometimes called dressmaker’s carbon) is a bit different.
Pros:
* Works on dark fabrics: The colored carbon lines show up on darker cloth.
* No light needed: You just need a hard surface to press on.
* Good for details: Pressing with a sharp pencil can transfer fine lines.
Cons:
* Can be messy: The carbon can smudge if you are not careful.
* May need rubbing off: Some carbon lines need to be rubbed off gently after stitching if they don’t wash out completely.
* Need the right kind: Must use carbon made for fabric, not office carbon paper.
Tips for Carbon Paper:
* Test the carbon paper on a scrap of your fabric first! Make sure it transfers well and comes off cleanly (either by washing or rubbing).
* Place the carbon paper color side down.
* Use a tool with a rounded tip (like a dull pencil or a tracing wheel designed for carbon paper) to go over the pattern lines. A sharp pencil can tear the paper.
* Only press hard enough to get the line transferred. Pressing too hard can make lines that are hard to remove.
* Be careful not to drag your hand across the carbon paper or the transferred lines.
Deciphering Iron-On Pattern Use
Using iron on embroidery patterns saves you from tracing. The design is printed on special paper with heat-sensitive ink.
Pros:
* Fast: It’s very quick to transfer the pattern.
* Easy: Just place and press with an iron.
Cons:
* May be one-time use: Some iron-on patterns only work once.
* Lines can be faint: Sometimes the transferred lines are not very dark.
* Need heat: Not good for fabrics that can’t be ironed.
* Can be hard to position exactly: Once you iron it, it’s stuck.
Tips for Iron-On:
* Read the instructions that come with the pattern carefully! Heat settings and press time are important.
* Place the pattern exactly where you want it before ironing. You can pin it in place first.
* Press straight down with the iron. Do not move the iron back and forth like you are ironing clothes. Just press.
* Check the transferred lines before removing the pattern paper completely. If parts are faint, you might be able to press again (if the pattern allows).
* Some iron-on patterns are copies you make yourself using special paper. Follow the paper’s instructions.
Interpreting Water-Soluble Stabilizer Method
Using water-soluble stabilizer is versatile. You transfer the pattern onto the stabilizer, then stitch through it.
Pros:
* Works on any fabric: Great for dark, patterned, or textured fabrics where tracing is hard.
* Accurate: The pattern is right there on top of the fabric.
* Doesn’t rub off: The lines stay until you are done stitching.
* Washes away: No need to remove lines later, as the stabilizer dissolves.
Cons:
* Costs more: You have to buy the stabilizer.
* Need to wash: You have to wet the finished piece to remove the stabilizer. This might not be ideal for all projects or threads.
* Can feel strange to stitch through: The stabilizer adds an extra layer.
Tips for Water-Soluble Stabilizer:
* You can print directly onto some types of stabilizer using an inkjet printer. Check the package!
* Or, you can trace onto it just like tracing onto paper.
* Some stabilizers are sticky on the back. This helps them stay in place on the fabric.
* Make sure you rinse all the stabilizer away when you are done. Leftover stabilizer can feel stiff. Follow the package directions for dissolving.
Choosing the right way to transfer embroidery pattern to fabric is key to a good start. Think about your project and pick the method that seems best for your fabric and pattern.
Getting the Fabric Ready to Stitch
We touched on this earlier, but let’s look closer at preparing embroidery fabric. This step might seem small, but it helps a lot.
- Wash and Iron: If your fabric is new, wash it first. Some fabrics shrink. Washing it now means your finished embroidery won’t get distorted later if you wash it. After washing, iron it flat. This gives you a smooth surface to work on and transfer the design.
- Find the Center: For many patterns, finding the center of the fabric and the center of the design is helpful. You can fold the fabric in half one way, then the other, and lightly mark the center point. Find the center of the pattern too. Line up these center points when you transfer the design. This helps make sure your design is straight on the fabric.
- Trim Edges: If your fabric has rough edges, they might fray as you work. You can finish the edges by sewing a quick seam around them or using masking tape. This is not strictly necessary for small projects in a hoop, but it can prevent annoyance from fraying threads.
- Think about Backing: For some fabrics or projects (especially things like clothing), you might want to add a layer of stabilizer to the back of your fabric. This can help delicate fabrics hold stitches better or prevent the fabric from stretching as you stitch. There are different types of stabilizers (cut-away, tear-away, etc.). This is a bit more advanced and not always needed for a beginner project on good cotton or linen.
Properly preparing embroidery fabric sets you up for easier stitching and a better-looking finished piece.
More on Hooping Your Fabric
Making sure your fabric is tight in the hoop is super important. This part is hooping embroidery.
Why is tightness so key?
* Loose fabric can wrinkle as you stitch.
* Your stitches might be uneven.
* The finished design can look distorted when you take it out of the hoop.
Tips for Great Hooping:
- Place the inner ring on a flat surface.
- Drape the fabric over it. Gently press the outer ring down.
- Before you tighten the screw a lot, gently pull the edges of the fabric all the way around the hoop. Pull it taut but not so hard that it distorts the fabric weave.
- As you tighten the screw, keep pulling the fabric a little bit more.
- Tighten the screw until the fabric is very firm. You should be able to bounce a needle off it lightly, and it makes a drum sound.
- Check for big wrinkles inside the hoop. If you see any, you need to unhoop and try again, pulling the fabric more evenly.
- Make sure your design is centered or placed correctly within the hoop before you tighten fully.
Your fabric should be flat and tight in the hoop. It’s like giving your fabric a flat, stable place to be stitched on.
Starting with Basic Stitches
An embroidery pattern for beginners will often use stitches that are easy to learn. You don’t need to know hundreds of stitches to start. Focusing on a few basic embroidery stitches is perfect.
Let’s look briefly at a couple more useful stitches:
- Satin Stitch: Used to fill in shapes completely with smooth stitches that lay side-by-side. Great for leaves or small hearts.
- French Knot: Makes a tiny knot on the surface. Used for dots, eyes, or decorative fill. Can be tricky at first, but worth learning.
- Lazy Daisy Stitch: Makes a small loop shaped like a petal. Good for flowers or leaves.
Most pattern instructions will suggest which stitches to use for each part of the design. They might even show small pictures or diagrams of how to make the stitches.
If you are just starting, focus on making your chosen stitch neatly. Don’t worry about speed. Practice the stitch on a scrap of fabric first if you like.
Remember, you don’t have to use the stitches the pattern suggests. As you get more confident, you can change them! Maybe you want to fill an area with satin stitch instead of straight stitches. It’s your project!
Following the Pattern
Now you have the pattern on the fabric and the fabric in the hoop. You have your needle and thread ready. You know a basic stitch or two. What next?
Simply follow the lines you transferred onto the fabric.
- Look at the pattern key or instructions. It might tell you which color thread to use for which line or area.
- It might suggest a specific stitch for a line (like back stitch for an outline) or an area (like satin stitch for a fill).
- Start stitching along the lines. Take one stitch at a time.
- Keep your tension even. This means don’t pull the thread too tight (it will pucker the fabric) or leave it too loose (the stitches will look messy).
- Work on one color or one section at a time if that helps you stay organized.
Think of the lines on your fabric as a coloring book outline. Your stitches are the colors filling it in or drawing the lines with thread.
Tips for Beginner Stitchers
- Start Small: Your first project should be small. This way, you finish it faster and feel good about your work.
- Use Good Light: Stitching in good light helps you see the fabric lines and your stitches clearly.
- Sit Comfortably: Find a comfy chair. Hold your hoop at a good distance so you don’t have to slouch.
- Don’t Knot Too Much: Avoid big knots on the back of your work. Learn how to start and end threads neatly by weaving them under existing stitches.
- Practice: Like any new skill, embroidery gets easier with practice. Don’t be afraid to try!
- Fix Mistakes: If you make a stitch you don’t like, it’s okay to carefully take it out with scissors or a seam ripper.
- Washable Pens are Your Friend: For tracing, using a pen or pencil that washes away is great for beginners. If your lines don’t get fully covered by stitches, they will disappear later.
- Keep it Clean: Wash your hands before stitching, especially if you are working on a light-colored fabric.
Completing Your Project
Once you have stitched all the lines and areas you want, your embroidery is finished!
- Carefully take your fabric out of the hoop by loosening the screw.
- If you used a water-soluble pen or stabilizer, follow the directions to wash it away. You might need to soak it in water. Lay it flat to dry on a clean towel.
- Once dry (or if you didn’t need to wash it), you might want to iron it gently from the back. Place the embroidery face down on a soft towel and iron the back. This protects the stitches.
- Trim the extra fabric around your design. Leave enough to finish it.
- Now you can frame it in a hoop, put it in a picture frame, or sew it onto something else like a bag or pillow.
Finishing your first piece is a great feeling!
Frequently Asked Questions
Q: My fabric keeps slipping in the hoop. What can I do?
A: Make sure the screw is very tight. You can also wrap the inner ring of the hoop with fabric strips or ribbon. This gives the outer ring something softer to grip onto, making the fabric stay tighter.
Q: How many strands of floss should I use?
A: This often depends on the pattern and the look you want. For fine lines, use 1-2 strands. For thicker lines or filling areas, use 3 or more. Most patterns for beginners will tell you to use 2 or 3 strands. Try stitching a few stitches with different numbers of strands on a scrap piece to see what you like.
Q: My stitches are not perfectly even. Is that okay?
A: Yes, that is totally okay! No one’s stitches are perfectly even when they start. The beauty of hand embroidery is that it is made by hand. Your stitches will get more even with practice. Focus on finishing the piece and enjoying the process.
Q: What is the best way to transfer a pattern to black fabric?
A: Using fabric carbon paper or water-soluble stabilizer are the best ways for dark fabrics. Tracing with light won’t work.
Q: My fabric is getting wrinkled around the hoop. Did I do something wrong?
A: This can happen if you didn’t hoop the fabric tightly enough or if you are pushing the needle through very hard. Try re-hooping, making sure the fabric is drum-tight. Use a sharp needle that is easy to push through the fabric.
Q: Can I reuse an embroidery pattern?
A: Yes, paper patterns can be reused many times, especially if you use tracing methods. Iron-on patterns are often only good for one or two uses.
Q: How do I choose an embroidery pattern for beginners?
A: Look for patterns that are simple outlines or have large, easy shapes to fill. Avoid patterns with tiny details, many colors, or complex stitches until you have practiced a bit. A pattern labeled “beginner” is a good sign!
Finding More Patterns
Once you have finished your first project, you will likely want to stitch more. There are many places to find more patterns:
- Online: Many craft blogs, websites, and shops offer free and paid digital patterns you can print at home. Search for “free embroidery patterns” or “beginner embroidery patterns.”
- Bookstores & Craft Stores: Look for embroidery pattern books or kits. Kits are great because they often include the pattern, fabric, hoop, and floss you need.
- Embroidery Shops: Local needlework stores have a wide selection of patterns and experienced staff who can help you choose.
Remember to pick patterns that match your skill level. As you get more comfortable with different stitches and techniques, you can try more detailed and complex designs.
Stepping Forward
You now have a guide on how to use an embroidery pattern from start to finish. You know about choosing embroidery supplies, preparing embroidery fabric, the different embroidery pattern transfer methods including tracing embroidery design and using iron on embroidery patterns. You know how to hooping embroidery and are ready to try some basic embroidery stitches.
Using an embroidery pattern for beginners is the perfect way to start this rewarding craft. Take your time, be patient with yourself, and enjoy the process of bringing a design to life with thread. Happy stitching!