
A leather sewing awl is a pointed tool used to make holes in leather for stitching. Can I use an awl for anything other than making holes? Yes, while its primary purpose is punching holes, a leather awl can also be used for marking stitching lines or even for some minor repair work. Who is a leather sewing awl for? It’s for anyone working with leather, from hobbyists to professional leatherworkers.
Working with leather can be a rewarding craft. It allows you to create durable and beautiful items, from wallets and bags to belts and even custom upholstery. One of the essential tools in any leatherworker’s arsenal is the awl. But not just any awl – specifically, the leather sewing awl. This versatile tool is your gateway to precise, strong, and aesthetically pleasing hand-stitched leather goods. If you’re a beginner looking to get started with hand-sewing leather, this guide is for you. We’ll break down everything you need to know about using a leather sewing awl, from choosing the right one to mastering essential techniques.
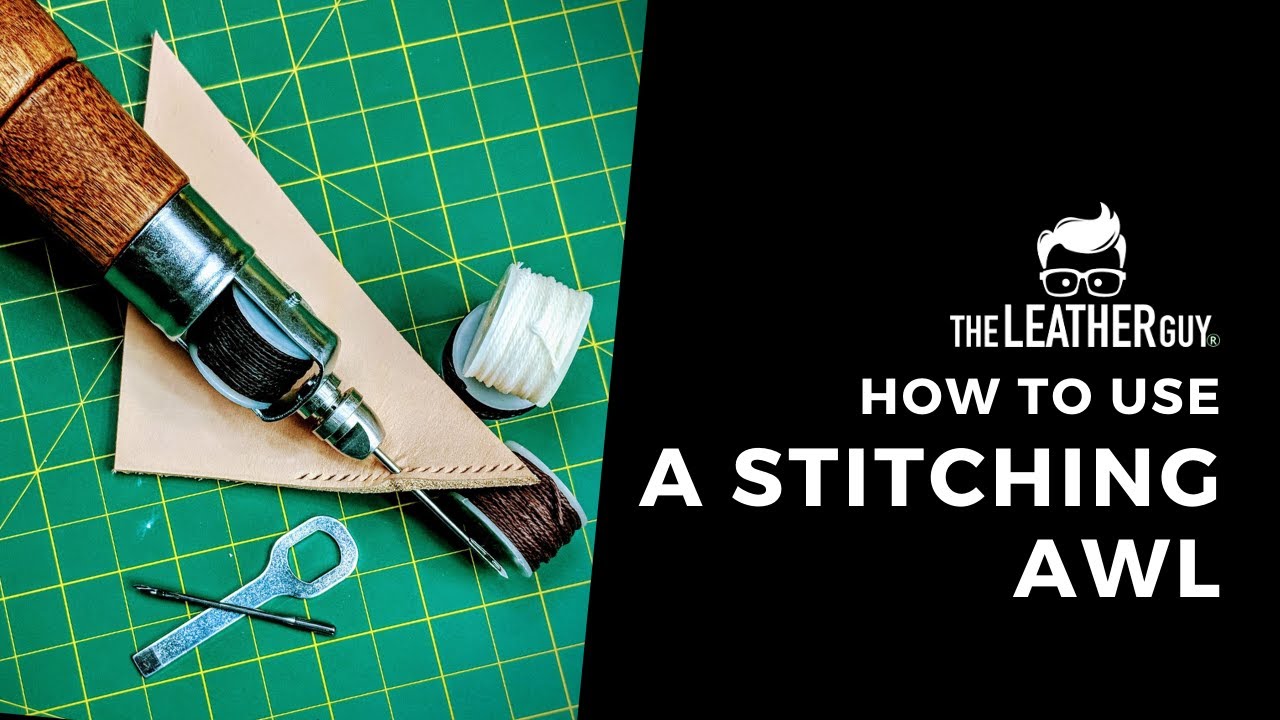
Image Source: i.ytimg.com
What is a Leather Sewing Awl?
At its core, a leather sewing awl is a simple yet incredibly effective tool. It features a sharp, pointed tip attached to a handle. The primary function of a leather awl for punch holes is to create clean, consistent openings in leather. These holes serve as guides for your leather sewing needle awl to pass through, ensuring that your stitches are evenly spaced and secure. Without these pre-punched holes, attempting to push a needle through thick leather would be incredibly difficult, potentially damaging both the needle and the leather.
Think of it as the foundation for your stitching. The quality of the holes you create directly impacts the quality of your finished product. A well-placed and properly sized hole makes for a strong seam that will last.
Types of Leather Sewing Awls
While the basic principle remains the same, there are a few variations of awls you might encounter:
- Scratch Awl: This is the most basic type. It has a sharp point and is used for marking lines on leather or for creating pilot holes. It’s not typically used for stitching holes directly.
- Stitching Awl: This is what we’ll be focusing on. It’s designed specifically for creating the holes needed for hand-sewing leather. These often have a broader tip or a specific bevel to create a clean slit that can accommodate thread.
- Round Awl: This type has a rounded, pointed tip. It creates a round hole, which is good for certain types of stitching or when you want a less noticeable hole.
- Blade Awl (or Diamond Awl): This is a very common type for leatherworking. It has a flattened, diamond-shaped tip. This shape creates a small, clean slit that is ideal for guiding a flat leather stitching needle and for making the stitch holes slightly angled, which can add to the strength and aesthetic appeal of the seam. This is often referred to as a leather stitching awl and is what most beginners start with.
- Automatic Awl: These are powered awls that can rapidly punch holes. While efficient, they can be less precise for beginners and are often overkill for typical hand-sewing projects.
For most beginners using leather awl for stitching, a good quality blade or diamond awl is the best choice.
Choosing Your First Leather Sewing Awl
When you’re just starting, it’s easy to get overwhelmed by the sheer variety of tools available. Here’s what to consider when picking out your first leather awl tool for sewing:
Handle Comfort and Grip
The handle is where you’ll be holding the awl for extended periods. A comfortable handle will prevent hand fatigue and allow for better control.
* Wooden Handles: Traditional and often very comfortable. Look for smooth, well-finished wood.
* Ergonomic Handles: Some awls come with specially shaped handles designed to fit naturally in your hand.
* Grip Material: Some handles have rubberized or textured grips for added control.
Tip Material and Sharpness
The tip is the business end of your awl.
* Steel: Most good quality awls are made from hardened steel, ensuring durability and a sharp point.
* Sharpness: A sharp awl will glide through the leather with ease. If the tip feels dull, it will require more force, increasing the risk of slipping and damaging your work or yourself.
Tip Shape
As discussed, the diamond-shaped blade awl is excellent for leather stitching awl technique as it creates a slit that helps guide your needle and thread.
Budget
You don’t need the most expensive awl to start. A decent quality awl can be found at a reasonable price point. As you progress and your needs become more specific, you can invest in higher-end tools.
The Essential Companion: The Stitching Pony or Clamp
While not strictly part of the awl itself, a stitching pony or a good leather clamp is almost essential for effective leather awl for hand sewing. A stitching pony holds your leather project firmly in place, leaving both your hands free to manipulate the awl and needle. This stability is crucial for creating straight, even stitches. Without one, you’ll find yourself struggling to keep the leather steady, which will directly impact the quality of your stitching.
Mastering the Leather Awl: A Step-by-Step Guide
Now, let’s get down to the nitty-gritty of how to use a leather sewing awl. This process involves preparing your leather and then making those crucial holes.
Step 1: Preparing Your Leather
Before you even think about using the awl, ensure your leather is ready.
* Marking Your Stitching Line: This is a critical first step. You need to know where you want to stitch. Use a scratch awl, a groover, or a stitching wheel to lightly mark your intended stitch line. This line will guide where you place your awl holes.
* Thick vs. Thin Leather: The thickness of your leather will influence how much pressure you need to apply and the angle of your awl. Thicker leather will require more force and potentially a slightly wider hole.
Step 2: Positioning the Awl
Place the tip of your awl directly on the marked stitching line.
* Angle: For most leather stitching awl technique, you’ll want to hold the awl at a slight angle, mirroring the angle you want your stitches to have. This angle is typically around 45 degrees, but can vary depending on the desired look and stitch strength.
* Consistency is Key: Try to maintain a consistent angle for all your holes. This ensures your stitches will look uniform and professional.
Step 3: Punching the Hole
This is where the action happens.
* Pressure and Twist: Apply firm, steady pressure and gently twist the awl. The sharp tip should bite into the leather and begin to create a hole.
* Controlled Movement: Don’t just jam the awl through. A controlled twisting motion will create a cleaner hole.
* Depth: You want to punch all the way through the leather. If you’re using a stitching pony, ensure the awl can pass through without hitting the clamp.
* For Blade Awls: The blade of the awl should be oriented to create a slit in the direction of your stitch. This slit will act as a channel for your thread.
Step 4: Advancing and Repeating
After punching one hole, you need to move to the next.
* Spacing: The distance between your holes determines the length of your stitches. This is often dictated by your thread thickness and the desired look. A common spacing is 3-4 millimeters between holes.
* Using Your Previous Hole: Often, the tip of the awl can be placed in the previous hole to ensure consistent spacing and alignment. This is a crucial part of how to use leather punch awl effectively.
* Steady Advancement: Move along your marked line, punching each hole with the same consistent angle and pressure.
Step 5: Threading Your Needle
Once you have a series of holes, it’s time to stitch. Use a strong, waxed thread and a leather sewing needle. The needle should be able to pass easily through the holes you’ve created.
Key Techniques for Better Stitching
Using leather awl for stitching effectively involves more than just punching holes. Here are some tips to elevate your craft:
Consistency in Hole Spacing and Angle
This is paramount. Evenly spaced and angled holes create a professional and durable seam.
* Use a Pricking Iron or Wheel: For very precise spacing, many leatherworkers use a pricking iron (a multi-pronged tool that punches several holes at once) or a stitching wheel that marks the spacing before you punch with the awl. However, for beginners, carefully measuring and using the awl itself is a good starting point.
* Practice: The more you practice, the better you’ll become at judging consistent spacing and angles.
Hole Size Management
The size of the hole matters.
* Too Small: If the holes are too small, the thread might not fit comfortably, or it could cut into the leather, weakening the seam.
* Too Large: Holes that are too large can make the stitches look sloppy and might not provide enough support.
* Blade Awl Advantage: The slit created by a blade awl is often preferred because it’s just wide enough for the thread and the angle helps the thread lay flat.
Stitching Through Multiple Layers
When stitching thicker projects or multiple layers of leather, the awl is your best friend.
* Punching Through All Layers: Ensure you punch through all layers of leather at once. This keeps everything aligned.
* More Force Needed: Be prepared to apply more pressure for thicker stacks of leather.
Repair and Modification
Beyond stitching, a leather awl for punch holes can be used for:
* Marking: Clearly mark where you want to cut or fold.
* Minor Repairs: In a pinch, an awl can be used to carefully poke out a stray thread or slightly enlarge a hole that’s become too tight.
Common Beginner Mistakes and How to Avoid Them
Even with the best intentions, beginners can make a few common errors when using a leather awl.
Mistake 1: Inconsistent Hole Spacing
Why it happens: Not carefully measuring or using a guide.
How to avoid: Use a ruler and a scratch awl to mark your stitch line and individual hole placement. Practice makes perfect!
Mistake 2: Varying Awl Angle
Why it happens: Holding the awl loosely or changing grip.
How to avoid: Focus on a firm, consistent grip. If using a stitching pony, ensure the leather is stable, allowing you to focus on your awl angle.
Mistake 3: Not Punching Deep Enough
Why it happens: Hesitation or not applying enough pressure.
How to avoid: Commit to the punch. A shallow hole won’t allow your needle to pass through properly.
Mistake 4: Awl Slipping
Why it happens: Dull awl, too much force applied incorrectly, or the leather moving.
How to avoid: Ensure your awl is sharp. Apply steady pressure with a slight twist. Use a stitching pony or clamp to secure the leather.
Mistake 5: Punching Holes Too Close to the Edge
Why it happens: Poor planning or not using a stitching groover.
How to avoid: Always mark your stitch line at a consistent distance from the edge. A stitching groover creates a channel for your stitches, helping to keep them away from the very edge, which adds strength.
Caring for Your Leather Sewing Awl
Your tools are an investment, and proper care will ensure they last a long time.
* Keep it Sharp: A dull awl is dangerous and ineffective. Sharpen it occasionally with a fine-grit sharpening stone or honing strop.
* Cleanliness: Wipe the awl clean after each use, especially if working with dyed or finished leather, to prevent any residue buildup.
* Storage: Store your awl in a protective case or sheath to prevent the tip from getting damaged or causing accidental injuries.
Advanced Techniques and Tools
As you become more comfortable with the basics of how to use leather punch awl, you might explore:
Stitching Grooves
A stitching groove is a tool that cuts a shallow channel along your stitch line. Punching your awl holes within this groove helps protect the stitches from abrasion and gives a cleaner, more professional look.
Pricking Irons
These are specialized tools with multiple sharp teeth set at a specific spacing. When struck with a mallet, they punch several holes simultaneously, ensuring perfect, consistent spacing. They are often used in conjunction with an awl or as a replacement for marking individual holes.
Diamond Chisels
Similar to pricking irons, diamond chisels create diamond-shaped slits, but they are typically used by striking with a mallet. They are highly efficient for creating stitching holes, especially on thicker leather.
When to Use a Stitching Awl vs. Other Methods
While the awl is fantastic for hand-sewing, it’s not the only way to create stitching holes.
Sewing Machine
For very long seams or production work, a leather sewing machine is faster and can create strong stitches. However, machines require specific needles and threads and can be less forgiving with thicker leathers.
Scratch Awl for Marking
A scratch awl is excellent for lightly marking your stitch line before using your stitching awl. This ensures your stitch line is straight and consistent.
Awl for Making Holes (General Use)
When you just need to poke a hole for something other than stitching, like attaching a rivet or creating a decorative pattern, a standard scratch awl is often sufficient.
The Beauty of Hand-Sewn Leather
Leather sewing awl technique is at the heart of beautiful, durable hand-sewn leather goods. The slight imperfection of hand-stitched seams often adds character and charm, a testament to the craftsmanship involved. By mastering the use of your leather awl tool for sewing, you unlock a world of creative possibilities.
The process of using leather awl for stitching might seem daunting at first, but with practice and patience, it becomes second nature. It’s a fundamental skill that allows you to create truly unique and lasting leather items. Remember, every great leatherworker started where you are now – learning to use their tools with care and precision.
So, grab your leather, your awl, and your thread. Enjoy the journey of learning this rewarding craft. With this how to guide leather awl, you’re well on your way to creating beautiful, hand-stitched leather creations that you can be proud of.
Frequently Asked Questions (FAQ)
Q1: What is the difference between a scratch awl and a stitching awl?
A: A scratch awl has a pointed tip and is mainly used for marking lines or creating small pilot holes. A stitching awl, particularly a blade or diamond awl, has a tip designed to create a slit or hole that is the correct size and shape for a leather sewing needle and thread.
Q2: Can I use a regular awl for leather stitching?
A: While you can make holes with a regular awl, a dedicated leather stitching awl is highly recommended. Its tip is designed to create the optimal slit for thread, making stitching easier and stronger, and preventing the thread from fraying or cutting.
Q3: How do I make my stitches straight?
A: Mark your stitch line clearly before using the awl. Practice holding the awl at a consistent angle. Using a stitching pony or clamp to hold the leather steady will also greatly improve the straightness of your stitches.
Q4: What is the best way to use a leather awl?
A: The best way involves preparing your leather by marking your stitch line, holding the awl at a consistent angle (usually around 45 degrees), applying firm pressure with a slight twisting motion, and ensuring each hole is punched cleanly through all layers of leather.
Q5: How far apart should my stitch holes be?
A: The spacing depends on your project and personal preference. A common spacing for hand-stitched leather is between 3mm and 4mm between holes. Consistency is more important than the exact measurement.
Q6: Do I need a stitching pony to use an awl?
A: While not strictly mandatory, a stitching pony or a good clamp is highly recommended. It holds your leather securely, leaving both your hands free to manipulate the awl and needle, leading to much better results and making the process far easier.
Q7: How often should I sharpen my leather sewing awl?
A: You should sharpen your awl when you notice it struggling to penetrate the leather cleanly or if it feels dull. This might be after every few projects or more frequently depending on the leather you are working with and the frequency of use.
Q8: Can I use an awl for sewing on thick leather?
A: Yes, an awl is essential for sewing on thick leather. You may need to apply more pressure and ensure your awl is sharp and sturdy enough to handle the thicker material. Punching through all layers simultaneously is key to maintaining alignment.