
You need to wind a sewing machine bobbin to have thread ready for the bottom part of your sewing stitch. A bobbin winder is the part on your sewing machine that helps you put thread onto the bobbin neatly and quickly. It’s a simple but key part of getting your machine ready to sew.
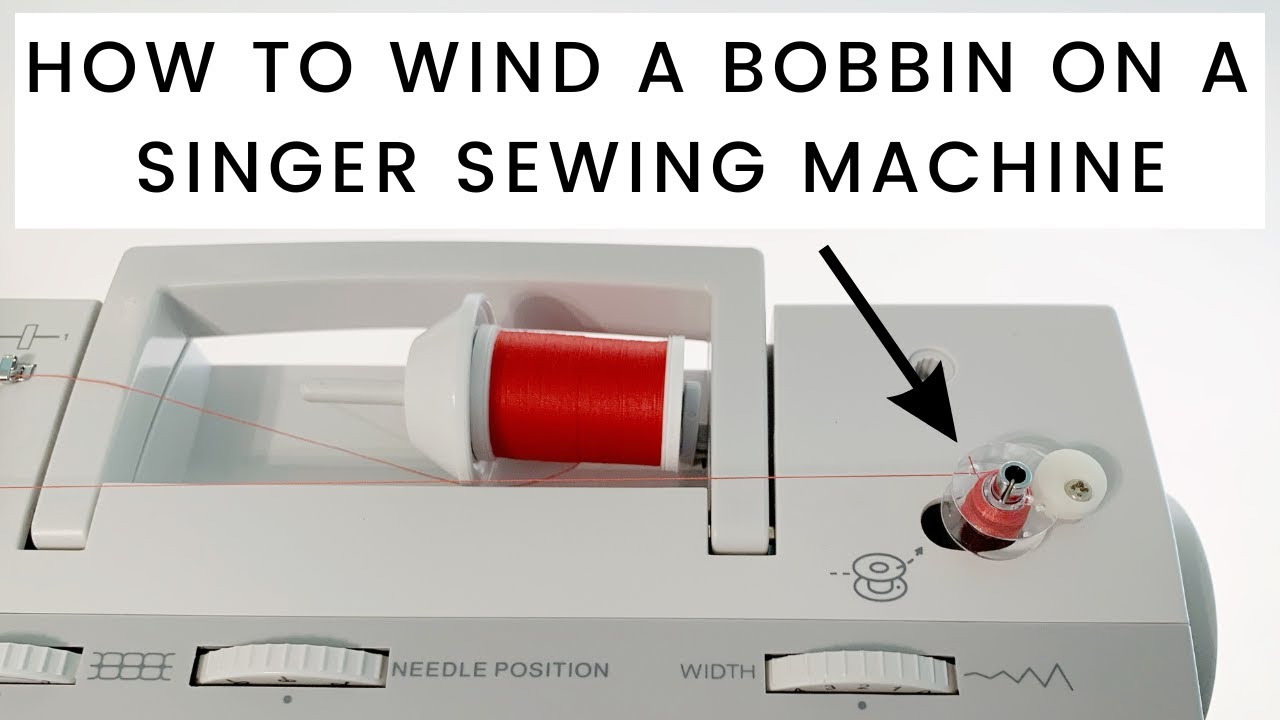
Image Source: i.ytimg.com
Grasping the Basics: The Parts You Need
Before you start winding thread, know the parts you will use. You need your thread spool. This is the big spool of thread. You also need a sewing machine bobbin. This is a small spool. It holds the thread that goes under your fabric. Most machines have a bobbin winder. This is a special pin or area on the top or side of your machine. Its job is to spin the small bobbin. It helps fill bobbin with thread from the big spool. Knowing these parts helps you get ready.
What is a Sewing Machine Bobbin?
A sewing machine bobbin is like a small cylinder. It has ends to keep the thread on. These small spools come in different sizes and materials. Some are metal. Some are plastic. Your machine uses a certain type. Make sure you use the right size sewing machine bobbin. Using the wrong one can cause problems. It might not fit right. It might not wind correctly. It might make bad stitches. Always check your machine book. It tells you the right bobbin size.
About the Thread Spool
You will use thread from a larger spool. This is the thread you see on top of your machine. This thread will be wound onto the sewing machine bobbin. You need to put this spool in the right place. Your machine has a spool pin. It might stand up tall. It might lay flat. Place your thread spool on this pin. Make sure the thread comes off the spool correctly. For most threads, it should come off over the top edge. This is like it’s coming off a roll.
What is the Bobbin Winder?
The bobbin winder is a key part for winding thread onto bobbin. Look at your sewing machine. Find a little pin that sticks up. This pin often has a clip or a spot to hold the bobbin. There might also be a tension guide near it. This guide helps keep the thread tight as it winds. The bobbin winder makes the bobbin spin fast. This pulls thread from your big spool. It wraps it around the little bobbin. Some machines have an automatic bobbin winder. Others are more simple. No matter the type, its goal is to fill bobbin for you.
Getting Your Machine Ready: Sewing Machine Setup
Before you wind your bobbin, do a quick sewing machine setup.
1. Turn on the power. Plug in your machine. Turn on the power switch. You need the machine to make the bobbin winder spin.
2. Raise the presser foot. This is the little foot that holds your fabric down. Lift it up. It’s good practice. It releases tension on other parts of the machine.
3. Check the needle. For some machines, you might need the needle up. Or the machine might tell you to take the thread out of the needle. Most machines have a handwheel. Turn it to move the needle up if needed.
These steps help make sure your machine is ready for winding. It is different from setting up for sewing. You are just getting power to the bobbin winder.
Step-by-Step: Winding Your Bobbin
Now let’s go through winding thread onto bobbin. This is a simple process. Follow these steps carefully. You will have a full thread bobbin soon.
Step 1: Place the Thread Spool
First, put your large thread spool on the spool pin. If your pin stands up, put the spool on it. If it lays flat, put the spool on it the other way. Make sure the thread can unroll smoothly. Some machines have a little cap for the spool pin. Put this cap on. It stops the thread from jumping off. It holds the spool steady.
Step 2: Find the Bobbin Winder Path
Your machine has a path for the thread to follow for winding. This path guides the thread. It makes sure the thread is ready for the bobbin winder. Look for numbers or pictures on your machine. These show you the path. The path usually starts at the spool pin. It goes through a guide. It might go around a tension disc. This tension disc is important. It keeps the thread tight. This makes the bobbin wind evenly. Find the right path for winding thread onto bobbin.
Step 3: Thread the Bobbin Winder Tension
Follow the path you found in Step 2. Take the thread from the spool. Guide it through the first thread guide. Then wrap it around the bobbin winder tension disc. This disc looks like two metal plates together. The thread goes between these plates. This adds a little pull, called tension. Good tension means the thread winds neatly onto the sewing machine bobbin. If the thread is too loose here, your bobbin will be loose. A loose thread bobbin can cause problems later.
Step 4: Place the Empty Bobbin
Get your empty sewing machine bobbin. Find the bobbin winder pin or post. Push the bobbin onto this pin. Make sure it sits all the way down. It should fit snugly. The hole in the center of the bobbin goes onto the pin. Most bobbins have a small hole or notch on the top edge. You will use this hole in the next step. Make sure the bobbin is ready to spin.
Step 5: Secure the Thread on the Bobbin
Now you need to attach the thread to the empty sewing machine bobbin. Take the end of the thread coming from the tension guide. Thread this end through the small hole or notch on the edge of the bobbin. Push about an inch of thread through the hole. This bit of thread helps the winding start. It gives the machine something to grab onto. It makes sure the first few turns of thread stick to the bobbin. This is key for the fill bobbin process to work right.
Step 6: Engage the Bobbin Winder
This is a crucial step to start winding thread onto bobbin. Your bobbin winder pin usually moves. It might slide to the side. Or it might tilt down. You need to move the bobbin winder into the “winding” position. Push the pin with the bobbin on it towards the right. Or push it down. This locks the bobbin winder into place. When it’s in this position, the machine’s motor will make it spin. If you don’t engage it, the machine might just sew when you press the pedal. Check your machine book if you are unsure how to engage your specific bobbin winder.
Step 7: Hold the Thread Tail (for the start)
Remember that little bit of thread you put through the hole on the bobbin? When you start winding, hold onto this thread tail. Hold it gently. As the bobbin starts to spin, it will wrap thread around itself. The first few turns will catch the thread tail. After just a few wraps, you can let go. The tail will be held in place by the new layers of thread. Forgetting to hold the tail can make the start of the bobbin messy. Or the thread might not catch at all.
Step 8: Start Winding!
Now you are ready to fill bobbin. Press the foot pedal or the start button on your machine. The bobbin winder will start to spin the bobbin very fast. Watch the thread wind onto the bobbin. The tension you set up helps it wind smoothly. At the very start, you might see the thread building up in one spot. The bobbin winder arm will move back and forth. This arm guides the thread. It helps spread the thread evenly across the bobbin. This makes a nice, neat thread bobbin.
Controlling Winding Speed
Most machines let you control the winding speed. Press the foot pedal lightly to go slow. Press it harder to go faster. Some machines have a speed slider. For winding thread onto bobbin, a steady speed is good. Going too fast can sometimes make the thread wind unevenly. Or it can cause thread breaks. Find a speed that works well. The bobbin winder will do its job.
Step 9: Let the Bobbin Fill
Keep the machine running. Let the bobbin winder fill bobbin until it is full. Watch it wind. See the layers of thread grow. The bobbin winder arm will move back and forth. It makes sure the thread layers are even. A well-wound thread bobbin looks smooth. The thread is packed neatly from one side to the other.
Step 10: The Automatic Stop (Usually)
Most modern bobbin winder units have an auto-stop feature. When the sewing machine bobbin is full, the thread will reach a certain point. This point is often a small lever or guide that the thread touches. When the thread pushes against this point, it tells the bobbin winder to stop spinning. This stops the process automatically. You know the fill bobbin is complete. If your machine doesn’t stop automatically, watch the bobbin. Stop when it looks full. Don’t overfill it. An overfilled bobbin might not fit in the bobbin case.
Step 11: Cut the Thread
The bobbin is full. The winding has stopped. Now cut the thread. There is usually a small thread cutter near the bobbin winder. It might be on the machine’s body. Or it might be part of the bobbin winder unit. Slide the thread into the cutter. Or use scissors. Cut the thread that connects the full thread bobbin to the thread spool. Leave a little tail (about 3-4 inches) on the full bobbin. This tail is helpful when you are loading bobbin into the machine or bobbin case.
Step 12: Remove the Full Bobbin
The final step is to take the full thread bobbin off the bobbin winder. Slide the bobbin winder pin back to its resting position. This is usually to the left. Or it might flip up. This disengages the winder. Then lift the full bobbin off the pin. You now have a ready-to-use thread bobbin. Good job! This fresh bobbin is ready for loading bobbin into your machine.
Here is a simple table summarizing the main steps:
| Step Number | Action | Key Point |
|---|---|---|
| 1 | Place Thread Spool | Put big spool on pin, secure it if needed. |
| 2 | Find Bobbin Winder Path | Look for machine guides/numbers for winding. |
| 3 | Thread Winder Tension | Wrap thread around tension disc for neat winding. |
| 4 | Place Empty Bobbin | Push bobbin onto the bobbin winder pin. |
| 5 | Secure Thread on Bobbin | Put thread end through hole/notch on bobbin edge. |
| 6 | Engage Bobbin Winder | Slide or move the winder pin into winding spot. |
| 7 | Hold Thread Tail | Gently hold tail for first few wraps, then release. |
| 8 | Start Winding | Press pedal, let bobbin spin and fill. |
| 9 | Let Bobbin Fill | Watch bobbin fill evenly with thread. |
| 10 | Wait for Auto-Stop (or Stop) | Stop when bobbin is full (auto or manually). |
| 11 | Cut the Thread | Use cutter or scissors to free the full bobbin. |
| 12 | Remove Full Bobbin | Disengage winder, lift full bobbin off pin. |
This process is the basic way to winding thread onto bobbin for most machines.
Avoiding Mistakes When You Fill Bobbin
Sometimes things go wrong when you fill bobbin. Here are common problems and how to avoid them.
- Thread winds too loose: If the thread on your bobbin is soft and squishy, it’s too loose. This happens if you didn’t thread through the
bobbin windertension guide correctly. Make sure the thread is between the tension discs. Loose bobbins can cause messy stitches and tangles while sewing. - Thread winds too tight: If the bobbin looks like it’s pulling itself inwards, or if the thread digs into the layers below, it’s too tight. This is less common but can happen if the tension guide is too tight or the thread is wrapped wrong. Very tight bobbins can stretch the thread. This can weaken it.
- Thread piled on one side: If thread only piles up on one side of the bobbin, the
bobbin winderarm might be stuck. This arm should move back and forth. It spreads the thread evenly. Check the arm. Make sure it is clean and can move freely. A bobbin filled on one side will not fit right. - Using the wrong bobbin size: Always use the bobbin made for your machine. They look similar, but sizes and shapes vary slightly. Using the wrong one can cause winding problems. It can also cause sewing problems. Check your manual!
- Not securing the thread at the start: If you don’t put the thread end through the hole on the bobbin edge, the thread might not catch. It might just make a mess around the winder pin. Always thread through the bobbin hole first.
By checking these points, you can make sure your winding thread onto bobbin goes smoothly every time. A good thread bobbin is the start of good sewing.
Using Your Full Thread Bobbin
You have finished winding thread onto bobbin. Now you have a full thread bobbin. What next? You need to put this bobbin into your sewing machine. This is called loading bobbin or inserting bobbin.
There are two main ways machines hold the bobbin:
- Drop-in Bobbin: Many newer machines have a clear cover plate on the sewing bed. The bobbin drops into a special holder from the top. You usually don’t use a
bobbin casethat you remove fully.Inserting bobbininvolves placing the bobbin in the holder. You make sure the thread comes out in the right direction. There is usually a guide slot. Pull the thread through it. - Front-load or Side-load Bobbin: Older machines often have a metal
bobbin case. You take thisbobbin caseout of the machine. You place thesewing machine bobbininto thebobbin case. Then you thread the bobbin case. The thread goes through a slot and under a little tension spring on the case. Afterloading bobbininto thebobbin case, you insert the wholebobbin caseback into the machine’s bobbin area.
Both methods need a full thread bobbin. The process of loading bobbin or inserting bobbin into the machine is the next step after winding. Getting the thread into the bobbin case (if you have one) or the drop-in holder correctly is vital for good stitches. This is a different skill than winding. But winding must come first!
Different Types of Bobbins and How They Wind
Not all sewing machine bobbin types are the same. And not all bobbin winder units work the exact same way. Knowing the types helps.
Bobbin Types
- Class 15 Bobbins: These are very common. They are flat on top and bottom. They often have small holes on the sides. They can be metal or plastic. Many home sewing machines use Class 15 bobbins.
- Class 66 Bobbins: These look different. They are a bit taller and curved on the top and bottom edges. They are often plastic. Some Singer machines use Class 66 bobbins.
- L Style Bobbins: These are small and flat. They are used in many embroidery machines and some sewing machines. They are often plastic or pre-wound.
- M Style Bobbins: These are larger than L style. They are used in many longarm quilting machines and some industrial machines.
Why does the type matter for winding? The bobbin winder pin and mechanism are made for a specific bobbin shape and size. Using the wrong type means it won’t fit. It won’t spin correctly. It won’t fill bobbin right. Always buy bobbins that match your machine’s class or style.
Bobbin Winder Types
Most home machines have a bobbin winder built-in.
* Manual Engagement Winder: This is the most common. You push the bobbin winder pin to the side to engage it. This connects it to the motor. You usually control the speed with the foot pedal. The auto-stop is often a simple lever.
* Automatic Bobbin Winder: Some high-end machines have an automatic bobbin winder. You place the bobbin on the pin. You guide the thread. Then you might just press a button. The machine might wind the bobbin automatically. It might control the speed itself. These are very convenient. They make winding thread onto bobbin even easier. Some very fancy machines might even have a separate motor just for the automatic bobbin winder. This means you can wind a bobbin while you are sewing with another one! But this is not common on most home machines.
No matter the type of automatic bobbin winder or manual one, the basic idea is the same: spin the bobbin, guide the thread, and fill bobbin neatly.
Keeping Your Bobbin Winder Working Well
Your bobbin winder needs care too. Lint and thread bits can build up.
- Clean the Area: Use a small brush to clean around the
bobbin winderpin and the tension discs. Lint here can affect the tension. It can make your bobbins wind unevenly. - Check for Damage: Look at the winder pin. Make sure it’s not bent. Check the tension discs. Make sure they are clean and smooth. Check the little lever or arm that guides the thread or stops the winding. Make sure it moves freely.
- Refer to Manual: Your machine manual will have specific tips for cleaning the
bobbin winder. Follow its advice.
Taking a moment to keep the bobbin winder clean helps ensure it works correctly every time you fill bobbin.
Tips for Perfect Bobbin Winding
Here are some extra tips for better winding thread onto bobbin:
- Use the Same Thread: Always wind the
sewing machine bobbinwith the same type and weight of thread you are using in the needle. Using different threads can mess up your stitches. - Don’t Wind Too Fast: While it’s tempting to go full speed, a moderate, steady speed is better. This helps the thread wind evenly.
- Check Tension: Feel the tension when you pull the thread through the
bobbin windertension discs before winding. It should have a slight pull. If it’s too easy or too hard, re-thread that part. - Don’t Overfill: Stop winding when the
automatic bobbin winderstops, or when the bobbin looks full but not bulging. Overfilled bobbins cause problems. - Keep it Neat: Start the winding neatly by using the bobbin’s hole and holding the tail. This makes the rest of the winding much better.
- Wind Enough: Make sure you wind enough thread. Running out mid-seam is annoying! Wind a full bobbin each time.
Mastering winding thread onto bobbin is a basic but very important sewing skill. It sets you up for successful stitching. Every sewist needs a good thread bobbin to sew properly. Learning this simple process is part of knowing your machine. Your sewing machine setup for winding might be a little different than your friend’s. That’s okay. Just follow your machine’s guides.
The Importance of a Well-Wound Bobbin
Why do we focus so much on how to fill bobbin? A poorly wound bobbin leads to problems. Loose bobbins can birdnest (make a tangled mess of loops) on the bottom of your fabric. Tight bobbins can break thread. Uneven bobbins don’t fit right in the bobbin case or holder. They can cause skipped stitches. Or they can make the thread break.
A correctly wound thread bobbin unwinds smoothly. It provides the right amount of tension from the bottom. This tension works with the top thread tension. It creates a balanced stitch. This balanced stitch looks the same on the top and bottom of your fabric. It is also strong and holds your seams together.
So, taking the time to wind your sewing machine bobbin properly is not a wasted step. It is a time-saver in the long run. It prevents frustration from machine problems. It helps you make stitches that look good.
Remember the steps: Thread the spool, go through guides, use the bobbin winder tension, put the bobbin on the pin, secure the thread, engage the winder, hold the tail, start winding, let it fill bobbin neatly, stop, cut, and remove. Practice makes perfect. Soon, winding thread onto bobbin will be second nature to you. You will do it without even thinking. It will be a smooth part of your sewing machine setup.
Winding with Special Threads
What if you use special threads? Like thick threads, thin threads, or stretchy threads?
* Thick Threads: Some very thick threads might not wind well on a standard sewing machine bobbin. They can overfill it quickly. Or they might not fit through the tension guides. Check your machine manual. It might have limits on thread size for the bobbin winder.
* Thin Threads: Very fine threads can be tricky. Make sure they stay in the tension guide. Wind them at a steady, maybe slightly slower, speed.
* Stretchy Threads: Elastic thread or similar stretchy threads are often wound by hand onto the bobbin. You do NOT use the bobbin winder. Winding stretchy thread with tension will make it stretch. When it relaxes, it will cause problems. You just gently place the stretchy thread onto the bobbin by hand. For standard sewing thread, though, always use the bobbin winder.
For most common sewing threads (cotton, polyester, rayon), the standard winding thread onto bobbin steps using the bobbin winder work best.
FAQ: Questions About Winding Bobbins
Q: My bobbin winder isn’t spinning. What’s wrong?
A: Make sure you have engaged the bobbin winder pin. It usually needs to be pushed to the side or down. Check your machine manual to see how to engage it. Also, make sure the machine power is on. On some machines, the needle must be in the up position.
Q: Why does my thread break when winding the bobbin?
A: This can happen if the thread is old or weak. It can also happen if the bobbin winder tension is too tight. Check that the thread is running smoothly from the spool and through the tension guide. Clean the tension discs. If your machine has a separate motor for the automatic bobbin winder, it might be winding too fast.
Q: How do I know when the bobbin is full?
A: Most modern machines have a bobbin winder with an auto-stop. It will stop on its own. If yours doesn’t, stop winding when the thread reaches just below the edge of the bobbin flange (the side disc). Don’t let it pile up above the edge. An overfilled thread bobbin will cause issues fitting into the machine or bobbin case.
Q: Can I use pre-wound bobbins?
A: Yes, for some machines and applications, pre-wound bobbins are available. These bobbins come already filled with thread. They are convenient. However, they might not work in all machines. And the thread type/quality might be different from the thread you use on top. Check your machine manual to see if pre-wound bobbins are recommended. If you use them, you skip the whole winding thread onto bobbin step.
Q: My bobbin winds unevenly. What should I check?
A: Make sure you threaded through the bobbin winder tension correctly. Clean the tension discs. Check the thread path. Make sure the bobbin winder arm or guide (if your machine has one that moves) is free from lint and moves smoothly. It moves back and forth to spread the thread. Sometimes winding too fast causes unevenness. Try winding at a slower speed.
Q: Does the direction matter when putting the bobbin on the winder pin?
A: Usually no, for the winding process itself. The pin goes through the middle hole. However, the direction the thread comes off the finished thread bobbin does matter when you are loading bobbin into the machine or bobbin case. Always check your machine manual for the correct direction of thread unwinding for loading bobbin or inserting bobbin.
Q: My machine makes a loud noise when winding the bobbin. Is that normal?
A: Some noise is normal as the bobbin winder spins fast. However, a new, loud grinding, squeaking, or knocking sound could mean something is wrong. It might need cleaning or oiling. Check the machine manual. Stop if the noise sounds bad and investigate.
Q: Do I need to hold the top thread when winding?
A: You hold the tail of the thread coming from the bobbin at the very start of winding (Step 7). You do not need to hold the top thread coming from the spool after the first few turns. The bobbin winder tension and the bobbin itself will pull the thread.
Q: Can I wind a bobbin with the needle threaded?
A: It depends on the machine. Some machines require you to unthread the needle first. Others don’t mind. Some have a feature that disconnects the needle mechanism when the bobbin winder is engaged. Check your manual for your specific sewing machine setup for winding. It’s often safer to unthread the needle or lift the presser foot.
Q: How much thread should I wind on a bobbin?
A: Wind a full bobbin. The automatic bobbin winder will stop when it’s full, or you stop when it reaches the edge. A full thread bobbin gives you plenty of sewing time. Winding only a little bit means you have to stop and wind again sooner.
Q: Why is it important to use the correct bobbin case?
A: The bobbin case holds the bobbin and provides the bottom thread tension. If your machine uses a removable bobbin case, it is made for your machine and bobbin type. Using the wrong bobbin case means the bobbin might not fit, or the tension will be wrong. This will lead to poor stitch quality.
Q: My automatic bobbin winder doesn’t stop. What is broken?
A: The auto-stop mechanism might be blocked by lint or damaged. On many machines, this is a small lever or hook near the winder pin. When the bobbin fills, the thread pushes against this lever, stopping the winding. Clean this area carefully. If it still doesn’t work, the part might be broken and need repair. Stop winding manually if the auto-stop fails.
Q: Can I wind thread from a cone instead of a spool?
A: Yes, but you might need a special cone adapter or stand. Cones are larger and sit differently than spools. The adapter holds the cone so the thread can feed correctly to the bobbin winder path. This helps maintain the right tension and prevents the cone from falling over.
Q: Why does my bobbin wind loosely even with tension?
A: Double-check you are using the correct sewing machine bobbin for your machine. An ill-fitting bobbin might not sit right on the pin or engage the winder properly. Also, ensure the thread path before the tension disc is clear and the thread isn’t snagging anywhere. Sometimes, thread that is too thick for the tension guide can cause issues.
Q: Is it okay to wind a bobbin over old thread?
A: No. Always wind a bobbin onto an empty bobbin. Winding over existing thread makes the bobbin uneven. The old thread might be a different type or color. It also makes it harder to know how much thread you have. Always empty the sewing machine bobbin before winding thread onto bobbin.
Winding your sewing machine bobbin is the first step to any sewing project. Get it right, and you are on your way to smooth sewing!