

Have you ever dreamed of transforming a pile of colorful plastic beads into a dazzling work of art? Perler beads are a fantastic way to get creative, but the magic truly happens when you iron them. Getting that perfect melt can feel like a mission, and choosing the right iron can be a puzzle.
Many people find themselves unsure about what makes an iron good for Perler beads. You might worry about melting them too much, not enough, or even ruining your iron! It’s frustrating when your hard work doesn’t turn out just right because of the tool you’re using. But don’t worry, we’re here to help you beat that bead-melting blues.
In this guide, we’ll explore the best irons for Perler beads, what features to look for, and some handy tips to make your ironing process a breeze. By the end, you’ll feel confident picking the perfect iron and ready to create amazing Perler bead masterpieces. Let’s dive in and discover how to get that perfect melt every time!
Our Top 5 Iron For Perler Beads Recommendations at a Glance
Top 5 Iron For Perler Beads Detailed Reviews
1. Honoson Mini Craft Iron Mini Heat Press Small Iron Portable Handy Tiny Flatiron with Charging Base Accessories for Fuse Beads Patch DIY Shoes T-Shirts Heat Transfer Vinyl Projects(Green)

Rating: 8.9/10
The Honoson Mini Craft Iron is a super handy tool for anyone who loves to get creative! This tiny heat press is perfect for all your small DIY projects, from adding patches to your favorite jacket to making cute t-shirts with heat transfer vinyl. Its small size makes it easy to handle and store, and it heats up fast, so you can start crafting in minutes.
What We Like:
- It’s super portable, measuring about 4.25 x 2.48 x 2.6 inches, making it easy to carry and store.
- Perfect for small and narrow areas, ideal for detailed craft work.
- Heats up quickly to around 170°C in just 1.5 to 3 minutes.
- Works on various fabrics like wool, polyester, silk, and nylon.
- Comes with a charging base and accessories for convenience.
- Great for fuse beads, patches, DIY shoes, t-shirts, and heat transfer vinyl projects.
What Could Be Improved:
- The cord is only about 1 meter (39 inches) long, which might be short for some projects.
- The specific heating temperature can be affected by the room temperature.
- Users need to be mindful of the small size and cord length when purchasing.
This mini craft iron is an excellent choice for crafters who need a compact and efficient tool for their detailed projects. It truly makes small DIY tasks a breeze.
2. HTVRONT Heat Press Mini Heat Press Machine
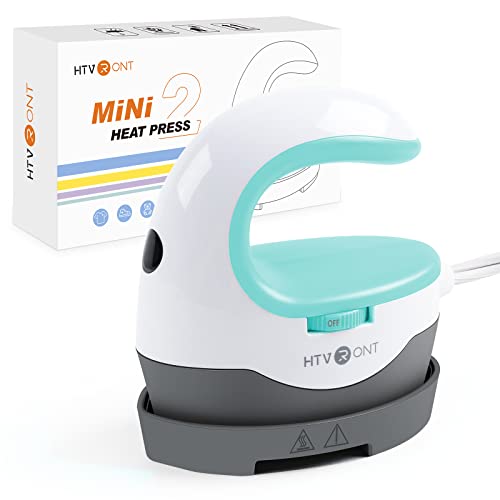
Rating: 8.7/10
Meet the HTVRONT Heat Press Mini Heat Press Machine in a delightful mint color! This little powerhouse is perfect for all your small crafting projects. It’s designed for ease of use, making it a great tool for anyone who loves to personalize t-shirts, hats, and other items with heat transfers.
What We Like:
- It’s small and super easy to handle for little projects. You don’t need a big machine for small jobs!
- It has three different heat settings: 284℉, 320℉, and 356℉. This lets you choose the right temperature for different materials.
- It heats up fast, saving you time. The handle is designed to keep your hands safe from burns.
- It comes with an insulated base and a user manual. It’s also lightweight, making it easy to take with you anywhere, like to a craft fair or a friend’s house.
- HTVRONT offers great customer service. If you have any issues, they promise to help you find a solution.
What Could Be Improved:
- While it’s great for small projects, it might not be suitable for very large designs or multiple items at once.
This mini heat press is a fantastic choice for crafters who need a portable and user-friendly option. It makes heat transfer projects fun and accessible for everyone.
3. Honoson Mini Craft Iron Mini Heat Press Small Iron Portable Handy Tiny Flatiron with Charging Base Accessories for Fuse Beads Patch DIY Shoes T-Shirts Heat Transfer Vinyl Projects(Purple)

Rating: 9.1/10
Unleash your creativity with the Honoson Mini Craft Iron! This adorable purple mini heat press is designed for all your small DIY projects. It’s perfect for adding those special touches to fuse beads, patches, custom shoes, t-shirts, and heat transfer vinyl designs.
What We Like:
- Its super compact size (around 4.25 x 2.48 x 2.6 inches) makes it incredibly portable and easy to store, fitting perfectly into your craft bag or drawer.
- The iron heats up quickly, reaching a working temperature of about 170°C in just 1.5 to 3 minutes, so you can start crafting almost immediately.
- It’s fantastic for getting into small and narrow areas on fabrics, making detailed work a breeze.
- The included charging base makes it easy to set up and use, and it comes with a 1-meter (39-inch) cord.
- It works well on a variety of fabrics like wool, polyester, silk, nylon, velvet, and linen.
- It’s a practical tool for anyone who loves crafting and DIY projects.
What Could Be Improved:
- The small size, while great for portability, might not be ideal for larger ironing tasks.
- The cord length is 1 meter, which might feel a bit short for some users depending on their workspace.
- Users need to be mindful of the cord length and the iron’s size before purchasing if these are crucial factors for their needs.
- Remember to turn off the switch and unplug when not in use to prevent accidents, and allow the iron to cool completely before storing.
This mini craft iron is a charming and effective tool for small-scale crafting. It’s a great addition to any DIY enthusiast’s collection.
4. Mini Crafts Iron Handy Heat Press Machine Kit Portable with PVC Doormat for Heat Transfer

Rating: 9.0/10
Unleash your inner crafter with the Mini Crafts Iron Handy Heat Press Machine Kit! This portable powerhouse is designed for all your DIY heat transfer projects, from custom t-shirts and shoes to personalized bags. It even comes with a PVC doormat for your convenience.
What We Like:
- Compact and Portable: This mini iron is super small, making it easy to take anywhere and store in tight spaces.
- Energy Efficient: It uses low power, so you don’t have to worry about high electricity bills.
- Versatile Heat Settings: With adjustable temperatures up to 430°F, it works great on different fabrics like cotton, linen, wool, and synthetics. Just a little water on the cloth helps!
- Built to Last: Made from strong ceramic and plastic, this iron is durable. It also has a safety feature that automatically turns it off if it gets too hot.
- Great for DIYers: It’s perfect for ironing on patches, heat transfer vinyl, and even rhinestones. It’s a fantastic gift for anyone who loves making things.
What Could Be Improved:
- Power Cord Length: The 3.3FT power cord might be a bit short for some users, limiting placement options.
- Learning Curve: While easy to use, mastering different temperature settings for various materials might take a little practice.
This mini heat press is a fantastic tool for crafters of all levels. Its portability and versatility make it a go-to for any DIY enthusiast looking to add a personal touch to their creations.
5. Calogy Mini Heat Press

Rating: 9.5/10
The Calogy Mini Heat Press is a compact and user-friendly heat transfer machine designed for all your crafting needs. It’s perfect for adding personalized touches to T-shirts, hats, bags, and more. This little machine makes creating custom items fun and easy.
What We Like:
- Super simple to use with just one button for all controls.
- It’s really small, making it easy to store and take with you.
- Three different heat settings let you choose the right temperature for your projects.
- The automatic shut-off feature gives you peace of mind.
- You can clearly see the temperature on the LED screen.
- It heats up quickly, so you don’t have to wait long.
- You can switch between Celsius and Fahrenheit easily.
- The handle is comfy to hold.
- The power cord can be unplugged for better storage.
- It works great for small and unique craft projects.
What Could Be Improved:
- The heat plate size might be too small for larger designs.
- It only comes with a US plug.
This mini heat press is a fantastic tool for crafters of all levels. It’s a great gift idea for anyone who loves to personalize their items.
Iron for Perler Beads: Your Melting Masterpiece Guide
Perler beads are a fun craft for all ages. You arrange tiny plastic beads on a pegboard to make cool designs. Then, you iron them to melt the beads together. This guide helps you pick the best iron for your Perler bead projects.
Key Features to Look For
When you buy an iron for Perler beads, think about these important features:
- Temperature Control: This is the most important feature. You need an iron that can get hot enough to melt the beads but not so hot that it melts the pegboard. Look for an iron with different heat settings. Some irons have a “synthetics” or “low” setting that works well.
- Smooth Soleplate: The soleplate is the bottom part of the iron that touches the fabric. A smooth soleplate glides easily over your Perler bead creations. It helps you iron evenly.
- Cord Length: A longer cord gives you more freedom to move around your workspace. You won’t be stuck too close to an outlet.
- Weight and Balance: A lightweight iron is easier to handle, especially for younger crafters. It should feel comfortable in your hand.
- Auto Shut-Off: This is a safety feature. If you forget to turn off the iron, it will shut itself off after a certain time. This prevents accidents.
Important Materials
You don’t need a special iron just for Perler beads. Many irons work well.
- Standard Household Irons: Most home irons are perfect for Perler beads. You might already have one!
- Travel Irons: Smaller travel irons can also work. They are lightweight and easy to store. Just make sure they have good temperature control.
Factors That Improve or Reduce Quality
The quality of your Perler bead creations depends on a few things.
What Makes a Great Melt:
- Consistent Heat: An iron that heats up quickly and stays at the right temperature makes melting easy.
- Even Heat Distribution: The heat should be the same all over the soleplate. This helps melt all the beads evenly.
- Non-Stick Soleplate: Some irons have a non-stick coating. This can prevent melted plastic from sticking to the iron.
What Can Cause Problems:
- Uneven Heating: If the iron has hot spots, some beads might melt too much while others don’t melt enough.
- Too High Heat: If the iron gets too hot, it can melt the pegboard or make the beads too flat and bubbly.
- Rough Soleplate: A soleplate with scratches or rough spots can snag on the beads.
User Experience and Use Cases
Using an iron for Perler beads is straightforward.
Getting Started:
First, lay out your Perler beads on a pegboard. Make your design. Then, place a piece of ironing paper (usually included with Perler beads) over your design. Set your iron to a low or medium heat setting (look for “synthetics” or “low”). Gently move the iron in a circular motion over the design. You should see the beads start to melt and stick together. Be patient! You want to melt them just enough.
Common Uses:
- Decorations: Make magnets, keychains, or ornaments.
- Gifts: Create personalized gifts for friends and family.
- Art Projects: Design unique pixel art.
- Stress Relief: The repetitive action can be calming.
Frequently Asked Questions (FAQ)
Q: What is the best temperature setting for Perler beads?
A: Start with the lowest heat setting on your iron, often labeled “synthetics” or “low.” You can test on a few spare beads first.
Q: Do I need a special iron for Perler beads?
A: No, a standard household iron or a travel iron works perfectly. The key is temperature control.
Q: What kind of ironing paper should I use?
A: Use the ironing paper that comes with your Perler beads. If you run out, you can buy more or use parchment paper.
Q: How long should I iron the beads?
A: Iron for about 10-20 seconds per section. You want the beads to fuse together but not melt into a puddle.
Q: My beads are sticking to the iron. What did I do wrong?
A: The iron might be too hot, or you may have forgotten to use ironing paper. Make sure the paper is between the iron and the beads.
Q: Can I iron both sides of a Perler bead creation?
A: Yes, you can iron both sides for extra strength. Just let the first side cool completely before ironing the second side.
Q: What if my iron doesn’t have a temperature setting?
A: If your iron only has an “on” and “off” switch, be very careful. Try ironing for a very short time, like 5 seconds, and check your beads. You might need to let the iron cool down between passes.
Q: Can I use a heat gun instead of an iron?
A: A heat gun can work, but it’s harder to control the heat and can easily melt the pegboard or the beads too much. An iron is generally easier and safer for beginners.
Q: How do I store my iron after using it for Perler beads?
A: Make sure the iron is completely cool before storing it. Unplug it and store it in a safe place.
Q: Are there any safety tips I should follow?
A: Always have an adult supervise when children are using an iron. Never leave a hot iron unattended. Be careful of the hot soleplate.
In conclusion, every product has unique features and benefits. We hope this review helps you decide if it meets your needs. An informed choice ensures the best experience.
If you have any questions or feedback, please share them in the comments. Your input helps everyone. Thank you for reading.