
Okay, here is the long-form blog post designed for high readability and covering the troubleshooting steps for a sewing machine that won’t sew.
Why is my sewing machine not sewing? Most times, it’s a simple fix like wrong threading, a bad needle, or a problem with the bobbin. Your machine might not sew because the thread is tangled, the needle is broken, the fabric is stuck, or the tension is off. Sometimes, the machine just needs cleaning. This post will help you find and fix the problem step by step. Think of it as your simple sewing machine troubleshooting guide. We will look at common issues like sewing machine skipped stitches, sewing machine thread breaking, sewing machine thread jam, sewing machine bobbin problems, sewing machine tension issues, sewing machine fabric not feeding, sewing machine needle breaking, and sewing machine upper thread issues. We’ll also touch on why sewing machine maintenance needed helps prevent these issues.
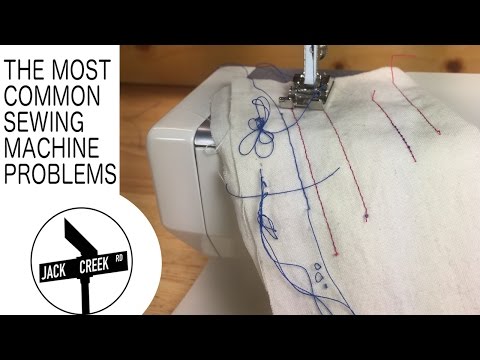
Image Source: i.ytimg.com
Starting Simple: Basic Checks First
Before you dig deep, let’s check the easy things. Sometimes the fix is super quick!
Is the Machine On?
This sounds silly, right? But check the power switch. Make sure it’s plugged in well. Is the power cord okay? Is the light on? A machine won’t sew if it has no power.
Is the Foot Pedal Connected?
If your machine uses a foot pedal, is it plugged in? Is the pedal itself working? Try pressing it gently.
Is the Bobbin Winder Engaged?
Most machines cannot sew when the bobbin winder is pushed over. Check the top of your machine. Is the bobbin winder pin pushed to the side? Push it back to the sewing position. The handwheel might also be disengaged (pulled out). Push it back in towards the machine body.
Turn the Handwheel
Can you turn the large wheel on the side of the machine by hand? Turn it slowly towards you. Does it move freely? Or is it stuck? If it’s stuck, something is jammed. We will look at jams soon. If it moves, that’s good.
Sorting Out Threading
Wrong threading is the number one reason a machine won’t sew right. Or won’t sew at all. A tiny mistake can stop everything. Let’s check both the top thread and the bobbin thread.
Sorting Out the Top Thread
- Take it all out: Remove the spool of thread. Cut the thread at the needle. Pull the rest of the thread out from the machine. Start over.
- Lift the presser foot: This is super important! When the presser foot is down, the tension discs are closed. If you thread with the foot down, the thread won’t sit in the tension discs right. This causes big problems. Always lift the foot before you start threading the top.
- Place the spool: Put the thread spool on the pin. Make sure it spins the right way. For most machines, the thread should come off the front of the spool. Some machines need the thread to come off the back. Check your machine book if you are unsure.
- Follow the path: Your machine has guides. These are small hooks or loops. Follow the numbers or marks on your machine exactly. Make sure the thread goes through every single guide.
- Get into the tension discs: The thread needs to go down and loop around or through the tension discs. Make sure the thread pops right into them. This happens best when the presser foot is up.
- Go up and down: The thread usually goes down, makes a turn or loop, goes up through the take-up lever, then goes back down to the needle.
- Check the take-up lever: This is a moving part that goes up and down as you sew. The thread MUST go through the hole or slot in the take-up lever. If it is missed, the machine will not make stitches. Turn the handwheel towards you to bring the take-up lever to its highest point before threading it.
- Thread the needle: Put the thread through the eye of the needle. Most machines thread from front to back. Pull about 6 inches of thread through the eye.
Why this fixes issues: Bad top threading is a major cause of sewing machine skipped stitches, sewing machine thread breaking, messy stitches, and sewing machine thread jam (often called a bird’s nest) under the fabric. Checking and fixing the sewing machine upper thread issues is key.
Sorting Out the Bobbin Thread
The bottom thread comes from the bobbin. Problems here are also very common. They lead to bad stitches, thread breaks, and jams. These are classic sewing machine bobbin problems.
- Check the bobbin: Is the bobbin wound evenly? If it looks messy or lumpy, wind a new one. Is the thread caught anywhere on the bobbin itself?
- Is it the right bobbin? Use only bobbins made for your specific machine. Different machines use different bobbin sizes and shapes (metal vs. plastic, different heights). Using the wrong bobbin causes many problems.
- Put the bobbin in correctly: This is critical. How the thread comes off the bobbin when you insert it matters a lot.
- For drop-in bobbins (top loading): The bobbin usually spins counter-clockwise when you pull the thread. Look for a diagram on your machine.
- For front-loading bobbin cases: Put the bobbin into the metal case. The thread usually comes off the left side, making the bobbin spin clockwise inside the case. Pull the thread into the small slot on the side of the case.
- Pull the thread: After putting the bobbin in, pull the thread tail a few inches.
- Pick up the bobbin thread: Hold the top thread gently. Turn the handwheel towards you one full turn. The top thread should go down, catch the bobbin thread loop, and pull it up through the needle plate hole.
- Pull both threads: Pull both the top and bobbin threads under the presser foot and towards the back of the machine. Leave tails about 4-6 inches long.
Why this fixes issues: Incorrect bobbin winding or insertion is a top reason for sewing machine thread breaking, loops on the bottom or top of your fabric (tension problems that start with the bobbin), and bad sewing machine bobbin problems that lead to nasty jams.
The Right Needle Matters
The needle is a small part, but it does a big job. A wrong, old, or bent needle causes many sewing headaches.
Picking the Right Needle
- Needle Type: Use the right type of needle for your fabric.
- Universal: Good for many woven fabrics.
- Ballpoint/Jersey: For knit fabrics. It pushes loops aside instead of breaking them.
- Denim/Jeans: Stronger needle for thick fabrics.
- Microtex/Sharp: For very fine or tightly woven fabrics like silk or microfibers.
- Needle Size: Use the right size for your thread and fabric thickness.
- Sizes go from small (60/8 for fine fabrics) to large (110/18 for heavy fabrics).
- A needle too small for thick fabric will bend or break. A needle too large for fine fabric makes big holes.
Putting the Needle In
- The Flat Side: Sewing machine needles are not round all the way. They have a flat side at the top. This flat side must face the back of the machine. Always. If it’s turned wrong, the machine won’t form stitches right, or the thread will break.
- Push it Up: Loosen the screw holding the needle. Take the old needle out. Put the new needle in the clamp. Push it up as far as it will go. It must be seated all the way up.
- Tighten the Screw: Hold the needle up while you tighten the screw firmly. Not overly tight, just snug.
Why this fixes issues: A bent, dull, wrong size, or incorrectly inserted needle is the main cause of sewing machine skipped stitches. It also leads to sewing machine needle breaking and sewing machine thread breaking. Change your needle often! A good rule is to change it after every project or about every 8-10 hours of sewing time.
Deciphering Tension Issues
Tension controls how the top and bottom threads lock together within the fabric. If the tension is off, your stitches look bad. You might get loops or the thread might break. These are sewing machine tension issues.
How Tension Should Look
- Look at the seam from both the top and the bottom of your fabric.
- Good tension means the top thread and bottom thread meet exactly in the middle of the fabric layers.
- You should not see loops of the top thread on the bottom side of the fabric.
- You should not see loops of the bottom thread on the top side of the fabric.
What Goes Wrong
- Top tension too tight: Pulls the bobbin thread up to the top. You see straight bobbin thread and loops of top thread on the bottom.
- Top tension too loose: Pulled up by the bobbin thread. You see straight top thread and loops of bobbin thread on the top.
- Bottom tension (bobbin case) too tight/loose: This is less common to adjust. Usually, you fix tension using the top dial. If the bobbin case tension seems wrong, it might be a bobbin winding problem or lint in the case.
Fixing Tension Problems
- Re-thread first! Most tension problems are caused by bad threading, not a broken tension dial. Always re-thread the top and the bobbin perfectly before touching the tension dial. Remember the presser foot up!
- Test on scrap fabric: Use the same fabric you plan to sew. Sew a test line. Look at the stitches.
- Adjust the top tension dial:
- If you have loops on top, the top tension is too loose. Turn the dial to a higher number.
- If you have loops on the bottom, the top tension is too tight. Turn the dial to a lower number.
- Make small changes: Move the dial only one number at a time. Sew another test line. Check the stitches again. Keep testing and adjusting until the stitches look good.
- Check the bobbin area: Sometimes lint or a stray thread in the bobbin case or around the tension spring causes sewing machine bobbin problems that look like tension issues. Clean this area carefully.
Why this fixes issues: Correct tension prevents sewing machine skipped stitches, sewing machine thread breaking, and ugly seams. It’s a key part of a good sewing machine troubleshooting guide.
Deciphering Thread Jams
A thread jam is when thread gets tangled up inside the machine. This often happens under the needle plate, around the bobbin. It can stop the machine completely. This is a major sewing machine thread jam.
How Jams Happen
- Starting to sew without holding the thread tails.
- Bad threading (top or bobbin).
- Trying to sew very thin or thick fabric without changing the needle or settings.
- Lint buildup.
- Starting stitching right at the edge of the fabric.
- Trying to sew when the presser foot is still up.
Finding the Jam
- The machine might make loud noises.
- It might just stop and not move.
- You might see a big mess of thread under your fabric (a “bird’s nest”).
- The handwheel will likely be hard to turn.
Clearing the Jam
- STOP! Do not force the handwheel or the machine. You can damage it.
- Unplug the machine. Safety first!
- Lift the presser foot. If you can.
- Cut the thread: Cut the top thread near the spool and near the needle.
- Remove the fabric: Gently try to pull the fabric away. If it’s stuck, cut the threads around it. Be careful not to cut your fabric.
- Open the bobbin area: Take off the needle plate cover. Remove the bobbin. Remove the bobbin case (if your machine has one).
- Look for thread: Find all the tangled threads. Use small scissors or tweezers to pull them out. Get every little bit.
- Check everywhere: Look under the needle plate, around the feed dogs, and in the bobbin housing.
- Turn the handwheel (slowly): Once you think you got it all, turn the handwheel towards you by hand. It should now turn freely. Listen for any scraping or catching sounds.
- Clean the area: While you are in there, it is the perfect time for cleaning.
Why this fixes issues: Clearing a jam directly fixes the problem stopping your machine. It prevents sewing machine thread breaking caused by force and potential damage that would require more sewing machine maintenance needed.
Grasping Why Fabric Won’t Feed
Your machine has little metal teeth under the presser foot. These are called feed dogs. They move the fabric under the needle as you sew. If the fabric is not moving, the feed dogs might be the problem. This causes sewing machine fabric not feeding.
Check the Feed Dogs
- Are they up? Some machines have a switch to lower the feed dogs for free-motion quilting or darning. Is the switch in the correct position to have the feed dogs up for normal sewing? This switch is often on the back or side of the machine. Flip the switch to the ‘up’ position. You might need to turn the handwheel a little for them to pop up fully.
- Are they clean? Lint and thread bits can pack in around the feed dogs. This stops them from gripping the fabric. Clean this area well (see the maintenance section).
- Are they damaged? Are any teeth bent or missing? This is less common but can happen if a needle breaks and hits them hard.
Use the Right Presser Foot
- Using the wrong presser foot can stop fabric from feeding right. Make sure you are using a standard presser foot for basic sewing.
- Is the presser foot on correctly and screwed in tightly? If it’s loose or tilted, it won’t hold the fabric down correctly for the feed dogs to work.
Don’t Push or Pull
- Do not force the fabric through the machine. The feed dogs do the moving. Pushing or pulling the fabric as you sew can bend the needle (leading to sewing machine needle breaking or sewing machine skipped stitches) and can stop the feed dogs from working right. Just guide the fabric gently.
- Is the presser foot down? The foot must be down for the feed dogs to grip the fabric against it. If the foot is up, the fabric just slides around.
Why this fixes issues: Making sure feed dogs are up, clean, and that you are using the right foot correctly solves sewing machine fabric not feeding.
Interpreting Skipped Stitches
Skipped stitches look like gaps in your seam. The machine makes a stitch, then misses a spot, then makes another stitch. It’s annoying and makes the seam weak. Sewing machine skipped stitches are usually easy to fix.
Main Reasons for Skipped Stitches
- The Needle (Most Common!):
- Is it bent or dull? Change it for a new one.
- Is it inserted correctly? Flat side to the back, pushed all the way up.
- Is it the right type/size for the fabric? (e.g., Using a universal needle on knit fabric). Switch to the correct needle type.
- Threading:
- Is the top thread threaded perfectly? Re-thread with the presser foot up.
- Is the bobbin in correctly? Check direction and seating.
- Tension:
- Is the tension very loose? This can sometimes cause skips. Adjust the top tension slightly tighter.
- Using poor quality thread: Cheap thread can sometimes cause issues. Try a better quality thread.
- Machine timing: If none of the above work, the timing might be off. This is when the needle and the bobbin hook don’t meet at the right moment to form a stitch loop. This needs a repair person to fix.
Why this fixes issues: Addressing needle, threading, and tension problems fixes most cases of sewing machine skipped stitches and is a key part of any sewing machine troubleshooting guide.
Fathoming Why Thread Breaks
Is your thread snapping while you are sewing? This is a common problem. It can be the top thread or the bobbin thread. Sewing machine thread breaking has several causes.
Why the Top Thread Breaks
- Wrong Threading: The thread is not in the guides, take-up lever, or tension discs right. Re-thread carefully.
- Tension Too Tight: If the top tension dial is too high, it puts too much stress on the thread and it snaps. Lower the top tension.
- Bad Needle: A bent, dull, or wrong size needle can cause the thread to catch or fray and break. Change the needle.
- Thread Path Obstruction: Is there lint, a piece of thread, or a scratch on the machine that the thread is catching on as it passes? Check guides, tension discs, and needle eye closely.
- Poor Quality Thread: Old thread or cheap thread can be weak or have slubs that catch. Use good quality thread. Try a new spool.
- Sewing Too Fast: On some machines, sewing at very high speed can cause thread to break, especially with delicate threads.
- Thread Jam: If there is a jam forming, the thread will try to pull against it and snap. Clear any jams.
Why the Bobbin Thread Breaks
- Bobbin Wound Wrong: If the bobbin is wound too loose, too tight, or unevenly, it can cause problems. Wind a new bobbin properly.
- Bobbin Inserted Wrong: The bobbin needs to be put in so the thread comes off in the correct direction and is seated in the bobbin case tension spring (if applicable). Re-insert the bobbin correctly.
- Bobbin Case Problems: Lint or damage in the bobbin case can cause thread to catch or break. Clean the bobbin case area well. Check the case for nicks or rough spots.
- Tension (Less Common): While less common to adjust the bobbin case tension itself, if it’s way off, it can cause breaks. Usually, this is fixed by re-winding the bobbin and cleaning the case.
- Thread Jam: Like the top thread, a jam below can cause the bobbin thread to snap. Clear the jam.
Why this fixes issues: Checking threading, tension, needle, thread quality, and cleaning helps stop sewing machine thread breaking and gets you back to sewing smoothly.
Sewing Machine Maintenance Needed
Just like a car, a sewing machine needs care. Cleaning and oiling (if your machine needs it) are vital. Lack of care causes many issues, including those that stop the machine from sewing right. Sewing machine maintenance needed prevents problems.
Cleaning Lint and Dust
- Where it gathers: Lint and dust from fabric and thread build up most in the bobbin area and around the feed dogs. They also gather in the tension discs.
- How to clean:
- Unplug the machine!
- Remove the needle, presser foot, needle plate, bobbin, and bobbin case.
- Use a small brush (your machine likely came with one) to brush away lint.
- Use tweezers to pull out stubborn bits of thread or lint.
- You can use a small vacuum hose or canned air carefully. Be cautious with canned air as it can push lint deeper into the machine. Directing it outward is best.
- Clean the tension discs by raising the presser foot and pulling a piece of strong thread or dental floss through them.
- How often: Clean your machine often. After every project or after several hours of sewing is a good idea.
Oiling Points
- Check your manual: Not all modern machines need oiling by the user. Many newer machines are “self-lubricating” or have points that only a service person should oil. Check your machine’s manual first!
- Where to oil (if needed): Your manual will show the specific spots that need a drop of sewing machine oil. These are usually metal-on-metal moving parts.
- What oil to use: Only use proper sewing machine oil. Do not use other oils like WD-40, cooking oil, or 3-in-One oil. These can damage your machine.
- How much: Just a tiny drop on the designated points. Wipe away any extra.
- How often: Again, check your manual. If it does need oiling, it might be after many hours of sewing or a few times a year depending on use.
Why this fixes issues: Cleaning prevents thread jams (sewing machine thread jam), fabric not feeding (sewing machine fabric not feeding), and can even help with tension (sewing machine tension issues) and thread breaking (sewing machine thread breaking). Oiling ensures parts move smoothly, preventing strain and potential damage. Regular sewing machine maintenance needed keeps your machine happy and sewing.
Putting It Together: Your Troubleshooting Checklist
Okay, your machine isn’t sewing. Let’s go through the steps like a proper sewing machine troubleshooting guide. Start at the top and work your way down.
- Power Check: Is it plugged in? Is it on? Is the foot pedal connected? Is the bobbin winder disengaged? Is the handwheel pushed in? (Basic Checks section)
- Re-thread Everything: Take out the top thread and bobbin. Thread the top again carefully with the presser foot UP. Insert the bobbin correctly, making sure the thread comes off the right way. Pick up the bobbin thread. Pull both threads back under the foot. (Sorting Out Threading section)
- Change the Needle: Put in a brand new needle. Make sure it’s the right type and size for your fabric. Make sure the flat side is to the back and it’s pushed all the way up. Tighten the screw. (The Right Needle Matters section)
- Check for Jams: Look under the needle plate and in the bobbin area. Is there a mess of thread? Clean it out completely. Turn the handwheel by hand to feel if it’s still stuck. (Deciphering Thread Jams section)
- Clean the Machine: While the bobbin area is open, brush out all the lint and dust. Clean around the feed dogs. Clean the tension discs. (Sewing Machine Maintenance Needed section)
- Test Tension: Use scrap fabric (same type you want to sew). Sew a line. Check the stitches. Adjust the top tension dial slightly if needed. Sew another line. Repeat until stitches look good. (Deciphering Tension Issues section)
- Check Feed Dogs: Are they in the ‘up’ position? Is the right presser foot on? Is the presser foot down when you try to sew? (Grasping Why Fabric Won’t Feed section)
- Check Thread Quality: Is your thread old or poor quality? Try a new spool of good thread.
If you go through these steps methodically, you will likely find the reason your machine is not sewing. Most times, it’s one of the first few steps!
When to Get Help
You’ve tried everything in the troubleshooting guide. Re-threaded a dozen times, changed the needle, cleaned every accessible spot, checked the bobbin, messed with tension, and still, the machine isn’t right.
Here’s when it might be time to take it to a professional sewing machine repair shop:
- The machine makes loud grinding or knocking noises that weren’t there before.
- The handwheel is completely stuck and you cannot clear a visible jam.
- The needle keeps hitting the bobbin case or needle plate (timing is likely off).
- The feed dogs are damaged.
- Stitches are still looping badly or skipping consistently even after checking everything here.
- Electronic issues (screen not working, buttons not responding).
- You followed all steps and cannot find the problem.
A professional can diagnose internal issues, fix timing, replace worn parts, and give your machine a deep cleaning and tune-up. This can prevent major problems down the road.
Frequently Asked Questions (FAQ)
- Can I use any type of thread in my sewing machine?
No. Use good quality thread meant for sewing machines. Avoid old thread that snaps easily. Avoid thread meant only for hand sewing. Avoid very fluffy or weak threads unless your machine manual says it’s okay. - How often should I clean my sewing machine?
Clean the bobbin area after every few bobbins or every project. A more complete cleaning (like taking off the needle plate) should be done after every several projects or every 8-10 hours of sewing. Check your manual for specific advice. - Why does my machine keep making bird’s nests (thread jams)?
This is almost always caused by incorrect top threading, especially not threading with the presser foot up. It can also be caused by starting to sew without holding the thread tails back for the first few stitches, or problems with the bobbin. - My machine is old. Can I still get it fixed?
Often, yes! Older mechanical machines are often very durable and fixable. It depends on the specific machine, what is wrong, and if parts are available. Get an estimate from a repair shop. - Should I lubricate my machine myself?
Only if your machine manual says you should and shows you where to put the oil. Many newer machines do not require home oiling or only in specific spots. Using the wrong oil or oiling the wrong place can cause damage.
Conclusion
It can be frustrating when your sewing machine won’t sew. But don’t give up! Most issues are simple and happen often. They are part of learning to sew and care for your machine. Start with the easiest checks: re-threading and changing the needle. Then look at the bobbin, tension, jams, and cleaning. By using this sewing machine troubleshooting guide and checklist, you can likely fix the problem yourself. Regular sewing machine maintenance needed will help prevent many problems in the first place. Happy sewing!