
What is the best way to tie a knot for sewing? The best way to tie a knot for sewing is to create a small, secure knot at the end of your thread that won’t pull through the fabric. This guide will show you several simple and effective sewing knot techniques for finishing stitches and securing your work.
Learning how to tie a knot for sewing is a fundamental skill that every crafter needs. Whether you’re hand-sewing a button, mending a tear, or creating a masterpiece, a good knot ensures your stitches stay put. Without proper thread knotting for sewing, your hard work can unravel. This guide provides a comprehensive look at practical sewing knots, focusing on secure sewing knots that keep your sewing thread ends from fraying or coming loose. We’ll cover everything from creating basic knots to ensuring your knotting thread for fabric is as strong as possible, leading you to master basic sewing knots for all your projects.
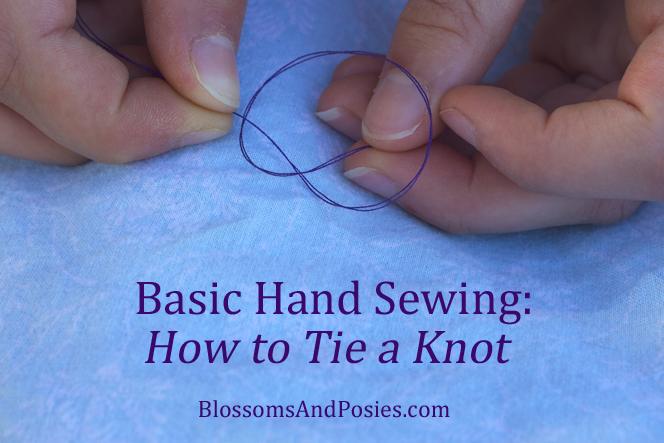
Image Source: blossomsandposies.com
Why Simple Knots Matter
At its core, sewing is about joining pieces of fabric together. The thread is the unseen hero, and the knot is its anchor. A poorly tied knot can lead to:
- Unraveling stitches: This means your work comes apart, often at the most inconvenient times.
- Loose ends: These can snag on things, creating further damage or an untidy appearance.
- Frustration: Constantly re-tying or fixing undone stitches can be very discouraging.
Mastering a few basic sewing knots will give you confidence and improve the quality of your sewing. It’s about making your stitches last and your projects look neat.
Getting Started: Preparing Your Thread
Before you even think about tying a knot, you need to prepare your thread correctly.
Cutting the Thread
- Length: It’s best to work with shorter lengths of thread, usually between 18 and 30 inches (45-75 cm). Longer threads can tangle easily, leading to knots in your thread rather than just at the end.
- Sharp Scissors: Always use sharp scissors to cut your thread cleanly. A clean cut prevents fraying before you even start.
Threading the Needle
This can be the trickiest part for some!
- Tip: If your thread is fraying, try moistening the very end slightly with water or saliva (if you’re not working with food). You can also try a thread conditioner or beeswax.
- Angle: Hold the needle still and bring the thread towards the eye. Try to pass the thread through the eye at a slight angle.
- Needle Threader: For those with less than perfect eyesight or dexterity, a needle threader is a fantastic tool.
Essential Sewing Knots
Let’s dive into the most useful sewing knot techniques. We’ll focus on knots that are easy to tie, create minimal bulk, and are incredibly secure sewing knots.
1. The Simple Overhand Knot (The Go-To Knot)
This is the most common and often the most effective knot for general sewing. It’s quick, easy, and reliably keeps your thread from slipping.
How to Tie:
- Thread Your Needle: Make sure you have a good length of thread.
- Separate the Ends: Pull the thread through the needle. Let the needle dangle. You’ll have two ends: one attached to the needle, and one free end.
- Form a Loop: Take the free end of the thread and cross it over the longer working thread, forming a loop.
- Wrap and Pull: Wrap the free end around the longer thread two or three times. The more wraps, the thicker and more secure the knot, but too many can be bulky.
- Tug: Hold the loop with your thumb and forefinger, and pull the needle and the working thread away from the loop. This will tighten the wraps into a neat knot at the end of your thread.
- Trim: Once the knot is secure and snug against the fabric (or where you want it to be), trim the excess thread tail close to the knot. Be careful not to cut too close, which could loosen the knot.
When to Use: This is your everyday knot for most hand-sewing tasks, from tacking down a hem to sewing on a button. It’s a fantastic knot for knotting thread for fabric.
Tips for a Secure Finish:
- Number of Wraps: For thinner threads or fabrics that might snag, try wrapping 3-4 times. For thicker threads or general use, 2 wraps are often sufficient.
- Tension: Pull the knot snugly, but not so tight that it tears the fabric or creates a visible puckering.
2. The Double Knot (For Extra Security)
Sometimes you need a little extra insurance. The double knot is just a slightly more robust version of the simple overhand knot.
How to Tie:
- Thread Your Needle: As before, prepare your thread and needle.
- Form the First Knot: Tie a single overhand knot as described above.
- Tie Again: Before pulling the first knot completely tight, leave it slightly loose. Now, using the same end of the thread, wrap it around the forming knot and through the loop one more time.
- Pull Tight: Hold the original loop and pull the needle and working thread firmly. This creates a larger, more substantial knot.
- Trim: Trim the excess thread tail.
When to Use: This is ideal for situations where the thread might be under more stress, such as attaching heavy embellishments, working with slippery fabrics, or when you want to be extra sure a stitch won’t come undone. It’s one of the most reliable strong sewing knots.
3. The Loop Knot (Thread Through Loop)
This knot is excellent because it uses the thread itself to create a secure anchor, often without needing to make multiple wraps. It’s particularly good for finishing stitches.
How to Tie:
- Thread Your Needle: Prepare your thread and needle.
- Leave a Tail: Instead of pulling the thread all the way through the needle eye, leave a short tail of about 4-6 inches (10-15 cm) on one side.
- Form a Loop: Take the end of the thread that is coming out of the needle eye and loop it back towards the needle eye.
- Catch the Loop: Pass the needle through the loop you just created.
- Pull: Pull the needle and working thread away from the fabric. As you pull, the loop will tighten around the thread tail, forming a knot close to the fabric.
- Trim: Trim the excess thread tail.
When to Use: This is a fantastic way to tie off your sewing. It’s a neat knot that lies flat and is very secure. It’s perfect for tying off thread at the end of a seam or when you need to secure the end of a basting stitch.
4. The Weaver’s Knot (For Joining Threads)
While not strictly for tying off the end of a single thread, the Weaver’s Knot (also known as the Renni knot or Becket knot) is invaluable for joining two pieces of thread together neatly and securely. This is a more advanced but very useful knot for experienced sewers or for projects requiring continuous thread.
How to Tie:
- Prepare Threads: Take the two ends of thread you want to join.
- Form a Loop: Lay the end of thread A across the end of thread B, forming a small loop.
- Wrap: Take the end of thread A and wrap it around thread B, then bring it over and through the loop you created.
- Repeat: Now, take the end of thread B and wrap it around thread A, then bring it over and through the second loop you created.
- Tighten: Gently pull both working ends of the threads simultaneously. The two knots will slide towards each other and interlock.
- Trim: Trim the excess tails close to the knot.
When to Use: When you run out of thread mid-project and need to add more without creating a bulky knot on the outside of your work. It’s one of the most efficient sewing knot techniques for seamlessly continuing your work.
Advanced Techniques for Stronger Knots
Sometimes, basic knots aren’t quite enough, especially with slippery threads or demanding fabrics. Here are a few ways to enhance your knotting.
Using Wax or Beeswax
Beeswax (or a specialized thread wax) can be your best friend for several reasons:
- Strengthens Thread: It coats the fibers, making them less likely to break.
- Reduces Snagging: It smooths the thread, helping it glide through fabric and the needle eye more easily.
- Helps Knots Hold: It adds a slight tackiness that helps knots stay tied.
How to Use: Simply draw your thread along a block of beeswax or thread wax. A light coating is all you need.
Knotting on the Wrong Side
For visible projects, it’s always best practice to place your knots on the “wrong side” of the fabric (the side that won’t be seen). This keeps the visible side looking clean and professional.
Reinforcing the Knot
If you’re sewing something that will experience a lot of wear and tear, you might want to reinforce your knot.
- Backstitch Knot: After completing your last stitch, instead of just tying a knot, make one or two tiny stitches back over the thread you just used, essentially creating a tiny backstitch right on the spot. This anchors the thread very securely.
- Multiple Knots: For extreme durability, you can tie a double knot or even a triple knot, especially if using a fine thread.
Troubleshooting Common Knotting Issues
Even experienced sewers can face knotting problems. Here’s how to deal with them.
The Knot Won’t Stay Tied
- Thread Type: Is your thread very slippery (like silk or some synthetics)? Try using beeswax or opting for a different knot like the double knot or loop knot.
- Tension: Are you pulling the knot tight enough? Ensure you’re giving it a firm tug.
- Too Few Wraps: For some threads, two wraps might not be enough. Try three or four.
The Knot is Too Bulky
- Thread Weight: Are you using a thread that’s too thick for the fabric or needle? Consider a finer thread.
- Too Many Wraps: Stick to 2-3 wraps for the simple overhand knot.
- Knot Placement: Try to tie the knot as close to the fabric as possible before trimming.
Thread Tangling While Sewing
This is a common frustration!
- Thread Length: Shorter threads tangle less. Try working with 18-24 inch lengths.
- Needle Position: Keep the needle threaded, but don’t let it dangle too long. When you’re not actively sewing, push the needle into the fabric.
- Thread Path: As you sew, be mindful of how the thread is passing through the fabric. If the needle twists, the thread can twist too.
A Comparison of Sewing Knots
Here’s a quick look at the knots we’ve discussed and their strengths.
| Knot Type | Ease of Tying | Security | Bulk | Best Use Case |
|---|---|---|---|---|
| Simple Overhand | Very Easy | Good | Low | General sewing, everyday tasks |
| Double Knot | Easy | Very Good | Medium | High-stress areas, extra security needed |
| Loop Knot | Easy | Excellent | Low | Tying off stitches, neat finish |
| Weaver’s Knot | Medium | Excellent | Very Low | Joining two threads seamlessly |
These practical sewing knots cover most needs, offering reliable ways to secure your stitches.
Final Thoughts on Securing Your Stitches
Mastering basic sewing knots is a small step that makes a huge difference in your sewing projects. It’s about creating strong sewing knots that won’t let you down. Remember to choose the right knot for the job, prepare your thread properly, and always practice good technique. With a little practice, tying off thread will become second nature, and your sewing will look tidier and last longer. These sewing thread ends will be secured so your fabric stays joined!
Frequently Asked Questions (FAQ)
Q1: What is the best way to tie a knot for sewing when using slippery fabric?
A1: For slippery fabrics, it’s best to use a knot with more wraps or a knot that creates a more substantial anchor. The double knot is a great option, as is the loop knot. Using thread wax can also help the knot grip the fabric better.
Q2: Can I sew without tying a knot?
A2: While some advanced techniques allow you to secure stitches without visible knots (like knotless beginnings or backstitching firmly), for most beginner and intermediate hand-sewing, tying a knot is the most straightforward and secure method.
Q3: How do I prevent my knots from coming undone when sewing with strong thread?
A3: Ensure you are using a secure knot like the double knot or loop knot. Make sure to pull the knot tightly against the fabric. If the thread is still prone to slipping, consider using thread wax to add a bit of grip.
Q4: Is it okay to leave a long thread tail after tying a knot?
A4: It’s generally best to trim the thread tail quite close to the knot, usually about 1/8 inch (2-3 mm). Leaving a long tail can create a tripping hazard for the thread, making it more likely to snag or unravel. However, don’t trim so close that you risk cutting the knot itself.
Q5: How many times should I wrap the thread for a knot?
A5: For a standard overhand knot, 2-3 wraps are usually sufficient for most threads and fabrics. If you’re using a very fine thread on a fabric that tends to snag or loosen stitches, you might increase this to 4 wraps. For the double knot, you’re essentially doing two sets of wraps.