
Can you change a sewing machine needle yourself? Yes, absolutely! Changing a sewing machine needle is a fundamental skill for any sewer, and it’s surprisingly simple. This guide will walk you through the process step-by-step, ensuring you can perform this essential piece of sewing machine maintenance with confidence.
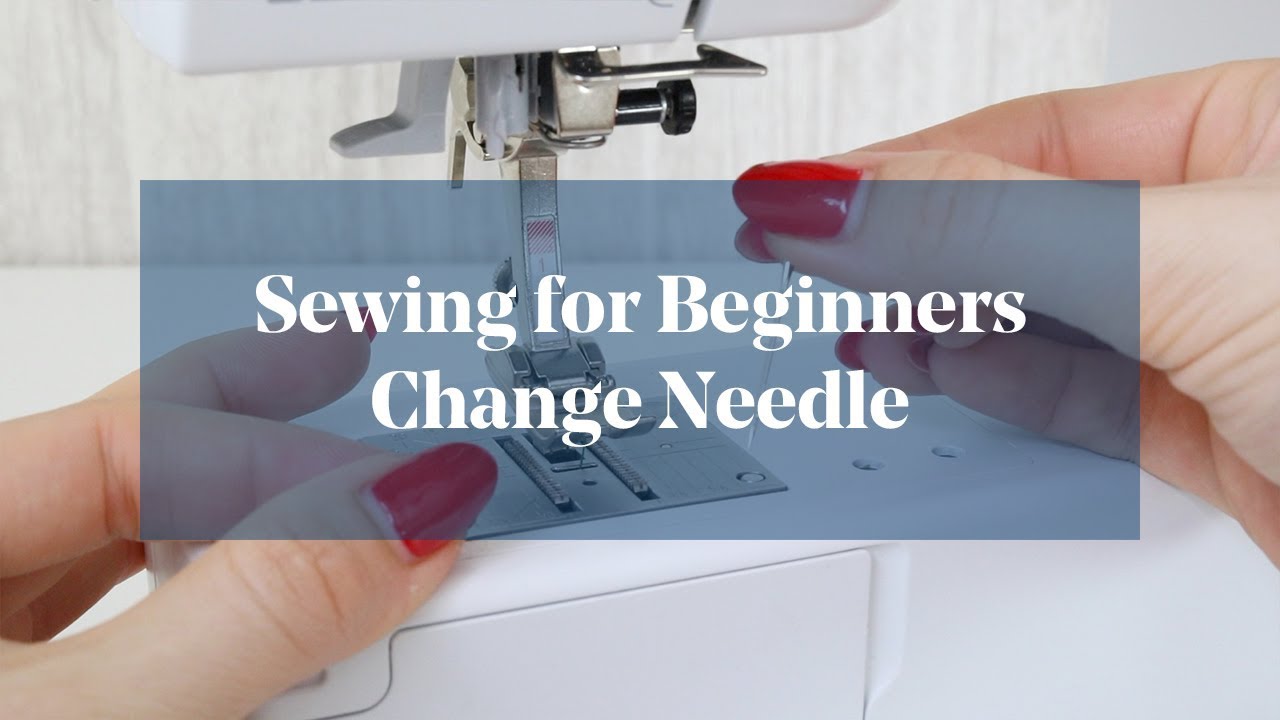
Image Source: i.ytimg.com
Why Sewing Machine Needle Replacement Matters
Your sewing machine needle is the unsung hero of your stitching. It pierces fabric, guides the thread, and creates the loops that form stitches. Over time, or when using the wrong needle for your fabric, the needle can become dull, bent, or even broken. This can lead to a host of frustrating sewing problems, from skipped stitches to fabric damage. Regularly changing your sewing machine needle is a critical part of proper sewing machine maintenance and can dramatically improve the quality of your sewing.
Signs Your Sewing Machine Needle Needs Changing
- Skipped Stitches: If your stitches are uneven, or some are missing altogether, a dull or damaged needle is a common culprit.
- Thread Breaking: A damaged needle can snag and break your thread.
- Fabric Puckering: A bent or blunt needle can pull the fabric, causing it to pucker around the stitch line.
- Fabric Damage: A dull needle can snag or tear delicate fabrics, leaving visible damage.
- Strange Noises: Your machine might make a grinding or knocking sound if the needle is bent and hitting the needle plate.
- Inconsistent Stitch Quality: Even if not severe, you might notice your stitches aren’t as neat or consistent as usual.
Choosing the Right Sewing Needle
Before you learn how to change a needle, it’s important to know there isn’t a one-size-fits-all sewing needle. Using the correct sewing needle types for your fabric and thread is crucial for successful sewing. Different sewing needles are designed with varying points, shaft shapes, and eye sizes to handle different materials and thread weights.
A Look at Different Sewing Needles
Here’s a breakdown of common sewing needle types and their uses:
| Needle Type | Point Type | Best For |
|---|---|---|
| Universal Needle | Slightly Rounded | An all-purpose needle for many woven and knit fabrics. A good starting point. |
| Ballpoint Needle | Rounded | Knit fabrics, stretchy materials. The rounded point pushes through the fabric fibers, preventing runs or holes. |
| Sharps/Microtex Needle | Very Sharp | Woven fabrics, quilting, microfibers, silks, artificial leather. The sharp point pierces cleanly without snagging. |
| Leather Needle | Chisel/Flat | Leather, vinyl, suede. The chisel point cuts through tough materials to create a clean stitch. |
| Denim/Jeans Needle | Sharp | Heavy fabrics like denim, canvas, upholstery fabric. Designed for strength and to penetrate thick layers. |
| Stretch Needle | Medium Rounded | Medium-weight knits and stretch fabrics where a ballpoint might be too soft. Has a larger eye for thicker stretch threads. |
| Embroidery Needle | Slightly Rounded, Larger Eye | Machine embroidery. The larger eye accommodates embroidery thread, and the slight rounding helps prevent fabric damage. |
| Topstitch Needle | Sharp, Large Eye | Topstitching, decorative stitching. The large eye is for heavy-duty or metallic threads. |
| Quilting Needle | Sharp | Piecing quilt blocks. Designed to easily penetrate multiple layers of fabric. |
Key Features to Consider:
- Point: Sharp points pierce woven fabrics, while rounded points glide between knit fibers.
- Shaft: The shaft is the long part of the needle.
- Eye: The eye is where you thread the needle. A larger eye is needed for thicker threads, like those used for topstitching or embroidery.
- Size: Needles come in various sizes, typically numbered from 60/8 (very fine) to 120/20 (very heavy). Finer needles are for lighter fabrics, and larger needles are for heavier fabrics.
When in doubt, consult your sewing machine manual or the fabric manufacturer’s recommendations for the best needle choice. Having a variety of sewing machine accessories, including different sewing needles, is a good idea for tackling diverse projects.
Your Step-by-Step Guide to Sewing Machine Needle Insertion
Now that you know why and when to change your needle, let’s get to the actual process. Changing a sewing machine needle requires care and attention to detail.
What You’ll Need:
- New Sewing Machine Needle: Ensure it’s the correct type and size for your project.
- Needle-Nose Pliers or Small Wrench (Optional): For stubborn needles.
- Soft Cloth or Paper Towel: To wipe down the needle area.
The Process of Changing a Sewing Machine Needle:
Step 1: Safety First – Turn Off Your Machine!
This is the most crucial step. Always turn off your sewing machine and unplug it from the power source before attempting to change the needle. This prevents accidental starting and potential injury.
Step 2: Lower the Presser Foot
Lower the presser foot lever. This helps to stabilize the needle holder (also called the needle clamp) and makes the needle easier to access and remove.
Step 3: Locate the Needle Clamp Screw
Look for a small screw on the side of the needle holder, which is attached to the needle bar. This screw holds the needle in place. Some machines have a wingnut-style screw that you can turn with your fingers, while others have a regular screw that might require a small screwdriver.
Step 4: Loosen the Needle Clamp Screw
Using your fingers or a screwdriver, turn the needle clamp screw counter-clockwise. You only need to loosen it enough to release the needle; you don’t need to remove the screw completely. If the screw is very tight, a quick turn with needle-nose pliers can help, but be gentle to avoid stripping the screw head.
Step 5: Remove the Old Needle
Once the screw is loose, the needle should be free. Carefully pull the old needle straight down and out of the needle holder. If it’s stuck, a gentle wiggle might help. Be cautious not to bend the needle bar.
Step 6: Prepare the New Needle
Take your new sewing machine needle. Note that most sewing machine needles have a flat side on the shank (the part that goes into the needle holder). This flat side should always face towards the back of the machine. This orientation is vital for proper needle installation.
Step 7: Insert the New Needle
Slide the new needle into the needle holder, ensuring the flat side of the shank is towards the back of the machine. Push the needle up as far as it will go into the holder.
Step 8: Tighten the Needle Clamp Screw
While holding the needle firmly in place, tighten the needle clamp screw clockwise. Turn it until it’s snug, but don’t overtighten it, as this could damage the screw or the needle holder. The needle should feel secure and not wobble.
Step 9: Check Needle Alignment
Gently try to wiggle the needle. It should be straight and firm. If it feels loose, tighten the screw a bit more. Also, ensure the needle is centered within the needle plate opening. A bent needle or improper sewing machine needle insertion can cause problems.
Step 10: Clean Up
Use a soft cloth or paper towel to wipe away any lint or debris from the needle area.
Step 11: Test Your Stitching
Plug your machine back in, turn it on, and thread it as usual. Place a scrap piece of fabric under the presser foot and sew a few stitches. Check the stitches for consistency and ensure there are no unusual noises. If everything looks good, you’re ready to sew your project!
Troubleshooting Common Issues with Needle Changes
Sometimes, despite following the steps, you might encounter minor issues. Here are some common problems and how to address them as part of your sewing machine troubleshooting.
Needle Won’t Go In All the Way
- Cause: The needle is not oriented correctly.
- Solution: Ensure the flat side of the needle shank is facing the back of the machine. Remove the needle, re-orient it, and insert it again, pushing it up as far as it will go.
Needle is Loose After Tightening
- Cause: The needle clamp screw is not tightened enough, or the screw itself might be worn.
- Solution: Tighten the screw further. If it continues to be loose, the screw or the needle clamp might need replacement, which could be a minor sewing machine repair.
Needle Keeps Breaking
- Cause: Using the wrong type of needle for the fabric, a bent needle, or the needle is inserted incorrectly.
- Solution: Double-check that you are using the correct sewing needle types for your fabric. Ensure the needle is straight and properly seated in the holder. If it continues to break, the needle bar might be misaligned, requiring professional sewing machine repair.
Skipped Stitches After Changing Needle
- Cause: The new needle might be faulty, not fully inserted, or the wrong type.
- Solution: Remove the new needle and try another one of the same type. Ensure it’s pushed all the way up and the screw is tight. Verify you’re using the correct different sewing needles for your fabric.
When to Call a Professional
While most sewing machine maintenance tasks, including needle changes, are simple DIY jobs, there are times when you might need a professional. If you’re experiencing persistent issues like:
- The needle bar seems bent.
- The needle clamp screw is stripped and won’t tighten or loosen.
- Your machine is making loud, unusual noises after a needle change.
- You suspect a deeper issue with the needle mechanism.
It’s best to consult a qualified sewing machine repair technician. They have the expertise and tools to diagnose and fix more complex problems.
Expanding Your Sewing Toolkit: Essential Sewing Machine Accessories
Having the right sewing machine accessories can make your sewing experience smoother and more enjoyable. Beyond needles, consider investing in:
- A variety of needles: As discussed, a good collection of different sewing needle types is essential.
- A seam ripper: For correcting mistakes.
- Quality thread: Matching your thread to your needle and fabric is important.
- Presser feet: Different presser feet are designed for specific tasks like zippers, buttonholes, and quilting.
- A sewing machine manual: Always keep your machine’s manual handy for reference.
Frequently Asked Questions (FAQ)
Q1: How often should I change my sewing machine needle?
A: It’s generally recommended to change your sewing machine needle after every 6-8 hours of sewing time, or after finishing a project. If you notice any signs of dullness or damage, change it immediately.
Q2: Can I use a needle from a different brand than my sewing machine?
A: Yes, in most cases. Most home sewing machines use standard universal needles, so needles from different reputable brands should be compatible. However, always check your machine’s manual to confirm the type of needle shank it uses.
Q3: What happens if I don’t change my needle?
A: Not changing your needle can lead to skipped stitches, thread breakage, fabric damage (like snags or runs), puckering, and even stress on your sewing machine’s motor.
Q4: My new needle feels wobbly. What should I do?
A: Ensure the needle is pushed all the way up into the needle holder and that the needle clamp screw is tightened firmly. If it still wobbles, the screw or holder might be worn, and it’s time for a repair.
Q5: What’s the difference between a sharp needle and a ballpoint needle?
A: A sharp needle has a very fine point designed to pierce woven fabrics cleanly. A ballpoint needle has a rounded tip that pushes through knit fabric fibers, preventing snags and runs.
Q6: Can I use a hand-sewing needle in my machine?
A: No, absolutely not. Hand-sewing needles are not designed for the high speeds and forces of a sewing machine and can cause damage to your machine and produce poor stitch quality. Always use needles specifically made for sewing machines.
Mastering the simple act of sewing machine needle replacement is a key step in becoming a proficient sewer. By following these steps and paying attention to the details of sewing machine maintenance, you’ll ensure your machine runs smoothly and your projects turn out beautifully. Happy sewing!