
Can you read a tailor measuring tape in centimeters? Yes, you absolutely can! Learning to read a tailor measuring tape in centimeters is a straightforward skill that opens up a world of precise garment creation and alteration. This guide will demystify the process, making centimeters on measuring tape as familiar as your own hand. We’ll dive deep into how to use a sewing tape measure, interpret its markings, and ensure you’re accurately taking measurements for any project.
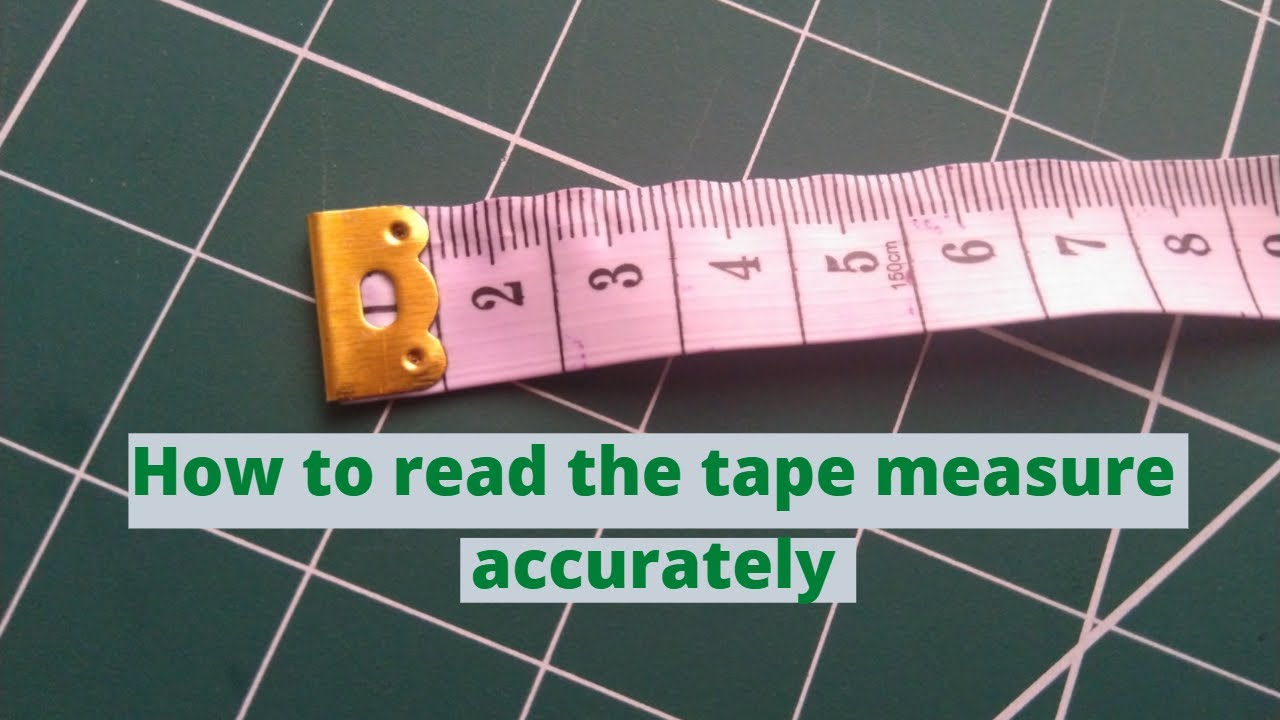
Image Source: i.ytimg.com
Decoding the Centimeters on Your Tailor’s Tape Measure
A tailor’s tape measure cm is a versatile tool, but its markings can sometimes be a little confusing if you’re not used to them. Unlike a standard ruler you might have used in school, a fabric tape measure often features a continuous scale of centimeters with finer divisions. This guide is your comprehensive fabric tape measure guide to help you master reading cm on fabric tape.
The Anatomy of a Centimeter Scale
Most tailor’s tape measures display both inches and centimeters. However, for many international patterns and tailoring techniques, relying on centimeters is essential. The centimeter scale is usually printed in a different color, often red or a darker shade, to make it easy to distinguish from the inch scale.
Here’s what you’ll typically see on the centimeter side:
- Major Markings: These are the larger, bolder lines that represent whole centimeters. You’ll see numbers like 10, 20, 30, and so on, clearly printed next to these lines.
- Minor Markings: Between the major centimeter markings, you’ll find shorter lines. These represent the millimeters. There are typically 10 millimeters in every centimeter.
- Subdivisions: The smallest lines are the millimeter markings. If you look closely, you’ll notice that the line at the midpoint between two whole centimeters (e.g., between 10 cm and 11 cm) might be slightly longer than the other millimeter lines, indicating 0.5 cm or 5 mm.
Grasping the Relationship: Centimeters and Millimeters
The key to accurately reading centimeters on a measuring tape is to understand the relationship between centimeters and millimeters.
- 1 cm = 10 mm
This means that for every whole centimeter, there are 10 smaller divisions. So, if you’re measuring 2.5 cm, you’re looking for the mark that is 2 whole centimeters plus 5 millimeter marks.
Visualizing the Scale
Imagine a ruler marked only in centimeters. Now, divide each centimeter into 10 equal parts. That’s essentially what you’re seeing on your tailor’s tape measure.
- Example: If you are measuring a piece of fabric and the edge falls at a long red line labeled “20,” that’s 20 centimeters. If it falls at a shorter line just after the “20” mark, it’s 21 centimeters. If it falls at the halfway point between the “20” and “21” centimeter marks, that’s 20.5 centimeters, or 20 centimeters and 5 millimeters.
How To Use a Sewing Tape Measure for Accurate Measurements
Knowing how to use a sewing tape measure is crucial for successful tailoring. Whether you’re measuring yourself, a garment, or fabric, a consistent approach yields the best results.
For Personal Measurements
When taking measurements of your body, it’s important to:
- Wear Fitted Clothing: Avoid bulky layers. A t-shirt and form-fitting pants or leggings are ideal.
- Keep the Tape Measure Snug but Not Tight: The tape should lie flat against the skin without indenting it.
- Maintain Good Posture: Stand naturally, with your shoulders relaxed.
- Use a Mirror: This helps ensure the tape is level and positioned correctly.
Let’s walk through a few common body measurements using the centimeter scale:
- Bust: Measure around the fullest part of your bust. Keep the tape level around your back.
- Waist: Measure around your natural waistline, which is usually the narrowest part of your torso, typically just above your belly button. Don’t suck in your stomach!
- Hips: Measure around the fullest part of your hips and buttocks.
- Inseam: Measure from the crotch seam down to where you want the hem of your pants to fall. It’s best to have someone else do this measurement or measure a pair of pants that fit you well.
When reading these measurements, pay attention to the centimeter marks. For instance, if your bust measurement is 92.7 cm, you’ll be looking for the 92 cm mark and then counting 7 millimeters past it.
For Garment Measurements
When measuring a finished garment:
- Lay the Garment Flat: Smooth out any wrinkles.
- Measure Across the Widest Points: For items like shirts, measure across the chest from armpit to armpit. For pants, measure across the waist and hips.
- Measure Seams: For features like sleeve length or inseam, measure along the seam from the edge to the intended end point.
Table: Common Garment Measurements in Centimeters
| Measurement | How to Measure (Flat Garment) |
|---|---|
| Chest (Width) | Across the garment from armpit to armpit, then double it. |
| Waist (Width) | Across the narrowest part of the garment’s waist, then double it. |
| Hips (Width) | Across the garment at its widest point below the waist, then double it. |
| Sleeve Length | From the shoulder seam to the cuff, along the top of the sleeve. |
| Garment Length | From the shoulder seam at the neckline down to the hem. |
| Inseam | From the crotch seam down to the hem along the inner leg seam. |
When reading these measurements, ensure your tape measure is aligned with the garment’s seams and edges. If a measurement is, say, 45.3 cm, you’ll find the 45 cm mark and then count 3 millimeter marks past it.
For Fabric Measurements
When cutting fabric:
- Lay Fabric Flat: Ensure it’s smooth and not stretched.
- Use a Cutting Mat and Rotary Cutter (Optional but Recommended): This provides a clean, straight edge.
- Measure Carefully: Align the zero mark of your tape measure with the raw edge of the fabric.
Tip: Always measure twice and cut once! Precision is key when working with fabric.
Deciphering the Numbers: Reading cm on Fabric Tape
Let’s get more granular with reading cm on fabric tape. The markings are designed to provide increasing levels of precision.
The Basic Centimeter Markings
The primary numbers on the tape measure (10, 20, 30, etc.) represent whole centimeters. These are your primary reference points.
The Millimeter Marks: Your Precision Tools
Between each whole centimeter, you’ll see 10 smaller marks. These are millimeters.
- The Longest Millimeter Mark: As mentioned, the mark exactly halfway between two whole centimeters represents 0.5 cm, or 5 millimeters. This is your most frequently used subdivision.
- Shorter Millimeter Marks: The marks between the 0.5 cm mark and the next whole centimeter are 6 mm, 7 mm, 8 mm, and 9 mm.
Example Scenario:
Imagine you’re measuring a piece of trim.
- You lay the tape measure flat. The beginning of the trim aligns with the ‘0’ mark.
- You extend the tape measure along the trim.
- The trim ends just past the ’15’ centimeter mark.
- You look closely at the marks between ’15’ and ’16’.
- You see the longest millimeter mark, which is the halfway point (15.5 cm).
- The trim extends a little further, to the third short millimeter mark after the 15.5 cm mark.
This means the measurement is 15.5 cm + 3 mm = 15.8 cm.
Identifying the Largest Number
The largest number printed on the tape measure indicates the total length of the tape in centimeters (often 150 cm). This is useful for quickly gauging the overall size of a project or fabric piece.
Fathoming Inch and Centimeter Equivalents: Imperial to Metric Tape Measure
Many tailor’s tape measures are an imperial to metric tape measure, meaning they show both inches and centimeters. Understanding how these scales relate is vital, especially when working with patterns from different regions.
The Conversion Factor
The fundamental conversion is:
- 1 inch = 2.54 centimeters
This means that every inch is roughly two and a half centimeters.
When to Use Which Scale
- Centimeters: For precision in garment construction, international patterns, and when you need finer adjustments. This is generally preferred for most modern tailoring.
- Inches: For older patterns, specific crafting techniques, or if you are more accustomed to using them.
Practical Conversion Tips
- Quick Estimation: If you see a measurement in inches, multiply it by 2.5 to get a rough centimeter equivalent. For example, 10 inches x 2.5 = 25 cm.
- Accurate Conversion: Use the exact factor of 2.54 for precise tailoring.
- Pattern Adjustments: If a pattern calls for an adjustment of 1/4 inch, this is approximately 0.64 cm (0.25 x 2.54). For a 1/2 inch adjustment, it’s about 1.27 cm.
Table: Common Inch to Centimeter Equivalents for Tailoring
| Inches | Centimeters (approx.) | Centimeters (precise) |
|---|---|---|
| 1/4 | 0.6 cm | 0.64 cm |
| 1/2 | 1.3 cm | 1.27 cm |
| 3/4 | 1.9 cm | 1.91 cm |
| 1 | 2.5 cm | 2.54 cm |
| 2 | 5.1 cm | 5.08 cm |
| 3 | 7.6 cm | 7.62 cm |
| 4 | 10.2 cm | 10.16 cm |
| 5 | 12.7 cm | 12.70 cm |
| 10 | 25.4 cm | 25.4 cm |
| 20 | 50.8 cm | 50.8 cm |
Reading the Dual Scale
When using an imperial to metric tape measure, you’ll see markings for both. If a garment edge falls between the ’12’ inch mark and the ’13’ inch mark, and you want the centimeter measurement, find the corresponding centimeter marks. 12 inches is roughly 30.5 cm, and 13 inches is roughly 33 cm. You’ll then pinpoint where on the centimeter scale the edge falls.
Centimeters for Tailoring: Why They Matter
Centimeters for tailoring offer a level of precision that is often preferred in the fashion industry and by many sewers.
Precision and Consistency
The decimal nature of centimeters and millimeters allows for very fine adjustments. When creating a custom-fit garment, even half a centimeter can make a difference. Using centimeters helps ensure that your measurements are consistent, especially when working with patterns or collaborating with others who use the metric system.
International Standards
Many sewing patterns, especially those from Europe and Asia, are designed and drafted using the metric system. Having a tape measure that easily reads centimeters ensures you can accurately follow these patterns without the need for constant conversion, reducing the chance of errors.
Graduated Seam Allowances
Seam allowances are often specified in centimeters (e.g., 1.5 cm seam allowance). Being able to measure and mark these accurately with your tailor’s tape measure is fundamental to achieving professional results.
Understanding CM Measurements in Patterns
When a pattern piece indicates a measurement, it’s usually given in centimeters. For example, a pattern might tell you to place a dart point 10 cm from the side seam or to cut a piece 25.5 cm long. Being comfortable reading your tape measure in centimeters means you can directly translate these instructions to your fabric.
Your Fabric Tape Measure Guide: Best Practices
To get the most out of your tailor’s tape measure, follow these best practices:
- Keep it Clean: Fabric dust and oils can accumulate. Wipe your tape measure with a damp cloth if needed.
- Store it Properly: Avoid kinks or stretching by storing it rolled or loosely folded.
- Check for Damage: Regularly inspect your tape measure for any tears, faded markings, or stretching that could affect accuracy. A damaged tape measure can lead to incorrect measurements.
- Practice Regularly: The more you use it, the more intuitive reading centimeters will become. Measure various items around your house, even if you don’t intend to alter them, just for practice.
- Use a Sturdy Tape Measure: Invest in a good quality tailor’s tape measure that is made of durable, non-stretch material. Flexible plastic or fiberglass is ideal. Avoid flimsy paper or very stretchy fabric tapes.
- Always Start at the Zero Mark: Ensure the very beginning of your tape measure (the end with the ‘0’) is placed precisely at the starting point of your measurement.
Common Pitfalls to Avoid
- Stretching the Tape: Never pull the tape measure taut, especially when measuring fabric or body parts. This will result in an inaccurate, longer measurement.
- Not Keeping the Tape Level: For body measurements, ensure the tape is parallel to the floor and not dipping in the back.
- Misreading the Millimeters: Double-check that you’re not mistaking a millimeter mark for a half-centimeter mark or vice versa.
- Ignoring the Midpoint Mark: The longest millimeter mark between whole centimeters is your key to reading half-centimeters accurately.
CM Conversion Tailoring: When and How
CM conversion tailoring is about accurately translating measurements between inches and centimeters.
When You Might Need Conversion
- Using Vintage Patterns: Older patterns might primarily use inches.
- Working with Mixed Instructions: Sometimes, a pattern might provide measurements in both systems.
- Communicating with International Sewists: If you’re collaborating on a project or discussing techniques with someone who uses a different system, clear conversion is necessary.
Tools for Conversion
- Your Dual-Scale Tape Measure: The most convenient tool you already have.
- Online Converters: Many websites offer quick inch to centimeter converters.
- Conversion Charts: Keep a small chart handy for common measurements.
Performing Conversions
From Inches to Centimeters:
Multiply the inch measurement by 2.54.
* Example: 15 inches * 2.54 = 38.1 cm
From Centimeters to Inches:
Divide the centimeter measurement by 2.54.
* Example: 40 cm / 2.54 = 15.75 inches (approximately 15 3/4 inches)
When converting for tailoring, precision is paramount. While quick estimates are helpful for general understanding, always use the 2.54 factor for actual garment construction or pattern adjustments.
Final Thoughts on Measuring Tape Markings CM
Mastering the measuring tape markings cm is an empowering step for any sewer or tailor. It unlocks greater precision, allows you to confidently use international patterns, and leads to better-fitting, more professional garments. The humble tailor’s tape measure, with its clear centimeter scale, is your gateway to accuracy. By practicing, paying attention to the details, and knowing your conversions, you’ll find that reading and using centimeters on your measuring tape becomes second nature. Happy measuring and happy sewing!
Frequently Asked Questions (FAQ)
Q1: Is it better to measure in inches or centimeters for sewing?
A1: While both systems can work, centimeters are often preferred in modern tailoring for their finer divisions and widespread use in international patterns and industry standards. Precision is key, and centimeters offer a slight edge in this regard.
Q2: How do I know which numbers on my tape measure are centimeters?
A2: Centimeter markings are usually printed in a different color (often red or a darker shade) than inch markings. They are also typically numbered in a continuous scale from 0 up to 150 cm or more, and each whole centimeter is divided into 10 smaller millimeter marks.
Q3: What does the longest line between centimeter marks mean?
A3: The longest line between two whole centimeter marks represents the halfway point, which is 0.5 cm, or 5 millimeters. It’s your primary guide for taking measurements in half-centimeter increments.
Q4: My pattern uses inches, but I prefer centimeters. How do I convert?
A4: To convert inches to centimeters, multiply the inch measurement by 2.54. For example, 10 inches x 2.54 = 25.4 cm. You can use your dual-scale tape measure or an online converter for accuracy.
Q5: How do I measure my body accurately with a tailor’s tape measure?
A5: Wear fitted clothing, keep the tape snug but not tight, maintain good posture, and ensure the tape is level around your body. If measuring yourself, use a mirror to help position the tape correctly. It’s often best to have someone else take your body measurements for maximum accuracy.