
Image Source: blossomsandposies.com
Grasping the Basics of Sewing Knots
Sewing is a wonderful skill. It lets you fix clothes, make new items, and express yourself. But for any sewing project to last, you need strong knots. Many people ask, “How to tie off stitches?” or “What is a hand sewing starting knot?” And some wonder, “Can I use a double knot for everything?” The good news is, tying off stitches means making a knot to stop your thread from coming undone. A hand sewing starting knot is the first knot you make to hold your thread at the beginning of your sewing line. While a double knot sewing method is very strong and useful for many tasks, it’s not always the best choice. Sometimes, you need a neater finish or a different kind of knot for a specific job. This guide will show you many sewing knot techniques. You will learn how to make your stitches secure. You will prevent stitch unraveling, making your projects last longer.
Why Knots Are Key in Sewing
Knots are tiny but mighty. They are the backbone of any sewn item. Think of a knot as a tiny anchor. It holds your thread in place. Without a good knot, your stitches will not stay. Your hard work could come apart. This is why learning how to tie a knot when sewing easily is so important.
Preventing Stitch Unraveling
Imagine sewing a button onto a shirt. You work hard. The button looks great. But if your knot is weak, the thread can loosen. The button could fall off. A secure thread knotting method stops this. It locks your stitches. This keeps your fabric and stitches safe. Your items stay together.
Reinforce Sewing Thread
Knots do more than just hold things. They also make your thread stronger at key points. For example, where you start or stop sewing, stress is highest. A well-made knot reinforces sewing thread at these spots. This adds extra strength. It makes your sewing last a long time. It helps garments hold up to wear and washing.
Ensuring Durability
Good knots lead to durable items. A durable item lasts through many uses. It can handle being pulled or stretched. It can stand up to being washed over and over. When your knots are strong, your sewing projects are strong. This means more joy from your handmade items. Or it means a repair that truly holds.
Essential Hand Sewing Starting Knot Methods
Starting a sewing line needs a good knot. This knot holds your thread. It stops it from pulling through the fabric. Choosing the right hand sewing starting knot is the first step to neat and strong sewing.
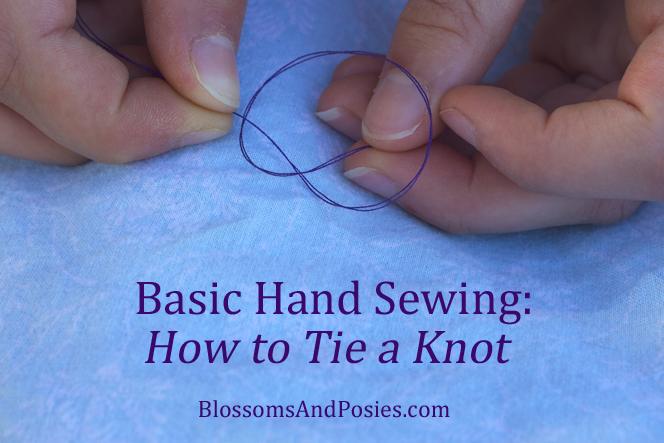
The Simple Knot (Single Knot)
This is the most basic knot. It is easy for beginner sewing knots. Many people learn this one first.
How to Make It
- Hold the thread: Take the end of your thread. Wrap it around your pointer finger.
- Make a loop: Cross the long end of the thread over the short end. This forms a small loop.
- Push through: Use your thumb and pointer finger. Push the short end of the thread through the loop you made.
- Pull tight: Gently pull both ends of the thread. The loop will close into a small knot.
- Slide down: You can slide this knot down to the end of your thread. Or you can slide it close to the eye of your needle.
When to Use It
The simple knot is good for light fabrics. It works well for easy repairs. Use it for hand basting. Basting is temporary stitching. It holds fabric pieces together before final sewing. It is a quick knot. It is very useful when you need to start fast.
Tips for Beginners
- Don’t pull too hard at first: A gentle pull helps the knot form. Pulling too hard can make it disappear.
- Practice: Make many simple knots. This helps your fingers learn the motion.
- Check the knot size: Make sure the knot is big enough. It must not pull through the fabric weave.
| Pros of Simple Knot | Cons of Simple Knot |
|---|---|
| Quick and easy to learn | Can be less secure on some fabrics |
| Good for light fabrics or basting | May pull through loosely woven fabric |
| Ideal for beginner sewing knots | Less durable for heavy-duty items |
The Double Knot (Surgeon’s Knot Variant)
The double knot sewing method gives extra security. It is like a simple knot but done twice. This makes it much stronger. It is a very reliable hand sewing starting knot.
How to Make It
- First wrap: Wrap the end of your thread around your pointer finger. Wrap it one time.
- Second wrap: Now, wrap it again, right next to the first wrap. So, the thread loops around your finger two times.
- Cross the thread: Take the long end of the thread. Cross it over the short end and the two loops.
- Push through: Push the short end of the thread through both loops on your finger.
- Pull gently: Gently pull both ends of the thread. The loops will become a small, neat knot.
- Slide down: Slide the knot to the end of your thread.
When It’s Best
Use the double knot when you need a strong start. It is perfect for sewing buttons. It is also good for mending seams. This knot is great for medium to heavy fabrics. It prevents stitch unraveling very well. It is a key secure thread knotting method.
Why It’s Stronger
The double wrap makes the knot bulkier. It adds more friction. This means it holds better. It is much harder for this knot to pull through fabric. It is a true workhorse knot for hand sewing.
| Uses of Double Knot | Strengths of Double Knot |
|---|---|
| Attaching buttons | Very secure and unlikely to unravel |
| Mending seams and tears | Prevents stitch unraveling effectively |
| Sewing heavy fabrics | Ideal for reinforcing sewing thread |
| Projects needing high durability | Good for long-lasting stitches |
The Tailor’s Knot (Loop Knot)
The tailor’s knot is also known as a loop knot for starting. It is popular with professional tailors. It creates a very strong knot right at the fabric.
How It Works
- Thread the needle: Thread your needle. Do not make a knot at the end yet.
- Take a small stitch: Push the needle through the fabric from the back to the front. Pull the thread almost all the way through. Leave a small tail (about 2 inches).
- Make a loop: Take the long part of the thread. Make a loop around the tip of your needle.
- Wrap the thread: Wrap the thread around the needle tip 2-3 times inside the loop.
- Hold and pull: Hold the wrapped threads with your thumb and finger. Pull the needle all the way through. As you pull, slide your fingers down the needle. This guides the knot.
- Tighten: Pull the thread firmly. A knot will form very close to the fabric.
When It’s Preferred
This knot is great for a neat start. It is good when you do not want a bulky knot. It works well for topstitching. Topstitching is sewing done on the visible side of the fabric. This knot keeps the start tidy. It also works well for a secure hand sewing starting knot on delicate fabrics.
The Waste Knot
The waste knot is a special starting knot. You do not leave it in your final sewing. You cut it off later. It is great when you need a very smooth finish. It is also useful when you need to start sewing in the middle of a fabric piece.
What It Is
A waste knot is simply a knot made far from your starting stitch. It is usually a simple knot or a double knot. You make it on the end of your thread. But instead of starting your stitch right where the knot is, you start it some distance away.
When to Use It
- Invisible starts: If you want no knot showing at all.
- Middle of fabric: When you need to begin sewing in the middle of a large piece of fabric. You cannot hide a knot on the back.
- Appliqué or quilting: For projects where a clean front is vital.
How to Remove It
- Make the knot: Make a simple or double knot about 4-6 inches from your needle.
- Start stitching: Begin your stitches. Work away from the knot.
- Sew over the thread: As you sew, make sure your stitches go over the tail of the thread. This is the thread leading from your waste knot to your first stitch. You will cover this tail with your stitches. Sew over it for about 1 inch (2-3 cm). This anchors your thread.
- Cut the knot: Once your stitches have covered the tail, cut the waste knot off. The stitches now hold your thread secure.
Mastering Finishing Sewing Knot Techniques
Just as important as starting a stitch is finishing it. A finishing sewing knot locks your work. It stops everything from coming undone. This is crucial for durability. It is how to tie off stitches properly.
The Backstitch Knot
This is one of the most common and secure ways to finish hand sewing. It creates a strong anchor point.
Steps to Tie Off Stitches with This Method
- Last stitch: Complete your last regular stitch. Your needle and thread should be on the back side of the fabric.
- Small backstitch: Push your needle back through the fabric. Do this very close to where your thread came out. Take a tiny stitch, moving backward along your stitch line.
- Form a loop: Pull the thread almost all the way through. Leave a small loop of thread.
- Go through loop: Push your needle through this loop.
- Pull tight: Gently pull the thread. The loop will close. A small knot will form right at the base of your stitch.
- Repeat (optional): For extra security, repeat steps 2-5 one or two more times. Make the new knot right on top of the first one. This creates a secure thread knotting point.
- Trim: Cut the thread close to the knot.
How It Secures
The backstitch knot creates a series of small, tight knots. They are very close to the fabric. They are hard to see. They grab onto the fabric fibers. This makes it very hard for the thread to pull out. It is a reliable finishing sewing knot.
Visualizing the Finish
When done correctly, this knot looks like a tiny bump. It sits right on the fabric. It is often hidden on the back of your work.
The Loop Knot (French Knot Variant for Finishing)
This method is similar to making a French knot. But here, you use it to secure your thread at the end. It creates a small, decorative, and strong knot.
How to Make It
- Last stitch: Finish your last stitch. Your needle should be on the front side of the fabric.
- Bring needle down: Push the needle very close to where the thread came up. Do not push it all the way through yet. Just pierce the fabric slightly.
- Wrap the needle: Wrap the thread around the needle tip 2-3 times. Do this close to the fabric.
- Pull needle through: Hold the wraps with your thumb and finger. Pull the needle all the way through the fabric to the back. As you pull, slide your fingers down the needle. This keeps the wraps tight.
- Tighten: Pull the thread firmly. A small, neat knot will form on the fabric surface.
- Secure and trim: Push the needle through the fabric again, very close to the knot. Make a tiny stitch on the back. Then trim the thread.
When to Use It for a Neat Finish
This knot creates a slightly raised dot. It is visible on the fabric surface. Use it when that look is okay. It is great for decorative stitches. It is also good when you want a very secure finishing sewing knot for thicker threads.
The Running Stitch Knot (for securing a line)
This method is less of a single knot and more of a technique. It secures a line of running stitches. It works by doubling back over your last few stitches.
Method
- Sew your line: Complete your running stitches. Your thread will be on the back of the fabric.
- Backtrack: Instead of making a knot, push your needle back through the fabric. Go back over the last 3-4 stitches you made. Follow the same path.
- Pull tight: Pull the thread through. This doubles up the thread in those last stitches.
- Trim: Cut the thread close to the fabric.
Use Cases
This is very subtle. It works well for temporary stitches. It is also good for areas that will be covered by other sewing later. It does not create a true knot. So, it is less secure for high-stress areas. It relies on friction to prevent stitch unraveling.
The Bar Tack Knot (Heavy Duty Finishing)
A bar tack is not strictly a knot. But it is a very strong way to secure threads. It is used where strength is key. Think of belt loops or pocket openings on jeans.
Steps for This Strong Knot
- Mark the spot: Decide where you want the bar tack. It is usually a short line.
- First pass: Make several small, parallel stitches across this short line. These form the “bar.”
- Wrap and secure: Now, take your needle and wrap the thread tightly around these parallel stitches. Go from one end of the bar to the other. Make many small, close wraps.
- Finish: When the bar is fully wrapped, push your needle to the back. Make a small backstitch knot to finish.
When to Apply It
Use a bar tack for extreme reinforcement. It is perfect for areas of high wear. It is excellent for strengthening seams that pull apart easily. It greatly reinforces sewing thread.
The Invisible Sewing Knot
The invisible sewing knot is the holy grail for many sewers. It is a way to start or end your thread without any visible knot. This is often done by hiding the knot within the fabric layers.
Secrets to Hiding Knots
The main secret is to use the layers of your fabric. Or you can hide it within a seam allowance. Seam allowance is the extra fabric around your stitches.
When It’s a Must
- Topstitching: When stitches are seen on the outside.
- Appliqué: When adding a fabric shape to another fabric.
- Quilting: For very neat quilt finishes.
- Anything that needs a super clean look.
How to Achieve It (Hiding a Knot within Fabric Layers)
- Prepare: Thread your needle. Make a small knot (simple or double) at the very end of your thread.
- Enter fabric: Push your needle into the wrong side of the fabric. Go into a seam allowance or between fabric layers. Do not go all the way through to the front.
- Thread path: Guide your needle through the fabric for about half an inch. Keep it between the fabric layers.
- Exit fabric: Bring the needle out to the right side of the fabric where you want to start your stitch.
- Pull gently: Pull the thread. The knot will slip inside the fabric layers. It will be invisible.
- Start stitching: Begin your sewing. The knot is hidden inside.
For Finishing:
- Last stitch: Finish your last stitch. Your needle is on the wrong side.
- Small knot: Make a small backstitch knot right on the wrong side of the fabric. Make it as small and flat as possible.
- Bury the tail: Push your needle into the fabric very close to the knot. Go through the fabric layers for about half an inch.
- Exit and trim: Bring the needle out. Pull the thread tight. The knot and tail will be pulled inside. Cut the thread very close to the fabric. It will disappear inside.
Advanced Sewing Knot Techniques
While the basics cover most needs, some special knots offer unique benefits. These sewing knot techniques can be useful in specific situations.
The Lock Stitch Knot (for machine sewing tie-off)
In machine sewing, the machine makes a “lock stitch” to secure threads. It does this by taking a few stitches in reverse. This is how machines “tie off” threads. You can do something similar by hand.
How It Relates to Hand Sewing
When you hand sew, you don’t have a machine doing reverse stitches. But you can mimic the strength.
Simulating It by Hand
- Sew a few stitches: Sew 3-4 tiny stitches forward.
- Go back: Take your needle and go back over those same 3-4 stitches. Follow the exact same holes. Do this two or three times. This builds up the thread in the same spot.
- Make a knot: After reinforcing, make a secure backstitch knot right there. This method greatly reinforces sewing thread. It gives a very strong start or finish. It is often used for stress points on garments.
The Figure-Eight Knot (Rare, but strong)
The figure-eight knot is complex. It is more common in climbing or sailing. But it can be used in sewing when extreme strength is needed for a single point. It makes a very strong, stable knot that resists slipping.
When It Might Be Useful
- Attaching very heavy items to fabric.
- Making a super strong loop in a thread.
- Special crafts where you need a non-slip, visible knot.
How to Form It
- Make a loop: Form a loop in your thread.
- Cross over: Take the working end (the end you are using to tie) and cross it over the standing part (the main thread).
- Wrap around: Bring the working end behind the standing part. Then bring it up through the loop you first made.
- Pull tight: Carefully pull both ends to tighten. The knot will look like the number 8.
Tips for Better Knotting
Good knots come from good habits. Here are some tips to help you master your sewing knot techniques.
Use the Right Needle
The needle size matters. A needle that is too thick can leave big holes. A needle that is too thin might not pull the thread through easily. Pick a needle that matches your fabric and thread. This helps knots sit neatly.
Choose the Right Thread
Strong thread makes strong knots. Cotton thread is good for cotton fabric. Polyester thread is strong and durable. Silk thread is fine for delicate silks. Using the right thread helps your knots hold. It also helps prevent stitch unraveling.
Practice Makes Perfect
Tying knots takes practice. Your fingers need to learn the movements. Practice tying simple knots while watching TV. Do it until it feels natural. This builds muscle memory.
Trim Threads Carefully
After tying your knot, trim the extra thread. Do not cut it too short. Leave a small tail, about 1/4 inch (0.5 cm). If you cut too close, the knot might unravel. For an invisible sewing knot, you cut very close only after burying the tail.
Reinforce Sewing Thread Where Needed
Some areas need more strength. Areas like buttonholes, corners, or seams on tight clothes need extra reinforcement. Use a double knot sewing method. Or make several backstitch knots. This prevents strain from breaking your stitches.
Prevent Stitch Unraveling with Proper Technique
- Always use a knot: Never start or end a stitch line without a knot.
- Knot close to the fabric: The closer the knot is to your fabric, the more secure it will be.
- Check tightness: Knots should be snug, but not so tight they pucker the fabric.
Common Mistakes to Avoid
Even experienced sewers make mistakes. Knowing what to avoid helps you tie better knots.
Knots Too Loose
A loose knot will not hold. It will slip. Your stitches will come undone. Make sure you pull your knots firmly. They should feel tight.
Knots Too Tight
Pulling too hard can make the knot too tight. This can break your thread. Or it can pucker your fabric. Pucker means the fabric gathers up. It should be snug, not overly tight.
Knots in the Wrong Place
Sometimes, a knot shows where it should not. For instance, a big knot on the front of a project looks messy. Learn to hide knots or use invisible sewing knot techniques when needed.
Not Enough Security
One small simple knot might not be enough. For things that get a lot of use, like a button, a single knot is risky. Use a double knot sewing method. Or make multiple backstitch knots. Always choose a knot that matches the project’s needs.
Frequently Asked Questions (FAQ)
Why does my knot keep slipping?
Your knot might be slipping for a few reasons.
* Too loose: You are not pulling it tight enough.
* Wrong thread: The thread might be too slippery (like some nylons). Try a different thread type.
* Fabric too open: The fabric weave might be too loose. The knot might be pulling through. Try a larger knot or double it.
* Not enough practice: Keep practicing. Your technique will get better.
How can I make my knots invisible?
To make your knots invisible, you need to hide them. Use the invisible sewing knot method. This means burying the knot inside the fabric layers or in a seam allowance. You can also use a waste knot at the start, which you cut off later. Practice is key to mastering this.
Is it okay to use super glue on knots?
No, it is generally not okay to use super glue on knots in sewing. Super glue makes the fabric stiff. It can make it brittle. This can cause the fabric around the knot to break. It also often shows through the fabric. Plus, it is not flexible. It will not hold up to washing or wear. Rely on proper knotting techniques for strength.
What are the best beginner sewing knots?
For beginners, start with the simple knot for starting. This is easy to learn. For finishing, the backstitch knot is excellent. It is very secure. Once you are comfortable with those, move on to the double knot for extra strength. These beginner sewing knots will cover most of your early projects. Always remember, secure thread knotting is key for any successful sewing project.