
Are you wondering how to make beautiful drapes for your home without touching a sewing machine? Can you really create curtains with a polished look using simple tools and materials? Yes, you absolutely can! Making drapes without sewing is a fantastic option for beginners, renters, or anyone who wants a quick and easy way to update their windows. It’s all about clever techniques that bond or attach fabric edges, giving you stunning results with minimal effort. These no-sew curtain hacks are simpler than you think and offer a world of possibilities for adding style to any room.
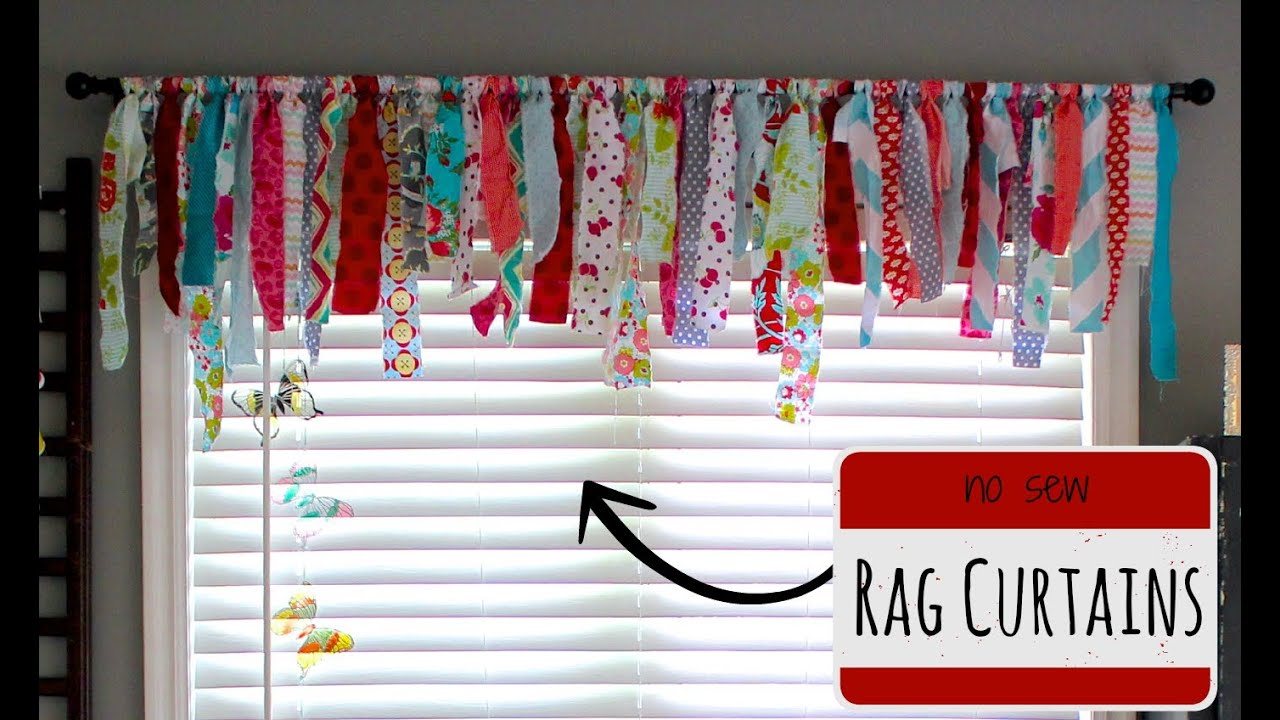
Image Source: i.ytimg.com
Why Choose the No-Sew Way?
Making curtains the old-fashioned way takes time. It needs skills with a sewing machine. Not everyone has one. Not everyone knows how to use one well. This is where no-sew comes in.
The no-sew method is great for many reasons:
- It is fast. You can finish a curtain panel in less time.
- It is simple. You don’t need special sewing skills.
- It saves money. No need to buy a sewing machine. You save on thread and needles too.
- It is for everyone. Even if you’ve never made anything before, you can do this.
- It lets you be creative. You can still pick your fabric and style.
Using easy no-sew curtains is a smart way to get a new look for your home quickly. It makes changing your window style easy. It also costs less than buying ready-made drapes.
What You Need for No-Sew Drapes
You don’t need many things to make drapes without sewing. The exact items depend on the method you pick. But here are common things you will likely use:
- Fabric: Choose the fabric you like. Make sure you buy enough. More on picking fabric later.
- Measuring Tape: To measure your window and your fabric.
- Sharp Scissors: For cutting the fabric neatly.
- Iron and Ironing Board: Needed for methods using heat-activated tapes.
- Straight Pins: To hold fabric in place before sealing.
- A Flat Surface: A table or the floor to work on.
Depending on your chosen method, you will also need one of these main items:
- Iron-On Hemming Tape: Also known as fusible web or fabric tape. This tape melts when heated and glues fabric together.
- Fabric Glue: A special glue that holds fabric firmly. Look for one that stays soft and is washable.
- Clip Rings: These rings clip onto the fabric top and hang on a curtain rod.
Using fabric tape for curtains or fabric glue for curtains is key to joining edges without stitches. Clip ring curtains just need the rings to hold the fabric.
Finding the Right Fabric
Picking your fabric is fun! But for no-sew drapes, some fabrics work better than others.
Look for fabrics that are:
- Not too thick: Heavy fabrics can be hard to work with tape or glue. They might not hold well.
- Not too thin: Very sheer fabrics might show the tape or glue lines.
- Have a bit of weight: Enough weight helps them hang nicely.
- Easy to cut: Fabrics that fray a lot can be tricky. Cotton, linen blends, or medium-weight synthetics are good choices.
Think about how much light you want to block.
- Light filtering: Cotton, linen, light blends.
- Room darkening: Use a thicker fabric or add a lining. You can even use no-sew methods to attach a lining!
Always pre-wash your fabric. Fabrics can shrink the first time they are washed. Do this before you measure and cut. This way, your drapes will stay the right size.
No-Sew Methods: Different Ways to Hem
The main part of making drapes is finishing the edges. This is called hemming. Hemming fabric without sewing is the core skill here. There are a few popular ways to do this without a needle and thread.
Let’s look at the most common ones.
Method 1: Using Iron-On Hemming Tape
This is perhaps the most popular way to make no-sew curtains. Iron-on hemming tape creates a strong, clean edge using heat from your iron. It’s simple and gives a smooth finish.
Comprehending Iron-On Tape:
Iron-on tape is a thin strip of adhesive material. It comes on a paper backing. When you place it between two layers of fabric and heat it with an iron, the adhesive melts. It bonds the fabric layers together. It’s like a fabric glue that needs heat to activate.
Step-by-Step Guide with Iron-On Tape:
This method is great for creating side hems and bottom hems.
H4: Step 1: Prepare Your Fabric
- Lay your washed and dried fabric flat. Smooth out any wrinkles. An iron is your friend here. Ironing makes sure the fabric is flat and ready.
- Measure and mark where you need to cut your fabric. Remember to add extra length for the hems. A common bottom hem is 3-4 inches. Side hems are usually 1 inch. So, add 6-8 inches to your needed length for the bottom and 2 inches to your needed width for the sides. Cut your fabric carefully with sharp scissors.
H4: Step 2: Fold the Side Hems
- Along one long side edge, fold the fabric edge over about 1/2 inch towards the back (wrong side) of the fabric. Press this fold with your iron.
- Fold this edge over again, another 1/2 inch. This hides the raw edge inside the fold. Pin it in place if needed.
- Press this double fold firmly with your iron. You are making a crisp line for the tape.
- Repeat on the other long side edge.
H4: Step 3: Apply the Hemming Tape to Side Hems
- Open up the second fold you just made on one side. You will see the first 1/2 inch fold and a crease line from your iron.
- Cut a piece of iron-on hemming tape. It should be slightly shorter than the hem length. This prevents the tape from sticking out the ends.
- Place the hemming tape inside the second fold, right along the first folded edge. The tape should be between the two layers of fabric you plan to bond.
- Fold the fabric back over the tape. The raw edge is now tucked away. The tape is inside the double fold.
- Place a pressing cloth over the fabric if your fabric is delicate. This protects the fabric from direct heat.
- Press down firmly with a hot iron. Follow the tape package directions for time and heat settings. Usually, you hold the iron for about 10-15 seconds on each spot, overlapping slightly as you move the iron. Do not slide the iron; lift and press.
- Let the hem cool completely. Check if the tape held. If not, press again.
- Repeat for the other side hem.
H4: Step 4: Fold the Bottom Hem
- Decide how deep you want your bottom hem. A deeper hem (3-4 inches) adds nice weight and makes the drape hang better.
- Fold the bottom raw edge of the fabric up towards the back (wrong side) by half of your planned hem depth (e.g., fold up 2 inches for a 4-inch hem). Press this fold.
- Fold the edge up again by the same amount (another 2 inches in our example). This hides the raw edge. Pin it in place.
- Press this double fold firmly.
H4: Step 5: Apply Hemming Tape to Bottom Hem
- Open up the second fold of the bottom hem.
- Place strips of iron-on hemming tape inside the fold, along the first folded edge. Use multiple strips side-by-side if needed to cover the width of the hem. Make sure the tape pieces touch but don’t overlap too much. Cut the tape slightly shorter than the hem width.
- Fold the fabric back over the tape.
- Using your iron (and pressing cloth if needed), press down firmly on the hem. Hold the iron for 10-15 seconds on each spot, lifting and pressing. Cover the entire hem width.
- Let the hem cool completely. Check the bond. Re-press if needed.
You now have a neatly hemmed drape panel with finished sides and bottom, all done by hemming fabric without sewing!
H5: Tips for Success with Iron-On Tape:
- Always test the tape on a small scrap of your fabric first. See if it holds well and if the heat affects the fabric color or texture.
- Use the right heat setting for your fabric. Too hot can burn the fabric. Not hot enough won’t melt the glue.
- A pressing cloth (a thin cotton cloth) protects your fabric, especially synthetics or dark colors.
- Work on a hard, heat-safe surface. An ironing board is best.
- Let the hem cool completely before handling it roughly. The bond gets stronger as it cools.
Using fabric tape for curtains makes creating crisp, straight lines simple. It’s a key skill in DIY no-sew window treatments.
Method 2: Using Fabric Glue
Fabric glue is another great way to avoid sewing. It’s useful for hems, adding trims, or fixing small tears. Choose a glue made for fabric that is washable and dries clear.
Comprehending Fabric Glue:
Fabric glue is a liquid adhesive made to bond fabric fibers together. Unlike craft glue, fabric glue stays flexible after it dries. This lets the fabric move naturally. Good fabric glue is also water-resistant after it cures, so you can wash your finished drapes.
Step-by-Step Guide with Fabric Glue:
Glue is great for hemming, especially if you don’t have an iron or are working with tricky shapes (though straight hems are easiest for beginners).
H4: Step 1: Prepare and Cut Fabric
- Wash, dry, and iron your fabric.
- Measure and cut your fabric, adding extra for hems (same amounts as for tape – 1 inch for sides, 3-4 inches for bottom).
H4: Step 2: Fold the Side Hems
- Fold one long side edge of the fabric over about 1/2 inch towards the back. Press this fold with an iron or just crease it firmly with your fingers if you don’t use an iron.
- Fold this edge over again, another 1/2 inch. Pin this double fold in place to hold it.
H4: Step 3: Apply Fabric Glue to Side Hems
- Open up the second fold you just made. You’ll see the first fold line.
- Apply a thin line of fabric glue along the inside of the second fold, close to the folded edge. Don’t use too much glue; it might seep through the fabric. A thin, even line is best.
- Fold the fabric back over, pressing the hem flat. The glue is now between the two fabric layers.
- Press the hem down firmly with your fingers or a roller. You can use pins or clips to hold it while it dries.
- Wipe away any extra glue that squeezes out right away.
- Let the glue dry completely according to the package directions. This can take a few hours or even a day.
- Repeat on the other side hem.
H4: Step 4: Fold the Bottom Hem
- Decide on your bottom hem depth (3-4 inches is good).
- Fold the bottom raw edge up by half the hem depth (e.g., 2 inches). Press or crease this fold.
- Fold the edge up again by the same amount (another 2 inches). Pin this double fold.
H4: Step 5: Apply Fabric Glue to Bottom Hem
- Open up the second fold of the bottom hem.
- Apply a thin, even line of fabric glue along the inside of the second fold, near the folded edge. You might need to make a few parallel lines of glue across the wide hem.
- Fold the fabric back over, pressing the hem flat.
- Hold the hem down with pins or clips while it dries.
- Let the glue dry completely as the package says.
- Wipe away any extra glue right away.
Your drape panel is now hemmed using fabric glue for curtains!
H5: Tips for Success with Fabric Glue:
- Read the glue’s instructions carefully. Drying times and application methods can differ.
- Test the glue on a fabric scrap first. Check if it holds, if it shows through, and how it feels when dry.
- Use thin, even lines of glue. Too much glue makes the hem stiff and messy.
- Apply glue in sections if working on a long hem. This stops the glue from drying before you fold the fabric.
- Use pins or clips to hold the hem flat while the glue dries fully.
- Make sure the glue is fully cured before washing the drapes.
Fabric glue is a simple tool for hemming fabric without sewing. It’s part of many easy no-sew curtain hacks.
Method 3: Using Clip Rings
This method is the fastest and simplest for hanging drapes without any hemming needed at the top. It uses special rings that clip onto the fabric.
Comprehending Clip Ring Curtains:
Clip rings are curtain rings that have a small clip or clamp at the bottom. The top of the fabric panel is simply clipped into these rings. The rings then slide onto a curtain rod. This creates soft pleats at the top of the drape.
Step-by-Step Guide with Clip Rings:
This method doesn’t require any finishing of the top edge. You just need to finish the sides and bottom using tape or glue.
H4: Step 1: Hem Sides and Bottom
- Wash, dry, and iron your fabric.
- Measure and cut your fabric. For this method, you don’t need extra fabric for a top hem. You just need extra for the side and bottom hems (1 inch for sides, 3-4 inches for bottom).
- Use either iron-on hemming tape (Method 1) or fabric glue (Method 2) to create neat double-fold hems on the two sides and the bottom edge of your fabric panel. Follow the steps described above for your chosen hemming method.
- Let the side and bottom hems cool or dry completely.
H4: Step 2: Attach Clip Rings
- Lay your finished fabric panel flat, right side up.
- Decide how many clip rings you need. A good rule is one ring every 4-6 inches across the top width of your drape. This helps create even folds.
- Starting at one top corner, place a clip ring about 1-2 inches from the side edge. Clip it onto the top edge of the fabric. The ring should be on the front side of the fabric.
- Measure the distance you decided on (4-6 inches) along the top edge and clip the next ring.
- Continue clipping rings evenly spaced across the top width of the panel until you reach the other side. Place the last ring about 1-2 inches from that side edge.
- Make sure the clips are holding the fabric firmly.
H4: Step 3: Hang Your Drapes
- Slide the clip rings onto your curtain rod.
- Hang the rod on its brackets.
- Adjust the fabric between the rings to create even folds or pleats.
Using clip ring curtains is one of the fastest DIY no-sew window treatments. It makes hanging super simple.
H5: Tips for Success with Clip Rings:
- Use the same number of rings on each drape panel for a consistent look.
- Space the rings evenly to create nice pleats.
- Clip the rings firmly so they don’t slip off the fabric.
- This method works with almost any fabric that isn’t too thick for the clips.
- Clip rings are a great option for exploring no stitch curtain ideas.
Alternative Curtain Making Methods Without Sewing
Beyond tape, glue, and clip rings, there are other simple no stitch curtain ideas and alternative curtain making methods.
- Tie-Top Curtains: Buy fabric with finished edges (like a tablecloth or flat sheet). Cut strips of matching or contrasting fabric (you might need glue or tape to finish the strip edges). Tie the strips to the top corners and at intervals across the top edge of the main panel, then tie these strips onto the curtain rod. No hemming needed on the main panel if edges are already finished.
- Using Grommets: While some grommets need a tool to punch a hole and set the metal ring, they don’t involve stitching fabric edges. You would hem the sides and bottom with tape or glue. Then use a grommet tool kit to add grommets along the top edge. These grommets slide onto the rod. This gives a modern, clean look. This method does require buying a special tool kit, but it’s still a no-sew way to finish the top edge.
- Fabric with Built-in Rod Pockets: Some fabrics are sold with a finished pocket along one edge already made. You might only need to hem the sides and bottom using tape or glue. Then you slide the rod through the built-in pocket. This is less common for raw fabric by the yard but can sometimes be found.
These alternative curtain making methods show you can get creative with how you attach fabric to the rod without sewing.
Putting It All Together: General Steps
No matter which no-sew method you choose for the top (clip rings, ties, grommets) or how you hem the sides and bottom (tape, glue), the basic process involves these steps:
H3: Planning Your Project
This involves deciding on the style, fabric, and getting your measurements right.
H4: Measure Your Window
- Decide where your curtain rod will go. Usually, it’s a few inches above the window frame and wider than the frame on both sides.
- Measure the width you want the rod to cover.
- Measure the length from the rod to where you want the bottom of the drape to end (e.g., windowsill, below the sill, floor).
- Curtains usually look best with some fullness. Multiply your rod width measurement by 1.5 to 2.5 times to get the total width of fabric panels you need. For example, if your rod is 60 inches wide, you might need 90 to 150 inches of fabric width in total. Divide this total width by the width of your chosen fabric to know how many panels you need to cut (most fabrics are 54 inches wide).
- Add extra length to your measured length for the bottom hem (3-4 inches) and any top finishing if you aren’t using clip rings or ties (e.g., 1-2 inches for a folded top edge if using grommets). Also, add 1 inch to the width for side hems (1/2 inch on each side).
H4: Buy Your Materials
Get your fabric, chosen hemming material (tape or glue), clip rings if using, and any other tools listed earlier. Remember to pre-wash fabric!
H3: Crafting Your Panels
Now you make the actual fabric panels.
H4: Cut Your Fabric
- Iron your pre-washed fabric flat.
- Carefully measure and mark your panels based on your calculations (Finished Length + Bottom Hem + Top Allowance, by Finished Width + Side Hems).
- Cut your panels using sharp scissors. Cut along the grain of the fabric as much as possible for straight lines.
H4: Hem the Sides
- Use either iron-on hemming tape or fabric glue to create a 1/2-inch double fold hem on both long sides of each fabric panel. Follow the steps for Method 1 or Method 2.
- Let the hems cool or dry completely.
H4: Hem the Bottom
- Use either iron-on hemming tape or fabric glue to create your planned double-fold bottom hem (e.g., 4 inches deep) on the bottom edge of each panel. Follow the steps for Method 1 or Method 2.
- Let the hem cool or dry completely.
H4: Finish the Top Edge (Based on Method)
- If using Clip Rings: Leave the top edge raw. Simply clip the rings onto the top edge as shown in Method 3.
- If using Grommets: Fold the top edge over 1-2 inches and secure it with tape or glue. Then follow the grommet kit instructions to add the grommets through this reinforced edge.
- If using Ties: Use tape or glue to create a clean edge along the top. Then attach fabric ties by gluing or taping them onto the top edge at intervals, or by cutting slits and tying them through the slits (secure slits with glue/tape).
H3: Final Touches
The last steps get your drapes ready to hang.
H4: Press Everything
Go over all the hemmed edges with an iron (if compatible with your chosen method and fabric) to make sure they are flat and crisp. This really improves the finished look of your DIY no-sew window treatments.
H4: Hang Your Drapes
Put your curtain rod up. Slide on your finished panels using the clip rings, grommets, ties, or built-in pocket. Adjust the folds. Step back and admire your work!
Following these simple steps makes creating drapes without sewing a straightforward task. It’s about breaking it down into small, manageable actions.
Adding Embellishments (No-Sew)
Just because you’re not sewing doesn’t mean you can’t add style! You can add things like trim, ribbon, or border fabric to your no-sew drapes.
- Ribbon or Braid: Use fabric glue or hemming tape (check if the tape works with the trim material) to attach ribbon or decorative braid along the edges of your drapes, or in stripes across the fabric.
- Fabric Borders: Cut strips of a different fabric. Hem one long edge of the strip with tape or glue. Then use more tape or glue to attach the raw edge of the border strip to the main drape panel (making sure to tuck the raw edge of the panel inside the bond). This adds color and weight.
- Fringe or Tassels: Attach fringe or tassels along the bottom hem using a strong fabric glue. Make sure the glue is meant for heavier items if your trim is weighty.
These no stitch curtain ideas help you personalize your drapes easily.
Taking Care of Your No-Sew Drapes
How you care for your drapes depends on the fabric and the no-sew method used.
- Washing: Check if your fabric glue or hemming tape is listed as washable. Most good quality ones are. If so, you can likely machine wash on a gentle cycle with cold water. It’s often better to air dry no-sew drapes or tumble dry on a very low heat setting. High heat could potentially weaken the adhesive.
- Spot Cleaning: For small marks, try spot cleaning with a mild cleaner. Don’t soak the hemmed areas if possible.
- Ironing: If you need to iron out wrinkles, use a low to medium heat setting. Use a pressing cloth over the hemmed areas, especially if you used iron-on tape, to protect the adhesive from direct, high heat. Avoid ironing directly on areas bonded with glue if the glue feels sticky or might melt.
- Handling: Be gentle with the hemmed edges, especially after washing, until you are sure the bond is strong.
Reading the instructions for the specific fabric glue or hemming tape you used is key to proper care. This helps ensure your easy no-sew curtains last a long time.
If Things Go Wrong: Troubleshooting
Sometimes, you might run into small problems when making drapes without sewing. Here are a few common ones and what to do:
- Hem Not Sticking (Tape): Did you use enough heat? Did you press long enough? Was the tape old? Try pressing again with more heat or longer time. Make sure you are pressing down, not sliding the iron. If it still doesn’t stick, the tape might be old or the wrong type for your fabric. You can try adding more tape or switching to fabric glue in those spots.
- Hem Not Sticking (Glue): Did you use enough glue? Is the fabric too textured for the glue? Did you let it dry long enough? Try applying a bit more glue. Make sure you are using a glue made for fabric. Hold the area with pins or clips longer to help it bond.
- Glue Shows Through Fabric: You used too much glue, or the fabric is too thin/light colored. Always test glue on a scrap first. Unfortunately, if it has dried and shows through, it’s hard to fix. You might need to start that panel over or try adding trim over the area. Using thin, even lines of glue is important.
- Hem Is Not Straight: The initial fold wasn’t straight, or the fabric shifted while applying tape/glue. It’s important to measure and press/pin your folds carefully before applying adhesive. For minor wobbles, ironing might help flatten it. For bigger issues, you might need to carefully undo the bond (sometimes possible with heat or a bit of solvent, but test first) and re-do the hem.
- Fabric Fraying: Some fabrics fray easily. Fold your hems twice (double fold) to tuck the raw edge inside. Apply the tape or glue right up to the edge of the inner fold to seal it.
Don’t worry if your first try isn’t perfect. Learning DIY no-sew window treatments is a process. Practice makes better!
Comparing No-Sew Methods
Let’s look at the main no-sew hemming methods side-by-side.
H4: Table Comparing No-Sew Hemming Methods
| Feature | Iron-On Hemming Tape | Fabric Glue | Clip Rings (for top) |
|---|---|---|---|
| Ease of Use | Very Easy | Easy to Medium | Very Easy |
| Time Needed | Fast (bonding is quick) | Slow (drying time is needed) | Very Fast (once hems are done) |
| Tools Needed | Iron, Ironing Board | Pins/Clips (helpful) | No extra tools needed (just the rings) |
| Look Achieved | Crisp, Flat Hem | Flat, Flexible Hem (can be slightly stiffer) | Soft pleats at the top (sides/bottom flat) |
| Durability | Good (if applied correctly) | Good (choose washable glue) | Very Durable (rings are metal) |
| Fabric Type | Works on most non-sheer fabrics | Works on most fabrics (test sheers) | Works on almost any fabric (for clipping) |
| Cost | Low to Medium | Low | Medium to High (depending on ring style/qty) |
| Best For | Clean, professional-looking hems quickly | Detail work, adding trims, no-iron needed | Fastest top finish, easy hanging/taking down |
This table helps illustrate the strengths of using fabric tape for curtains versus fabric glue for curtains, and how clip rings offer a different approach for the top edge. All are great options for exploring no stitch curtain ideas.
Cost vs. Sewing vs. Buying
How does making drapes without sewing compare in cost?
- Buying Ready-Made: Can range from cheap (basic panels) to very expensive (custom). Quality varies greatly. No control over fabric choice unless paying a lot.
- Sewing Yourself: Costs include fabric, thread, needles, and maybe sewing machine cost/maintenance. Time is a factor.
- No-Sewing Yourself: Costs include fabric, hemming tape or glue, clip rings (if used). No machine cost. Time is less than sewing.
Generally, making your own drapes, even with no-sew methods, is often cheaper than buying good quality ready-made drapes, and significantly cheaper than custom ones. The main cost is the fabric. The no-sew supplies like tape, glue, or basic clip rings are quite affordable. This makes DIY no-sew window treatments a budget-friendly option.
More Creative No-Sew Curtain Hacks
Thinking outside the basic panel gives you more no stitch curtain ideas.
- Color Blocking: Hem two different fabrics separately. Then, use a long strip of hemming tape or glue to join the finished edges together horizontally or vertically.
- Adding Blackout Lining: You can attach blackout fabric to the back of your main curtain fabric using iron-on tape or glue along the edges. Just treat the two fabrics as one during the hemming process, or hem them separately and then bond them together around the edges.
- Valances: Short window toppers (valances) are very easy to make with no-sew methods. Hem the sides and bottom, then use clip rings or create a rod pocket with tape/glue at the top.
- Using Scarves or Tablecloths: As mentioned, these often have finished edges. You just need to add a way to hang them (clip rings!) and maybe hem the bottom if they are too long. This is one of the simplest easy no-sew curtain hacks.
Exploring these no-sew curtain hacks lets you get creative without needing complex sewing skills.
Final Thoughts on No-Sew Drapes
Making drapes without sewing is a simple, effective, and budget-friendly way to update your home. Whether you use the reliable bond of iron-on hemming tape, the flexibility of fabric glue, or the sheer simplicity of clip ring curtains, you can achieve beautiful results.
These DIY no-sew window treatments are perfect for adding a personal touch to any room. They prove that you don’t need fancy tools or expert skills to create custom-looking home decor. Hemming fabric without sewing opens up a world of possibilities. So grab your fabric and supplies, and start crafting your own no stitch curtain ideas today!
Frequently Asked Questions (FAQ)
H4: Can I wash drapes made with iron-on tape or fabric glue?
Most high-quality iron-on tapes and fabric glues made for fabric are washable once they are fully set or cured. Always check the product packaging for specific washing instructions and recommendations. Use a gentle cycle and cold water for best results.
H4: How long do no-sew drapes last compared to sewn ones?
With good preparation, proper application of the adhesive, and careful handling/washing, no-sew hems can last for a long time. They might not be as durable as a sturdy sewn hem under extreme stress, but for normal use and washing, they hold up very well. Clip rings are very durable as they are typically metal.
H4: What is the best fabric to use for no-sew curtains?
Medium-weight fabrics like cotton, linen blends, or polyester blends work best. They are easy to cut, hem, and the adhesives bond well. Avoid very thick fabrics (hard to bond) or very thin/sheer fabrics (adhesives might show through). Always test on a scrap first.
H4: Can I use no-sew methods to add a lining to my drapes?
Yes, you can! You can hem the lining fabric separately using tape or glue. Then, lay the main fabric wrong side up, center the lining fabric right side up on top of it, and use tape or glue around the outer edges to bond the two fabrics together. Then proceed with hemming the main drape edges, treating the two layers as one, or folding the main fabric edge over the lining and securing it.
H4: Where can I find iron-on hemming tape or fabric glue?
These supplies are widely available. Look in craft stores, fabric stores, general merchandise stores with a craft or sewing section, or online retailers. Read product descriptions to make sure the adhesive is suitable for fabric and is washable.