
Image Source: dropinblog.net
Mastering How To Backstitch On Sewing Machine Easily
What is backstitching on a sewing machine, why is it needed, and how do you actually do it? Backstitching is simply sewing backward for a few stitches right at the start and end of a seam. This is a super important step in sewing. It helps to reinforce sewing seam, making sure your stitches won’t come undone. Think of it like tying a knot with your machine. Without backstitching, the stitches at the start and end of your seam are loose and can easily unraveling stitches, messing up all your hard work. Doing a sewing machine reverse stitch creates a small, strong overlap of stitches that locks the thread in place. This gives you sturdy, reliable seams.
Why Backstitch Matters
When you sew two pieces of fabric together, you create a seam. This seam holds everything in place. But just like tying your shoe, you need to secure the ends. If you don’t, the stitches can loosen and pull out, especially when the seam is put under stress.
- Stops Stitches From Unraveling: This is the main reason. Without backstitching, the thread at the beginning and end of your seam is just held by friction. Any pull or stress on the seam can cause the stitches to pop out, one by one, like a loose thread on a sweater. Backstitching locks those first and last stitches in place. This creates lock stitches machine sewing does so well, far stronger than just sewing straight off the edge.
- Makes Seams Stronger: By sewing over the same spot a couple of times, you add more thread to that area. This helps to reinforce sewing seam, making it much more durable. This is extra important in areas that get a lot of wear and tear, like seams on clothing, bags, or cushions.
- Secures the Beginning and End: It’s specifically designed to secure beginning seam and the end of your stitching line. This prevents the seam from pulling apart from the edge of the fabric. It makes sure the whole seam stays neat and strong right from where you started to where you finished.
Imagine sewing a straight line. You start sewing, sew all the way, and lift the presser foot. If you didn’t backstitch, you could probably just pull the thread at either end and the whole line of stitching would easily pull out. Backstitching prevents this frustrating problem.
How Backstitching Works on Your Machine
Most modern sewing machines have a built-in way to sew backward. This function lets you make a sewing machine reverse stitch. When you activate this function, the feed dogs—those little metal teeth under the presser foot that move the fabric forward—change direction. Instead of pushing the fabric away from you, they pull it towards you.
While the feed dogs are moving backward, the needle keeps stitching just as it does when sewing forward. This means the new stitches you make are laid directly on top of the stitches you just made going forward.
- Overlap is Key: The magic is in the overlap. By sewing forward a few stitches, then backward over those stitches, then forward again, you create a dense area of stitches that are all woven together. The same happens at the end: you sew up to your stopping point, backstitch a few stitches, and then maybe sew forward one more stitch (though some people just backstitch and stop).
- Creating the Lock: This overlapping action makes it incredibly difficult for the thread ends to pull through the fabric. It creates a strong anchor point. This is essentially how you get lock stitches machine sewing is known for at the start and end of your work.
It’s a simple mechanism, but it makes a huge difference in how strong and lasting your sewing projects are. Knowing how to properly use the reverse function is a basic but essential skill for anyone using a sewing machine.
Locating Your Backstitch Button or Lever
Every sewing machine is a little different, but they all have a way to activate the reverse stitch. You’ll usually find either a button or a lever.
- The Reverse Lever: This is common on many older machines and some newer mechanical ones. It’s a lever you typically press down or push up and hold in place. As long as you hold the lever, the machine will sew backward. When you let go, it goes back to sewing forward. It gives you direct control over when the machine sews in reverse using the reverse lever sewing machine.
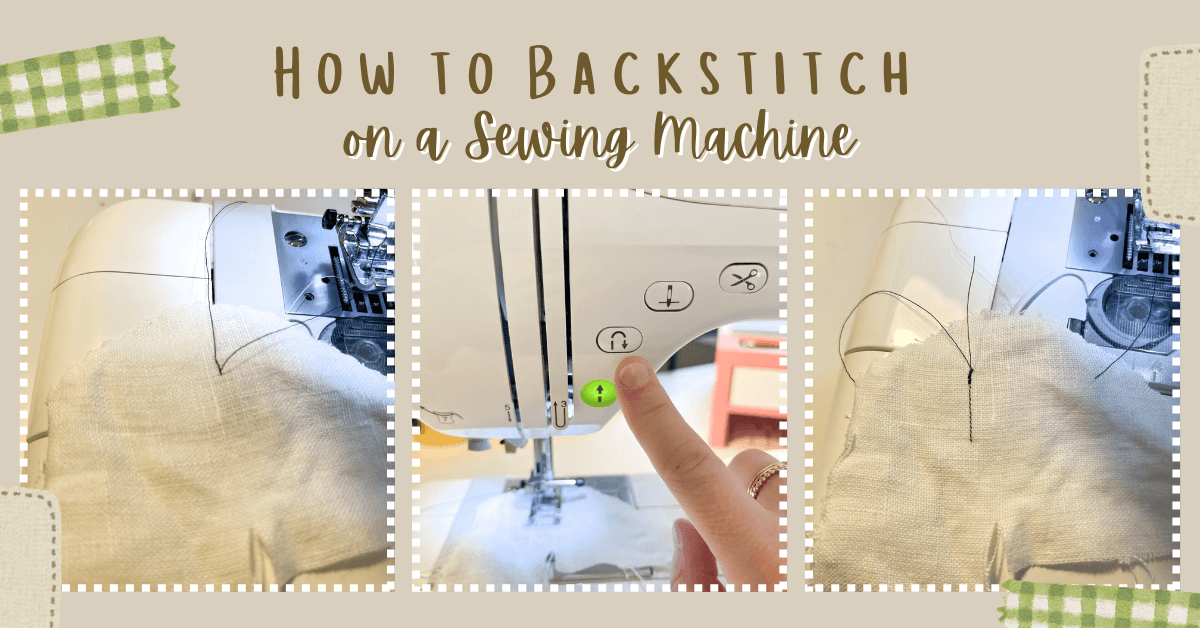
- The Backstitch Button: Many electronic and computerized machines have a dedicated button. You might see an icon of an arrow pointing backward, or maybe a circle with an arrow. On some machines, you press the button once to start sewing backward, and press it again to go back to forward sewing. On others, you might have to hold the button down, similar to a lever. This is your sewing machine backstitch button.
Finding Yours:
- Look on the front or side of your machine.
- Search for a lever you can push or pull.
- Look for a button with a reverse arrow icon (an arrow curving back on itself) or maybe the word “Reverse” or “Reinforce.”
- Check your sewing machine’s manual. It will clearly show you where the backstitch control is and how to use it. This is always the best place to look if you’re unsure.
Knowing where this button or lever is and how it works is the first step to mastering machine backstitching.
Simple Steps to Start a Seam Strong
Using backstitching at the beginning of your seam is vital. It helps secure beginning seam and gives your stitching a strong start. Here are the easy steps:
- Place Your Fabric: Put the fabric you want to sew under the presser foot. Line up the edge of the fabric with the seam allowance guide on your machine’s plate.
- Lower the Presser Foot: Make sure the presser foot is down. You can’t sew with it up!
- Start Sewing Forward: Begin sewing slowly forward. Sew for about 3 to 4 stitches. Don’t sew too many, just a few to get started.
- Activate Reverse: Now, activate your backstitch control.
- If you have a lever: Push and hold the reverse lever sewing machine.
- If you have a button: Press the sewing machine backstitch button. You might need to hold it depending on your machine.
- Sew Backward: Sew backward directly over the 3 to 4 stitches you just made. Sew the same number of stitches backward as you did forward. This is the sewing machine reverse stitch.
- Release Control: Let go of the lever or press the button again to stop sewing backward.
- Sew Forward Again: Now, continue sewing forward along your seam line as you normally would. The stitches you just made going backward are now locked in place by the forward stitches you will make over them.
This simple process creates a solid anchor at the starting end seam stitch (meaning, the stitches where your seam begins). It makes it very hard for those first few stitches to ever pull out.
Simple Steps to Finish a Seam Neat
Backstitching at the end of your seam is just as important as doing it at the start. This helps prevent unraveling stitches at the very end of your sewing line. Here’s how to do it:
- Sew Towards the End: Sew forward along your seam line as usual. Stitch all the way until you reach the very end of where your seam needs to stop.
- Stop Sewing Forward: Stop sewing when you reach the end point. The needle should ideally be down in the fabric.
- Activate Reverse: Now, activate your backstitch control just like you did at the start.
- If you have a lever: Push and hold the reverse lever sewing machine.
- If you have a button: Press the sewing machine backstitch button.
- Sew Backward: Sew backward for about 3 to 4 stitches. These stitches will go back over the end stitches you just made.
- Release Control: Let go of the lever or press the button again.
- Optional: Sew Forward One Stitch: Some sewers like to sew forward just one more stitch after backstitching at the end. This can sometimes make the final look a tiny bit neater. It’s up to you.
- Stop and Lift: Stop sewing completely. Make sure the needle is up. Lift the presser foot.
- Cut Threads: Pull your fabric away from the machine and snip the threads close to the fabric.
By doing this, you effectively create lock stitches machine sewing relies on to secure the end of your seam. You have successfully used the sewing machine reverse stitch to stop the last stitches from unraveling. This step is crucial for durability.
Picking Your Stitch Length for Backstitching
Does the size of your stitches matter when you backstitch? Yes, it can. Your machine has a setting for stitch length. This controls how long each individual stitch is.
- Typical Stitch Length: For most general sewing, a medium stitch length is used (often around 2.0 to 2.5 on the machine dial or screen).
- Stitch Length Backstitching: When you backstitch, you are sewing over stitches you just made. If your stitches are too long, you won’t get enough overlap in those few backstitches. The securing effect might not be as strong.
- Too Short Stitches: If your stitches are too short, they can get very dense when you backstitch. This can create a stiff, bulky area. On some fabrics, this very dense stitching might even weaken the fabric itself by punching too many holes too close together.
- Finding the Right Length: Usually, using your standard stitch length for backstitching works perfectly fine. The machine is designed so the reverse stitch length matches the forward stitch length. So, if you set your machine to a length of 2.4 for your seam, you will also backstitch at a length of 2.4.
Recommendation: Stick with your regular stitch length setting when backstitching. Don’t make your stitches super short just for the backstitch. Aim for 3-4 backstitches. This number, combined with your standard stitch length, is usually enough to create a strong reinforce sewing seam without making a stiff knot.
If you are working with very fine or delicate fabric, you might use a slightly shorter stitch length overall, maybe 1.8-2.0. You would then also backstitch with that slightly shorter length. The key is consistency within the same seam.
Helpful Tips for Great Backstitches
Getting good at backstitching takes just a little practice. Here are some tips to help you get the best results:
- Start Slow: Don’t start sewing forward at full speed right away. Sew the first few forward stitches slowly. This gives you better control when you activate the reverse function.
- Count Your Stitches: Try to be consistent. Sewing 3 or 4 stitches forward, 3 or 4 stitches backward, and then continuing forward is a good rule of thumb. Doing the same number when you backstitch at the end helps too. Consistency makes the lock stitches machine sewing creates look neat.
- Sew Straight: When backstitching, try to keep your fabric feeding straight. The machine is sewing right on top of the stitches you just made. If you push or pull the fabric sideways, your backstitches won’t line up perfectly with the original stitches, which can look messy or not secure as well.
- Practice on Scraps: Before sewing on your real project, practice backstitching on a scrap piece of the same fabric. Sew a few lines, backstitching at the start and end. Check how it looks. See how strong it feels. This helps you get a feel for your machine’s sewing machine backstitch button or reverse lever sewing machine.
- Watch the Corner: If you are sewing seams that meet at a corner, be mindful of where you stop to backstitch. Don’t backstitch right into the corner point itself, as this can make that spot too bulky. Stop a stitch or two before the corner, backstitch, then pivot at the corner if needed.
Using these tips will help you create neat, strong backstitches every time, helping to secure beginning seam and prevent unraveling stitches like a pro.
Fixing Little Backstitch Problems
Sometimes, things don’t go perfectly. You might run into issues when trying to backstitch. Here are some common problems and how to troubleshoot them, including the dreaded skipped stitches backstitch fix.
- Problem 1: Stitches don’t line up when sewing backward.
- Why it happens: You are probably not feeding the fabric straight when backstitching, or you started sewing forward too fast.
- Fix: Slow down when sewing those first few stitches forward. When you activate the reverse stitch, gently guide the fabric to keep it going straight backward, right on top of the stitches you just made. Don’t force it.
- Problem 2: The backstitch area is too thick or messy.
- Why it happens: You might be sewing too many backstitches, or your stitch length is too short, or both.
- Fix: Reduce the number of backstitches. 3 to 4 stitches backward is usually enough. Check your stitch length backstitching. Make sure it’s not set too short. Use your standard stitch length.
- Problem 3: My machine won’t sew backward when I press the button/lever.
- Why it happens: The reverse mechanism might be stuck, there might be a thread jam, or there could be a mechanical issue.
- Fix: First, check for thread jams under the presser foot or in the bobbin area. Clear any tangled threads. Make sure the presser foot is down. If it’s a mechanical machine with a lever, try gently wiggling the lever. If it’s electronic, try turning the machine off and on again. If it still doesn’t work, check your manual or have the machine serviced.
- Problem 4: Skips stitches when backstitching.
- Why it happens: This is the skipped stitches backstitch fix scenario. It can happen for several reasons: the needle might be bent or dull, the thread might be old or poor quality, the machine might need cleaning or oiling, the bobbin thread might be tangled, or the presser foot pressure isn’t right for the fabric.
- Fix:
- Change your needle! A bent or dull needle is a common cause of skipped stitches, especially when changing direction.
- Re-thread the machine completely, both the top thread and the bobbin. Make sure the thread is seated correctly in all the guides.
- Use good quality thread.
- Clean out lint from the bobbin area and feed dogs.
- Check your bobbin winding – is it smooth? Is it inserted correctly?
- Ensure the presser foot is down firmly.
- If your machine has adjustable presser foot pressure, check if it’s set correctly for your fabric type (sometimes too little pressure causes skips).
- Problem 5: Thread breaks when backstitching.
- Why it happens: This often means there is too much tension somewhere, or the thread is catching on something, or the needle is bent.
- Fix: Change the needle. Re-thread the machine and bobbin carefully. Check tension settings (though usually not the first thing to adjust for backstitching breaks). Make sure thread isn’t getting caught on the spool holder or machine body.
Handling these common issues will help you master backstitching smoothly and effectively, ensuring your reinforce sewing seam efforts pay off.
Table: Quick Problem Solver for Backstitching
| Problem | Most Likely Reason | Simple Fix |
|---|---|---|
| Stitches don’t line up backward | Fabric not feeding straight / too fast forward start | Slow down forward start, gently guide fabric straight backward. |
| Area is too thick/messy | Too many backstitches / stitch length too short | Use only 3-4 backstitches. Check stitch length backstitching is set to standard. |
| Machine won’t sew backward | Thread jam, mechanism stuck, or electrical glitch | Clear thread jams. Re-thread. Power cycle machine (electronic). Gently check lever (mechanical). |
| Skipped stitches backstitch fix | Bent needle, bad threading, dirt, old thread | Change needle first! Re-thread machine/bobbin. Clean bobbin area. Use good thread. Check bobbin winding. Presser foot down firmly. |
| Thread breaks | Tension, catching thread, bent needle | Change needle. Re-thread carefully. Check tension (less common reason). Ensure thread feeds smoothly. |
More Ways to Use Backstitching
Backstitching is mostly used at the start and end of straight seams, but it has other helpful uses too.
- Reinforcing Stress Points: Sometimes you need extra strength in a specific small area, not just at the seam ends. For example, where a strap attaches to a bag, or the corner of a pocket opening. You can use a short burst of backstitching (again, 3-4 stitches) right in that spot during the seam or as a separate step. This helps to reinforce sewing seam specifically where it needs it most.
- Corners and Curves: While you don’t typically backstitch around a curve or right in a sharp corner, you do backstitch on the straight seams leading into or out of them. Secure the straight parts with backstitching to prevent them from pulling apart when the seam is clipped or turned.
- Buttonholes: Some machine buttonhole programs include automatic backstitching or dense stitching at the ends to secure them. If your machine doesn’t, a few tiny backstitches at the top and bottom of the buttonhole bar tack can add strength.
- Zipper Ends: When sewing zippers, you often need to stop and start. Backstitching at these stop/start points, especially at the top and bottom of the zipper tape where it’s attached to the fabric, provides great security. This helps secure beginning seam and end points around the zipper.
Using backstitching strategically adds durability to your projects in various places, not just the main seam start/end.
Why Knots Are Different
Beginners sometimes wonder if they can just tie knots in the threads instead of backstitching. You can tie hand knots after sewing, but it’s usually not the best method for machine sewing.
- Machine Backstitching is Faster: Backstitching is quick and built into the sewing process. Tying knots by hand after every seam takes extra time.
- Machine Backstitching is Stronger (for seams): The way the machine lays stitches over each other when backstitching creates a really strong, flat lock. Hand-tied knots can be bulky and might pull through certain fabrics over time. The lock stitches machine sewing creates are designed for seam security.
- Machine Backstitching Looks Neater: Properly done backstitching lies flat within the seam allowance. Hand knots often create little bumps.
While hand-tying knots might be useful for finishing decorative stitches or securing a single stitch, backstitching using your sewing machine reverse stitch is the standard and most effective way to secure beginning seam and end points on machine-sewn seams. It reliably helps prevent unraveling stitches.
Keeping Your Machine Happy for Backstitching
A well-maintained sewing machine performs all its functions better, including backstitching. Regular cleaning and oiling (if your machine requires it) are important.
- Clean the Feed Dogs: Lint and thread fuzz can build up around the feed dogs. This can make them less effective at gripping and moving the fabric, especially backward. Clean this area regularly with a small brush.
- Check Under the Needle Plate: Remove the needle plate and clean out the bobbin case area. Lint here can interfere with thread tension and movement, potentially causing skipped stitches backstitch fix issues or thread breaks.
- Use the Right Needle: As mentioned before, a sharp, undamaged needle is key for all sewing, but it’s especially important for successful backstitching where stitches are close together. Change your needle often (every project or every 8-10 hours of sewing time).
- Service Your Machine: Just like a car, your sewing machine needs tune-ups. Getting it serviced by a professional periodically ensures that the reverse mechanism and other parts are working correctly.
Taking good care of your machine helps ensure the sewing machine reverse stitch works smoothly and effectively every time you need to secure beginning seam or reinforce sewing seam.
Checking Your Backstitch Work
After you’ve sewn a seam, take a moment to look at your backstitching.
- Look at the front: The backstitching should lie directly on top of your forward stitches. You should see a slightly denser area of stitching.
- Look at the back: The bobbin thread should also show dense, overlapping stitches that mirror the top thread.
- Give it a Gentle Tug: Once the seam is finished, try gently pulling on the fabric at the start and end of the seam where you backstitched. The stitches should feel solid and not pull out easily. This tells you your lock stitches machine sewing created are doing their job to prevent unraveling stitches.
If the stitches look messy, are skipped, or pull out easily, go back to the troubleshooting section or practice more on scraps. The goal is a small, neat, strong bar of stitches that secures the seam.
Conclusion
Mastering how to backstitch on your sewing machine is a fundamental skill that makes a huge difference in the quality and durability of your finished projects. By using the sewing machine reverse stitch correctly with your reverse lever sewing machine or sewing machine backstitch button, you effectively secure beginning seam and the end of your stitching lines. This simple technique helps reinforce sewing seam integrity and is the primary way to prevent unraveling stitches. Remember to use your standard stitch length backstitching and aim for about 3-4 stitches of overlap. If you encounter problems like skipped stitches backstitch fix solutions usually involve checking your needle, thread, and cleaning. With a little practice, backstitching will become a natural part of your sewing routine, leading to stronger, neater seams and projects that last.
Frequently Asked Questions
h4: How many stitches should I backstitch?
Generally, sewing backward for 3 to 4 stitches is enough to create a strong lock. Sewing more can create unnecessary bulk.
h4: Do I need to backstitch on every single seam?
For seams that will experience any kind of stress or handling (like clothing seams, bag seams, etc.), yes, backstitching is essential at both the start and end. For temporary stitches like basting, you don’t backstitch.
h4: My machine doesn’t have a reverse lever or button. What do I do?
Very old machines might not have a reverse function. In this case, you would sew forward for a few stitches, lift the presser foot and needle, manually turn the fabric around, sew forward back over the first stitches, turn the fabric again, and then continue sewing forward. It’s a manual way to achieve the same overlap effect and secure beginning seam. At the end, you would stop, turn the fabric, sew backward a few stitches, turn back, and maybe sew one more stitch.
h4: Can I backstitch over thick areas?
Be careful backstitching over very thick seams or multiple layers. Go slowly and make sure your needle is strong enough for the fabric. Too much bulk and speed can break needles or cause skipped stitches.
h4: Does the type of thread matter for backstitching?
Using good quality, appropriate thread for your fabric is important for all sewing, including backstitching. Old or weak thread can break, leading to failed backstitches and the skipped stitches backstitch fix problem.
h4: What’s the difference between backstitching and knotting off by hand?
Backstitching uses the machine to create a flat, strong overlap of stitches within the seam allowance, providing a durable lock stitches machine sewing finish. Hand knotting ties a physical knot in the threads after sewing, which can be bulkier and sometimes less secure for seams.
h4: My backstitches look messy. How can I make them neater?
Make sure you are sewing straight when going backward, directly on top of the stitches you just made. Slow down. Use only 3-4 stitches. Check that your stitch length backstitching is appropriate and not too short. Practice on scrap fabric.