
Binding gives your quilt a finished look. It covers the raw edges. Using your sewing machine for this job is fast and strong. This post will show you how. You will learn a great machine quilt binding tutorial. You will see how to attach binding with sewing machine methods. We will cover sewing continuous quilt binding and finishing quilt edges by machine. We will also show you how to make quilt binding strips and sewing mitered corners binding machine style. Tips for machine binding walking foot use and an easy machine binding method are here too. You will learn how to attach binding to quilt front and sew binding to quilt back.
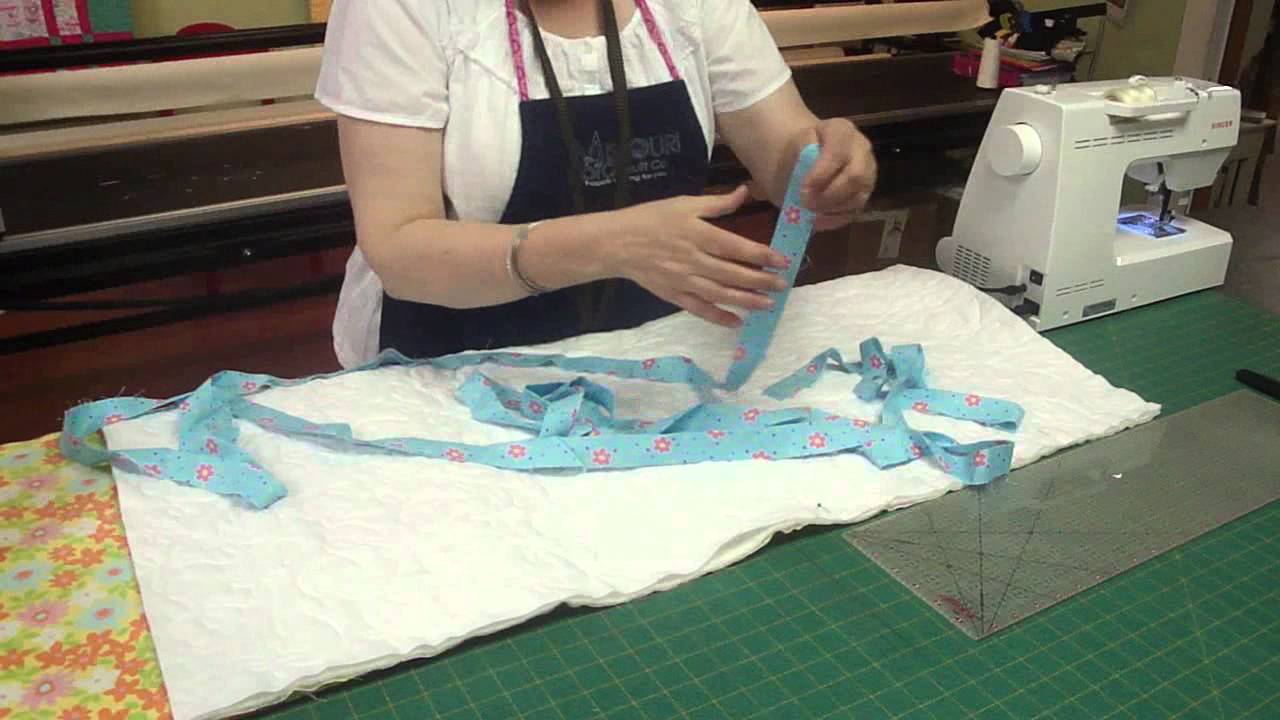
Image Source: i.ytimg.com
Getting Ready to Bind
Binding is the final step for your quilt. It frames your work. It makes the edges strong. Machine binding is quick. It makes a tough edge. This is good for quilts used often.
Things You Will Need
Gather your tools first. Having everything ready helps a lot.
- Your finished quilt top, batting, and backing. These should be layered and quilted.
- Fabric for your binding.
- Rotary cutter.
- Cutting mat.
- Long quilting ruler.
- Sewing machine.
- Thread that matches your binding fabric well. Or use thread that matches your quilt top.
- Sewing machine needles. A new needle is always best.
- Pins or binding clips.
- Iron and ironing board.
- Optional: A walking foot for your sewing machine. This helps fabric feed evenly. It is great for binding.
Making the Binding Fabric Strips
First, you need the fabric strips. This is how to make quilt binding strips. You will cut fabric into long, thin pieces. Most people use straight grain binding. This means you cut parallel to the fabric edge or selvage. This is the simplest way.
How to Cut Your Strips
- Wash and press your binding fabric. This makes it flat and easy to cut.
- Fold the fabric. Fold it so the selvages meet.
- Line up one edge of the fabric with a line on your cutting mat. Make sure it is straight.
- Trim off the folded edge. This makes a clean, straight edge to start from. This is called squaring up the edge.
- Decide how wide your binding strips should be. A common size is 2.5 inches wide. This makes a finished binding of about 0.5 inches. If you want a wider binding, cut wider strips.
- Place your ruler on the fabric. Line up the ruler edge with the clean edge you just cut.
- Cut strips that are 2.5 inches wide. Cut through both layers of fabric.
- Keep cutting strips until you have enough.
How Much Fabric Do You Need?
You need enough strips to go all around your quilt edges.
- Measure the distance around your quilt. Add up the length of all four sides. This is the perimeter.
- Add some extra fabric for joining strips and for corners. Add at least 10-12 inches to the total length needed.
- Divide the total length you need by the width of your fabric. Fabric is usually about 40-42 inches wide after cutting off the selvages.
- This tells you how many strips you need to cut.
- Multiply the number of strips by the width of your strips (like 2.5 inches). This tells you how much fabric width you need in total.
- Most quilts need between 0.5 and 0.75 yards of fabric for binding.
Example:
Quilt is 60 inches by 80 inches.
Perimeter: (60 + 80) * 2 = 280 inches.
Add extra: 280 + 12 = 292 inches needed.
Fabric width: 40 inches.
Strips needed: 292 / 40 = 7.3. You need 8 strips.
Fabric needed (width): 8 strips * 2.5 inches/strip = 20 inches of fabric width.
If your fabric is 40 inches wide, you need 20 inches of length. 20 inches / 36 inches per yard = about 0.56 yards.
Joining Binding Strips Together
You now have many short strips. You need one long strip to go around the quilt. This is sewing continuous quilt binding. You will join the strips end to end. Joining them on an angle makes the join less bulky.
Steps to Join Strips
- Take two strips. Put one strip face up.
- Take a second strip. Lay it face down on top of the first strip. Put the ends together at a right angle (like an L shape). The ends should stick out past each other.
- Draw a line. Draw a line from the top corner where the fabrics meet down to the bottom corner on the other side. This line goes across the square where the fabrics cross.
- Pin the fabrics together near the line.
- Sew on the line you drew. Use a regular stitch length.
- Check the back. Open the strips. They should form one long strip with ends going the other way. The seam should be straight.
- Trim the extra fabric. Cut off the fabric outside the sewn line. Leave about a quarter-inch seam allowance.
- Press the seam open. Iron the seam flat. This helps reduce bulk. Or press it to one side. Some people like this better. Try both ways to see what you like.
- Repeat with the next strip. Add the third strip to the end of the second strip. Join them the same way.
- Keep adding strips until you have one very long binding strip. It should be longer than your quilt’s perimeter.
- Press all the seams flat.
Folding the Binding Strip
Now fold the long strip in half lengthwise. Fold it with the wrong sides of the fabric together. Press this fold. This makes the binding strip ready to attach. The raw edges are together on one side. The fold is on the other side.
Preparing the Quilt
Your quilt should be finished. This means it is quilted and squared up. Squaring up means trimming the edges so they are straight and the corners are 90 degrees. The batting and backing should be trimmed even with the quilt top edge.
Attaching the Binding to the Quilt Front
This is where you attach binding to quilt front. You will sew the folded binding strip onto the raw edge of your quilt top. You start along one side. Leave a tail of binding fabric at the start. You need this tail to join the ends later.
Sewing the First Side
- Start somewhere in the middle of one side of your quilt. Do not start at a corner. Start maybe 6-10 inches away from a corner.
- Place the raw edges of the folded binding strip along the raw edge of the quilt top. The binding strip is face up. The quilt top is face up.
- Leave about 8-10 inches of binding strip free at the start. This is your starting tail.
- Pin or clip the binding to the quilt edge. Start pinning where you will begin sewing.
- Begin sewing. Use a seam allowance of about 1/4 inch or slightly more. The exact size isn’t as important as keeping it the same all the way around. Sew slowly and keep the fabric edges lined up.
- If you have one, this is a great time to use your machine binding walking foot. A walking foot helps feed the layers of quilt and binding through the machine evenly. This stops puckers and stretching.
Sewing Around the Corners (Mitering)
When you get near a corner, you need to create a mitered corner. This makes a neat fold at the corner. This is sewing mitered corners binding machine style.
Steps for Corners
- Sew along the side until you are about a 1/4 inch away from the corner edge of the quilt. Stop sewing here. Use your sewing machine’s guide or mark the spot.
- Backstitch a few stitches. This locks the seam.
- Lift the presser foot. Do not cut the thread.
- Turn the quilt. Swing the quilt so the edge you just sewed is to your side.
- Fold the binding strip straight up. Fold it away from the quilt. The fold should make a 45-degree angle with the quilt edge. The raw edge of the binding strip should line up with the next raw edge of the quilt. The binding strip should stick straight up beyond the corner.
- Hold that fold with your finger.
- Now fold the binding strip back down. Fold it down along the next edge you will sew. The folded edge of the binding strip should line up with the raw edge of the quilt. This creates a little triangle of fabric on the corner.
- Pin or clip this fold in place.
- Move to the next side of the quilt. Start sewing again from the very edge of the quilt. Start sewing about 1/4 inch from the top of the fold you just made.
- Sew down this side. Keep sewing until you reach the next corner.
- Repeat this process for all four corners.
Sewing Along the Last Side
Sew along the fourth side of the quilt. Stop sewing about 10-12 inches away from where you started. You need this gap to join the binding ends.
Joining the Binding Ends
You have a gap in the binding strip. You have two binding tails sticking out. You need to join these ends neatly. This completes the loop of binding.
Steps to Join Ends
- Lay the quilt flat. Overlap the two binding tails. See how they line up with the unsewn section.
- Open up the folded binding tails. You have two flat strips again.
- Trim one tail. Trim it so it overlaps the other tail by the same amount as the width of your binding strip (e.g., 2.5 inches). Let’s say you are using 2.5-inch strips. Lay one tail flat along the quilt edge. Lay the other tail over it. The top tail should extend 2.5 inches past the end of the bottom tail. Trim the top tail at that point.
- Trim the other tail. Now trim the bottom tail. Trim it so it extends 2.5 inches back from the end of the top tail. Basically, you are creating a space between the two ends that is 2.5 inches wide.
- Open up the ends again. You have two strips cut to length. They overlap just right to make a perfect circle if you join them.
- Join the ends on an angle. Put one strip end face up. Put the other strip end face down on top. Line them up at a right angle. Just like you did when joining the first strips.
- Draw a line from corner to corner across the overlap. This is your sewing line.
- Pin the strips together.
- Sew on the line you drew.
- Check the join. Open the strip. It should lie flat and be the right length to fit in the gap.
- Trim the seam to 1/4 inch.
- Press the seam open or to one side.
- Fold the joined binding strip in half lengthwise again, wrong sides together. Press the fold.
- Place the folded binding strip into the gap on the quilt edge.
- Pin or clip it in place.
- Sew the rest of the binding down. Start sewing a few inches before the gap and sew over the new join. Finish sewing a few inches past the gap.
Your binding is now sewn to the front of the quilt.
Flipping and Sewing to the Back
The next step is to bring the binding to the back of the quilt. You will sew it down on the back. This completes the finishing quilt edges by machine.
Folding the Binding
- Lay your quilt flat with the back side up.
- Pull the binding strip away from the quilt edge. It will naturally want to fold over the raw edge you just sewed.
- Fold the binding strip over the edge of the quilt. Pull it tightly but not so tight it puckers the front. The fold of the binding strip should cover the line of stitches you made on the front. It should extend onto the backing fabric.
- Pin or clip the folded edge of the binding to the quilt back. Pin all the way around the quilt. Be careful at the corners.
Making Mitered Corners on the Back
The corners need a neat fold on the back too.
- At each corner, fold one side of the binding over first.
- Then fold the binding from the next side over. This creates a m neat diagonal fold at the corner.
- Pin or clip the corner fold carefully. Make sure the miter looks good on the front too. The stitching line on the front should look like it goes right into the corner.
Sewing the Binding Down
There are two main ways to sew binding to quilt back using a machine:
Method 1: Stitch in the Ditch from the Front
This is often considered an easy machine binding method for the back.
- Turn the quilt over so the front is facing up.
- Thread your machine with thread that matches your quilt top color. You can use bobbin thread that matches your binding color.
- Sew from the front of the quilt. Sew exactly in the ditch. The ditch is the tiny groove where the binding meets the quilt top fabric.
- Sew very carefully. Keep your stitches right in that groove.
- As you sew in the ditch on the front, your bobbin thread on the back will catch the edge of the folded binding. If your binding is folded evenly and covers the stitching line, this method looks great. The stitches on the front are hidden in the ditch. The stitches on the back hold the binding down.
- Go slowly at the corners. Pivot the quilt to stay in the ditch.
Method 2: Sewing Directly on the Back
- Lay the quilt back side up.
- Thread your machine with thread that matches your binding fabric.
- Sew near the folded edge of the binding strip. Stitch about 1/8 inch from the fold.
- Sew all the way around the quilt.
- This method shows stitches on the back binding fabric. It can also show a line of stitches on the front of the quilt, near the edge of the binding. Some people like this look.
Choose the method you like best. Both are good ways to sew binding to quilt back.
Tips for Easy Machine Binding
Here are some tips to make the process smoother:
- Cut accurately: Straight, even strips make joining and sewing much easier.
- Use a walking foot: As mentioned, a machine binding walking foot really helps feed the quilt layers evenly. It prevents the fabric from shifting.
- Press well: Pressing seams flat and folding the binding neatly makes a big difference.
- Pin generously: Use plenty of pins or clips, especially around curves if your quilt has them, or when sewing the binding down on the back.
- Practice corners: Mitered corners take a little practice. Don’t worry if they aren’t perfect the first time.
- Test stitch length: A slightly longer stitch length (e.g., 2.5-3 mm) can look nice and is strong.
- Slow down: Sewing binding is a finishing step. Taking your time helps you make it look good.
- Consider using a binding tool: There are tools that can help you join binding ends perfectly.
- Check front and back: As you sew, especially when sewing from the front in the ditch, flip the quilt over now and then. Make sure the binding is being caught evenly on the back.
Reviewing Finishing Quilt Edges by Machine
You have now completed finishing quilt edges by machine. You started with fabric strips, joined them, attached them to the front, made neat corners, joined the ends, and sewed the binding down on the back.
The machine quilt binding tutorial covered making your strips, sewing continuous quilt binding, attaching binding with sewing machine to the front, sewing mitered corners binding machine style, joining the tails, and using two methods to sew binding to quilt back. This easy machine binding method using your machine provides a durable finish.
Look closely at your binding.
* Is it even all the way around?
* Are the corners neat?
* Are the stitches holding the binding down securely?
A few small wobbles are normal. Every quilter has them! The goal is a strong, good-looking edge that protects your quilt.
Other Binding Methods (Brief Mention)
While this guide focuses on machine binding, know that you can also sew the binding to the front by machine and hand stitch it to the back. Some quilters prefer the look of hand stitching on the back because the stitches are less visible. However, machine stitching is faster and stronger. This tutorial focused on attaching binding with sewing machine methods for both steps.
Caring for Your Machine Bound Quilt
Your quilt is finished! How you care for it depends on the fabrics used. Most cotton quilts can be washed in a machine on a gentle cycle. Use mild soap. You can dry it in a dryer on low heat or lay it flat to dry. Machine binding is strong, so it holds up well to washing and use.
FAQ
Q: How wide should I cut my binding strips?
A: A common width is 2.5 inches. This makes a finished binding about 0.5 inches wide after folding and sewing. If you want a wider binding, cut your strips wider (e.g., 2.75 inches or 3 inches). Just remember that a wider strip means you will sew it down with a slightly larger seam allowance when attaching it to the front.
Q: Can I use a different seam allowance than 1/4 inch?
A: Yes. The key is to be consistent. Whatever seam allowance you use when attaching the binding to the front, make sure the folded edge of the binding on the back covers that stitch line. If you use a bigger seam allowance on the front, you need to fold the binding over a little further onto the back. Using a scant 1/4 inch (just slightly less than a quarter inch) is popular for binding as it gives a little extra room to catch the binding on the back.
Q: What if my binding strip isn’t long enough?
A: Go back and join more strips using the method for sewing continuous quilt binding. Make sure you have enough length plus that extra for the join and corners. It’s always better to have a bit too much binding than not enough. You can always trim off the extra.
Q: My mitered corners on the back look messy. What did I do wrong?
A: Making neat mitered corners with machine binding takes practice. Make sure you fold the binding tightly enough on the back. Pin the folds very carefully. When sewing, go slowly and try to keep your stitch line consistent. Some people hand stitch the corners on the back even if they machine stitch the rest, to make sure they are perfect.
Q: Do I really need a walking foot for machine binding?
A: A walking foot is highly recommended for machine binding. It helps feed the three layers (quilt top, batting, backing) and the extra layer of binding fabric evenly. Without it, the top layer can sometimes feed faster than the bottom layers, causing puckers or stretching on the binding or the quilt edge. If you don’t have a walking foot, go very slowly and try to ease the fabrics evenly.
Q: My stitches show on the front when I sew the binding down on the back. Is this okay?
A: Yes, if you are using the method where you sew directly onto the binding on the back, a line of stitches will show on the front. This is normal and part of that binding style. If you prefer not to see stitches on the front, use the “stitch in the ditch” method from the front, matching your thread to the quilt top fabric.
Q: My binding is wavy after attaching it. Why?
A: This can happen if you stretched the binding fabric as you sewed it to the quilt, or if the quilt edge itself was wavy before you started. Using a walking foot can help prevent stretching. Also, make sure your quilt edges were trimmed straight before starting. Sometimes gentle washing and drying can help relax slight waviness.
You have completed a full machine quilt binding tutorial. Now you can attach binding with sewing machine easily and finish your quilt edges with confidence.