
Image Source: threadsmonthly.com
Singer Sewing Machine Needle Change: Easy Guide
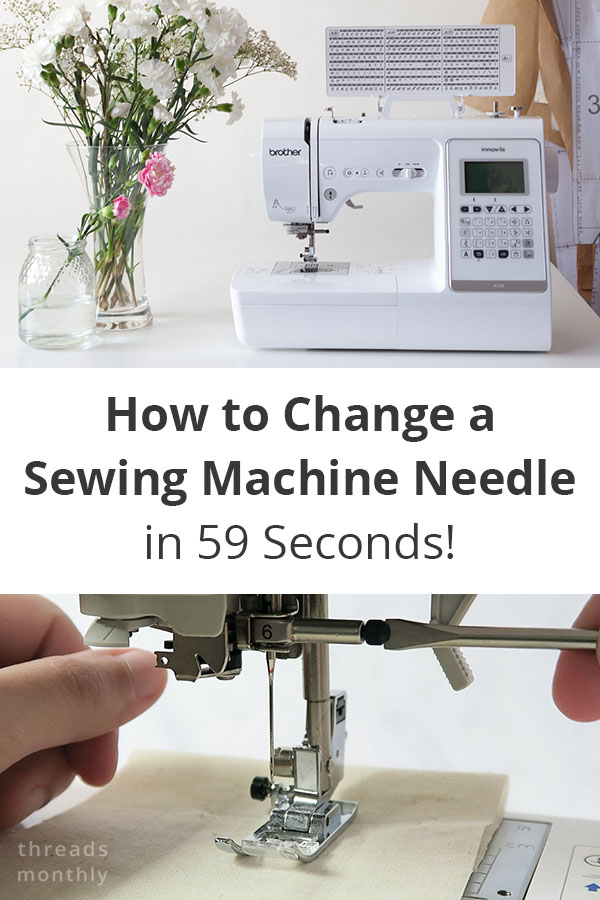
Can you change a needle on a Singer sewing machine? Yes, absolutely! Changing the needle on your Singer sewing machine is a fundamental maintenance task that ensures smooth sewing and prevents skipped stitches or fabric damage. It’s a simple process that, once mastered, will become second nature.
Why Changing Your Singer Sewing Machine Needle Matters
A dull, bent, or damaged needle can cause a host of sewing problems. It’s like trying to cut fabric with a dull pair of scissors – it’s frustrating and the results are never good. Regularly performing Singer sewing machine needle replacement is crucial for optimal performance. Here’s why:
- Prevents Skipped Stitches: A worn needle point can’t properly penetrate the fabric and form a stitch loop, leading to skipped stitches. This is particularly noticeable on knits and delicate fabrics.
- Avoids Fabric Damage: A bent or burred needle can snag, pull, or create holes in your fabric, especially fine or stretchy materials.
- Ensures Even Stitches: A sharp needle creates clean perforations, allowing the thread to lay smoothly and create uniform stitches.
- Improves Thread Tension: A damaged needle can affect how the thread interacts with the bobbin, leading to uneven tension and messy stitches.
- Extends Machine Life: By preventing undue stress on your machine’s components, proper needle care contributes to its longevity.
When to Change Your Singer Sewing Machine Needle
Think of your sewing machine needle as a disposable tool. While they can be used for a while, they don’t last forever. Here are common indicators that it’s time for a changing sewing machine needle Singer task:
- After Every 8-10 Hours of Sewing: This is a general guideline. If you sew frequently, this translates to changing your needle every few sewing sessions.
- When You Switch Fabric Types or Thread: Different fabrics and threads require different needle types. It’s good practice to change your needle when moving between vastly different materials (e.g., from denim to silk).
- If You Notice Sewing Issues: As mentioned above, skipped stitches, snagged threads, or fabric holes are clear signs your needle needs replacing.
- If the Needle Appears Bent or Damaged: Visually inspect the needle. Even a slight bend can cause problems.
- If You Dropped the Needle: If you accidentally drop your needle on the floor, it can become bent or damaged even if you can’t see it. It’s best to replace it.
Gathering Your Supplies: What You’ll Need for Singer Needle Change
Before you begin how to replace Singer needle, make sure you have everything ready. This makes the process quick and efficient.
- New Singer Sewing Machine Needle: This is the most important item. Ensure it’s the correct type and size for your project and Singer machine. We’ll cover sewing needle types for Singer machines later.
- Small Flathead Screwdriver or Needle Clamp Screw Tool: Most Singer machines use a small screw to hold the needle in place. Some models come with a specialized tool.
- Pliers (Optional, for stubborn screws): In rare cases, the screw might be tight and require gentle persuasion.
- A Clean Cloth: To wipe away any lint or debris from the needle area.
Step-by-Step Guide: How To Change Needle On Singer Sewing Machine
This section will walk you through the essential Singer sewing machine maintenance needle task of changing your needle. It’s a straightforward process.
Step 1: Power Down Your Machine
Safety first! Always turn off and unplug your Singer sewing machine before attempting any maintenance, including Singer sewing needle insertion. This prevents accidental starts and potential injury.
Step 2: Lower the Presser Foot and Needle
Ensure the presser foot is in the down position. This helps stabilize the needle bar.
Step 3: Locate the Needle Clamp Screw
Look directly above the needle. You’ll see a small metal clamp that holds the needle. This clamp has a screw.
Step 4: Loosen the Needle Clamp Screw
Using your small flathead screwdriver or the provided tool, turn the needle clamp screw counter-clockwise. You don’t need to remove the screw entirely, just loosen it enough so the old needle can slide out.
Step 5: Remove the Old Needle
Once the screw is loosened, the old needle should be free. Gently pull it downwards out of the needle clamp. Be careful not to bend or drop it. Place the old needle in a safe place, like a small container or directly into your trash, to avoid accidental pricks.
Step 6: Prepare the New Needle
Take your new sewing needle. Most modern needles have a flat side on the shank (the part that goes into the clamp) and a rounded side. This flat side is crucial for correct Singer sewing needle insertion.
Step 7: Insert the New Needle Correctly
This is perhaps the most critical step for successful Singer sewing machine needle insertion.
- Orientation: Hold the new needle with the flat side of the shank facing towards the back of the sewing machine (away from you). The rounded side should face forward. This orientation is essential for the needle to correctly interact with the bobbin and thread.
- Insertion Depth: Push the needle up into the needle clamp as far as it will go. You should feel it seat firmly against the inside of the clamp.
Step 8: Tighten the Needle Clamp Screw
Once the new needle is fully inserted, use your screwdriver to tighten the needle clamp screw clockwise. Turn it until it’s snug, but don’t overtighten. A firm grip is usually sufficient. Overtightening can strip the screw threads or even damage the needle clamp.
Step 9: Thread Your Machine
After changing the needle, it’s essential to re-thread your sewing machine. The new needle may affect the thread path slightly. Follow your Singer machine’s manual for the correct threading procedure. This includes how to thread Singer sewing machine after needle change. Always thread the machine with the presser foot UP.
Step 10: Test Your Sewing
Before diving into your project, test your newly threaded machine on a scrap piece of the same fabric you’ll be using. Check for any skipped stitches, uneven seams, or thread breakage. Make minor tension adjustments if needed.
Choosing the Right Singer Sewing Needle: A Comprehensive Guide
Selecting the correct sewing needle is as important as correctly inserting it. Different fabrics and threads require specific needle types for optimal results. Here’s a look at various sewing needle types for Singer machines and how to choose them.
Understanding Needle Anatomy
Before we dive into types, let’s briefly look at the parts of a sewing needle:
- Eye: Where the thread goes.
- Shank: The top part of the needle that fits into the machine’s needle clamp. Most modern home sewing machines use a shank with a flat side.
- Shaft: The long, thin body of the needle.
- Scarf: A groove on the back of the needle, opposite the eye. This helps the bobbin hook catch the thread loop.
- Point: The tip of the needle, which varies in shape depending on the needle type.
Common Sewing Needle Types for Singer Machines
Here’s a table outlining popular sewing needle types for Singer machines, their characteristics, and recommended uses:
| Needle Type | Point Type | Key Features | Best For |
|---|---|---|---|
| Universal | Slightly rounded, sharp | A good all-rounder. Has a slightly rounded point that can pierce most fabrics. | General sewing, cottons, linens, synthetics, light to medium-weight fabrics. A good starting point if you’re unsure. |
| Ballpoint | Rounded | Pushes through fabric fibers rather than cutting them, preventing runs and holes. | Knits, stretch fabrics, jersey, lycra, athletic wear, interlock. |
| Jersey | Medium ballpoint | Similar to ballpoint but with a slightly sharper point for better fabric penetration. | Knits, particularly those with a denser weave than jersey, like ponte knit and some performance fabrics. |
| Stretch | Small ballpoint, unique eye | Designed for highly elastic fabrics. Has a smaller scarf and a unique eye to prevent skipped stitches. | Spandex, lycra, swimwear fabric, stretch velvet, performance knits. |
| Sharp/Microtex | Very sharp, fine point | Ideal for precision sewing and piercing tightly woven fabrics. | Quilting cottons, silks, fine synthetics, microfibers, leather alternatives, and other densely woven or slippery fabrics where a clean hole is desired. |
| Leather | Chisel or Wedge point | Cuts a slit in the leather as it sews, allowing the thread to pass through easily. | Genuine leather, faux leather, vinyl, and other tough, non-woven materials. Note: Using a leather needle on woven fabrics can create unnecessary holes. |
| Denim/Jeans | Extra sharp, strong, slender | Stronger shaft and a sharp point to penetrate multiple layers of denim. | Denim, heavy canvas, upholstery fabric, multiple layers of fabric. |
| Embroidery | Large eye, large scarf | Large eye for thicker embroidery threads, large scarf to protect thread. | Machine embroidery, decorative stitching. Often has a slightly rounded point to avoid damaging delicate fabrics. |
| Topstitch | Extra-long eye | Extra-long eye to accommodate thicker topstitching threads. | Topstitching, decorative threads, when using thicker threads for a visible stitch. |
| Quilting | Sharp point, slightly shorter shaft | Designed for precision piecing and quilting through multiple layers. | Quilting, patchwork, piecing together layers of fabric. |
| Metallic | Special coating, large eye | Coated to reduce friction and prevent thread breakage with metallic or specialty threads. | Metallic threads, special effect threads. |
Singer Needle Size Chart and Selection
Needle sizes are indicated by numbers. For Singer machines and most other brands, the numbers represent the diameter of the needle shaft.
- Lower Numbers (e.g., 60, 65, 70): Thinner needles for finer, lighter fabrics.
- Medium Numbers (e.g., 80, 90): General-purpose needles for medium-weight fabrics.
- Higher Numbers (e.g., 100, 110, 120): Thicker needles for heavier fabrics.
Here’s a Singer needle size chart to help you choose:
| Fabric Type | Recommended Needle Size Range | Needle Type Examples |
|---|---|---|
| Sheer Fabrics | 60-70 | Microtex, Universal |
| Silks | 60-70 | Microtex, Universal |
| Lightweight Cottons | 70-80 | Universal |
| Linen | 80-90 | Universal, Microtex |
| Knits | 70-90 | Ballpoint, Jersey, Stretch |
| Medium-Weight Cottons | 80-90 | Universal |
| Denim/Jeans | 90-100 | Denim/Jeans, Universal |
| Leather | 90-110 | Leather |
| Upholstery | 100-120 | Denim/Jeans, Heavy Duty |
| Heavy Canvas | 110-120 | Denim/Jeans, Heavy Duty |
Pro Tip: When in doubt, always start with a universal needle in an appropriate size. If you encounter issues, consult the needle type chart and consider switching.
Troubleshooting Singer Sewing Machine Needle Issues
Even with careful attention, you might encounter problems. Here’s a quick guide to troubleshooting Singer sewing machine needle dilemmas:
Problem: Skipped Stitches
- Possible Causes:
- Dull or bent needle.
- Incorrect needle type for the fabric.
- Needle inserted incorrectly (flat side not to the back).
- Needle is not fully seated in the clamp.
- Lint or debris in the bobbin area or thread path.
- Incorrect threading of the machine.
- Solutions:
- Change to a new, sharp needle of the correct type.
- Ensure the needle is fully inserted and the flat side is to the back.
- Clean the bobbin area and thread path.
- Re-thread the machine carefully, with the presser foot UP.
Problem: Thread Breaking
- Possible Causes:
- Burred or bent needle.
- Incorrect needle size (too small for the thread).
- Thread snagged somewhere in the machine.
- Presser foot is too tight.
- Lint buildup.
- Wrong thread type for the fabric or needle.
- Solutions:
- Change the needle.
- Ensure the needle is the correct size for your thread and fabric.
- Check all thread guides and tension discs for lint.
- Re-thread the machine, ensuring the presser foot is UP.
- Adjust presser foot pressure if applicable.
Problem: Fabric Puckering or Snagging
- Possible Causes:
- Needle is too large for the fabric.
- Needle point is dull or damaged.
- Incorrect needle type (e.g., using a sharp needle on a knit).
- Thread tension is too high.
- Solutions:
- Use a smaller, sharper needle appropriate for the fabric (e.g., Microtex for fine fabrics).
- Change to a new needle.
- Ensure you are using the correct needle type (e.g., Ballpoint for knits).
- Check and adjust thread tension.
Problem: Needle Breaking
- Possible Causes:
- Needle is bent.
- Sewing too fast through thick fabric.
- Needle is hitting the presser foot or needle plate.
- Incorrect needle type (e.g., a universal needle in a knit).
- Needle is not fully inserted into the clamp.
- Solutions:
- Change to a new needle.
- Slow down when sewing through thick layers.
- Ensure the needle is inserted correctly and is the correct type for the fabric.
- Check that the needle is centered in the needle plate opening.
Frequently Asked Questions (FAQ)
Q1: How often should I change my Singer sewing machine needle?
A1: It’s recommended to change your needle every 8-10 hours of sewing time, or sooner if you notice any sewing problems like skipped stitches or fabric snagging. Switching between different fabric types (like from denim to silk) is also a good time to consider a needle change.
Q2: What happens if I don’t change my Singer sewing machine needle?
A2: Not changing your needle can lead to skipped stitches, thread breakage, fabric damage (snags, holes, runs), uneven stitches, and increased wear on your sewing machine’s components.
Q3: Can I use needles from other brands on my Singer sewing machine?
A3: Generally, yes. Most home sewing machines, including Singer, use a standard needle system (often referred to as 130/705 H or similar codes). As long as the shank type and size are compatible, needles from other reputable brands will work. However, using Singer brand needles is often recommended for optimal compatibility. Always check your Singer machine’s manual for specific needle recommendations.
Q4: My Singer sewing machine is skipping stitches after changing the needle. What should I do?
A4: First, re-check that the needle is inserted correctly: flat side to the back, pushed up as far as it will go. Ensure you are using the correct needle type for your fabric (e.g., a ballpoint needle for knits). Re-thread the entire machine, making sure the presser foot is UP when threading. Clean any lint from the bobbin area. If issues persist, try a different new needle, as the current one might be faulty.
Q5: How do I know which needle size to use for my Singer machine?
A5: Needle size refers to the diameter of the needle shaft. Smaller numbers (e.g., 60-70) are for finer, lighter fabrics, while larger numbers (e.g., 90-110) are for heavier fabrics. Consult a Singer needle size chart or your fabric manufacturer’s recommendations. For general sewing with cottons, an 80/12 or 90/14 universal needle is a good starting point.
Q6: My Singer sewing machine broke a needle. What should I do?
A6: First, turn off and unplug your machine. Carefully remove any remaining pieces of the broken needle. Check the needle plate and the bobbin area for small fragments of the needle. Clean thoroughly to prevent damage to your machine. Install a new needle, ensuring it’s the correct type and size, and that it’s properly inserted. Then, re-thread your machine and test on a scrap piece of fabric. If the needle broke, it’s crucial to identify why to prevent it from happening again (e.g., dull needle, wrong type, hitting an obstruction).
By following these detailed steps and advice, you can confidently perform Singer sewing machine needle replacement, ensuring your machine runs smoothly and your sewing projects look their best. Happy sewing!