
Image Source: i.ytimg.com
Guide: How To Fill The Bobbin On A Brother Sewing Machine
A sewing machine needs two threads to make a stitch. One thread comes from the top spool. The other thread comes from the bobbin below. Filling the bobbin with thread is a key step before you can sew. This guide shows you exactly how to fill the bobbin on your Brother sewing machine. It covers finding the bobbin winder, setting it up, winding the thread, and putting the bobbin in the machine.
Getting Ready to Wind
Before you start winding the bobbin, get everything ready. This makes the job easy and quick.
What You Need
You only need a few things:
- Your Brother sewing machine.
- An empty bobbin made for your Brother machine. (Check your machine manual if you are not sure).
- A spool of thread you want to use for sewing.
Find the Bobbin Winder
Every Brother sewing machine has a place to wind the bobbin. This part is called the bobbin winder. It is usually on the top or front of the machine. Look for a small spindle that pops up or slides out. There is also a guide or tension disc nearby. This guide helps the thread wind tightly onto the bobbin. Finding the Brother machine automatic bobbin winder is the first step.
- Check the top right side of your machine. Many models have the winder there.
- Look near the handwheel. It is often close to this large turning wheel.
- Your machine manual shows exactly where it is.
Setting Up the Bobbin Winder
Now you have your supplies and know where the bobbin winder is. Let’s set it up. This is part of the bobbin winder setup Brother process. It is simple and takes only a moment.
Place the Thread Spool
Put your spool of thread on the spool pin. This pin is usually on top of the machine.
- Some machines have a standing pin.
- Some have a pin that lies flat.
- Make sure the thread comes off the spool smoothly. It should not get stuck.
- If your spool has a slit on the side, make sure the thread does not catch on it.
Guide the Thread
You need to guide the thread from the spool to the bobbin winder. Brother machines have guides for this. These guides make sure the thread goes the right way.
- Look for numbers or pictures on your machine showing the thread path.
- The thread usually goes through a thread guide near the spool.
- Then it goes around a small tension disc or guide close to the bobbin winder. This disc puts a little pull on the thread. This pull helps the thread wind nicely and evenly on the bobbin.
Threading the Bobbin
Now it’s time for threading bobbin Brother machine. This means putting the thread onto the empty bobbin.
- Take your empty bobbin.
- Find the small hole or slit on the edge of the bobbin.
- Put the end of the thread through this hole from the inside to the outside.
- Pull about 3 to 4 inches (7 to 10 cm) of thread through the hole.
Place the Bobbin on the Winder
Put the threaded bobbin onto the bobbin winder spindle.
- Push the bobbin down firmly.
- The thread coming out of the hole should be on top of the bobbin.
Engage the Winder
Most Brother bobbin winders need to be engaged or clicked into place. This moves the spindle slightly. This tells the machine you want to wind a bobbin, not sew.
- Slide the bobbin winder spindle to the right (towards the stop).
- You might hear a click.
- This also often disengages the sewing needle. The needle should not move while you are winding a bobbin. This is a safety feature. Check your manual to see how to do this on your specific model. Sometimes you pull out the handwheel slightly.
Winding the Thread
With the setup done, you are ready for the main part: winding thread on Brother bobbin. This is the core of the Brother sewing machine bobbin winding process.
Hold the Thread End
Remember that tail of thread you pulled through the bobbin hole? You need to hold onto it for the first few wraps.
- Hold this thread tail firmly with your hand. Keep it away from the path of the thread being wound.
- Holding the tail helps the thread catch on the bobbin and start winding smoothly.
- Hold it for about 5 to 10 wraps of thread.
Start Winding
Now press the foot controller or the Start/Stop button on your machine.
- The bobbin will start spinning.
- The thread will start wrapping around the bobbin.
- Watch the first few wraps. They should go over the thread tail you are holding.
- After 5 to 10 wraps, you can stop holding the thread tail.
- Trim the small thread tail close to the bobbin. This makes the winding neat.
Winding Process Explained
The machine does the winding for you. This is the Brother machine automatic bobbin winder working.
- The bobbin spins at high speed.
- The thread guides and tension disc make sure the thread winds evenly.
- The spindle often moves back and forth a little. This helps layer the thread evenly across the bobbin. This is part of the steps to wind bobbin Brother machines use.
When to Stop Winding
Your Brother machine has a stop feature for winding.
- As the bobbin fills up, the thread will reach the edge of the bobbin.
- The bobbin winder spindle will have a small arm or stopper.
- When the thread reaches this stopper, it tells the winder to stop.
- The bobbin will stop spinning automatically. This prevents overfilling.
Stopping Manually
You can also stop the winding process at any time.
- Take your foot off the foot controller.
- Or press the Start/Stop button again.
Finishing the Wind
Once the bobbin is full or you have enough thread, you need to finish up.
Disengage the Winder
Slide the bobbin winder spindle back to its original position (usually to the left).
- This disengages the winder.
- It also re-engages the sewing needle area.
Remove the Bobbin
Take the full bobbin off the spindle.
- Lift the bobbin straight up.
Cut the Thread
There is a thread cutter often built into the machine near the bobbin winder.
- Slide the thread from the bobbin into this cutter.
- The thread will be cut, leaving the full bobbin ready to use and the thread from the spool ready for the next task (like threading the machine for sewing).
Putting the Bobbin in the Machine
The full bobbin is ready. Now you need to put it into the bobbin case or area in your machine. This is about loading bobbin Brother sewing machine, inserting bobbin Brother machine, and Brother sewing machine bobbin installation. Brother machines use two main types of bobbin systems:
- Top-Load (Drop-in) Bobbin: This is the most common type on newer machines. The bobbin drops into a spot on the top of the machine, under the needle plate.
- Front-Load Bobbin: This type has a separate bobbin case. The bobbin goes into the case, and the case goes into a shuttle area usually at the front of the machine, often behind a door.
Let’s look at how to install the bobbin for both types.
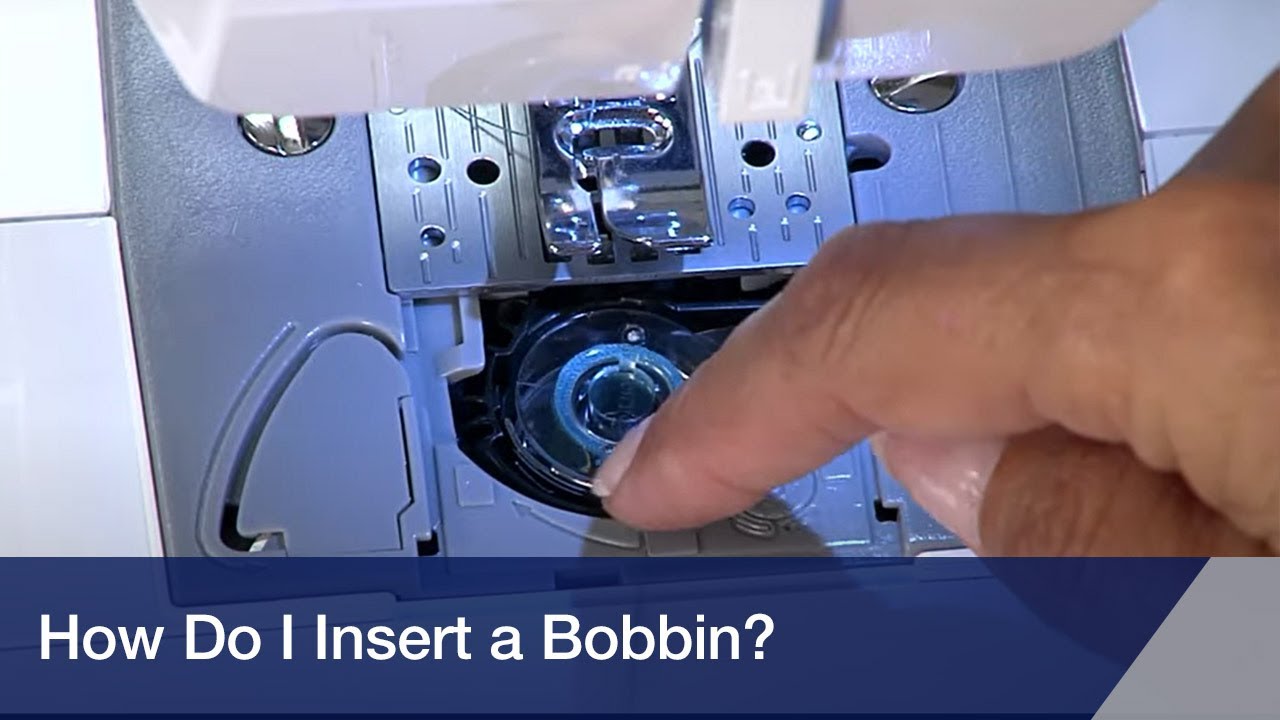
Inserting a Top-Load Bobbin
This system is very easy.
- Open the bobbin cover plate. This is usually a clear plastic plate near the needle.
- Take out any old bobbin if there is one.
- Take your new, full bobbin.
- Look at the thread coming off the bobbin. For Brother top-load machines, the thread usually needs to come off the bobbin in a specific direction. Most Brother machines want the thread to come off the left side, making the bobbin spin counter-clockwise when you pull the thread. Check your machine or manual to be sure. There is often a picture right on the machine plate.
- Drop the bob bobbin into the bobbin area. Make sure it sits flat.
- Guide the thread end into the path marked on the machine. There will be slots and guides leading the thread towards the needle area.
- Pull the thread gently. It should slide smoothly into the guides.
- Leave about 3-4 inches (7-10 cm) of thread hanging out.
- Close the bobbin cover plate.
- Now you can lower the needle to pick up the bobbin thread (this is for threading the machine for sewing, a step done after bobbin installation).
Inserting a Front-Load Bobbin
This system involves a separate bobbin case.
- Open the door at the front of the machine. This door is often below the needle area.
- If there is an old bobbin case, take it out. There is usually a small latch or handle to hold onto.
- Take your full bobbin.
- Put the bobbin into the bobbin case. Make sure it fits snugly.
- Look at the bobbin case. There is a slit or guide on the side. The thread needs to go through this guide.
- Pull the thread from the bobbin and guide it through the slit on the bobbin case. Pull gently. You should feel a little tension as the thread pulls through the case’s tension spring. This tension is very important for good stitches.
- Leave about 4-6 inches (10-15 cm) of thread hanging from the bobbin case.
- Hold the bobbin case by its latch or handle.
- Insert the bobbin case into the shuttle area in the machine. It will only fit one way. It should click or lock into place.
- Make sure the bobbin case is seated properly and does not feel loose.
- Close the front door on the machine.
- Now you are ready to pick up the bobbin thread for sewing.
Common Issues and How to Fix Them
Sometimes, bobbin winding or installation does not go perfectly. Here are some common problems and how to handle them. This is part of bobbin troubleshooting Brother machines.
Bobbin Winding Problems
| Problem | Cause | How to Fix |
|---|---|---|
| Uneven Winding | Thread not going through tension disc. | Check thread path. Make sure thread goes around the bobbin winder tension. |
| Thread not held at start. | Hold thread tail for first few wraps. | |
| Bobbin not pushed on spindle fully. | Push bobbin down firmly onto the spindle. | |
| Thread Breaks While Winding | Thread path wrong. | Check machine diagram for correct threading path. |
| Thread caught on spool. | Check if thread is snagged on spool end or spool pin. | |
| Bobbin damaged. | Use a new, undamaged bobbin made for your machine. | |
| Machine speed too high (older models). | Try winding at a medium speed. | |
| Bobbin Not Filling Up | Winder not engaged. | Slide the bobbin winder spindle fully into the winding position. |
| Bobbin slipping on spindle. | Make sure bobbin is fully pushed down. | |
| Bobbin Winder Not Stopping | Stopper mechanism blocked or broken. | Check for thread or debris blocking the stopper. Consult manual or service if broken. |
| Bobbin Winder Does Not Spin | Winder not engaged. | Slide the spindle fully. |
| Handwheel not disengaged (if applicable). | Pull out the handwheel slightly as shown in your manual. | |
| Machine not powered on. | Check power switch and cord. |
Addressing these points is key to effective Brother sewing machine bobbin winding.
Bobbin Installation Problems
| Problem | Cause | How to Fix |
|---|---|---|
| Stitches Look Bad | Bobbin thread tension wrong. | For front-load, check thread path in case. For top-load, ensure thread is in guide path. |
| Bobbin inserted wrong way. | Check manual or machine markings for correct bobbin rotation (thread coming off right way). | |
| Machine Jams | Thread caught under bobbin. | Make sure thread is properly seated in guide path (top-load) or case (front-load). |
| Bobbin not correct size or type. | Use only bobbins made for your specific Brother model. | |
| Thread caught in bobbin case (front-load). | Remove case, clear any tangled thread. Reinsert. | |
| Needle Breaks | Needle hitting bobbin case. | Ensure bobbin case (front-load) is installed correctly and fully seated. |
| Bobbin cover plate not closed (top-load). | Close the cover plate firmly. |
Solving these can save you time and frustration during Brother sewing machine bobbin installation.
Tips for the Best Bobbin Winding
Follow these tips for perfectly wound bobbins every time you do Brother sewing machine bobbin winding.
- Use the Right Bobbin: Always use bobbins made for your specific Brother machine model. Using wrong bobbins (plastic vs. metal, wrong size) can cause many problems. They might not fit the winder right, wind unevenly, or not fit in the bobbin area correctly.
- Use Quality Thread: Cheap or old thread can break easily while winding. Use good quality thread.
- Wind at Medium Speed: If your machine lets you control the speed, start winding at a medium speed. Once the thread is caught on the bobbin, you can increase the speed if you like. High speed from the start can sometimes cause tangles.
- Don’t Overfill: Let the automatic stopper work. Overfilling a bobbin makes it too big. It can rub in the bobbin case or area, causing tension problems, jamming, or even breaking needles.
- Wind a Few Spares: It’s a good idea to wind a few bobbins before you start a sewing project. Wind one for each color of thread you will use. This way, you don’t have to stop sewing to wind a new bobbin.
- Check Thread Path: Double-check that the thread is going through all the right guides and tension discs before you start winding. This is part of the bobbin winder setup Brother steps.
Why Proper Winding Matters
A well-wound bobbin is key to good stitches.
- Even Tension: A bobbin wound evenly with medium tension provides consistent thread flow. This helps create balanced stitches where the top and bottom threads meet nicely between the fabric layers.
- No Jams: An unevenly wound or overfilled bobbin can snag, get stuck, or jump around in the bobbin area. This often leads to thread nests, jams, and frustration.
- Smooth Sewing: When the bobbin thread feeds smoothly, the machine runs better. You get fewer thread breaks and skipped stitches.
Steps to wind bobbin Brother machines are designed to make this process easy and reliable. Following them helps your machine work its best.
Diving Deeper into Bobbin Types
As mentioned, using the correct bobbin is critical. Brother machines typically use plastic bobbins.
Plastic Bobbins
- Most modern Brother machines use a specific type of plastic bobbin.
- These are often called “Class 15” or “Style A” bobbins, but even within this type, there can be slight variations.
- Always check your machine manual. It will tell you the exact bobbin type needed.
- Using metal bobbins in a machine designed for plastic ones can damage the machine because of magnetic parts or different weights and sizes.
- Using plastic bobbins from another brand might seem okay, but they might be slightly different in size or shape, leading to winding or stitching problems. Stick to Brother-branded bobbins or high-quality bobbins specifically listed as compatible with your model.
Front-Load Bobbin Cases
For machines with front-load bobbins, the case is also important.
- The bobbin case provides the tension for the bobbin thread.
- There is a small screw on the bobbin case. Turning this screw adjusts the bobbin thread tension. Only adjust this if you know what you are doing and have tested other things first. Incorrect bobbin tension is a common cause of stitch problems.
- Keep the bobbin case clean from lint and thread bits.
- If your bobbin case gets damaged (bent, scratched), it can affect the thread flow and tension. A damaged case should be replaced.
Understanding the bobbin type and how it works with your machine helps with bobbin troubleshooting Brother issues.
More on Bobbin Winder Setup
Let’s look closer at the bobbin winder setup Brother machines use.
The Spool Pin
The spool pin holds your thread.
- Ensure the spool pin is fully upright or in the correct position for your spool size.
- Use the correct size spool cap if your machine came with different sizes. The cap helps the thread come off the spool smoothly without tangling.
The Thread Guides
These are like little pathways for the thread.
- Follow the numbers or lines on your machine exactly.
- Make sure the thread snaps into any guides or hooks.
- Ensure the thread is seated firmly in the bobbin winder tension disc. You might need to pull the thread into the disc. This tension is crucial for the thread to wind tightly on the bobbin, not loosely. Loose winding causes stitches to be uneven.
The Bobbin Winder Spindle
This is the part the bobbin sits on.
- Push the bobbin all the way down.
- Slide the spindle over to the winding position. This is often a click or a firm push.
- This action usually disengages the main sewing mechanism. If your needle is still moving when you try to wind, check your manual for the step to disengage the needle (often pulling out the handwheel).
A good bobbin winder setup Brother requires following these steps carefully.
Winding Thread on Brother Bobbin: Step-by-Step Summary
Let’s put the winding steps together simply.
- Put thread spool on spool pin.
- Guide thread through upper guides.
- Wrap thread around bobbin winder tension disc.
- Thread thread end through hole in empty bobbin.
- Place bobbin on winder spindle.
- Slide spindle to winding position.
- Hold thread tail for a few wraps.
- Press foot control or Start/Stop.
- Trim thread tail after bobbin catches it.
- Let bobbin wind until it stops.
- Slide spindle back to original position.
- Remove full bobbin.
- Cut thread using the cutter.
This sequence covers the steps to wind bobbin Brother machines.
Loading Bobbin Brother Sewing Machine: Step-by-Step Summary
Now, how to put the full bobbin into the machine.
Top-Load Bobbin
- Open clear bobbin cover plate.
- Check which way thread needs to come off the bobbin (usually counter-clockwise).
- Drop bobbin into the hole.
- Guide thread into the marked path slots.
- Pull thread gently to seat it in guides.
- Leave thread tail hanging out.
- Close cover plate.
Front-Load Bobbin
- Open front door.
- Take bobbin case out (if present).
- Put bobbin into case.
- Pull thread into the slit on the case.
- Hold case by latch.
- Insert case into machine until it clicks.
- Leave thread tail hanging out.
- Close front door.
These cover loading bobbin Brother sewing machine methods for both common types.
More Bobbin Troubleshooting Brother Tips
Sometimes problems are not obvious.
- Lint and Dust: A major cause of bobbin issues is lint build-up. The bobbin area and the bobbin case (front-load) collect tiny fibers. Clean these areas regularly with a small brush.
- Damaged Bobbins: Even a tiny crack or bend in a plastic bobbin can make it spin unevenly or catch thread. Inspect your bobbins and throw away any damaged ones.
- Thread Quality/Type: Using thread that is too thick for your needle or machine, or very fuzzy thread, can cause issues with winding and stitching.
- Machine Timing: If you have constant, unsolvable bobbin issues (like thread breaking inside, loops on bottom fabric, jamming) even after cleaning and checking everything, the machine’s timing might be off. This needs a repair shop.
Don’t be afraid to consult your Brother machine manual. It has specific pictures and instructions for your model. This is the best resource for bobbin troubleshooting Brother machine problems unique to your specific machine.
FAQ Section
Here are some common questions about bobbins on Brother machines.
Q: Can I use metal bobbins in my Brother machine?
A: Most modern Brother machines are made for plastic bobbins. Check your manual. Using metal bobbins in a machine made for plastic ones can damage it.
Q: Why is my bobbin winding loose?
A: The thread might not be going through the bobbin winder tension disc. Make sure it is threaded correctly around that guide or disc near the winder spindle. Also, make sure you held the thread tail for the first few wraps.
Q: The bobbin winder on my Brother machine won’t stop automatically. What’s wrong?
A: There might be lint or thread blocking the automatic stopper arm on the winder spindle. Clean the area. If it still doesn’t stop, the mechanism might need service.
Q: How much thread should I wind onto the bobbin?
A: Wind it until the automatic winder stops. Do not try to cram more thread on. Overfilling causes problems.
Q: My bobbin thread is looping on the bottom of the fabric. Is this a bobbin problem?
A: Yes, often. This means the top thread tension is too tight, or the bobbin thread tension is too loose. For front-load machines, check the thread path in the bobbin case. For top-load, make sure the bobbin thread is seated correctly in the guide channel and the bobbin is inserted the right way.
Q: My bobbin keeps running out of thread too fast.
A: This might mean you are not winding it fully, or you are using a lot of thread in your sewing (e.g., dense stitches or long seams). Wind bobbins until the automatic stop engages. Consider winding several bobbins at once before you start a big project.
Q: My Brother machine is making a strange noise when I wind the bobbin.
A: Stop winding. Check for tangled thread around the winder spindle, under the bobbin, or back at the spool. Also check if the handwheel is fully disengaged (if your machine requires this step for winding). If the noise continues after checking, there might be a mechanical issue.
Conclusion
Winding a bobbin on your Brother sewing machine is a basic skill. It is important for smooth sewing. By following the steps for Brother sewing machine bobbin winding, setting up the bobbin winder setup Brother correctly, threading bobbin Brother machine, and properly loading bobbin Brother sewing machine, you can avoid many common sewing problems. Remember to use the right bobbins, guide the thread correctly, and let the automatic winder do its job. Knowing how to handle bobbin troubleshooting Brother issues will help you keep sewing without frustration. Happy stitching!