
Can I hem a dress with a sewing machine? Yes, you absolutely can hem a dress with a sewing machine! It’s a fundamental skill in dressmaking and a fantastic way for beginners to start improving their sewing projects. Sewing machine hem work is a gateway to more advanced dressmaking.
Hemming a dress by machine might seem daunting at first, but with a little guidance, it becomes a straightforward and rewarding process. This guide will walk you through everything you need to know to achieve a professional-looking hem on your dress, even if you’re new to sewing. We’ll cover the essential tools, different hemming methods, and common pitfalls to avoid. Whether you’re working with a simple cotton sundress or a more delicate fabric, these techniques will help you finish your dress beautifully. Let’s dive into the world of sewing machine for hemming and master the art of dress hemming techniques.
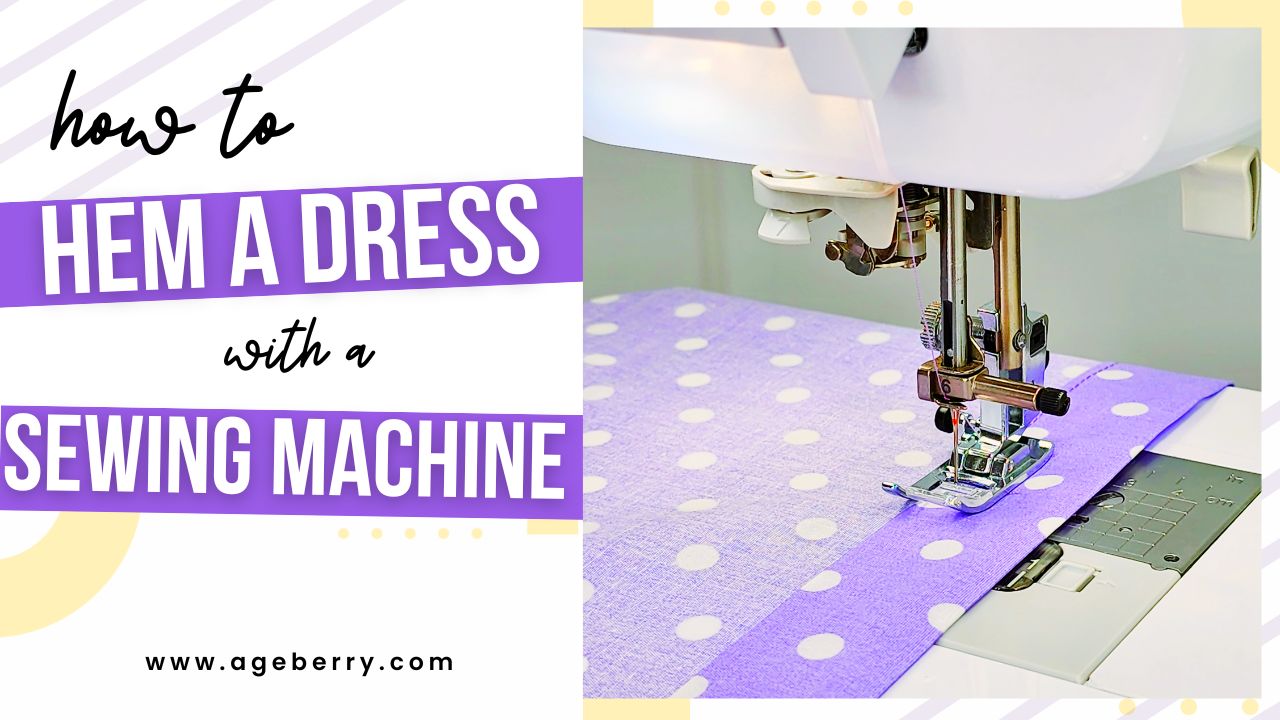
Image Source: www.ageberry.com
Getting Started: Your Sewing Machine and Essential Supplies
Before we begin sewing a dress hem, let’s make sure you have the right tools for the job. The right sewing machine and accessories can make all the difference.
The Right Sewing Machine for Hemming
- Basic Functionality: For hemming, any standard sewing machine will work. You don’t need a fancy computerized model. A machine that can do a straight stitch and a zigzag stitch is ideal.
- Needle Selection: Always use a new, sharp needle appropriate for your fabric. A universal needle is a good starting point for many fabrics. For knits, use a ballpoint or stretch needle. For delicate fabrics, a fine needle (size 60/8 or 70/10) is best.
- Thread Choice: Use good quality all-purpose polyester thread. It’s strong and versatile. Match your thread color to your dress fabric for an invisible hem, or use a contrasting color for a decorative effect.
Essential Supplies for Dress Hemming
Here’s a list of items you’ll need to successfully hem your dress:
- Sewing Machine: As discussed above.
- Iron and Ironing Board: Crucial for pressing seams and hems as you go.
- Fabric Scissors: Sharp scissors specifically for cutting fabric.
- Measuring Tape: For accurate measurement of your hemline.
- Fabric Marker or Tailor’s Chalk: To mark your hemline.
- Pins: Straight pins to hold the fabric in place.
- Seam Ripper: For undoing any mistakes (it happens to everyone!).
- Thread: Matching your fabric.
- Hemming Tape (Optional): For certain types of hems, like blind hems, this can be very helpful.
- Rotary Cutter and Mat (Optional): For very precise cutting of the hem allowance.
Preparing Your Dress for Hemming
Proper preparation is key to achieving a neat hem. This involves measuring, marking, and pressing.
Measuring and Marking the Hemline
- Wear the Dress: Put on the dress and stand in front of a mirror. If you have shoes you plan to wear with the dress, wear them too.
- Determine Desired Length: Have a friend help you mark the desired hem length. Use a measuring tape to ensure it’s even all the way around. Alternatively, you can use a fabric marker and a ruler or a seam gauge to mark the hem at a consistent distance from the floor.
- Marking Methods:
- Fabric Marker/Chalk: Mark small dots at intervals along the desired hemline.
- Pins: Place pins horizontally at the desired hem level.
- Remove the Dress: Once marked, carefully take off the dress.
- Draw the Hemline: Connect the marks with a fabric marker or tailor’s chalk to create a clear, continuous line.
Pressing the Hem Allowance
- Cutting the Excess Fabric:
- If your dress doesn’t have enough fabric for a hem allowance, you might need to add some. A typical hem allowance is 1 to 4 inches, depending on the fabric and style.
- Use your scissors or rotary cutter to cut along the marked hemline.
- Folding the First Fold:
- Place the dress wrong side up on your ironing board.
- Fold the fabric along your marked hemline by about 1/2 inch to 1 inch (or your desired allowance for the first fold).
- Press this fold firmly with your iron. This creates a crisp edge.
- Folding the Second Fold:
- Fold the fabric again along the edge of the first fold, enclosing the raw edge. The width of this second fold will determine the finished width of your hem. Press this second fold firmly.
Choosing the Right Sewing Machine Stitches for Hems
Your sewing machine offers various stitches, and some are better suited for hemming than others. Selecting the right stitch is crucial for both appearance and durability.
Common Sewing Machine Stitches for Hems
| Stitch Name | Description | Best For |
|---|---|---|
| Straight Stitch | The most basic stitch, used for most construction. Can be used for visible hems. | Visible hems, heavier fabrics, decorative topstitching. |
| Zigzag Stitch | A back-and-forth stitch. Can be used to finish raw edges or as part of a hem. | Finishing raw edges before folding, stretchy fabrics, preventing fraying. |
| Blind Hem Stitch | Designed to create a nearly invisible hem by catching only a few threads of the main fabric. | Invisible hems on most fabrics, especially trousers and dresses. |
| Twin Needle Stitch | Uses two needles to create two parallel straight stitches on top and a zigzag stitch on the bobbin side. | Hemming knits and stretchy fabrics, providing elasticity. |
How to Set Up Your Machine for Different Stitches
- Straight Stitch: Most machines default to this. Ensure you have the correct needle and thread.
- Zigzag Stitch: Select the zigzag stitch on your machine. Adjust the width and length. A medium width (around 2.0-3.0) and a shorter length (around 1.0-2.0) usually work well for finishing edges.
- Blind Hem Stitch: Consult your sewing machine manual. This stitch often requires a special blind hem foot. You’ll typically set the stitch to a medium width and length. The needle will swing over to catch the fabric.
- Twin Needle: Insert a twin needle into your machine (following your manual). You’ll usually thread the machine as normal for one spool, but then thread the second spool onto the second thread post. Set your stitch to a straight stitch. Your machine might have a specific setting for twin needles.
Popular Dress Hemming Techniques for Beginners
Let’s explore some common and beginner-friendly ways to finish a dress hem using your sewing machine.
1. The Double Fold Hem (Folded Hem)
This is a versatile and common method that creates a clean, durable finish. It’s excellent for most woven fabrics.
Steps for Machine Sewing Hem:
- Prepare the Hem: You’ve already pressed the first and second folds.
- Pin the Hem: Secure the folded hem in place with pins, placing them perpendicular to the fold.
- Sewing Machine Stitches for Hems: Select a straight stitch on your sewing machine.
- Start Sewing: Begin sewing at the side seam, leaving a few stitches unsewn to help you pivot. Backstitch at the beginning to secure the thread.
- Follow the Fold: Guide the folded edge under the presser foot, keeping the raw edge of the fold as close to the machine’s needle plate as possible.
- Maintain Evenness: Sew along the top edge of the folded hem, ensuring your stitching line is straight and consistent. Use the presser foot as a guide if possible. For a truly even result, you can use a seam guide attachment or mark a sewing line.
- Finish Sewing: When you reach the beginning, backstitch to secure your stitches. Trim any excess threads.
- Press Again: Give the hem a final press to set the stitches.
Tips for a Perfect Double Fold Hem:
- Pressing is Key: Don’t skip the pressing steps! A well-pressed fold makes sewing much easier and neater.
- Use a Walking Foot: If your fabric tends to shift or is slippery, a walking foot can help feed the layers evenly.
- Test on Scraps: Always test your stitch on a scrap of the same fabric to ensure it looks good and that your machine tension is correct.
2. The Narrow Rolled Hem
This delicate hem is perfect for lightweight or sheer fabrics like chiffon, silk, or voile. It creates a very fine, rolled edge.
Steps:
- Prepare Fabric: Cut the hem allowance to about 1/2 inch.
- First Fold: Fold the raw edge up by about 1/4 inch and press.
- Second Fold: Fold it up again by another 1/4 inch, enclosing the raw edge completely. Press very firmly.
- Sewing Machine Stitches for Hems: This hem is often best sewn with a straight stitch, but a narrow zigzag stitch can also work if your fabric is a bit more prone to fraying.
- Sewing:
- Start sewing at the side seam.
- Aim to sew very close to the folded edge. Some machines have a special “rolled hem foot” which guides the fabric into a tiny roll as you sew. If you don’t have one, you can try to carefully guide the fabric yourself.
- Sew slowly and steadily, keeping your stitching line straight and as close to the inner fold as possible.
- Backstitch at the beginning and end.
- Press: Press the finished hem.
Tips for a Narrow Rolled Hem:
- Use a Fine Needle: A fine needle (size 60/8 or 70/10) is essential for delicate fabrics.
- Lower Tension: You might need to slightly lower your machine’s upper tension. Test on scraps.
- Practice Makes Perfect: This hem takes practice. Don’t be discouraged if your first attempts aren’t perfect.
3. The Blind Hem Stitch
This stitch creates a nearly invisible hem, making it ideal for dresses where you want a very clean, unadorned finish.
Steps:
- Prepare the Dress:
- Hem the dress to your desired length.
- Fold the hem allowance up twice as you would for a double fold hem, but only press the folds. Do not sew the folded edge down yet.
- Turn the dress right side out.
- Prepare for the Blind Hem:
- You will need to adjust your sewing machine settings for the blind hem stitch (refer to your manual).
- You will also likely need to switch to a blind hem foot. This foot has a guide in the middle that helps the needle catch only a few threads of the main fabric.
- Position the Fabric:
- Place the dress wrong side up on your sewing machine.
- Position the fabric so that the folded edge of the hem is against the guide on the blind hem foot.
- The needle should swing over and catch just a few threads of the main fabric on the right side of the dress.
- Sewing Machine Stitches for Hems: Select the blind hem stitch.
- Sewing:
- Start at a side seam. Backstitch to secure.
- Sew slowly, allowing the needle to swing from side to side. The needle will stitch straight across the folded hem and then swing out to catch a few threads of the dress fabric.
- Ensure you are only catching a minimal amount of the main fabric so the stitch is truly invisible from the right side.
- Continue all the way around the hem. Backstitch at the end.
- Press: Gently press the hem.
Tips for a Successful Blind Hem:
- Blind Hem Foot is Key: This foot makes a huge difference in achieving a neat blind hem.
- Adjusting Stitch Length/Width: You may need to experiment with the stitch length and width settings on your machine to get the perfect balance of coverage and invisibility.
- Fabric Weight: This stitch works best on medium-weight fabrics. Very thin or very thick fabrics can be more challenging.
4. Hemming Knits with a Twin Needle
Knitted fabrics have stretch, and a regular straight stitch can break when the fabric is stretched. A twin needle is a fantastic solution for this.
Steps:
- Prepare the Dress:
- Turn the dress wrong side out.
- Fold the hem allowance up by about 1 to 1.5 inches.
- Press the fold.
- For a cleaner finish, fold again by another 1/2 inch and press firmly. This encloses the raw edge.
- Install Twin Needle: Insert the twin needle into your sewing machine. Follow your manual for threading instructions, as you’ll be using two spools of thread.
- Select Stitch: Set your machine to a straight stitch.
- Sewing Machine Stitches for Hems: Use the straight stitch setting.
- Sewing:
- Start at a side seam. Backstitch.
- Sew along the folded edge, keeping your stitching line straight. The twin needle will create two parallel stitches on the top side of the fabric.
- On the underside, your machine’s bobbin thread will create a zigzag stitch that bridges the gap between the two top stitches. This zigzag stitch allows the hem to stretch with the fabric without breaking.
- Backstitch at the end.
- Press: Press the finished hem.
Tips for Twin Needle Hemming:
- Needle Choice: Use a ballpoint or stretch twin needle for knits.
- Thread Tension: You might need to adjust your upper thread tension. If the zigzag stitch on the underside is too tight or pulling, loosen the tension slightly.
- Test First: Always test on a scrap piece of your knit fabric to ensure the stitch is elastic and looks good.
Finishing Touches and Common Issues
Once you’ve sewn your hem, a few final steps can elevate your work from good to great.
Final Pressing
- Always give your finished hem a final press. This helps the stitches lay flat and gives the dress a polished, professional look.
- Press from the wrong side to avoid flattening the stitches too much.
Dealing with Curves
Hemming a curved hem requires a bit more attention.
- Clip the Hem Allowance: If you’re doing a double fold hem on a curved edge, clip small notches into the raw edge of the first fold. These clips allow the fabric to lie flat when you make the second fold. Clip only through the first fold, not into the main dress fabric.
- Pin Carefully: Pin the hem allowance in place, ensuring it lies smoothly without puckering. You may need more pins on a curve than on a straight edge.
- Sew Slowly: Take your time when sewing around curves. Sew at a slower speed and guide the fabric gently.
Common Pitfalls and How to Avoid Them
- Uneven Hemline: This is often due to inconsistent measuring or marking. Double-check your initial measurements and use a seam gauge or ruler as you sew.
- Wavy Hem: This can happen if the fabric stretches as you sew. Using a walking foot or stabilizer can help. Also, ensure your presser foot pressure is adjusted correctly for your fabric.
- Stitches Puckering: This usually indicates tension issues or using the wrong needle. Test your stitch on scraps and adjust tension or needle accordingly.
- Thread Breaking: Ensure you’re using the correct needle and thread for your fabric. Also, check your machine’s tension settings.
Advanced Hemming Techniques (Brief Overview)
While we’ve focused on beginner-friendly methods, dressmaking offers more advanced options as you gain experience.
- Rolled Hem by Machine (Advanced): Using a specialized rolled hem foot for a perfectly consistent, narrow finish on silks and lightweight fabrics.
- Hand-Rolled Hem: A time-consuming but beautiful finish for very delicate or fine fabrics where machine sewing might be too bulky.
- French Hem: Creates a very neat, enclosed edge that looks similar to a rolled hem but is sewn differently.
- Satin Stitch Hem: Often used on satin or silk, this involves a very dense zigzag stitch that covers the raw edge completely.
Conclusion: Mastering Your Sewing Machine Hem
Hemming a dress with a sewing machine is a fundamental skill that opens up a world of possibilities in dressmaking. By following these steps, choosing the right sewing machine stitches, and practicing patience, you can achieve professional-looking results. Remember that every stitch is a step forward, and with each project, your confidence and skill will grow. Enjoy the process of sewing a dress hem and the satisfaction of finishing your beautiful garments!
Frequently Asked Questions (FAQ)
What is the best stitch for hemming a dress?
The best stitch depends on the fabric and the desired look. For most woven fabrics, a double fold hem sewn with a straight stitch is excellent. For knits, a twin needle or a zigzag stitch is recommended. For an invisible finish, the blind hem stitch is ideal.
Can I hem a dress without a sewing machine?
Yes, you can hem a dress by hand, but it takes significantly longer and may not be as durable or neat as machine hemming. Techniques like a blind stitch or a simple running stitch can be used for hand hemming.
How wide should a hem allowance be?
The width of the hem allowance varies depending on the style of the dress, the fabric weight, and personal preference. Common widths are 1 inch to 4 inches. Lighter fabrics often have narrower hems, while heavier fabrics can accommodate wider hems. Always press your folds carefully, regardless of width.
What if my fabric is fraying a lot?
If your fabric frays excessively, consider using a zigzag stitch or an overlock stitch (if your machine has one) to finish the raw edge of the hem allowance before folding and pressing. You can also use a product like Fray Check to prevent fraying.
How do I get a perfectly straight hem?
Precision in measuring and marking is crucial. Use a measuring tape and fabric marker or chalk. When sewing, use your sewing machine’s seam guide, edge stitching foot, or even painter’s tape on your machine bed to help keep your stitching line straight and consistent along the folded edge.
Do I need a special foot for hemming?
While not strictly necessary for all hems, a blind hem foot is highly recommended for achieving a professional blind hem. A rolled hem foot can also be very helpful for narrow rolled hems on delicate fabrics. For knit fabrics, a twin needle is a key accessory for preventing popped stitches.