
Can you line a crochet bag without sewing? Yes, you absolutely can! There are simple ways to add a lining to your beautiful handmade crochet bags without ever picking up a needle and thread for sewing. These no-sew bag lining tutorial methods use materials like glue, iron-on bonding, or pre-made inserts. They offer an easy way to line a crochet bag and give it a finished, professional look. You can easily attach fabric lining crochet bag projects using these techniques. It’s a great DIY no-sew bag lining project! This guide will show you how to put lining in crochet bag projects using these simple, no-sew steps.
Adding a lining to your crochet bag is a really good idea. It makes your bag stronger. It stops it from stretching out too much. A lining also hides the stitches on the inside. This makes your bag look much neater. Plus, a lining keeps small items like keys or pens from slipping through gaps in the crochet work. You can even add pockets to a lining! It helps your bag keep its shape better too. So, lining your bag is worth it! And doing it without sewing is even better for many people.
There are a few different ways to add a lining without sewing. We will look at the most popular and easiest ones.
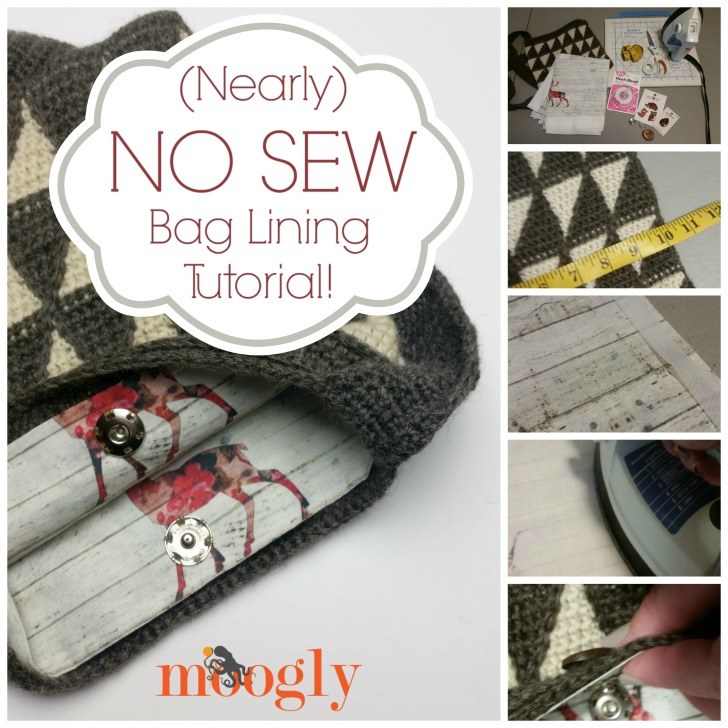
Image Source: www.mooglyblog.com
How To Line Your Bag Using Fabric Glue
One simple way is to use glue. Not just any glue! You need a special glue made for fabric. This method involves bonding fabric lining crochet bag projects. It’s like gluing the fabric to the inside of your bag. Using fabric glue for bag lining is a straightforward method.
What You Need for the Glue Method
- Your crochet bag
- Fabric for the lining (like cotton)
- Sharp scissors
- Fabric glue (look for one that is washable and flexible)
- Clips or clothespins
- An old cloth or paper towels
- An iron (optional, for pressing fabric)
Picking the Right Glue
Not all glues are good for fabric. You need one that says it is for fabric. It should stay soft when it dries. It should also be able to be washed without coming undone. Brands like Aleene’s Fabric Fusion or unique fabric glues work well. Always read the bottle to make sure it is right for your project.
Steps for Gluing Your Lining
Here is a step-by-step guide on how to do this.
h5 Step 1: Prepare Your Bag and Fabric
First, make sure your crochet bag is clean. If you just finished making it, it should be clean already. Next, iron your lining fabric. This makes it flat and easier to work with.
h5 Step 2: Cut the Fabric
You need two pieces of fabric for most bags (front and back). If your bag is made in a circle without sides, you might need one large piece or a tube shape. Let’s think about a basic flat bag shape for now.
Lay your bag flat. Place your fabric on top of the bag. Cut the fabric a little bit bigger than the bag shape. Leave about 1/2 inch extra all around the sides and bottom. For the top edge, leave about 1 inch extra. This extra bit is for folding over later. Cut two pieces like this, one for each side of the bag.
h5 Step 3: Prepare the Fabric Pieces
Take one piece of fabric. This will be for one side of the bag. Fold the extra 1 inch at the top edge over to the inside (wrong side) of the fabric. Press this fold with your fingers or iron it flat. You can add a tiny line of fabric glue along the edge of this fold to keep it down neatly. Let it dry a little if you glue the fold. This folded edge will be the top edge of your lining, where it meets the opening of your bag.
Do this for the second fabric piece too.
h5 Step 4: Apply Glue to the Bag
Turn your crochet bag inside out. This is important! You will be gluing the fabric to the inside of the bag.
Put glue along the edges of the bag inside. Start with the bottom edge. Squeeze a thin line of glue. Don’t use too much! A thin line is better. You can also put a few dots of glue in the middle of the bag area, but keep it light. Stay maybe 1/2 inch away from the very edge of the bag. You don’t want glue squeezing out the sides.
h5 Step 5: Place the Fabric
Carefully place one piece of your prepared fabric onto the glued area inside the bag. Make sure the folded top edge of the fabric lines up near the top opening of the bag (but inside the bag). Smooth the fabric down gently from the center out to the edges. Make sure the fabric covers the glued areas well.
h5 Step 6: Glue the Other Side
Now, turn the bag over or work on the other side. Add glue to the edges and maybe the center of the other side of the bag’s inside. Place the second fabric piece onto this side. Smooth it down.
h5 Step 7: Glue the Side Edges
Now you need to glue the side edges where the two fabric pieces meet. You can put a thin line of glue along the edge of one fabric piece. Then press the edge of the other fabric piece onto it. Or you can put glue on the inside edge of the crochet bag sides and press both fabric pieces into it. Be careful not to glue the front and back of the bag together! You are gluing the fabric to the crochet bag, not the fabric pieces to each other (except possibly a tiny bit at the very side edge seam).
Use clips or clothespins to hold the fabric edges in place while the glue dries. Put clips along the sides and bottom.
h5 Step 8: Glue the Top Edge
This is where the folded edge you made comes in. Carefully put a thin line of glue just under the folded top edge of the fabric lining. Then press this folded edge against the inside of the top opening of your crochet bag. Make sure it is neat and smooth. Repeat for the other side. You can use clips here too, but be gentle so they don’t leave marks.
h5 Step 9: Let the Glue Dry
Let the bag sit flat to dry completely. Read the glue bottle for drying time. It might take several hours or even a full day. Do not use the bag until the glue is fully dry and set.
h5 Step 10: Trim if Needed
Once dry, turn the bag right side out carefully. Check the inside. If there is any extra fabric sticking up around the top edge, you can carefully trim it with sharp scissors. Make sure you don’t cut the crochet!
Good Points About Using Glue
- It is easy to do.
- You don’t need special tools like a sewing machine.
- Fabric glue is often not too expensive.
Not So Good Points About Using Glue
- The glue might make the fabric a little stiff.
- You have to wait for it to dry.
- If you use too much glue, it can squeeze through the crochet stitches or the fabric.
- It might not be as strong as sewing in the very long run, especially with heavy use.
Tips for Gluing
- Always test the glue on a small piece of your fabric first. Make sure you like how it dries.
- Use a thin line of glue. Less is more!
- Work on a protected surface. Glue can be messy.
- Use clips generously to hold things while drying.
- Give it plenty of time to dry completely.
This is one easy way to line a crochet bag and complete a DIY no-sew bag lining project. It successfully helps you attach fabric lining crochet bag items by bonding fabric lining crochet bag projects.
How To Line Your Bag Using Iron-On Interfacing
Another great no-sew method uses something called fusible interfacing. This is a material with glue on one side. You iron it onto fabric, and the heat melts the glue, sticking it there. You can use this to make a stiff lining that holds its shape. This creates an iron-on interfacing bag liner. It involves using fusible interfacing for crochet bag lining.
What You Need for the Interfacing Method
- Your crochet bag
- Fabric for the lining
- Fusible interfacing (make sure it’s iron-on!)
- Sharp scissors
- An iron and ironing board
- A pressing cloth (a thin cotton cloth or old t-shirt)
- Clips or pins (optional, for holding fabric)
Picking the Right Interfacing
Fusible interfacing comes in different weights (how thick it is) and types. For a bag lining, you usually want a light to medium weight. If your crochet is very open, you might want a slightly stiffer interfacing to give the fabric more body. Make sure it is the “fusible” kind – this means it has the heat-activated glue. Check that it is suitable for the type of fabric you are using for the lining.
Steps for Using Iron-On Interfacing
This method makes the lining fabric stiff on its own, which helps the bag keep its shape.
h5 Step 1: Prepare Your Bag and Fabric
Make sure your bag is clean. Iron your lining fabric.
h5 Step 2: Cut the Fabric and Interfacing
Lay your bag flat. Cut two pieces of your lining fabric. Again, make them a little bigger than the bag shape. About 1/2 inch extra on sides and bottom, and 1 inch extra at the top.
Now, cut two pieces of the fusible interfacing. Cut these pieces the exact size that you want the finished lining pieces to be after you fold the top edge. So, cut the interfacing the size of the bag sides, plus the 1/2 inch extra on the sides and bottom. Do not include the 1 inch extra for the top fold in the interfacing size.
h5 Step 3: Iron Interfacing onto Fabric
Place one piece of your lining fabric on the ironing board with the wrong side up. Place one piece of fusible interfacing on top of the fabric. The gluey side of the interfacing (it might feel rough or shiny) must face down onto the fabric.
Place a pressing cloth over the interfacing and fabric. Press down firmly with a hot iron (check interfacing instructions for heat level). Hold the iron in place for the time recommended by the interfacing maker (usually about 10-15 seconds). Do not slide the iron. Lift and move to the next spot, slightly overlapping the area you just pressed. Cover the whole piece of interfacing.
Let the fabric cool. The interfacing should be stuck firmly to the fabric. Repeat for the second fabric piece and interfacing piece.
h5 Step 4: Prepare the Top Edge
Now, take one fabric piece with the interfacing ironed on. The interfacing stops about 1 inch from the top edge. Fold this extra 1 inch of fabric at the top edge over onto the interfacing side. Press this fold with your iron (use the pressing cloth again). This creates a clean, finished top edge for your lining piece. Repeat for the second fabric piece.
h5 Step 5: Insert Lining into Bag
Turn your crochet bag inside out. Carefully place one prepared lining piece inside the bag. The interfacing side should be against the inside of the crochet bag. The folded top edge should be near the top opening of the bag. Smooth it into place.
Place the second lining piece inside the bag on the other side. Smooth it down. The interfacing sides of the fabric pieces should be facing outwards, towards the inside of the crochet bag. The non-interfaced, finished sides of the fabric should be facing inwards, towards each other (this will be the inside of your finished lining).
h5 Step 6: Secure the Lining
The fusible interfacing makes the fabric quite stiff. This helps it stay in place inside the bag. However, you might want to secure it more firmly.
You can use fabric glue for this step! Place thin lines or dots of fabric glue along the edges of the interfacing/fabric pieces inside the bag. Press the fabric firmly against the inside of the crochet bag. Work your way along the sides and bottom edges. Use clips to hold everything in place while the glue dries.
You also need to secure the top edge. Put a thin line of fabric glue just under the folded top edge of the lining fabric. Press this folded edge against the inside of the top of the crochet bag. Hold it in place with clips until the glue dries.
h5 Step 7: Let Dry and Trim
Let the glue dry completely if you used any. Turn the bag right side out. Check the top edge. Trim any loose threads. The stiff interfacing should help the lining stand up inside the bag nicely.
Good Points About Using Interfacing
- Gives the bag more structure and body.
- Helps the fabric lining stay in place better than just glue alone.
- Creates a smooth, finished look inside.
- It’s still a no-sew method!
Not So Good Points About Using Interfacing
- Requires an iron.
- Can be tricky to cut and line up correctly.
- Might make the fabric a bit stiff or less flowy.
- Adding the fabric glue step adds a drying time.
This method helps you attach fabric lining crochet bag items effectively by creating an iron-on interfacing bag liner. It uses fusible interfacing for crochet bag projects.
How To Use a Pre-Made Bag Liner Insert
This might be the easiest no-sew method of all! You simply use a liner that is already made. This is a pre-made bag liner insert. You just put it inside your bag.
What is a Pre-Made Liner?
A pre-made liner is like a fabric basket or pouch. It is already sewn into a bag shape. It might have pockets built into the sides. They come in different sizes and shapes. Some are made of felt, which is stiff on its own. Others are made of fabric.
What You Need for the Insert Method
- Your crochet bag
- A pre-made bag liner insert that fits your bag
- Optional: Fabric glue or clips to secure it
Finding the Right Insert
Measure the inside of your crochet bag. Look for a liner insert that is slightly smaller than the inside dimensions of your bag. You want it to fit snugly but not be too big to get in. Check the height too. The insert should sit just below the top opening of your crochet bag.
You can find these inserts online or in craft stores. Sometimes they are sold as “purse organizers” or “bag shapers.”
Steps for Using a Pre-Made Insert
h5 Step 1: Get the Right Size Insert
Measure your bag carefully. Find an insert that fits.
h5 Step 2: Place the Insert
Open up your crochet bag. Gently place the pre-made insert inside the bag. Push it down into the bottom corners. Make sure it sits flat against the sides and bottom of the bag.
h5 Step 3: Secure (Optional)
Many pre-made inserts will stay in place because they fit well. But if you want to make it extra secure, you can add a few dots of fabric glue. Put tiny dots of glue on the outside of the insert, near the top edge and maybe in the corners. Then press the insert against the inside of the crochet bag. Use clips to hold it while the glue dries. Be careful not to glue the insert to the wrong part of the bag or glue the bag opening shut!
Good Points About Using a Pre-Made Insert
- Super fast and easy!
- Requires almost no work.
- Often comes with pockets already built in.
- Adds structure to the bag.
- Can often be removed to clean the bag or use the liner in a different bag (if not glued in).
Not So Good Points About Using a Pre-Made Insert
- You have to find one that is the right size.
- Might not fit perfectly like a custom-cut lining.
- Can be more expensive than buying fabric and glue.
- Might shift around inside the bag if not secured.
Using a pre-made bag liner insert is perhaps the easy way to line a crochet bag without any cutting or gluing of fabric sheets. It’s a simple way to how to put lining in crochet bag.
Why Add a Lining to Your Crochet Bag?
You might wonder, why bother with a lining at all? Here are some good reasons:
h4 Stops Stretching
Crochet fabric is stretchy. Without a lining, your bag can stretch a lot when you put things in it. A lining, especially one with interfacing or a stiff insert, helps the bag keep its shape.
h4 Hides the Inside
The inside of a crochet bag often shows knots, ends woven in, or the back of stitches. A lining covers all this up. It gives your bag a clean, finished look inside.
h4 Protects What’s Inside
Small items can fall through the holes in crochet stitches. A lining creates a solid barrier. Your keys, pens, or coins will stay safely inside the bag.
h4 Adds Pockets
You can add pockets to your fabric lining before putting it in the bag (if using the glue or interfacing methods). Or you can buy a pre-made insert that already has pockets. Pockets make your bag much more useful for keeping things organized.
h4 Gives Structure
A lining, especially one using interfacing or a stiff insert, adds body and structure to the bag. This makes the bag look better and helps it stand up.
So, lining your bag makes it look better, last longer, and work better!
Choosing the Right Fabric for Your Lining
If you are using the glue or interfacing methods, you need to pick fabric. What kind works best?
h4 Cotton Fabric
Cotton is a great choice. It is easy to work with. Fabric glue sticks well to it. It is not too expensive. Look for quilting cotton or basic cotton prints.
h4 Canvas or Duck Cloth
These fabrics are thicker and stronger than regular cotton. They add more structure to the bag. They work well with interfacing and glue. They can be a bit harder to fold neatly.
h4 Poly-Cotton Blends
These fabrics are a mix of polyester and cotton. They are often durable and resist wrinkles. They work well with both glue and interfacing.
h4 Avoid Stretchy Fabrics
Do not use stretchy fabrics like jersey or knit fabric. They are hard to work with when gluing or ironing interfacing. They will also allow your bag to stretch, which defeats one purpose of the lining.
h4 Consider the Color and Pattern
Pick a fabric color or pattern you like! It will be the inside of your bag. Think about how it looks with the color of your crochet yarn. A busy pattern might hide small mistakes better. A light color makes it easy to find things inside the bag.
Getting the Perfect Fit Without Sewing
Measuring for your lining pieces is important. You want them to fit well without being too bulky or too small.
h4 Measure Your Bag Carefully
Turn your crochet bag inside out. Use a ruler or fabric tape measure.
- Measure the width: Measure across the widest part of the bag.
- Measure the height: Measure from the bottom seam up to where you want the top of your lining to be (usually just below the bag opening).
h4 Add Extra for Seams and Folds
- For the width and bottom edge, add about 1/2 inch extra. This is for the edge where the fabric will be glued or pressed against the bag side.
- For the top edge, add about 1 inch extra. This is the part you fold over to make a neat finish at the top.
h4 Example Measurement
Let’s say your bag is 10 inches wide and 8 inches tall (inside measurement).
- You would cut your fabric width: 10 inches + 0.5 inches + 0.5 inches = 11 inches wide. (0.5 inch for each side edge)
- You would cut your fabric height: 8 inches (finished height) + 0.5 inches (bottom edge) + 1 inch (top fold) = 9.5 inches tall.
Cut two pieces of fabric this size (11″ x 9.5″). Remember, these are for a flat bag shape. If your bag is shaped differently, you might need to adjust. For a round bag, you might cut a circle for the bottom and a rectangle for the sides.
If using interfacing, cut the interfacing piece the finished size of the main lining piece (10 inches wide x 8.5 inches tall in our example, including the bottom seam allowance but not the top fold).
A General Guide to Lining Your Bag No-Sew
Let’s put it together into a simple list of steps that applies to the glue and interfacing methods. This is a general how to put lining in crochet bag guide using no-sew techniques.
h4 Steps for Your DIY No-Sew Lining
- Choose Your Method: Decide if you will use just glue, or fabric plus iron-on interfacing.
- Gather Supplies: Get your bag, fabric (if needed), glue or interfacing, scissors, iron (if needed), pressing cloth (if needed), clips.
- Prepare Bag: Make sure the bag is clean. Turn it inside out.
- Measure and Cut: Measure the inside of your bag. Cut your fabric pieces. Add extra for edges and the top fold (1/2″ on sides/bottom, 1″ on top).
- Prepare Fabric:
- Glue Method: Fold the top 1 inch of fabric over and press. Add a tiny line of glue to hold the fold if you want.
- Interfacing Method: Cut interfacing the finished size (no top fold allowance). Iron interfacing onto the wrong side of the fabric, leaving the top 1 inch of fabric free. Fold the top 1 inch of fabric over onto the interfaced part and press to create a neat top edge.
- Place Fabric Inside: Put the prepared fabric pieces inside the inside-out crochet bag. The side you want to see as the lining should be facing the other fabric piece. The outside of the fabric (or the interfacing side) should be against the crochet bag.
- Secure the Lining:
- Apply a thin line of fabric glue along the inside edges of the crochet bag (sides and bottom).
- Press the fabric edges onto the glue.
- Apply a thin line of glue under the folded top edge of the fabric. Press the folded edge against the inside of the top of the bag.
- Use clips to hold the edges while drying.
- Let Dry: Allow the glue to dry completely according to the glue instructions.
- Finish: Turn the bag right side out. Check the top edge. Trim any loose threads.
This step-by-step process helps you attach fabric lining crochet bag projects without sewing. It’s a great DIY no-sew bag lining project and provides an easy way to line a crochet bag. It covers bonding fabric lining crochet bag using glue, and using fusible interfacing for crochet bag projects combined with glue for security.
Comparing the No-Sew Methods
Here is a quick look at the different ways to line your bag without sewing.
| Method | Materials Needed | Effort Level | Structure Added | Pockets | Notes |
|---|---|---|---|---|---|
| Fabric Glue | Fabric, Glue, Scissors, Clips | Medium | Some | Can add pockets to fabric before gluing | Fabric might feel a bit stiff. Needs drying time. |
| Iron-On Interfacing | Fabric, Interfacing, Iron, Cloth, Glue | Medium/High | A Lot | Can add pockets to fabric before ironing | Requires ironing. Gives good shape. Needs drying time if using glue to secure. |
| Pre-Made Insert | Pre-made Insert, Bag | Very Low | A Lot | Often has pockets already | Must find the right size. May shift if not secured. |
This table shows that each method has its own benefits. Your choice depends on what you want for your bag and what tools you have.
Solving Common Problems
Sometimes things don’t go perfectly. Here are some tips for issues you might face.
h4 Glue Squeezing Out
You used too much glue. If it’s still wet, quickly wipe it away with a damp cloth (check if your glue is water-soluble). If it’s dry, it might be hard to remove. Try gently picking at it, or cover it with a small patch of matching fabric if it’s inside the bag. Use less glue next time!
h4 Fabric Not Sticking
The glue might not be strong enough for your fabric or bag material. The surface might have been dusty or dirty. You might not have used enough glue or held it long enough with clips. Try adding more glue in the spots that are loose and re-clipping. Make sure the glue is right for fabric and is fresh.
h4 Fabric is Wrinkly
You didn’t iron the fabric before cutting, or you didn’t smooth it well when placing it. Iron the fabric before you start. When placing the fabric inside the bag, smooth it gently from the center out to the edges to push out wrinkles.
h4 Top Edge Looks Messy
The top fold wasn’t pressed neatly, or it wasn’t glued securely enough. Make sure you fold and press that top edge well (step 3 or 4 in the methods). Use enough clips along the top edge while the glue dries to hold it flat. You can trim messy threads carefully.
h4 Interfacing Not Sticking
Your iron wasn’t hot enough, or you didn’t press long enough. Use a hot iron (check interfacing instructions!). Hold it firmly in place without sliding. Make sure the gluey side is down on the fabric.
h4 Insert Doesn’t Fit
It’s too big: You measured wrong or the insert description wasn’t accurate. You might need to return it and get a smaller one. Don’t force a big insert in; it will make your bag bulge.
It’s too small: It will shift around too much. You can try securing it with glue or stitches at the top edge, but it might not look great. It’s usually better to get one that fits well.
Caring for Your Lined Bag
How you clean your bag depends on the method used and the materials.
h4 Spot Cleaning
For small marks, try to spot clean the area with a mild soap and water. Be careful not to get the glued or interfaced areas too wet, especially if the glue is not meant to be fully washable.
h4 Washing
If the glue and fabric are marked as washable, you might be able to hand wash the bag gently. Do not put a bag with glue or interfacing in a washing machine or dryer. The heat and tumbling can ruin the glue or make the interfacing peel. Hand wash gently in cool water, reshape, and let it air dry completely. Always test a small area or scrap first if you are unsure.
h4 Pre-Made Inserts
If the insert is not glued in, you can remove it to wash the crochet bag separately (following yarn care instructions). Check the care label on the insert to see how to clean it.
Frequently Asked Questions
h4 What kind of fabric glue should I use?
Use a fabric glue that is flexible when dry and says it is washable. Check reviews to see what other crafters recommend. Aleene’s Fabric Fusion is a popular choice.
h4 Can I use hot glue?
No, hot glue is not recommended for fabric lining. It dries hard and can crack. It doesn’t hold up well to washing or the bending of a bag. It can also be hard to work with neatly in thin lines.
h4 Do I have to use interfacing?
No, you don’t have to. The glue-only method works. But interfacing adds good structure. If you want your bag to hold its shape well, interfacing or a stiff insert is a good idea.
h4 Can I add pockets to the no-sew lining?
Yes! If you are using the fabric glue or interfacing method, you can make fabric pockets and glue them onto your lining fabric pieces before you attach the lining to the bag. Use fabric glue for this. Let the pockets dry completely before putting the main lining piece into the bag.
h4 How do I make sure the lining fits neatly?
Measure carefully! Cut your fabric straight. Fold and press the top edge neatly. Use clips generously while the glue dries to hold everything smoothly against the inside of the bag. Work slowly and smooth the fabric as you go.
h4 Is a no-sew lining as strong as a sewn one?
Generally, a sewn lining is the most durable, especially for heavy use. However, modern fabric glues and interfacing can create a surprisingly strong and long-lasting lining for many bag types. For lighter use bags, it works very well. For heavy bags or backpacks, sewing might be better in the long run.
Bringing It All Together
Lining your crochet bag doesn’t have to mean learning to sew! With methods using fabric glue for bag lining, iron-on interfacing bag liner techniques, or a simple pre-made bag liner insert, you have great no-sew options.
These DIY no-sew bag lining methods like bonding fabric lining crochet bag or using fusible interfacing for crochet bag are an easy way to line a crochet bag. They help you attach fabric lining crochet bag projects successfully. Now you know how to put lining in crochet bag without a sewing machine.
Choose the method that seems best for you. Gather your supplies, take your time, and you can add a beautiful, functional lining to your handmade bag. This will make your bag better and last longer. Give one of these no-sew bag lining tutorial methods a try!