
Can I make a knot with sewing thread? Yes, you can absolutely make a knot with sewing thread to secure your stitches. This blog post will guide you through various sewing knot types, how to tie a knot for sewing effectively, and the best sewing knotting techniques to ensure your projects are beautifully finished and durable. We’ll explore securing thread in sewing, finishing stitches sewing, knotting thread for hand sewing, and achieving both strong sewing knots and neat sewing knots, all while preventing thread unravelling sewing.
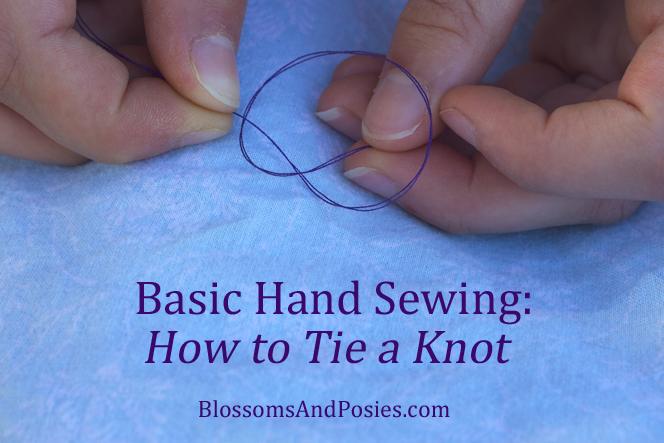
Image Source: blossomsandposies.com
The Importance of a Good Sewing Knot
A well-tied knot is the cornerstone of any successful sewing project, whether you’re hand-sewing a delicate hem or machine-sewing a sturdy seam. Its primary function is securing thread in sewing, ensuring that your stitches don’t come undone. Without a proper knot, your hard work can unravel, leaving your garment or craft looking unfinished and potentially falling apart. Learning how to tie a knot for sewing is a fundamental skill that every sewer, from beginner to advanced, should master. It’s about preventing thread unravelling sewing and ensuring the longevity and neatness of your finished piece.
Common Sewing Knot Types
There are several ways to create a knot to finish your sewing. The best choice often depends on the type of fabric you’re working with, the thread you’re using, and the desired outcome. Here are some of the most common sewing knot types:
1. The Simple Knot (or Overhand Knot)
This is the most basic knot and the one most people learn first. It’s quick and easy but can sometimes be bulky.
How to Tie a Simple Knot:
- Step 1: After completing your last stitch, bring the needle to the top of the fabric.
- Step 2: Loop the needle around the thread tail twice, creating two loops.
- Step 3: Pass the needle through both loops.
- Step 4: Gently pull the needle and thread away from the fabric. Hold the knot close to the fabric with your finger as you pull to keep it snug and prevent it from pulling through the material.
When to Use It:
Good for general sewing, quick fixes, and when bulk isn’t a major concern.
2. The Double Knot
This is simply a variation of the simple knot, made by looping the thread around the needle three times instead of two.
How to Tie a Double Knot:
- Step 1: Follow steps 1 and 2 of the simple knot, but loop the needle around the thread tail three times.
- Step 2: Pass the needle through all three loops.
- Step 3: Gently pull to tighten.
When to Use It:
Provides extra security for fabrics that are prone to slipping or for threads that are particularly smooth and slippery.
3. The Surgeon’s Knot
This knot offers a bit more security than the simple knot due to an extra wrap. It’s a good option for knotting thread for hand sewing when you need a reliable hold.
How to Tie a Surgeon’s Knot:
- Step 1: After your last stitch, bring the needle to the top of the fabric.
- Step 2: Wrap the needle around the thread tail twice (creating two loops).
- Step 3: Pass the needle through both loops.
- Step 4: Before pulling tight, wrap the needle around the thread tail again (this time only one loop).
- Step 5: Pass the needle through this new, single loop.
- Step 6: Gently pull both ends of the thread to tighten the knot snugly against the fabric.
When to Use It:
Excellent for securing strong seams, working with delicate fabrics where you want to minimize pulling, or when you need an extra secure finish.
4. The Loop Knot (or Loop-Around Knot)
This knot is useful when you’re sewing with a double strand of thread, as it creates a knot with the two ends together.
How to Tie a Loop Knot:
- Step 1: Thread your needle with a double strand of thread, leaving a tail of about 4-6 inches.
- Step 2: Align the two ends of the thread.
- Step 3: Tie a simple knot around both strands, about half an inch from the ends.
- Step 4: Pull the knot tight. This creates a loop at the end of your thread.
How to Use It for Securing:
After your last stitch, bring the needle up through the fabric. Instead of passing the needle through the loop, pass the needle and a small amount of fabric through the loop you created at the end of the thread. Pull snug.
When to Use It:
Great for securing the start and end of a seam, especially when using a double thread, as it uses the thread’s own strength.
5. The Backward Knot (or Knotting Backwards)
This is a variation of the simple knot that can be tied with just one hand.
How to Tie a Backward Knot:
- Step 1: Bring the needle to the top of the fabric.
- Step 2: Hold the needle in place with your thumb.
- Step 3: Wrap the thread around the needle tip twice, moving away from the fabric.
- Step 4: Slide the needle backward through the loops, keeping it close to the fabric surface.
- Step 5: Pull the needle away to tighten the knot.
When to Use It:
Useful when you need to tie a knot quickly or have limited mobility in one hand.
Advanced Sewing Knotting Techniques
Beyond the basic knots, there are different sewing knots and techniques that offer greater security and a more refined finish. These are particularly important for strong sewing knots and neat sewing knots.
1. The Tailor’s Knot (or Knotting the Tail)
This is a very common and effective way to tie a knot for hand sewing without leaving a visible knot on the outside of the fabric. It’s a key technique for finishing stitches sewing discreetly.
How to Tie a Tailor’s Knot:
- Step 1: After your last stitch, bring the needle up through the fabric, leaving a thread tail.
- Step 2: Hold the needle in place with your thumb.
- Step 3: Wrap the thread around the needle tip two or three times, moving the needle back and forth to create a small loop.
- Step 4: Slide the needle through this loop.
- Step 5: Gently pull the needle away from the fabric, holding the loop with your fingertip. This allows the knot to form within the stitch itself, hidden from view.
Why it’s Great:
This method is excellent for preventing thread unravelling sewing because the knot is embedded within the fabric fibers. It results in a neat sewing knot that doesn’t add bulk or show on the right side of the fabric.
2. The Weaver’s Knot
This knot is exceptionally strong and neat, making it ideal for situations where you need maximum security without any bulk. It’s one of the strong sewing knots.
How to Tie a Weaver’s Knot:
- Step 1: After your last stitch, bring the needle up through the fabric.
- Step 2: Insert the needle back down through the fabric, very close to where it emerged, but without making a full stitch. This creates a tiny loop.
- Step 3: Pass the needle through this small loop.
- Step 4: Before pulling tight, wrap the needle around the thread tail (the part coming from the spool) twice.
- Step 5: Slide the needle through the two loops you just created.
- Step 6: Gently pull the needle and the thread tail away from the fabric simultaneously. This draws the knot tight and compact.
When to Use It:
Perfect for delicate fabrics, fine threads, or any project where a nearly invisible and very strong knot is desired. It’s a sophisticated way of securing thread in sewing.
3. The Fence Knot
This knot is designed to be secure and lay flat, making it another excellent option for neat sewing knots.
How to Tie a Fence Knot:
- Step 1: Make your final stitch, bringing the needle to the top of the fabric.
- Step 2: Insert the needle back into the fabric about 1/8 inch away from where it emerged, but only go through one or two threads of the fabric.
- Step 3: Pass the needle through the loop created by this partial stitch.
- Step 4: Before pulling tight, wrap the needle around the thread tail three times.
- Step 5: Slide the needle through the three loops.
- Step 6: Gently pull the needle away from the fabric, holding the knot with your finger to keep it snug and flat.
When to Use It:
This knot is good for general hand sewing and provides a secure finish that lies relatively flat, contributing to a neat sewing knot.
Knotting Thread for Hand Sewing: Best Practices
When it comes to knotting thread for hand sewing, a few key practices can make a big difference in the quality and appearance of your work.
1. Thread the Needle Correctly
- Don’t use too much thread: Long lengths of thread are more likely to tangle and break. Aim for a length that’s comfortable to work with, usually between 18 and 30 inches.
- Moisten the end: Lightly moisten the end of the thread with water or saliva to help it stay together and pass through the needle’s eye more easily.
- Use a needle threader: If you struggle to thread your needle, a needle threader can be a lifesaver.
2. Selecting the Right Knot for the Fabric and Thread
- Delicate fabrics (silk, chiffon): Use knots that lie flat and are small to avoid damaging the fibers or showing through. The Weaver’s Knot or a well-tied Tailor’s Knot are excellent choices.
- Thicker fabrics (denim, canvas): You can get away with slightly larger knots or even a double knot for extra security, as the fabric can hide the bulk.
- Slippery threads (rayon, silk): These threads are more prone to slipping. Use knots with extra loops, like the Surgeon’s Knot or Weaver’s Knot, and ensure they are pulled very snug.
- Cotton threads: Cotton threads generally hold knots well and are less prone to slipping, so most knot types will work effectively.
3. Keeping Knots Neat and Compact
- Use your fingertip: As you pull the thread to form the knot, use your index finger and thumb to guide the thread and keep the knot tight and compact.
- Avoid pulling too hard: While you want a secure knot, yanking too hard can break the thread or distort the fabric.
- Trim excess thread: Once the knot is secure, trim the excess thread tail close to the knot, but not so close that you risk cutting the knot itself.
4. Securing the Beginning of Your Stitching
When starting a seam, you also need to secure your thread. Here are a few ways:
- The Double Knot (at the start): Tie a double knot on the very end of your thread before you start stitching. Bring the needle up from the wrong side of the fabric, leaving the knot on the outside. Then, make your first stitch, catching the knot securely. After a few stitches, you can trim the knot close to the fabric.
- The Loop Method (for double thread): As mentioned in the Loop Knot section, thread your needle with a double strand and tie a knot at the very ends. This creates a built-in knot that secures the thread as you begin.
- Stitching Back and Forth: Instead of a knot, you can make a few small stitches back and forth in the same spot on the wrong side of the fabric before starting your main seam. This can be a very neat way to secure the thread, especially on visible areas.
Knotting for Machine Sewing
While most sewing machines create their own knots when you reverse at the beginning and end of a seam, knowing how to tie a knot manually can be useful for specific situations, such as:
- Hand-finishing machine-sewn seams: If a machine seam needs a little extra reinforcement or if you’re sewing a very fine garment where machine knots might be too bulky.
- Repairing a broken thread mid-seam: If your thread breaks during machine sewing, you might need to tie a knot to continue.
How to secure thread for machine sewing (if needed manually):
- Start: At the beginning of your seam, sew forward for a few stitches, then backstitch (reverse) over those stitches. This effectively locks the thread without a visible knot.
- End: At the end of your seam, sew forward for a few stitches, then backstitch over them.
If you need to tie a manual knot after machine sewing, use one of the neat sewing knots like the Tailor’s Knot or Weaver’s Knot to keep it discreet.
Preventing Thread Unravelling Sewing: Advanced Tips
Beyond just tying a knot, several factors contribute to preventing thread unravelling sewing and ensuring a professional finish.
1. Thread Quality
- Use good quality thread: Cheap or old thread is more likely to fray, snap, and create weak knots. Invest in reputable brands.
- Match thread to fabric: Consider the weight and fiber content of your thread in relation to your fabric.
2. Needle Choice
- Sharp needles: A dull needle can snag and damage fabric, leading to fraying and making it harder to create neat knots.
- Correct needle size: Using a needle that is too large for the fabric or thread can create larger holes and weaken the fabric, making unravelling more likely.
3. Stitch Tension
- Proper tension: Whether hand or machine sewing, maintaining consistent stitch tension is crucial. If the tension is too loose, stitches can easily pull out. If too tight, it can pucker the fabric.
4. Finishing Raw Edges
- Seam finishes: Techniques like zig-zag stitching, serging, or French seams on raw edges of fabric help prevent fraying and contribute to overall project durability. While not directly a knotting technique, it’s part of preventing thread unravelling sewing in a broader sense.
Comparing Sewing Knots: A Quick Guide
Here’s a table summarizing some key aspects of different sewing knots:
| Knot Type | Ease of Tying | Security | Bulkiness | Visibility | Best For |
|---|---|---|---|---|---|
| Simple Knot | Very Easy | Moderate | Moderate | Visible | General sewing, quick fixes |
| Double Knot | Easy | Good | Moderate | Visible | Slippery threads, extra security |
| Surgeon’s Knot | Easy | Very Good | Moderate | Visible | Strong seams, delicate fabrics needing secure finish |
| Loop Knot | Easy | Good | Low | Low | Starting/ending seams with double thread |
| Tailor’s Knot | Moderate | Good | Very Low | Very Low | Discreet finishes, fine fabrics |
| Weaver’s Knot | Moderate | Excellent | Very Low | Very Low | Fine work, maximum security, invisible knots |
| Fence Knot | Moderate | Good | Low | Low | General hand sewing, flat finish |
Frequently Asked Questions (FAQ)
Q1: What is the best knot for invisible sewing?
The Tailor’s Knot and the Weaver’s Knot are generally considered the best for invisible sewing. They are tied close to the fabric surface and are pulled into the stitch itself, making them very difficult to see from the outside.
Q2: Can I use a knot on every stitch when hand sewing?
No, it’s usually only necessary to knot the thread at the beginning and end of a seam or at the end of a long run of stitches if the thread is prone to tangling. Tying a knot after every single stitch would create a very bulky and messy finish. Focus on securing thread in sewing at key points.
Q3: How do I prevent my thread from breaking when I knot it?
Ensure you are using good quality thread and not pulling your knots with excessive force. If you’re using a slippery thread, consider a knot with extra wraps, like the Surgeon’s Knot. Also, avoid knotting too close to the needle when pulling it through the fabric, as this can weaken the thread.
Q4: What if my knot keeps slipping through the fabric?
This usually happens with fine fabrics or very slippery threads. Try using a knot with more loops, like the Surgeon’s Knot or Weaver’s Knot. Alternatively, you can try a knot that anchors within the fabric itself, like the Tailor’s Knot or a knot tied very close to the fabric surface. Using a slightly thicker thread or a smaller needle can also help.
Q5: Are there different sewing knots for different projects?
Absolutely. The choice of sewing knot types depends on the fabric weight, fiber type, the project’s requirements for durability and appearance, and whether you are hand sewing or machine sewing. Learning different sewing knots allows you to choose the most appropriate for each task.
Mastering how to tie a knot for sewing is a simple yet vital skill that elevates your sewing from functional to beautiful. By practicing these sewing knotting techniques, you’ll gain confidence in your ability to create durable, strong sewing knots and neat sewing knots, ensuring your projects look polished and last longer, effectively preventing thread unravelling sewing. Happy sewing!