
Image Source: i.ytimg.com
Guide: How To Make Embroidered Patches With Embroidery Machine
Making embroidered patches with an embroidery machine is a fun and rewarding craft. Can I use my regular home embroidery machine for patches? Yes, absolutely! Most standard home embroidery machines are perfect for creating patches. What materials do I need? You’ll need basic embroidery supplies like thread, needles, fabric, and stabilizer, plus specific items for patches like special backing and sharp scissors. Knowing embroidery machine patch materials and techniques is key to great results. This guide will walk you through each step, making custom embroidered patch making easy and enjoyable.
Why Patches Are Fun to Make
Patches are little pieces of art you can put on jackets, bags, hats, or even frame! Making them yourself means you can create any design you can imagine. It’s a great way to personalize items, make gifts, or even start a small business. With an embroidery machine, you can make many patches that look the same, which is great for teams or clubs.
Gathering Your Patch Items
Before you start sewing, you need the right supplies. Having everything ready makes the process smoother. These embroidery machine patch materials are generally easy to find at craft stores or online.
Threads and Fabrics
- Thread: Use good quality polyester or rayon embroidery thread. Polyester is strong and colorfast, meaning the colors won’t fade easily, even with washing. Rayon is shiny and vibrant. Choose thread colors that match your design.
- Fabric for the Patch Base: You need a sturdy fabric that won’t stretch too much. Twill fabric is a popular choice for patches. Felt or even a heavy cotton can work too. Choose a color that works with your design, or one that matches your border color.
- Patch Blanks: You can also buy
patch blanks for embroidery. These are pre-cut fabric pieces, sometimes already bonded with backing, ready for stitching. Using blanks saves the step of cutting the base fabric yourself. They come in common shapes like circles, squares, and ovals.
Needles
Use a sharp embroidery needle in a size suitable for your thread and fabric. A size 75/11 or 90/14 is common for patch making. Sharp needles pierce the fabric cleanly, which is important with dense stitch-outs like patches.
Stabilizer Choices
Choosing the best stabilizer for patches is very important. Patches have a lot of stitches packed into a small area. This can make the fabric pucker or stretch. Stabilizer supports the fabric during stitching. For patches, you need a strong, stable base.
Here are types and why they work:
- Cutaway Stabilizer: This is often the
best stabilizer for patches. It’s strong and stays with the fabric permanently. Use a heavy-weight cutaway. It gives excellent support, stopping the patch fabric from distorting. You trim away the excess stabilizer after sewing. - Heavy Tearaway Stabilizer: A heavy tearaway can also work, especially if you want a slightly less stiff patch than cutaway provides. However, be careful when tearing it away not to distort the stitches. Sometimes, a heavy tearaway works well as a topping stabilizer on bumpy fabrics like fleece, but cutaway is usually preferred under the fabric for patches.
- Heat-Away or Water-Soluble Stabilizer: These types dissolve with heat or water. They can be good for patch bases if you want a flexible patch, but they offer less support during stitching than cutaway. They are great as topping stabilizers to keep stitches from sinking into fabric piles.
For most patches, a heavy cutaway stabilizer hooped tightly with your patch fabric will give the best results.
Patch Backing Options
Once your patch is stitched and cut, you need a way to attach it. Iron-on patch backing is the most popular choice for many patch makers.
- Iron-On Backing: This is a heat-activated adhesive film or sheet. You apply it to the back of the finished patch with heat (an iron or heat press). It turns the patch into a sticker that can be ironed onto fabric items.
- Sew-On: No special backing needed. The patch is simply sewn onto the item. This is the most durable method.
- Velcro: You can sew the “hook” or “loop” side of velcro onto the back of the patch. The other side is attached to the item. This lets you easily attach and remove the patch.
- Pin Backs: For patches meant to be worn like a pin, you can attach a pin back to the back.
We will focus mainly on adding iron-on patch backing later, as it’s a common method.
Tools for Finishing
- Sharp Scissors: You will need very sharp scissors to cut neatly around your finished patch. Small, sharp embroidery snips are helpful for trimming threads.
- Detail Scissors or Hot Knife: For a super clean edge close to the border stitches, specialized detail scissors or even a hot knife (used carefully on synthetic fabrics like twill) can give a professional look.
- Iron or Heat Press: If you are using
iron-on patch backing, you will need an iron or aheat press for patchesto apply the backing to the patch and later to apply the patch to an item. Aheat press for patchesgives more even heat and pressure than a home iron.
Preparing Your Design for Stitching
This is where the magic of embroidery digitizing for patches happens. Your picture or logo needs to be turned into a set of commands (stitches) that your embroidery machine can understand.
What Is Digitizing?
Digitizing is the process of converting artwork (like a JPEG or PNG image) into a stitch file (like DST, PES, JEF, etc.) that tells the embroidery machine exactly where to put each stitch. It’s not just converting a picture; it’s telling the machine the type of stitches, the order of colors, the density of stitches, and much more.
Why Digitizing Matters for Patches
Patches are often small but have dense stitching. Good embroidery digitizing for patches is crucial for several reasons:
- Stitch Density: Patches need high stitch density so the fabric base doesn’t show through. Proper digitizing ensures the stitches are close together.
- Push and Pull Compensation: Embroidery stitches pull and push the fabric. Digitizers add compensation to the design to counteract this, stopping the patch from looking distorted or having gaps.
- Stitch Angles and Underlay: Correct stitch angles and underlay stitches provide a stable base and smooth out the fabric, making the final patch look clean and professional.
- Border Creation: The digitizing process is where the outer border of the patch is created. This is typically a
satin stitch border patch. The digitizer plans this last step to sew neatly around the design.
Getting Your Design Ready
You have a few options for getting your design digitized:
- Use Pre-Digitized Designs: You can buy ready-made patch designs from online stores. These are already set up for patch making.
- Digitize Yourself: If you have embroidery digitizing software, you can learn to digitize your own artwork. This takes practice, especially for patches which need specific settings.
- Hire a Digitizer: Many services specialize in
embroidery digitizing for patches. You send them your logo or design, and they create the stitch file for you, optimized for patch making. This is often the best option for complex logos or if you are new to digitizing.
Make sure the final design file is in a format your embroidery machine can read.
Adding a Border
A classic patch has a raised border around the edge. This is almost always done with a satin stitch. A satin stitch border patch is created in the digitizing stage. The design file will include this border as the final sewing step. It sews last, covering the raw edge of the patch fabric base. The stitch density and width of the satin border are important for a clean, solid edge when you cut the patch out.
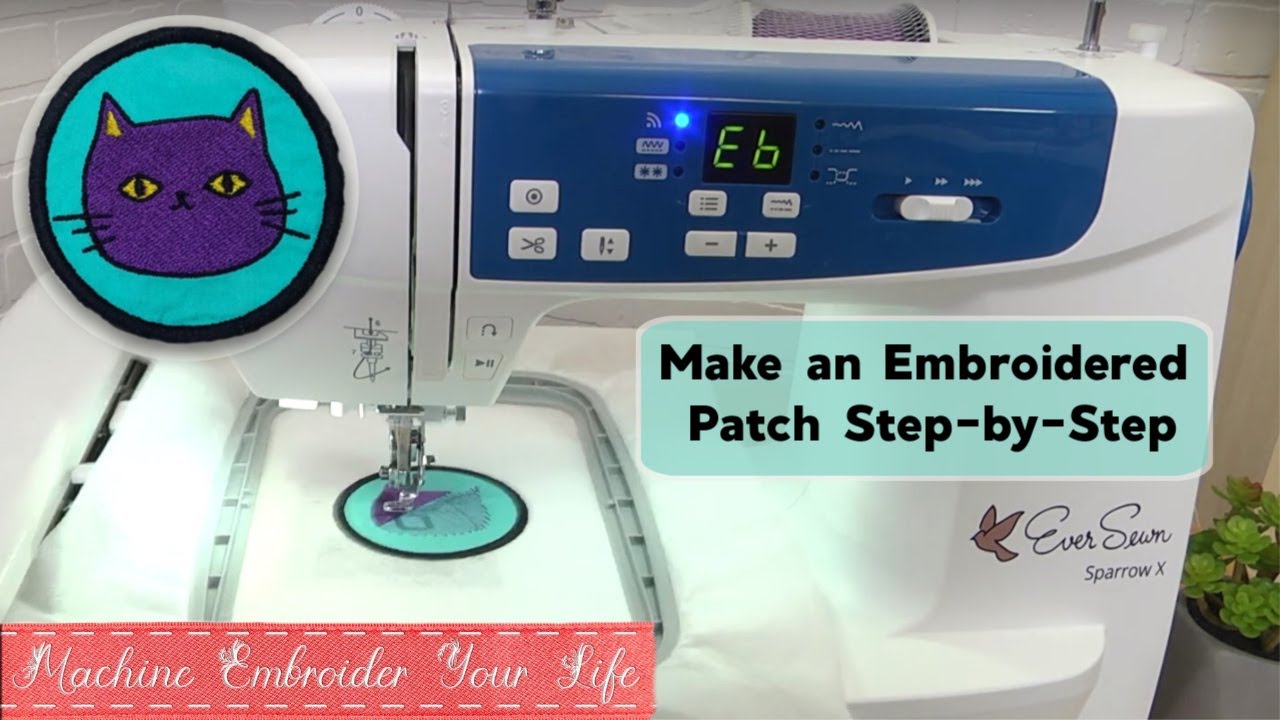
Sewing Your Patch (The Machine Work)
Now it’s time to put the design into stitches! This part uses your embroidery machine.
Setting Up Your Machine
- Choose the Right Needle: Put the correct size embroidery needle into your machine.
- Thread Your Machine: Use your first color of embroidery thread. You’ll change thread colors as the design calls for it. Load a bobbin with good quality bobbin thread.
- Load the Design: Transfer your digitized patch design file to your machine (usually via USB or direct connection).
- Prepare Your Hoop: Choose a hoop that is large enough for your patch design, plus some extra space around it.
Hooping Your Fabric and Stabilizer
This step is crucial for a good result.
- Cut a piece of your patch base fabric and a piece of your
best stabilizer for patches(like heavy cutaway). Make them a little bigger than your hoop size. - Layer the fabric on top of the stabilizer.
- Place the layers into your embroidery hoop. Make sure both the fabric and stabilizer are smooth and tight, like a drum. There should be no wrinkles. Hoop them together securely.
- Center the hooped fabric and stabilizer in your machine.
Running the Design
Now, follow the steps in your patch design file. The machine will sew the different colors and parts of the design in order.
- First Stitches: The first stitches are usually an outline or placement line for the patch shape. If you are using a ready-made patch blank, these stitches might not be needed or they help you align the blank.
- Inner Design: The machine will sew the main parts of your logo or picture. Watch for color changes as the design progresses.
- The Border: The last part sewn will be the
satin stitch border patch. This dense stitch will create the raised edge around your design. It sews on top of the fabric and stabilizer, defining the patch shape.
You can often sew multiple patches in one hoop if your machine and hoop size allow. This saves time.
Using the Applique Method
Some patch designs use the applique patch machine embroidery method. This means part of the design is a piece of fabric cut to shape and sewn down, rather than just stitches filling an area.
Here’s how applique patch machine embroidery for patches works:
- The machine sews a placement line on the stabilizer (or patch blank). This shows where the applique fabric goes.
- You stop the machine, place your applique fabric over the placement line, making sure it covers it completely.
- The machine sews a tack-down stitch. This holds the applique fabric in place.
- You stop the machine again and carefully trim the extra applique fabric away, close to the tack-down stitches.
- The machine then sews a finishing stitch (often a satin stitch) over the raw edge of the trimmed applique fabric to make it neat and secure.
If your patch design uses applique, follow the machine’s stops to add and trim the fabric pieces at the right times.
Creating the Border Stitch
As mentioned, the final step in sewing is usually the satin stitch border patch. The machine lays down a series of very close, parallel stitches that wrap around the edge of where the patch will be cut.
- The width of this satin stitch can vary, but it’s usually wide enough (3mm to 7mm) to create a clear, raised edge and provide a seam allowance for
cutting embroidered patches. - The density must be high enough so you cannot see the fabric underneath.
- The digitizing ensures the stitch angles are correct for a smooth, round look.
This border stitch is the most defining feature of a patch. It’s important that your machine tension is set correctly so the stitches look good on both the top and the back.
Finishing Your Patch Pieces
Once the sewing is done, your patches are still in the hoop with the stabilizer and fabric. Now you make them into standalone patches.
Taking Off the Hoop
Remove the hoop from your machine. Carefully take the embroidered piece out of the hoop.
Removing Stabilizer
This step depends on the type of stabilizer you used:
- Cutaway Stabilizer: Since cutaway stays with the patch, you just need to trim the excess stabilizer away from the back of the patch, outside of the border stitches. Leave a small margin (maybe 1/8 to 1/4 inch) of stabilizer around the edge of the border. This extra bit of stabilizer inside the satin border adds stiffness and body to the patch.
- Tearaway Stabilizer: If you used tearaway, carefully tear it away from the back of the stitching. Do this gently, supporting the stitches as you tear, to avoid distorting the patch.
- Water-Soluble or Heat-Away Stabilizer: Follow the product instructions to remove these. This might involve rinsing in water or applying heat.
You may also have topping stabilizer on the front. Remove this by tearing or dissolving as needed.
Carefully Cutting the Shape
This is perhaps the trickiest step for a perfect patch. You need to cut neatly around the satin stitch border. This is cutting embroidered patches.
- Use very sharp scissors. Detail scissors with small, fine blades work well.
- Cut close to the outer edge of the satin stitch border. Try to cut evenly all the way around. Cutting too far away leaves a fabric edge; cutting too close might snip the border stitches.
- If using twill or other synthetic fabrics, some people use a hot knife. This tool cuts and seals the fabric edge at the same time, preventing fraying. This requires practice and caution.
- For extra security against fraying, you can carefully apply a small amount of fabric sealant (like Fray Check) to the cut edge on the back of the patch after trimming, making sure not to get it on the front or the border stitches.
Your goal is a clean, crisp edge right next to the satin border.
Adding the Patch Backing
Now your patch is sewn and cut. It’s ready for its backing. We’ll focus on iron-on patch backing.
How Iron-On Backing Works
Iron-on patch backing has a layer of heat-activated glue. When you apply heat and pressure, the glue melts and bonds to the fabric of your patch. Once cooled, it forms a solid adhesive layer on the back. When you later iron the patch onto another fabric item, this glue layer melts again and bonds the patch to the item.
Applying with Heat
You can use a home iron or a heat press for patches to apply iron-on backing to your finished patch. A heat press for patches gives more consistent heat and pressure, often leading to better results.
Steps to Apply Iron-On Backing:
- Cut the Backing: Cut a piece of iron-on backing slightly smaller than your finished patch. You don’t want the adhesive sticking out beyond the edges. Some
iron-on patch backingcomes on a paper liner; you cut the backing with the liner attached. - Place the Backing: Place the adhesive side of the backing onto the back of your embroidered patch. If it has a paper liner, the paper side should be up.
- Apply Heat and Pressure:
- Using a Heat Press: Set your
heat press for patchesto the temperature recommended by the backing manufacturer (often around 280-320°F or 138-160°C). Place the patch with the backing on the heat press platen. You might put a thin cover sheet over it. Press for the recommended time (usually 15-20 seconds) with medium pressure. - Using a Home Iron: Set your iron to a medium-high heat setting (usually wool or cotton, no steam). Place the patch backing-side up on a heat-safe surface (like an ironing board). Place a pressing cloth over the patch. Press firmly down on the patch with the hot iron for 20-30 seconds, lifting and pressing down again to cover the whole patch area. Avoid sliding the iron.
- Using a Heat Press: Set your
- Cool Down: Let the patch cool completely. Once cool, the adhesive should be firmly bonded to the back of the patch. If it had a paper liner, you can peel it off now.
Your patch now has an iron-on backing and is ready to be applied to clothing or other items using heat again.
Other Backing Types
- Sew-On: No special steps needed after
cutting embroidered patches. - Velcro: Sew the velcro piece onto the back of the patch using your sewing machine or by hand, staying close to the edge of the velcro.
- Pin Backs: These are usually glued onto a small piece of felt or fabric first, then that piece is glued or sewn onto the back of the patch.
Ideas for Custom Patches
The possibilities for custom embroidered patch making are endless! Here are some ideas:
- Names or Initials: Personalize jackets or bags.
- Favorite Quotes or Sayings: Express yourself.
- Cartoon Characters or Logos: Make patches of things you love (make sure you have rights if selling!).
- Shapes: Create fun shaped patches like stars, animals, or food items.
- Sports Teams or Clubs: Design patches for local groups.
- Military or Service Style Patches: Create classic name tapes or unit patches.
- Artwork: Turn simple line art or illustrations into patches.
Custom embroidered patch making lets you bring any design to life in thread.
Solving Common Patch Problems
Even with careful work, you might run into issues. Here’s how to fix some common ones:
- Puckering: The fabric bunches up around the stitching. This usually means your stabilizer wasn’t strong enough or wasn’t hooped tightly enough. Use a heavier stabilizer (like heavy cutaway) and make sure it’s taut in the hoop. Your digitizing might also need more push/pull compensation.
- Skipped Stitches: The machine misses stitches. Check your needle; it might be bent or dull. Make sure it’s inserted correctly. Re-thread your machine. Check your tension settings.
- Poor Border: The
satin stitch border patchlooks uneven, too thin, or you can see fabric showing through. This is often a digitizing issue (density or width is wrong) or a tension problem. Ensure the bobbin tension is balanced with the top tension. - Fraying Edges After Cutting: The fabric ravels after
cutting embroidered patches. Use sharper scissors. Try a hot knife if the fabric is suitable (synthetics). Apply Fray Check to the back edge. - Iron-On Backing Not Sticking: You didn’t use enough heat, pressure, or time. Make sure your iron or
heat press for patchesis hot enough and you are applying firm, even pressure for the recommended time. Let it cool completely before checking the bond.
Practice makes perfect! Don’t be discouraged by early mistakes.
Frequently Asked Questions (FAQ)
- How do I make my patch stiff? Use a heavy cutaway stabilizer hooped tightly with your fabric base. Leaving a small margin of stabilizer inside the cut edge of the patch also adds stiffness. Iron-on backing adds a little stiffness too.
- What fabric is best for patches? Twill is very popular because it’s durable and holds stitches well. Felt can also be used for simpler patches.
- Can I wash a patch I make? Yes, if you use colorfast threads (like polyester) and a durable backing (like sew-on). If using iron-on backing, washing in cold water and air drying is best to help the adhesive last longer. High heat in a dryer can weaken the bond.
- Do I need special scissors for cutting patches? While not strictly required, very sharp, small detail scissors make it much easier to cut neatly close to the satin border.
- How do I put an iron-on patch on a jacket? Place the patch where you want it. Cover with a thin pressing cloth. Use a hot iron or
heat press for patcheswith firm pressure for 20-30 seconds (check backing instructions). Let it cool completely. If edges lift, press again. For extra security, you can also sew down the edges.
Finishing Up Your Patch Journey
You now have the steps to make your own embroidered patches! From picking your embroidery machine patch materials to embroidery digitizing for patches, sewing the design with a perfect satin stitch border patch, cutting embroidered patches neatly, and adding iron-on patch backing, you can create custom pieces. Whether you use patch blanks for embroidery or cut your own fabric, the process is rewarding. Remember that good stabilizer, careful cutting embroidered patches, and correct application of iron-on patch backing (perhaps with a heat press for patches) are key to professional-looking results. Enjoy the world of custom embroidered patch making!