
Image Source: thriftdiving.com
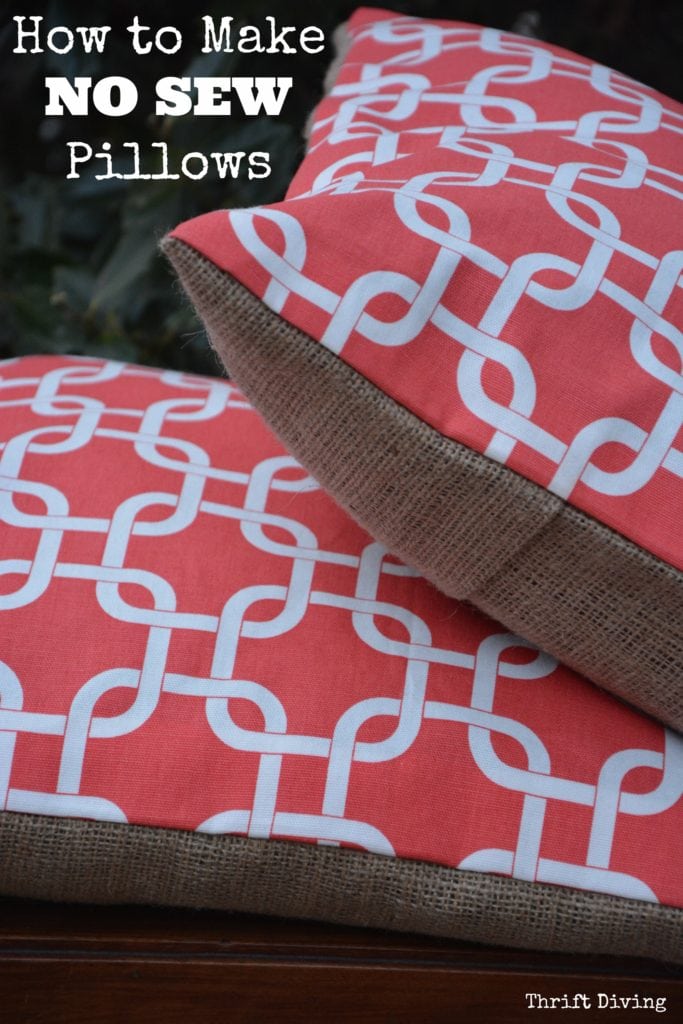
How To Make Pillows Without A Sewing Machine: No-Sew Craft Ideas
Can you make pillows without a sewing machine? Absolutely! Crafting pillows without a sewing machine is not only possible but also incredibly fun and rewarding. This guide is packed with easy no-sew pillow projects, showing you how to create beautiful no-sew pillows for your home using simple techniques and readily available materials. From no-sew cushion making to stylish no-sew pillow covers, you’ll discover the magic of crafting pillows without sewing.
The charm of no-sew projects lies in their accessibility. Whether you’re a seasoned crafter or a complete beginner, these methods open up a world of creative possibilities. Forget the hassle of threading needles or wrestling with bulky machines; we’re diving into techniques that rely on clever folding, strong adhesives, and simple ties. Get ready to transform plain fabric into cozy, stylish cushions that add a personal touch to any room.
The Essential Toolkit for No-Sew Pillow Making
Before we jump into the fun, let’s gather our supplies. Having the right tools makes all the difference in creating professional-looking DIY no-sew pillows.
Key Materials You’ll Need:
- Fabric: Choose fabrics that are easy to work with. Cotton, felt, fleece, and pre-made pillowcases are excellent choices. Consider the texture and pattern to match your decor.
- Pillow Inserts or Stuffing: You can buy pre-made pillow inserts or use no-sew pillow stuffing like polyester fiberfill, cotton batting, or even old fabric scraps.
- Fabric Glue or Adhesive: This is your primary tool for no-sew fabric adhesion. Look for a permanent fabric glue that dries clear and remains flexible. Fabric tape is another excellent alternative for a quick and clean finish.
- Scissors: Sharp fabric scissors are crucial for clean cuts.
- Ruler or Measuring Tape: For accurate measurements.
- Iron and Ironing Board (Optional but Recommended): For pressing seams created with fabric glue, which helps create a stronger bond.
- Craft Knife or Rotary Cutter (Optional): For more precise cutting.
- Fabric Markers or Paint (Optional): For decorating your pillows.
Method 1: The Simple No-Sew Pillow Cover (Using Fabric Glue)
This is one of the easiest ways to create no-sew pillow covers. It’s perfect for updating existing pillows or creating custom covers from scratch.
Materials:
- Two pieces of fabric (sized to fit your pillow insert with a 1-inch overlap on each side)
- Fabric glue or fabric tape
- Scissors
- Measuring tape
- Iron (optional)
- Pillow insert
Steps:
- Measure and Cut Your Fabric: Lay your pillow insert on your chosen fabric. Cut two pieces of fabric that are 1 inch larger than your insert on all sides. For example, if your pillow insert is 16×16 inches, cut two fabric pieces at 18×18 inches. This extra inch allows for the seam.
- Prepare the Edges: Take one piece of fabric. Fold over one of the 18-inch edges by about 1/2 inch and press with an iron (if using). This creates a clean hem. Apply a line of fabric glue along the folded edge. Fold over another 1/2 inch to create a double-folded hem. Press firmly. Repeat this for one edge of the second fabric piece.
- Tip: If using fabric tape, cut a piece of tape slightly longer than the edge, peel off the backing, and stick it to the wrong side of the fabric along the edge. Fold the fabric over the tape and press.
- Assemble the Pillow Cover: Lay one fabric piece right side up. Place the second fabric piece on top, right side down. Align the raw edges. The two hemmed edges should overlap in the middle, creating an opening to insert the pillow.
- Glue the Sides: Apply a generous line of fabric glue along three of the raw edges. Make sure the glue is about 1/2 inch from the edge to create a strong seam. Press the edges together firmly.
- Tip for a Stronger Bond: If your fabric glue allows, you can gently press the glued seam with a warm iron. Always check the glue manufacturer’s instructions for heat application.
- Create the Final Hem: Now, focus on the opening where the two hemmed edges overlap. Fold the raw edge of the bottom fabric piece over the hemmed edge of the top fabric piece by about 1/2 inch. Apply fabric glue along this folded edge. Fold over another 1/2 inch to create a double hem. Press firmly to secure. This creates a neat closure.
- Let it Dry: Allow the fabric glue to dry completely according to the manufacturer’s instructions. This might take several hours or even overnight.
- Insert Your Pillow: Once dry, turn the pillow cover right side out. Carefully insert your pillow form through the opening. Fluff and arrange. You’ve just made a fabric glue pillow!
Method 2: The Simple No-Sew Pillow (Using Fabric Tape)
Fabric tape is a fantastic alternative to glue, offering an instant hold and less mess. This method is incredibly quick and perfect for beginners.
Materials:
- Two pieces of fabric (sized to fit your pillow insert with a 1-inch overlap)
- Strong fabric tape (ensure it’s designed for fabric adhesion)
- Scissors
- Measuring tape
- Pillow insert
Steps:
- Measure and Cut Fabric: As in the previous method, cut two fabric pieces about 1 inch larger than your pillow insert on all sides.
- Prepare the Opening: Take one fabric piece. Fold one edge over by 1 inch, and press. Secure this fold with fabric tape. Apply the tape along the folded edge, press down firmly, and peel off the backing. Repeat this on one edge of the second fabric piece.
- Align and Tape: Place one fabric piece right side up. Lay the second fabric piece on top, right side down. The folded, taped edges should overlap in the center.
- Tape the Sides: Apply fabric tape along the three raw edges, about 1/2 inch from the edge. Press down firmly on the tape to secure the fabric layers.
- Secure the Opening: Carefully fold the raw edge of the bottom fabric piece over the taped edge of the top fabric piece by about 1 inch. Apply fabric tape along this folded edge and press firmly.
- Insert Pillow: Turn the cover right side out and insert your pillow. This is a super-fast way to create easy no-sew pillow projects.
Method 3: Tie Pillows – A Fun and Fluffy Approach
Tie pillows are a wonderfully whimsical way to create decorative cushions. They involve cutting fabric into strips and tying them to create a plush, textured surface.
Materials:
- One large piece of fabric for the pillow front (e.g., 18×18 inches for a finished 16×16 inch pillow)
- One piece of fabric for the pillow back (or another piece for the front if you want a double-sided tie pillow)
- Fabric scissors or rotary cutter
- Pillow stuffing
- Optional: Ruler, fabric marker
Steps:
- Prepare Your Base Fabric: Cut two pieces of fabric to your desired finished pillow size (e.g., 16×16 inches). If you want a slight loft, you can add an extra inch to each dimension before cutting your “tie strips” later.
- Cut Fabric Strips: For the “tie” effect, you need to cut a lot of fabric strips. The number depends on how dense you want the ties. For an 18×18 inch pillow front, you might need around 75-100 strips. Cut strips about 1-1.5 inches wide and 6-8 inches long. These strips will be the “ties” that you knot onto your base fabric.
- Tip: Using a rotary cutter and a self-healing mat makes cutting many strips much easier and faster.
- Mark Your Grid (Optional but helpful): On the wrong side of your pillow front fabric, lightly mark a grid with a fabric marker or chalk. This helps you place your tie strips evenly. Space them about 1-1.5 inches apart.
- Start Tying: Take a fabric strip. Fold it in half to find the center. Place the center of the strip onto the marked spot on your fabric. Thread the two ends of the strip through the loop you just created (like tying a knot). Pull the ends tightly.
- Continue Tying: Work your way across the fabric, tying strips in rows and columns until the entire front piece is covered with knots. Try to keep the knots snug and the strips standing upright.
- Assemble the Pillow: Once your front is completely covered, lay the tied front piece right side up. Place the back fabric piece on top, right side down. Align the edges.
- Secure the Opening: You need to leave an opening to add your stuffing. Apply fabric glue or tape along three sides of the pillow, about 1/2 inch from the edge, to secure the front and back pieces together. On the fourth side, leave about a 6-8 inch gap.
- Tip: Ensure the glue or tape doesn’t get onto the tied strips themselves, as it can mat them down.
- Stuff Your Pillow: Turn the pillow right side out. Gently push your no-sew pillow stuffing into the opening. Distribute it evenly for a plump look.
- Close the Opening: Once the pillow is stuffed to your liking, carefully fold the raw edges of the opening inward by about 1/2 inch. Apply fabric glue or tape along the folded edges and press them together to close the pillow. Let it dry completely.
- Note: This method requires patience, but the result is a wonderfully textured and unique pillow.
Method 4: No-Sew Pillow Covers with Fabric Paint or Markers
This method focuses on personalizing plain fabric before you assemble your pillow. It’s a great way to add artistic flair.
Materials:
- Two pieces of fabric (sized for your pillow)
- Fabric glue or tape
- Fabric paint or fabric markers
- Cardboard or plastic sheet (to place inside the fabric to prevent bleed-through)
- Scissors
- Measuring tape
- Pillow insert
Steps:
- Prepare Your Canvas: Cut your two fabric pieces to the desired size. Place a piece of cardboard or plastic inside one fabric piece to prevent the paint or markers from bleeding through to the other side.
- Decorate: Use fabric paint or markers to create your design. You can freehand draw, use stencils, or stamp patterns. Let your creativity flow!
- Dry and Set: Allow the paint or markers to dry completely. Many fabric paints require heat setting with an iron after drying. Follow the product instructions carefully.
- Assemble the Pillow: Once your fabric is decorated and set, assemble the pillow cover using either the fabric glue or fabric tape method described in Method 1 or Method 2. Remember to leave an opening to insert the pillow.
- Insert and Enjoy: Turn the cover right side out, insert your pillow, and admire your personalized DIY no-sew pillows.
Method 5: The Felt Pillow Magic
Felt is a crafter’s dream because it doesn’t fray, making crafting pillows without sewing a breeze. It’s also easy to cut and glue.
Materials:
- Felt fabric (two pieces the size of your pillow insert, plus seam allowance)
- Fabric glue or strong craft glue (felt glue works well)
- Scissors
- Measuring tape
- Pillow insert or felt scraps for stuffing
Steps:
- Cut Your Felt: Cut two pieces of felt to your desired pillow size plus about 1 inch on all sides for the seam allowance.
- Decorate (Optional): You can cut shapes from different colored felt and glue them onto your pillow front for a layered, appliqué look.
- Assemble with Glue: Lay one felt piece right side up. Apply a generous bead of fabric glue along three of the edges, about 1/2 inch from the border. Place the second felt piece on top, right side down, aligning the edges. Press firmly.
- Create the Opening: On the fourth side, fold the edge of the bottom felt piece over by about 1/2 inch, apply glue, and fold again to create a hem. Press firmly. Alternatively, leave this side open for stuffing.
- Stuff and Close: If you left an opening, turn the felt pillow right side out. Stuff it with your pillow insert or felt scraps. Once stuffed, carefully fold the opening edges inward and glue them shut. Let the glue dry.
Method 6: The No-Sew Cushion Making with Fabric Adhesion Tape
Fabric adhesion tape is a robust solution for creating durable no-sew pillows. It’s like a strong double-sided tape specifically for fabric.
Materials:
- Two fabric pieces (sized for your pillow with seam allowance)
- Fabric adhesion tape
- Scissors
- Measuring tape
- Iron (for some tapes)
- Pillow insert
Steps:
- Cut Fabric: Prepare your fabric pieces as usual.
- Apply Tape to Edges: Take one fabric piece. Turn it wrong side up. Apply strips of fabric adhesion tape along three of the edges, about 1/2 inch from the border.
- Prepare the Opening: On the fourth edge, fold the fabric over by 1 inch. Apply tape along this fold. Fold again by 1 inch to create a double hem and press firmly.
- Attach Second Fabric Piece: Peel the backing off the tape on the three sides. Place the second fabric piece on top, right side down, aligning the edges. Press down firmly to ensure good no-sew fabric adhesion.
- Secure the Opening: Now, peel the backing off the tape on the hemmed edge of the first fabric piece. Fold the raw edge of the second fabric piece over the hemmed edge of the first. Press firmly to secure the opening.
- Insert Pillow: Turn right side out and insert your pillow.
Tips for Success in No-Sew Pillow Crafting
- Fabric Choice Matters: Lighter-weight fabrics are generally easier to work with for no-sew projects. Fleece and felt are particularly forgiving.
- Test Your Adhesive: Before you start, test your fabric glue or tape on a scrap piece of your fabric to ensure it adheres well and doesn’t discolor the material.
- Clean Cuts: Use sharp scissors for clean, straight edges. This makes a big difference in the final appearance.
- Even Application: Apply glue or tape evenly to ensure a strong, seamless bond.
- Patience with Drying: If you’re using fabric glue, give it ample time to dry completely. Rushing this step can lead to seams coming apart.
- Double Check Measurements: Accuracy in measuring and cutting is key to avoiding wonky seams or ill-fitting covers.
Creative No-Sew Pillow Embellishments
Once your basic no-sew pillows are made, you can add extra touches to make them truly unique:
- Tassels: Create tassels from yarn or fabric scraps and glue them to the corners.
- Pompoms: Attach pre-made pompoms or make your own.
- Ribbons: Glue ribbons around the edges or create bows.
- Buttons: Use decorative buttons on fabric glue pillows for an added touch.
- Appliqué: Cut shapes from different fabrics and glue them onto the pillow front.
- Fabric Paint Stencils: Create custom patterns with stencils and fabric paint.
Frequently Asked Questions About No-Sew Pillows
Q: What is the best fabric glue for no-sew pillows?
A: Look for permanent fabric glues that are specifically designed for fabric adhesion. Brands like Aleene’s Fabric Fusion, E6000 Fabri-Fuse, and Beacon Fabri-Tac are popular choices. They dry clear, remain flexible, and hold up well to washing.
Q: Can I wash pillows made with fabric glue?
A: Most fabric glues are washable and dry-cleanable once fully cured. Always check the manufacturer’s instructions for specific care recommendations. Gentle washing on a cool cycle is usually best.
Q: How do I make a round no-sew pillow?
A: The process is similar to making square pillows, but cutting the fabric into a circle is key. You’ll need to gather the fabric slightly around the opening as you glue it shut to create a smooth, rounded edge. This can be trickier, so consider using fabric tape for easier assembly.
Q: Can I use any stuffing for no-sew pillows?
A: Yes, you can use various types of no-sew pillow stuffing. Polyester fiberfill is common and gives a fluffy look. Cotton batting provides a firmer feel. Even fabric scraps can be used, though they might create a lumpier texture.
Q: What are the easiest no-sew pillow projects for beginners?
A: The simplest projects involve using pre-made pillowcases or easily folded fabrics with fabric tape or glue. The tie pillow method, while visually complex, is also quite forgiving as the knots hide imperfections.
Q: How do I ensure my no-sew seams are strong?
A: Use a good quality fabric adhesive. Apply it evenly and allow sufficient drying time. For fabric glue, consider a double fold hem along the opening for added strength and a cleaner finish. Ironing seams (if the glue allows) also helps create a more robust bond.
Q: Can I make outdoor pillows without sewing?
A: Yes, but you’ll need to use outdoor-specific fabric and a weatherproof fabric adhesive or tape. Many outdoor fabrics are treated to resist moisture and UV rays. Ensure your adhesive is also rated for outdoor use to withstand the elements.
Q: What is the difference between fabric glue and fabric tape?
A: Fabric glue is a liquid adhesive that you apply and then press together. It often requires drying time and sometimes heat setting. Fabric tape is a double-sided adhesive strip that provides an instant bond when you press the fabric layers together. Fabric tape is often quicker, while glue can be more flexible and adaptable to different fabric types and shapes.
Creating beautiful and comfortable pillows for your home doesn’t require a sewing machine. With these no-sew pillow techniques, you can easily craft no-sew cushion making projects, decorative no-sew pillow covers, and personalized DIY no-sew pillows. Embrace the simplicity of fabric glue pillows, the quick fix of fabric tape, and the tactile joy of tie pillows. Enjoy your crafting pillows without sewing journey!