
Putting the bobbin in your Brother sewing machine is a simple task. You need the bobbin so the machine can make stitches. Without the bobbin, the needle thread has nothing to connect to. Knowing how to put the bobbin in is a basic part of using your machine. It is key for any sewing project. This guide will show you how.
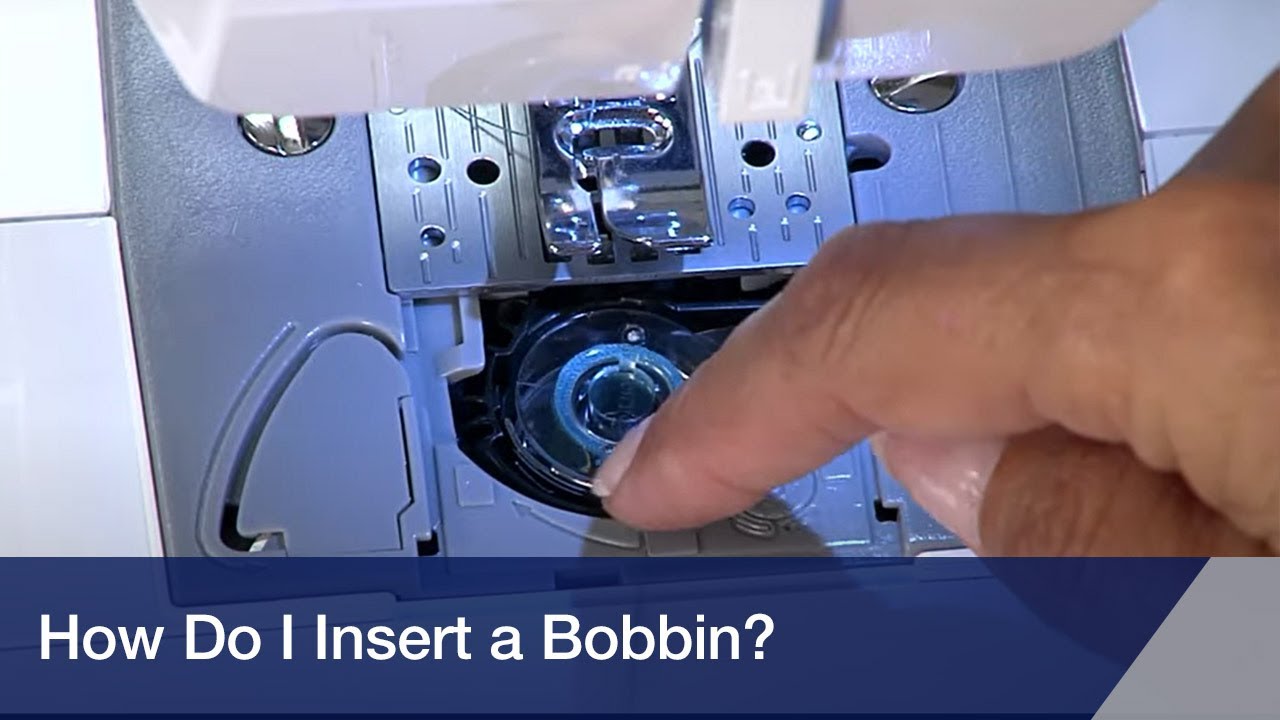
Image Source: i.ytimg.com
Getting to Know Your Bobbin System
Brother sewing machines use different ways to hold the bobbin. Knowing your machine helps a lot.
Interpreting the Bobbin Holder Location
Where does the bobbin go? It depends on your Brother machine. Most machines have one of two main types. One type is called top-loading. The other is called front-loading.
- Top-Loading System: This system is very common now. It is often called a drop in bobbin system Brother. The bobbin goes in from the top. It is right under the needle plate. There is a clear cover over it. This makes it easy to see your bobbin thread. You can see how much thread is left.
- Front-Loading System: Older machines often have this system. The bobbin goes in from the front. It is behind a door or cover near the free arm. The bobbin sits inside a metal case. This is called the Brother bobbin case insertion. You put the bobbin in the case first. Then you put the case in the machine.
Knowing which type you have is step one. Look at your machine. Where is the bobbin area? Is it on top or in the front? Your machine manual will also tell you.
Choosing the Right Brother Machine Bobbin Type
It is very important to use the correct bobbin. Brother machines need a specific type of bobbin. Using the wrong bobbin can cause problems. Bobbin problems Brother machine can stop your sewing.
- Brother machines usually use plastic bobbins.
- They are often Class 15 bobbins or a special SA156 type.
- Check your manual for the exact bobbin type.
- Do not use metal bobbins unless your manual says so.
- Do not use bobbins from other brands. They might look the same but are different.
- The wrong size or material bobbin can mess up stitching.
- It can even harm your machine over time.
- Always use bobbins that came with your machine or are made for it.
Using the right bobbin is just as important as putting it in right. Make sure you have the correct Brother machine bobbin type before you start.
Getting Your Bobbin Ready: Winding
Before you put the bobbin in, it needs thread. You need to fill the bobbin with thread. This is called Winding a bobbin Brother. Your Brother sewing machine has a special part for this.
Fathoming the Bobbin Winding Process
Every machine has a bobbin winder. This part makes winding easy. It is usually on the top of the machine.
h5 Finding the Winder Parts
- Look for a pin sticking up. This is the bobbin spindle. The empty bobbin goes on it.
- Look for a small disc or tension guide. Thread wraps around this.
- Look for a small lever or notch. This guides the thread onto the bobbin evenly.
- Look for a button or pedal control. This starts the winding.
h5 Simple Steps for Winding Thread
- Get your thread: Choose the thread you want to use. Put the spool on the spool pin on your machine. The thread should come off the spool smoothly.
- Place the bobbin: Take an empty Brother machine bobbin type. Put it onto the bobbin spindle. The bobbin might click into place. Make sure it spins freely on the spindle.
- Guide the thread: Take the end of the thread. Follow the winding path on your machine. Your manual shows the path. It usually goes through a guide. Then it wraps around a tension disc.
- Attach thread to bobbin: Put the end of the thread through a small hole in the bobbin. Some bobbins have one hole. Some have more. Pull about 2-3 inches through.
- Start winding: Push the bobbin spindle to the side. This locks it in place for winding. Hold the thread end for a few turns. This stops it from tangling.
- Press the pedal or button: Press the foot pedal lightly. Or press the start button if your machine has one. The bobbin will spin fast. The thread will fill the bobbin.
- Fill the bobbin: Watch the bobbin fill with thread. Let it wind until it is full. Do not overfill it. A full bobbin stops winding on its own on most machines. It pushes the spindle back.
- Finish winding: When the bobbin is full or has enough thread, stop the machine. Cut the thread. There is usually a thread cutter on the winder part.
- Remove the bobbin: Push the bobbin spindle back to its first place. Take the full bobbin off the spindle.
You now have a wound bobbin. It is ready to go into the machine. Winding a bobbin Brother is a key step before sewing. Make sure the thread is wound evenly. Uneven winding can cause bobbin problems Brother machine.
Putting the Bobbin In: Top-Loading System
This is the most common system today. It is often called a drop in bobbin system Brother. It is usually quite easy.
Step-by-Step Guide for Drop In Bobbin System Brother
This part shows you how to put the bobbin in your Brother machine with a top-loading system.
h5 Opening the Bobbin Area
- Turn machine off: Always turn your sewing machine power off first. Safety is important. Unplug it if you want to be extra safe.
- Lift the presser foot: Use the lever on the back of the machine. Lift the foot up. This helps when threading later.
- Find the bobbin cover: Look near the needle and needle plate. There is a flat, clear plastic cover. It is usually in front of the needle.
- Slide or open the cover: There is usually a small latch or button to open the cover. Or you might just slide it to the side. Open this cover fully. This lets you see the bobbin space.
h5 Placing the Bobbin Correctly
- Get the wound bobbin: Take the bobbin you just wound. It should be full of thread.
- Look at the bobbin direction: This is very important. The thread needs to come off the bobbin in a certain direction. Look at the bob bobbin holder location Brother. There is a picture or diagram nearby.
- Check the diagram: The diagram shows which way the thread should unwind. It is usually counter-clockwise for Brother drop-in systems. This means the thread comes off the left side as you look at the bobbin.
- Drop the bobbin in: Hold the bobbin. Make sure the thread is coming off the correct side (usually the left). Place the bobbin into the bobbin case holder. It should sit flat in the round space.
- Pull the thread: Find the end of the bobbin thread. Pull it into the small notch or groove on the bobbin holder. This guides the thread.
- Follow the path: Pull the thread along the path shown on the machine. There is usually a metal guide or channel. The thread should go into this channel. It might need to go under a small bar.
- Cut the extra thread: Pull out about 4-6 inches of thread. Lay it over the needle plate towards the back of the machine. Some machines have a cutter right there. If so, pull the thread through the cutter. It leaves the right amount of thread ready. If no cutter, just pull out the length and leave it there.
h5 Closing the Cover
- Close the bobbin cover: Put the clear plastic cover back in place. Slide it shut or snap it closed. Make sure it is closed all the way.
The bobbin is now in place. The thread is guided and ready. This is the process for the Top loading bobbin mechanism Brother. It is designed for speed and ease. Seeing the bobbin is a nice benefit.
Putting the Bobbin In: Front-Loading System
This system is found on many older or basic machines. It uses a metal bobbin case. Putting the bobbin in takes an extra step. You load the bobbin into the case first.
Step-by-Step Guide for Brother Bobbin Case Insertion
This part shows you how to put the bobbin in your Brother machine with a front-loading system.
h5 Getting to the Bobbin Case
- Turn machine off: Always turn your machine power off. Unplug it for safety.
- Lift the presser foot: Raise the foot using the lever.
- Open the front cover: Find the cover on the front of the machine. It is usually below the needle. It might swing open or slide off. Open it fully.
- Find the bobbin case: Inside this space, you will see a round metal part. This is the bobbin holder location Brother for this system. The bobbin case sits inside this holder.
- Remove the bobbin case: If there is a bobbin case inside, you need to take it out. There is usually a small latch on the bobbin case itself. Hold this latch. Pull the case straight out.
h5 Loading the Bobbin into the Case
- Get the wound bobbin: Take the full bobbin you wound earlier.
- Hold the bobbin case: Look at the metal bobbin case. It has a small slot or opening on the side. It also has a little pigtail-like spring guide.
- Look at the bobbin direction: This is very important for front-loading systems too. The thread needs to come off the bobbin in the correct direction. For front-loaders, the thread often comes off the right side of the bobbin. This makes it spin clockwise when in the case. Check your manual or the case itself.
- Put bobbin in case: Place the wound bobbin into the metal case. The thread must come off the right side (usually).
- Pull thread through the slot: Take the end of the bobbin thread. Pull it into the slot on the side of the case. Pull the thread firmly along the slot.
- Pull thread under the spring: After the slot, the thread must go under a small metal spring on the case. This spring provides tension. Pull the thread under it. You might hear a click. The thread should come out of the little pigtail guide.
- Check tension: Pull the thread coming out of the case. The bobbin should spin smoothly. The thread should pull with a little bit of resistance. It should not pull too easily or too hard. If you hold the thread hanging from the case, the case might slowly drop down.
h5 Inserting the Bobbin Case into the Machine
- Hold the latch: Hold the open latch on the bobbin case. This keeps the bobbin from falling out while you insert it.
- Line up the case: Look at the bobbin holder inside the machine. There is a pin or notch inside the holder. The bobbin case has a matching notch or tab.
- Insert the case: Gently push the bobbin case into the holder. Line up the notch on the case with the pin in the machine. Push it straight in until it is seated correctly.
- Release the latch: Let go of the latch on the bobbin case. It should snap into place. The case should feel secure inside the machine.
- Leave thread out: Leave about 4-6 inches of bobbin thread hanging out of the case. Let it hang down in front of the machine.
h5 Closing the Cover
- Close the front cover: Shut the door or slide the cover back into place.
The bobbin is now loaded inside its case. The case is in the machine. The thread is hanging out. This completes the Brother bobbin case insertion for a front-loading machine.
After Putting the Bobbin In: Bringing Up the Bobbin Thread
Once the bobbin is in, you need to bring the bobbin thread up to the top. This is needed before you start sewing. This step is part of Threading Brother sewing machine completely.
Bringing Up the Lower Thread
This step is the same for both top-loading and front-loading systems.
h5 The Pick-Up Process
- Make sure the needle is up: Turn the handwheel (the big wheel on the side of the machine) towards you. Turn it until the needle is in its highest position.
- Hold the top thread: Make sure your machine is threaded with the top thread through the needle. Hold the end of the top thread lightly with one hand. Keep it out of the way.
- Lower the needle: Turn the handwheel towards you again. Watch the needle go down into the needle plate hole. It goes down and grabs the bobbin thread.
- Bring the needle back up: Keep turning the handwheel towards you. Watch the needle come back up. As it comes up, it should bring a loop of the bobbin thread with it.
- Pull up the loop: Use your fingers or tweezers. Catch the loop of bobbin thread that the needle brought up. Pull the loop upwards gently.
- Pull out the thread: Pull the loop until the end of the bobbin thread comes out from the bobbin area.
- Lay threads back: You now have both the top thread and the bobbin thread pulled up. Lay both thread ends together under the presser foot. Pull them towards the back of the machine. This clears the way for your fabric.
You have now brought up the bobbin thread. Both threads are ready under the presser foot. This is a vital part of Brother sewing machine setup.
Full Machine Setup: Threading and Bobbin
Putting the bobbin in is one part. The other major part is threading the top thread. Threading Brother sewing machine correctly is key. If threading is wrong, even a perfectly placed bobbin will cause problems. Bobbin problems Brother machine are often caused by bad top threading.
Completing the Threading Process
Your Brother machine has a numbered path for the top thread. Follow it exactly.
h5 Step-by-Step Top Threading
- Put thread spool on: Place the thread spool on the spool pin.
- Follow the path: Guide the thread from the spool through the guides on the top of the machine. These are usually marked with numbers.
- Go down: Pull the thread down along the right channel.
- Go up: Loop the thread around and pull it up along the left channel.
- Through the take-up lever: The thread must go through the eye of the take-up lever. This lever moves up and down as you sew. The lever must be in its highest position. Turn the handwheel to raise it if needed. Thread the lever.
- Go down again: Pull the thread down towards the needle area.
- Through lower guides: Pass the thread through any guides near the needle bar.
- Thread the needle: Put the thread through the eye of the needle. Thread from the front to the back. Most machines have a needle threader. Use it! It makes this step very easy. Pull a few inches of thread through the needle eye.
h5 Final Steps
- Pull thread back: Pull the threaded top thread under the presser foot. Lay it towards the back with the bobbin thread.
- Lower presser foot: Lower the presser foot onto the needle plate. This sets the tension correctly.
Now your machine is fully threaded. Both the top thread and the bobbin thread are in place. This complete Threading Brother sewing machine process is part of the full Brother sewing machine setup.
Understanding Common Bobbin Issues
Sometimes sewing does not work right. Often, the bobbin is blamed. Many Bobbin problems Brother machine happen. But sometimes the problem is not the bobbin itself. It could be something else in the Brother sewing machine parts.
Interpreting Bobbin Problems Brother Machine
Here are some common issues and what might cause them.
h5 Table of Common Problems
| Problem | How it Looks | Possible Cause (Bobbin related) | Possible Cause (Other) | What to Check |
|---|---|---|---|---|
| Thread nests/loops on fabric underside | Big loops of thread under your fabric. | Bobbin thread tension is too loose. | Top thread tension is wrong. Bad top threading. | Is the bobbin in correctly? Is the thread in the bobbin case slot/spring? Is the top thread following the path? Is the presser foot down? |
| Thread breaks often | Threads snap while sewing. | Bobbin wound too tight or too loose. Wrong bobbin type. Bobbin damaged. | Top thread tension too tight. Needle is bent or dull. Thread is old/bad. Machine needs cleaning. | Is the right Brother machine bobbin type used? Is the bobbin wound smoothly? Is the top thread path clear? Change the needle. |
| Skipped stitches | Stitches are missing in the line. | Wrong bobbin type. Bobbin case not seated right (front-load). | Needle is wrong type or bent. Machine timing is off. | Is the right bobbin type used? Is the bobbin case pushed in all the way? Change the needle. |
| Uneven stitches | Stitches look different sizes or loose. | Bobbin tension is wrong. Bobbin wound unevenly. | Top thread tension is wrong. Thread quality is bad. | Check bobbin thread path in case/holder. Check top thread path. Use good quality thread. |
| Machine is noisy/jams | Machine makes bad sounds or stops moving. | Bobbin area is dirty. Bobbin is stuck. | Thread is tangled somewhere. Machine needs oiling. | Clean the bobbin holder location Brother area. Check for tangled threads under needle plate. |
Many times, fixing a bobbin problem means checking the top threading first. Threading Brother sewing machine correctly is very important.
Checking Your Brother Sewing Machine Parts
If you have problems, look at the related Brother sewing machine parts:
- Needle Plate: Lift it or remove it. Clean lint and thread bits from the bobbin area.
- Feed Dogs: These are below the needle plate. They move the fabric. Lint here can affect stitching and bobbin function.
- Bobbin Case/Holder: Check for scratches or damage. Make sure thread can pass freely.
- Bobbin: Is the bobbin damaged? Is it the correct Brother machine bobbin type? Is it wound evenly?
- Needle: Is it sharp? Is it straight? Is it inserted fully and facing the right way? A bad needle causes many problems often blamed on the bobbin.
A clean machine works best. Cleaning the bobbin area is important maintenance.
Brother Sewing Machine Setup Tips
Putting the bobbin in is part of getting ready to sew. Here are some tips for your Brother sewing machine setup:
- Read Your Manual: Your machine manual has pictures and exact steps for your model. It tells you the correct Brother machine bobbin type. It shows the exact Threading Brother sewing machine path. Keep it handy.
- Use Good Thread: Cheap or old thread breaks easily. This causes bobbin problems Brother machine. Use good quality thread for the needle and the bobbin.
- Match Threads: For best results, use the same type and weight of thread on top and on the bobbin. You can use different colors if you like.
- Clean Regularly: Lint builds up in the bobbin area. This can affect tension and cause jams. Clean the bobbin holder location Brother often with a small brush.
- Wind Bobbins Ahead: Wind several bobbins before you start a big project. This saves time later. Winding a bobbin Brother is quick once you practice.
- Check Bobbin Direction: For top-loading systems, make sure the thread comes off the correct side (usually left/counter-clockwise). For front-loading, it’s often right/clockwise. This is a top reason for bobbin problems Brother machine.
- Check Top Thread Path: Double-check your Threading Brother sewing machine path. Is the thread in all the guides? Is it in the take-up lever? Is the presser foot down when you start sewing?
Following these tips helps ensure your machine runs smoothly. Proper Brother sewing machine setup, starting with the bobbin, leads to better sewing results.
FAQ: Common Questions About Brother Bobbins
Here are answers to questions people often ask.
How do I know if my Brother machine has a top-loading or front-loading bobbin?
Look at the machine area under or near the needle. If there is a clear cover on top of the flat needle plate where you drop the bobbin in, it’s a top-loading system (drop in bobbin system Brother). If there is a door on the front of the machine below the needle, and you put a metal case in there, it’s a front-loading system (Brother bobbin case insertion). Your machine manual will also tell you.
Can I use metal bobbins in my Brother machine?
Most modern Brother machines are designed for plastic bobbins (often Class 15 or SA156). Using metal bobbins in a machine meant for plastic can cause damage or affect stitch quality because metal bobbins are heavier and can affect tension. Check your manual. Only use metal bobbins if your manual specifically says you should. Using the correct Brother machine bobbin type is key.
Why does my bobbin thread loop on the bottom of the fabric?
This is a very common problem. It usually means the top thread does not have enough tension. The machine cannot pull the bobbin thread up properly. Check your top Threading Brother sewing machine path very carefully. Make sure the thread is in all the guides, through the take-up lever, and that the presser foot is down when you sew. Also, check if the bobbin is placed correctly in its holder or case.
How much thread should I wind onto a bobbin?
Wind the bobbin until it is almost full. Most Brother machines have a stop feature. The bobbin winder will stop automatically when the bobbin is full. Do not overfill the bobbin past the edge.
My bobbin winder is not working. What can I do?
Check that the bobbin spindle is pushed all the way to the winding position. Make sure thread is following the correct path for Winding a bobbin Brother. Check if there is any thread tangled around the spindle. If it still doesn’t work, the winder might need repair.
How do I clean the bobbin area?
Turn off and unplug your machine. Remove the needle, presser foot, and needle plate (check your manual for how). Use a small brush (usually came with the machine) to brush away lint and dust from the bobbin holder location Brother. Do not use canned air, as it can blow lint deeper into the machine.
Why is the thread breaking when I sew after putting in a new bobbin?
This could be several things. The bobbin thread might be wound too tight. The bobbin might be the wrong type. The thread itself might be old or poor quality. Often, thread breaking is due to a bad needle (bent, dull, wrong type) or incorrect top Threading Brother sewing machine. Check the needle first.
What are the different Brother sewing machine parts involved with the bobbin?
The main parts are the bobbin itself, the bobbin spindle (for winding), the bobbin holder or case (where the bobbin sits in the machine), the needle plate (covers the bobbin area on top-loaders), and the front cover (on front-loaders). The tension spring on the bobbin case (front-load) or the tension guide in the bobbin holder (top-load) are also important parts.
Getting the bobbin right is a basic skill. It makes sewing much easier. Use this guide and your machine manual. Soon, putting in the bobbin will be quick and simple.