
Yes, you can tie a knot for sewing! Learning how to tie a knot for sewing is a fundamental skill that every sewer, from beginner to advanced, needs to master. A well-tied knot ensures your stitches stay put, preventing unraveling and giving your projects a polished, professional finish. This guide will walk you through the essentials of knotting thread in sewing, covering the best practices, different sewing knot types, and how to create a secure knot sewing for all your crafting needs. We’ll delve into the specifics of how to tie thread end for various situations and explore the best knot for hand sewing.
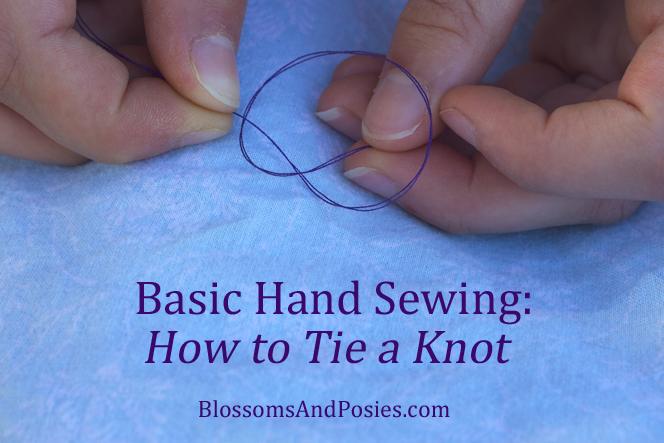
Image Source: blossomsandposies.com
The Importance of a Good Sewing Knot
Why bother with knots when machines do the stitching? Hand sewing often requires specific knots for reinforcement, finishing, and temporary holds. Even when machine sewing, you’ll need to know how to knot thread at the end of a seam to prevent it from coming undone. A strong knot acts as an anchor, securing your stitches against the stress of wear and washing. Without it, your beautiful creations can quickly fall apart, no matter how perfectly stitched they are. Mastering these techniques is crucial for creating durable and attractive sewn items.
Basic Sewing Knots: Your First Steps
When you’re starting out, the focus should be on learning a few reliable basic sewing knots. These are simple to execute and provide the necessary security for most hand-sewing tasks. Think of them as your foundational tools.
The Simple Overhand Knot
This is the most basic knot you can tie. It’s easy to learn and effective for securing the end of your thread.
How to Tie:
- Thread your needle.
- Leave a tail of about 4-6 inches (10-15 cm).
- Bring the needle back through the thread, close to the end, creating a loop.
- Pass the needle through the loop you just created.
- Pull the needle and thread taut to form a knot.
- For a more secure knot, repeat steps 3-5 once or twice more, layering the knots on top of each other.
This knot is a great starting point for beginner sewing knots.
The Double Overhand Knot
This is simply the overhand knot tied twice. It creates a slightly larger knot, which can be beneficial when working with thicker threads or fabrics where a more substantial anchor is needed.
How to Tie:
- Follow steps 1-3 for the Simple Overhand Knot.
- Before pulling the thread tight, pass the needle through the loop a second time.
- Pull both the needle and the thread tail to tighten the knot.
- You can repeat this process to create a triple or even quadruple knot for maximum security.
This knot is also an excellent choice for beginner sewing knots.
Advanced Sewing Knots for Enhanced Security
As you become more comfortable, you might want to explore knots that offer even greater security or are better suited for specific situations. These knots are still relatively easy to master but provide that extra layer of confidence.
The Surgeon’s Knot
The surgeon’s knot is a variation of the overhand knot that adds an extra wrap of thread. This extra wrap helps to create friction, making the knot less likely to slip, especially with smooth threads like silk or polyester. It’s a fantastic option for a secure knot sewing when you need extra insurance.
How to Tie:
- Thread your needle and leave your desired tail length.
- Bring the needle back through the thread, creating a loop, but pass the needle through the loop twice.
- Pull both the needle and the thread tail taut. The double wrap will tighten securely.
- For even more security, you can tie another simple overhand knot on top of the surgeon’s knot.
This is a highly effective finishing knot sewing technique.
The Loop Knot (or Lark’s Head Knot)
This knot is useful when you want to knot the thread without a needle, or when you want a small, neat knot that lies flat against the fabric. It’s also excellent for attaching a thread to a needle without having to tie a knot at the eye of the needle.
How to Tie:
- Form a loop with your thread.
- Pass the needle through the fabric where you want to start stitching.
- As you pull the needle through, catch the loop you created with the needle.
- Pull the needle and thread until the loop tightens around the thread emerging from the fabric. This effectively ties a knot at the base of your stitch.
This is a great way to learn how to tie thread end neatly when starting a seam.
Specific Situations and Their Best Knots
Different sewing tasks call for different knotting solutions. Knowing which knot to use where can make a big difference in the appearance and durability of your work.
The Best Knot for Hand Sewing
When it comes to general hand sewing, versatility and security are key.
- The Surgeon’s Knot: As mentioned, this is a strong contender for the best knot for hand sewing. Its double wrap provides excellent grip, preventing slippage and ensuring your stitches remain secure. It’s also relatively unobtrusive.
- The Double Overhand Knot: For thicker threads or when working with fabrics that have a lot of texture, the double overhand knot offers a good balance of ease and security.
- The Tailor’s Knot (or Weaver’s Knot): This is a slightly more advanced knot that is particularly good for securing the thread at the beginning and end of a seam. It’s discreet and strong.
How to Tie the Tailor’s Knot:
- Thread your needle.
- Leave a tail of about 4-6 inches.
- Hold the end of the thread against the fabric with your thumb.
- Wrap the thread around your thumb and forefinger in a loop, crossing the working thread over the tail.
- Bring the needle through the loop you just created around your fingers, catching both the working thread and the tail.
- Pull the needle through, then pull the working thread and the tail simultaneously to tighten the knot.
This knot is a very effective finishing knot sewing.
Knotting Thread for Machine Sewing (at the End of a Seam)
While sewing machines create their own stitches, you still need to secure the thread at the start and end of a seam to prevent it from unraveling.
- When you reach the end of your seam, backstitch for about an inch (2.5 cm). This means reversing the direction of your sewing machine for a short distance over the stitches you just made.
- Lift the presser foot and fabric.
- Cut the threads, leaving a tail of about 4-6 inches (10-15 cm).
- Thread this tail through your needle.
- Bring the needle up through the last stitch on the fabric.
- Tie a simple overhand knot (or a double overhand knot) securely against the fabric.
- Trim any excess thread close to the knot.
This method ensures a secure knot sewing for machine-stitched seams.
Knotting Thread for Appliqué and Embroidery
These techniques often involve decorative stitches or precise detail, so a neat and secure knot is paramount.
- The French Knot: While not a knot for securing a thread end in the traditional sense, the French knot is a decorative stitch that itself forms a small, raised knot of thread. It’s essential for adding texture and detail in embroidery.
How to Tie a French Knot:
- Thread your needle with embroidery floss (usually 2-3 strands).
- Bring the needle up through the fabric from the back.
- Wrap the working thread around the needle tip twice.
- Insert the needle back into the fabric very close to where it emerged, but not in the exact same hole.
- Pull the needle through to the back of the fabric. Keep gentle tension on the thread with your other hand as you pull to form a neat knot.
- The Knotless Knot (for Embroidery/Appliqué): This is a clever way to start and end embroidery or appliqué without a visible knot on the right side of the fabric.
How to Tie a Knotless Knot:
- From the back of your fabric, bring the needle up through the point where you want to start.
- Take a tiny stitch very close to where the thread emerged.
- Before pulling the needle completely through this tiny stitch, pass the needle through the loop of thread formed around the fabric.
- Pull gently to create a snug knot.
This is an excellent technique for how to tie thread end discreetly.
Thread Knot Sewing: Material Matters
The type of thread you use can influence how to tie a knot for sewing and how securely it holds.
- Cotton Thread: This natural fiber has a good grip, so most basic knots will hold well.
- Polyester Thread: Polyester is smooth and can be slippery. Surgeon’s knots and double overhand knots are recommended for better grip.
- Silk Thread: Similar to polyester, silk is very smooth. The Surgeon’s Knot is particularly effective here.
- Rayon/Embroidery Thread: These can be lustrous and sometimes prone to fraying. A neat, multi-wrap knot like the double or triple overhand knot works well.
When dealing with particularly fine or slippery threads, you might find yourself tying a knot multiple times to achieve the desired thickness for security.
Troubleshooting Common Knotting Issues
Even experienced sewers can encounter problems with knots. Here are a few common issues and their solutions:
Knot Slipping
- Cause: Thread is too smooth, knot isn’t tight enough, or not enough wraps.
- Solution: Use the Surgeon’s Knot or tie a double or triple overhand knot. Ensure you pull your knots very taut.
Knot Too Big and Bulky
- Cause: Tying too many knots on top of each other, or using a knot unsuitable for fine work.
- Solution: Practice the Tailor’s Knot or the Knotless Knot for a more discreet finish. For general sewing, a single, well-tightened overhand knot is often sufficient.
Thread Tangling
- Cause: Often happens when the needle is pulled through the fabric unevenly, causing loops to form.
- Solution: Keep your thread length manageable (no more than 18-24 inches / 45-60 cm). As you stitch, guide the thread smoothly through the fabric. If you notice a loop forming, stop and gently untangle it before pulling the needle through.
Difficulty Tying a Knot at the Needle Eye
- Another common problem is knotting thread at the needle eye. If the thread keeps slipping as you try to tie the knot, try this:
- Thread the needle, leaving your desired tail.
- Hold the needle and the tail of the thread together between your thumb and forefinger.
- Use your other hand to wrap the working thread around both the needle and the tail twice.
- While still holding the wraps taut with your thumb, slide the needle away, allowing the thread to form a knot around the tail.
- Pull the knot snug against the needle eye.
This technique is a key part of how to make a knot for sewing that stays put.
Frequently Asked Questions (FAQ)
What is the best knot for hand sewing?
The Surgeon’s Knot is often considered the best knot for hand sewing due to its excellent grip and security, thanks to the double wrap. The Tailor’s Knot is also a very good option for its discreet and strong finish.
How do I tie a secure knot sewing?
To tie a secure knot sewing, use knots with extra wraps, such as the Surgeon’s Knot or a double or triple overhand knot. Ensure you pull the knot very taut against the fabric. For finer work, practice the Tailor’s Knot or the Knotless Knot.
What are some basic sewing knots for beginners?
Beginner sewing knots should focus on simplicity and effectiveness. The Simple Overhand Knot and the Double Overhand Knot are excellent starting points. They are easy to learn and provide sufficient security for most initial projects.
How do I tie thread end for sewing?
When learning how to tie thread end, start with the Simple Overhand Knot. As you gain confidence, move on to the Double Overhand Knot or the Surgeon’s Knot for added security. For neatness, the Tailor’s Knot is a great skill to develop.
Can I machine sew without tying a knot?
No, you cannot machine sew without securing the thread at the beginning and end of a seam. While the machine stitches itself, you need to backstitch and then manually tie a knot at the thread ends to prevent the seam from unraveling over time.
What is the purpose of knotting thread in sewing?
Knotting thread in sewing serves to secure the stitches at the beginning and end of a seam, anchor a needle for hand sewing, and prevent fabric from fraying where a thread is terminated. It is crucial for the longevity and integrity of any sewn item.
How do I tie a knot in thread without a needle?
You can tie a knot in thread without a needle by using your fingers. The most basic method is the Overhand Knot: create a loop with the thread and pass the end of the thread through the loop, then pull taut. For a more secure, needle-less knot, you can experiment with techniques like the Figure-Eight Knot or a clove hitch, though these are less common in standard sewing.
Conclusion
Mastering how to tie a knot for sewing is an investment in the quality and durability of your creations. From the simplest overhand knot to the more secure surgeon’s knot, each technique has its place. By practicing these essential skills, you’ll build confidence and ensure that your stitches, whether by hand or by machine, will hold strong. Experiment with different sewing knot types to find what works best for your projects and threads, and you’ll be well on your way to creating beautiful, lasting sewn items. Remember, a good knot is the silent hero of every stitch, providing the foundation for your sewing success.