
What is the best sewing knot to use? The best sewing knot depends on the task, but for general purposes, a simple double knot or a surgeon’s knot is highly effective. Learning how to tie a sewing knot properly is fundamental to successful sewing. It ensures your stitches stay put and your fabric remains secure. This guide will walk you through various sewing knot tying techniques, from the most basic to more advanced options, helping you master this essential skill. Whether you’re a complete beginner or looking to refine your technique, how to tie thread correctly is a skill that will serve you well.
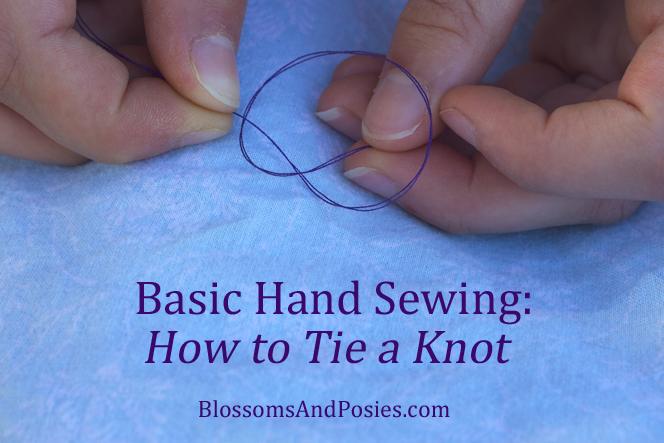
Image Source: blossomsandposies.com
The Importance of a Secure Sewing Knot
Every stitch, every seam, every project begins and ends with a knot. A well-tied knot is the silent hero of your sewing, the unsung champion that keeps your work from unraveling. Without it, all your careful stitching, your precise measurements, and your creative vision could easily fall apart. This is why grasping how to tie thread for sewing is not just a suggestion; it’s a necessity for anyone who wants their handmade creations to last.
A secure knot prevents your thread knot from slipping, which can lead to popped stitches, uneven seams, and ultimately, a garment or item that doesn’t hold up. For beginners, this might seem like a small detail, but it’s one of the most critical aspects of beginner sewing knots. Mastering this skill builds confidence and ensures your initial sewing experiences are positive and productive.
Basic Sewing Knot: The Double Knot
The simplest and most common knot is the double knot. It’s easy to learn and provides a reliable hold for most general sewing tasks.
Step-by-Step: Creating the Double Knot
- Thread Your Needle: First, thread your needle with the desired length of thread. It’s best to use a length that is manageable, usually around 18-24 inches, to prevent tangling.
- Create a Loop: Bring the two ends of the thread together, so you have a doubled strand. If you’re using a single strand and need a knot at the end, simply create a loop with the single thread.
- Wrap and Pull: Take one end of the thread and wrap it around the other end, creating a loop. Now, bring the end of the thread through this loop.
- The Second Wrap: Before pulling the knot tight, wrap that same end around the other thread again through the same loop. This creates the “double” part of the knot.
- Tighten: Gently pull both ends of the thread away from the needle. The knot will form at the end of the thread, near the fabric.
This needle and thread knot is excellent for hand sewing, basting, and general repairs. It’s a fundamental knot that forms the basis for many other sewing finishing knots.
The Surgeon’s Knot: A Stronger Hold
For situations where you need extra security, like when sewing with slippery fabrics or creating strong seams, the surgeon’s knot is a superior choice. It’s similar to the double knot but adds an extra wrap for increased friction and grip.
Mastering the Surgeon’s Knot
- Thread and Prepare: Thread your needle as you would for a double knot.
- First Pass: Take one end of the thread and wrap it around the other end to create a loop.
- Double Wrap the First Pass: Instead of pulling through the loop immediately, wrap the same end around the other thread a second time through the same loop. This is the key difference from the simple double knot.
- Pull Snugly: Gently pull both ends of the thread to tighten this initial double wrap. It should form a secure knot.
- Second Pass: Now, take the same end of the thread and make one more wrap around the other thread, creating a single loop.
- Final Pull: Pull both ends of the thread to tighten the second pass. This creates a robust knot that is less likely to slip.
The surgeon’s knot provides a much more secure thread knot, making it one of the best sewing knots for demanding tasks. It’s particularly useful when you’re worried about your knot coming undone under stress.
Alternative Sewing Knot Types
While the double knot and surgeon’s knot are workhorses, other knots can be useful in specific situations. Knowing various sewing knot types can expand your capabilities and offer more precise solutions for different sewing challenges.
The Fisherman’s Knot
This knot is known for its strength and is often used by anglers, but it can also be a reliable sewing knot for joining two threads.
How to Tie a Fisherman’s Knot:
- Overlap Ends: Lay the two ends of the thread you want to join alongside each other.
- First Overhand Knot: Take one end and tie a simple overhand knot around the other thread.
- Second Overhand Knot: Now, take the other end of the thread and tie a simple overhand knot around the first thread. Make sure this second knot is tied in the opposite direction of the first.
- Tighten Both: Gently pull both ends of the threads. The two overhand knots will slide towards each other, cinching the join securely.
This knot is particularly good when you need to tie two pieces of thread together in the middle of a project.
The Surgeon’s Loop Knot (for Tying Off)
This knot is a variation of the surgeon’s knot and is excellent for securing stitches at the end of a seam or when you want to create a very strong finish.
How to Tie a Surgeon’s Loop Knot:
- Knot Near Fabric: Bring your needle up through the fabric where you want to secure your stitch.
- Double Wrap: Before pulling the thread completely through the fabric loop, wrap the thread around the needle twice.
- Pull Through: Pull the needle through the two loops you just created. This forms a secure knot right against the fabric.
- Repeat (Optional but Recommended): For extra security, you can repeat steps 2 and 3, tying another double-wrap knot right next to the first.
This is one of the most reliable sewing finishing knots for ensuring your work stays put.
Using a Knotting Needle
While not strictly a knot-tying technique, a knotting needle can be a helpful tool, especially for those with dexterity challenges or when working with thicker threads.
What is a Knotting Needle?
A knotting needle typically has a larger eye than a standard sewing needle, often with a specially designed slit or hook. This allows you to easily thread your needle and then use the hook or slit to help create a knot by wrapping the thread around it.
How to Use a Knotting Needle:
- Thread the Needle: Pass the thread through the eye of the knotting needle.
- Position: Place the needle against the fabric where you want to tie your knot.
- Wrap the Thread: Wrap the free end of the thread around the needle shaft (or the hook/slit, depending on the needle design) two or three times.
- Slide the Knot: Carefully slide the wrapped thread off the needle and down towards the fabric. The needle helps create neat, consistent wraps, resulting in a strong knot.
A knotting needle can make sewing knot tying more accessible and efficient.
Practical Applications: When to Use Which Knot
The choice of knot often depends on the fabric, thread type, and the expected stress on the seam.
Table: Knot Selection Guide
| Sewing Task | Recommended Knot(s) | Why? |
|---|---|---|
| General Hand Sewing | Double Knot | Easy to tie, good hold for everyday stitching. |
| Mending & Repairs | Double Knot / Surgeon’s Knot | Provides a stronger hold, especially for areas under tension. |
| Sewing Slippery Fabrics | Surgeon’s Knot | Extra wrap creates more friction, preventing slippage. |
| Sewing Buttons | Surgeon’s Knot / Surgeon’s Loop | Essential for securing stitches tightly to the fabric. |
| Finishing a Seam | Surgeon’s Loop Knot | Creates a very secure end to prevent unraveling. |
| Joining Thread | Fisherman’s Knot | Securely joins two thread ends together in the middle of a project. |
| Quilting | Double Knot | Sufficient for joining fabric layers and general quilting stitches. |
| Delicate Fabrics | Single Knot (carefully tied) | Minimizes bulk and potential damage. Requires precision. |
Securing Stitches Effectively
Beyond just tying a knot at the end, it’s sometimes necessary to secure stitches mid-project or to reinforce a specific point. This is where knowing how to tie a knot without excessively shortening your thread is useful.
- Backstitching: While not a knot itself, backstitching involves sewing backward over your previous stitches. At the end of a backstitched section, you can then tie a knot.
- Knotting Between Stitches: For very strong seams, you can carefully create a small knot by looping the thread around your needle twice before pulling it through a few existing stitches. This creates a knot that is anchored within the seam itself.
Common Pitfalls and How to Avoid Them
Even with the best intentions, sewing knot tying can sometimes go awry. Here are some common issues and how to tackle them.
Thread Tangles and Knots
- Cause: Using too long a thread, not keeping the thread taut, or sewing in a jerky motion.
- Solution: Use shorter lengths of thread (18-24 inches). Keep the thread behind your needle taut as you pull it through the fabric. Sew with smooth, consistent movements. If a knot forms, gently try to tease it apart with your fingers or a needle.
Knots Slipping
- Cause: Using a simple knot on slippery fabrics or under significant tension, or not tying the knot tightly enough.
- Solution: Opt for a surgeon’s knot or a knotting needle for better grip. Ensure you are pulling your knots firmly.
Excessive Knot Bulk
- Cause: Tying multiple large knots, especially on delicate fabrics.
- Solution: For delicate fabrics, use a single, tight knot and trim the excess thread closely. Consider knotting between stitches or using a minimal knot with the surgeon’s loop.
Not Securing Stitches Adequately
- Cause: Insufficient knots at the beginning or end of a seam, or not reinforcing critical points.
- Solution: Always tie at least two secure knots at the beginning and end of your stitching. For areas of high stress, consider tying three knots or using the surgeon’s loop knot.
What If My Thread Gets Tangled?
If your thread gets tangled, don’t panic. Gently try to ease the tangle apart with your fingers. If it’s a stubborn knot, you can sometimes use the tip of your needle or a seam ripper to carefully loosen it. Avoid pulling forcefully, as this can worsen the tangle or break the thread.
Can I Sew Without Knots?
Yes, it is possible to sew without visible knots. Techniques like “locking stitches” or using a sewing machine’s backstitch function at the beginning and end of a seam can achieve a similar result. On a sewing machine, you typically press the reverse lever to create a short backstitch, effectively securing the thread without a visible knot. For hand sewing, you can thread your needle, pull the thread through the fabric from the wrong side, leaving a tail, and then sew back over that tail with a few stitches to secure it. This is especially useful when a knot would be visible or create an unwanted bump.
Who Needs to Master Sewing Knots?
Anyone who sews! From beginner sewing knots for your first project to advanced techniques for professional results, mastering sewing knot tying is crucial. This includes:
- Beginners: To ensure their early projects hold together and build confidence.
- Home Sewers: For mending, alterations, and creating garments.
- Quilters: To secure seams and create strong, lasting quilts.
- Embroiderers: To anchor embroidery threads neatly and securely.
- Crafters: For any project involving fabric and thread.
Advanced Techniques and Finishing Touches
As you progress, you might want to explore even more refined ways to finish your stitches.
Threading the Needle with a Single Strand
For neater finishes, many sewers prefer to use a single strand of thread.
- Thread: Pass one end of the thread through the needle’s eye.
- Measure: Pull the thread through until you have the desired length from the needle to the end of the thread.
- Knot: Tie your knot at the end of this single strand.
Threading with Two Strands (for Strength)
Using two strands of thread threaded through the needle (with the ends even) effectively doubles the thread’s strength.
- Thread: Fold a length of thread in half, passing both ends through the needle’s eye.
- Align Ends: Pull the thread through until the loop is near the needle and the two free ends are even.
- Knot: Tie your knot at the ends of these two free strands. This creates a thicker, stronger thread.
Knotting Without a Needle
Sometimes, you might need to tie a knot without a needle, perhaps to secure a thread manually. This is done just as you would tie a knot in any string:
- Take Ends: Hold the two ends of the thread (or one end and the fabric it’s attached to).
- Form a Loop: Cross one end over the other to create a loop.
- Pass Through: Bring the end that went over the other through the loop you just made.
- Tighten: Pull both ends to create a knot. For a double knot, repeat the process.
FAQ: Your Sewing Knot Questions Answered
Q1: How do I tie a knot at the end of my thread so it doesn’t come undone?
A1: For the most secure knot, use a surgeon’s knot. Tie a simple knot, but before pulling it tight, wrap the thread around the needle twice through the loop. Then, make another single knot next to it.
Q2: What is the best way to tie a knot when sewing buttons?
A2: Buttons require a very strong knot to hold them securely. Use a surgeon’s knot or tie several double knots, pulling each one tight. You can also use the surgeon’s loop knot for maximum security.
Q3: How much thread should I use when sewing by hand?
A3: It’s best to use lengths of about 18-24 inches. Longer threads are more prone to tangling and knotting. If you need a longer seam, tie off your current thread and start a new one.
Q4: Can I use any knot for any sewing project?
A4: While some knots are more versatile than others, it’s ideal to choose a knot appropriate for the fabric and the stress the seam will endure. A delicate fabric might not need the bulk of a surgeon’s knot, while a heavy-duty seam would benefit from its strength.
Q5: What are “sewing finishing knots”?
A5: Sewing finishing knots are knots used at the end of a sewing line to prevent it from unraveling. The surgeon’s loop knot and a secure double or surgeon’s knot are prime examples of sewing finishing knots.
Q6: Is there a way to make my thread knot easier to pass through the needle eye?
A6: Yes, you can try moistening the very end of the thread with a bit of water or saliva, then twisting it between your fingers. This can help create a firmer point that is easier to thread. Some people also use beeswax to stiffen the thread.
Mastering sewing knot tying is a journey, but with practice, you’ll find yourself instinctively reaching for the right knot for the job. These techniques are the bedrock of good sewing practice, ensuring your creations are not only beautiful but also durable. Happy sewing!