
Yes, you can tie thread after sewing to secure your stitches and prevent them from unraveling. This guide will show you how to do it effectively.
Sewing is a wonderful skill, whether you’re creating a new garment, mending a beloved item, or adding decorative touches. But a crucial part of any sewing project, often overlooked by beginners, is knowing how to properly tie off your thread once you’ve finished. This simple step ensures your hard work stays intact and looks professional. This guide will walk you through the best ways to secure your thread, making sure your stitches are locked in place and your fabric remains in good condition. We’ll cover various knotting techniques to keep your thread ends tidy and your finished seams strong.
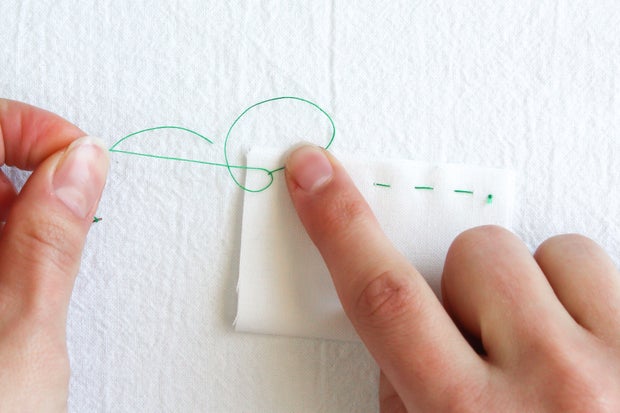
Image Source: content.instructables.com
Why Securing Thread is Important
When you finish sewing a line of stitches, leaving the thread dangling is a recipe for disaster. Over time, or with wear and tear, these loose thread ends can pull out, causing your stitches to unravel. This can ruin the appearance and integrity of your sewing. Proper securing thread prevents this from happening. It’s the final act that truly finishes stitches and ensures your sewing project lasts. Think of it as putting a lock on your work; it keeps everything together.
Basic Thread Knotting Techniques
There are several reliable ways to knot your thread after sewing. The best method often depends on the type of fabric, the weight of the thread, and how much stress the seam will endure.
The Simple Overhand Knot
This is the most basic knotting thread technique.
- Create a Loop: After your last stitch, bring your needle up through the fabric, but don’t pull the thread all the way through. Leave a small loop.
- Pass Needle Through Loop: Pass your needle through this loop.
- Pull Tight: Pull the needle away from the fabric. This creates a simple knot at the surface.
- Repeat (Optional): For extra security, you can make a second knot right next to the first one.
- Trim: Carefully trim the excess thread, leaving a small tail (about 1/4 inch or 0.6 cm).
When to Use: Good for quick fixes, temporary stitches, or when the knot won’t be visible or under much tension.
The Double Overhand Knot
This knot provides a bit more security than a single overhand knot.
- Create a Loop: After your last stitch, bring your needle up through the fabric, leaving a loop.
- First Pass: Pass your needle through the loop once.
- Second Pass: Without pulling the first knot tight, pass your needle through the same loop a second time.
- Pull Tight: Pull the needle away from the fabric, tightening both loops together to form a secure knot.
- Trim: Trim the excess thread.
When to Use: Offers more security than a single knot and is still very easy to create.
The Surgeon’s Knot
This knot is similar to the double overhand knot but offers even more security due to the extra wrap. This is excellent for locking thread and preventing it from slipping.
- Create a Loop: After your last stitch, bring your needle up through the fabric, leaving a loop.
- First Wrap: Wrap the thread around your needle twice within the loop.
- Pull Gently: Pull the needle through the loop, allowing the two wraps to form a slightly bulkier knot.
- Second Wrap (Optional but Recommended): For maximum security, wrap the thread around your needle twice again in the same direction.
- Pull Tight: Pull the needle away from the fabric to tighten the knot securely.
- Trim: Trim the excess thread.
When to Use: Ideal for projects where stitches might be under a lot of strain, like on bags or durable clothing, or when you want extra assurance against thread tails coming loose.
The Backstitch Knot (Securing Thread with Backstitching)
This is a very strong and discreet method, especially useful for finishing seams where the knot needs to be hidden. It essentially involves creating a knot by working your needle back into your last few stitches.
- Locate Last Stitch: After your final stitch, bring your needle up very close to the last point where your needle exited the fabric.
- Insert Needle: Insert your needle into the fabric just a tiny bit further along your stitch line, catching only a few threads of the fabric and the last stitch.
- Create a Loop: As you bring your needle back up, create a small loop with the thread.
- Pass Needle Through Loop: Pass your needle through this loop.
- Pull Tight: Pull the needle away from the fabric to create a knot that is nestled within the stitches.
- Repeat: You can repeat this process two or three times in the same spot for extra security.
- Trim: Trim the excess thread close to the fabric.
When to Use: Excellent for a clean finish, especially on visible areas or when you want to avoid a bulky knot on the surface. It’s a key technique for securing fabric neatly.
Knotting Techniques for Different Sewing Situations
The method you choose for knotting thread should also consider the type of sewing you’re doing.
Hand Sewing
For most hand sewing, the simple overhand knot, double overhand knot, or surgeon’s knot are perfectly adequate. The backstitch knot is also fantastic for a clean finish.
- Decorative Stitches: If you’re doing visible decorative stitches, you might want to use the backstitch knot or a very neat double overhand knot to keep the knot as inconspicuous as possible.
- Functional Stitches (e.g., hemming): For hems or seams that will experience some stress, a surgeon’s knot or a double overhand knot is recommended for better durability.
Machine Sewing
While sewing machines automatically lock stitches at the beginning and end of seams, it’s still good practice to know how to finish threads manually.
- Thread Tails: When you finish a seam on a sewing machine, the machine often creates a small stitch that acts like a knot. However, you might still have thread tails to manage.
- Manual Knotting: If you’re finishing a seam by hand after using a machine (perhaps for a specific detail or repair), use the techniques described above.
Quilting
Quilters often use a technique called “locking stitches” that is similar to hand knotting, but with a focus on creating a secure knot on the back of the quilt.
- Pintuck Knot: A common quilting knot involves bringing the needle up through the fabric, creating a loop, and passing the needle through the loop twice (similar to a surgeon’s knot) before pulling it snug against the fabric. This is done on the back of the quilt, so the knot is hidden.
Advanced Knotting Techniques for Extra Security
Sometimes, a standard knot just isn’t enough. Here are a few ways to ensure your thread is truly locked in place.
The “Whip” Knot
This is a variation of the backstitch knot that offers superior security.
- Final Stitch: Make your last stitch.
- Create a Small Loop: Bring your needle up through the fabric, but instead of a full knot, create a small loop by bringing the thread back close to where it emerged.
- Whip the Thread: Take your needle and “whip” it around the thread creating the loop several times (3-5 times is usually enough).
- Pass Needle Through Loop: Now, pass your needle through the small loop you created.
- Pull Tight: Pull the needle away from the fabric. The whipping action will pull the loop tight against the fabric, creating a very secure knot.
- Trim: Trim the excess thread.
When to Use: Excellent for situations where the seam might be repeatedly pulled or stressed, like on garment closures or stress points in bags. It’s a strong method of locking thread.
The “Hidden Knot” or “Seed Knot”
This technique is designed to be almost invisible.
- Thread Needle: Thread your needle and pull the thread through the fabric, leaving a short tail.
- Insert Needle Close: Insert your needle into the fabric just a tiny bit away from where the thread emerged.
- Catch Fabric Threads: Gently catch just a few threads of the fabric with your needle. Do not go all the way through to the other side.
- Create a Loop: As you pull the needle through, create a small loop with the thread.
- Pass Needle Through Loop: Pass your needle through this loop.
- Pull to Conceal: Pull the needle away from the fabric, drawing the knot down snugly against the fabric’s surface, ideally within a stitch or a small crease.
- Trim: Trim the excess thread very close to the knot.
When to Use: Perfect for visible areas where you want a perfectly clean and professional finish, hiding all thread ends.
Common Mistakes to Avoid When Knotting Thread
Even with these techniques, mistakes can happen. Being aware of common pitfalls will help you achieve the best results.
Knotting Too Tightly
Pulling your knot excessively tight can damage the fabric fibers, creating a puckered or weakened spot. Aim for snug, not strained.
Knotting Too Loosely
A loose knot is almost as bad as no knot at all. It won’t hold, and your stitches will likely unravel. Ensure your knot is firm.
Leaving Thread Tails Too Long
Long thread tails are prone to snagging and can look untidy. Always trim your thread close to the knot, but not so close that you cut the knot itself.
Not Knotting at All
This is the most common mistake for beginners. Always remember to secure your thread at the end of your sewing.
Knotting on the “Right” Side of Fabric
Whenever possible, try to make your final knot on the wrong side of the fabric or within the seam allowance. This keeps your work looking neat and professional.
Securing Thread in Different Fabric Types
The fabric you’re working with can influence the best knotting techniques.
Delicate Fabrics (Silk, Chiffon)
- Challenge: These fabrics can tear easily, so avoid pulling knots too tight or using excessive force.
- Best Methods: Use the hidden knot or backstitch knot. Work with a finer needle and thread. Catch only a few threads of the fabric to minimize damage.
Stretchy Fabrics (Knit, Jersey)
- Challenge: Stretchy fabrics can distort if pulled too hard. The stitches need to be able to move with the fabric.
- Best Methods: A surgeon’s knot or whip knot is good here, as the extra wrap can help the knot grip without overly constricting the fabric. Use a thread that has some elasticity.
Heavyweight Fabrics (Denim, Canvas)
- Challenge: These fabrics are sturdy but can hide knots well within their weave.
- Best Methods: A double overhand knot or surgeon’s knot will provide excellent security. You can afford to pull these knots a little tighter.
Leather and Vinyl
- Challenge: These materials cannot be re-pierced multiple times without leaving permanent holes.
- Best Methods: For sewing by hand, often a single, strong knot like a surgeon’s knot at the beginning and end is sufficient. Some crafters use a knot that’s tied around the thread itself, creating a “bar tack” effect. For machine sewing, specialized needles and threads are often used, and the machine’s backstitching is usually enough.
Table: Knotting Techniques at a Glance
| Technique | Ease of Use | Security Level | Visibility | Best For |
|---|---|---|---|---|
| Simple Overhand Knot | Very Easy | Low | Moderate | Temporary stitches, low-stress areas. |
| Double Overhand Knot | Easy | Medium | Moderate | General sewing, everyday wear. |
| Surgeon’s Knot | Easy | High | Moderate | Stressed seams, durable items, preventing slippage. |
| Backstitch Knot | Medium | High | Low | Visible areas, clean finishes, securing seams. |
| Whip Knot | Medium | Very High | Low | High-stress points, long-lasting durability. |
| Hidden Knot/Seed Knot | Medium | Medium | Very Low | Decorative stitches, visible areas needing a pristine finish. |
Frequently Asked Questions (FAQ)
Q: How many times should I knot my thread?
A: For most basic sewing, one to two secure knots are sufficient. For areas under high stress or for very slippery threads, you might use a double knot or a technique like the whip knot which achieves its security through wrapping rather than multiple separate knots.
Q: Can I use the same knot for every project?
A: While you can get by with a few basic knots, using different techniques for different situations will yield better results. A delicate fabric might require a less visible knot than a sturdy canvas bag.
Q: What is “backstitching” in hand sewing?
A: In hand sewing, backstitching is a type of stitch that mimics the look and strength of machine sewing. When used to secure thread, it involves making a knot by working your needle back into your last few stitches, effectively creating a knot that is embedded within the fabric. This is different from the sewing machine’s backstitching function.
Q: How do I prevent thread from breaking when knotting?
A: Use good quality thread that matches your fabric. Avoid pulling knots too tightly, especially on delicate materials. If your thread keeps breaking, consider using a stronger thread or a different knotting technique that distributes tension more evenly.
Q: What does “securing thread ends” mean?
A: “Securing thread ends” is another way of saying knotting thread or finishing your stitches. It means making sure the thread tails (the loose ends of the thread after you’ve finished sewing) are tied off so they don’t come undone.
By mastering these simple yet essential techniques for securing thread, you’ll elevate the quality and durability of all your sewing projects. Remember to practice these knotting techniques so they become second nature, ensuring every stitch is a strong stitch and your finished seams are built to last. Happy sewing!