
Putting your design onto fabric is a key step in embroidery. How do you get your pattern ready to stitch? You use one of several methods to transfer your design. These embroidery transfer methods help you move your pattern from paper to cloth so you know where to sew. There are many ways to do this. The best way depends on your fabric and your pattern.
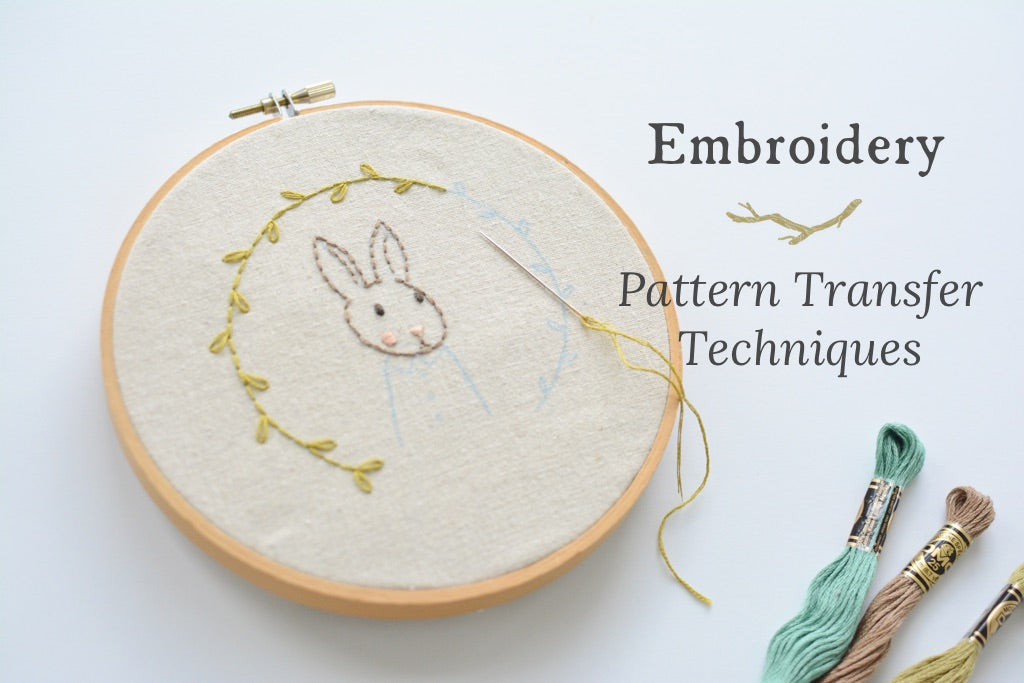
Image Source: www.twigandtale.com
Learning About Pattern Transfer
Getting your design onto fabric is the first big step. It sets up your whole project. A clear line on your fabric helps you sew neatly. A bad transfer can make stitching hard. It might even ruin your project. So, picking the right way to transfer your pattern is important.
Many crafters wonder how to start. They have a pattern but don’t know how to put it on their fabric. This part tells you about different ways. We will look at what tools you need for each. We will see how each way works. This helps you pick the best method for your project.
Think about your fabric. Is it light or dark? Is it thin or thick? Is it smooth or bumpy? These things matter. Think about your pattern. Is it simple or detailed? Does it have fine lines? Will your stitches cover the lines? These questions help you choose.
We will cover simple ways. We will cover ways that use special tools. You can find a method that works for you. Let’s learn about these helpful ways.
Popular Ways to Move Your Pattern
There are several popular ways to get your design onto fabric. Each method has good points and bad points. Some are easy. Some need special items. Here are some common embroidery transfer methods.
Tracing Your Pattern
Tracing is a simple way. You use a light source. This could be a window or a special light box. You place your pattern under your fabric. The light shines through. You can see the lines of your pattern. Then you draw over the lines onto your fabric.
This works well for light-colored fabrics. It is best for fabrics that are not too thick. Thin fabrics are easier to see through. You need a special pen or pencil for tracing. This pen must be made for fabric. We will talk more about these pens later.
Using a light box for embroidery tracing makes this easier. You don’t need to wait for daytime or a sunny window. A light box sits on your table. It shines light up. You put your pattern on the box. You put your fabric over the pattern. The light helps you see the lines clearly.
Using Special Pens and Markers
There are many pens made just for fabric. These are called embroidery pattern marking pens. They let you draw your design right onto the fabric. Some pens have ink that goes away.
One type is water soluble pens for embroidery. The ink from these pens washes out with water. You draw your design. You stitch over the lines. When you finish stitching, you wash the fabric. The lines disappear. This is very handy.
Another type is a wash away embroidery pen. This is much like a water soluble pen. The ink also washes away with water. Sometimes these terms mean the same thing. You must test these pens first. Try the pen on a scrap of your fabric. Make sure the ink washes out completely. You don’t want surprise marks left on your finished work.
There are also pens that fade over time or with heat. Air soluble pens fade after a few hours or days. Heat erasable pens disappear when you iron the fabric. Always test these too. Make sure they work right on your fabric.
Using Transfer Paper
This method uses a special paper. It is often called carbon paper for fabric. But it is made for cloth, not paper. This special paper has color on one side. You put this color side down on your fabric. You put your pattern on top of the transfer paper. You draw over the lines of your pattern with a tool. This tool can be a tracing stylus or a dull pencil.
The pressure from the tool makes the color from the transfer paper go onto the fabric. This leaves a line on your fabric. This is like using carbon paper to make a copy. But this paper is made for cloth.
Carbon paper for fabric transfer comes in different colors. White or yellow is good for dark fabrics. Blue is good for light fabrics. Again, test this paper first. Make sure the lines can be removed if needed. Some transfer papers wash away. Some need to be covered by stitches.
Using Heat Transfers
Some patterns come ready to iron on. These are called iron on embroidery transfers. The pattern is printed on a special paper with heat-sensitive ink. You place the paper ink-side down on your fabric. You press a hot iron onto the back of the paper. The heat makes the ink move from the paper to the fabric.
This is a fast way to transfer a pattern. It works well for simple designs. It might not be best for very detailed patterns. Sometimes the lines are thick. Sometimes the ink is hard to remove if you don’t cover it with stitches.
You can also create your own heat transfers. You can draw or print a design using special pens or paper for heat transfer embroidery. Then you iron it onto the fabric.
Using Stabilizers
Some products are sticky and dissolve in water. They are often called stick-and-stitch or water-soluble stabilizer. These are great for tricky fabrics. They are also good for complex designs.
You print or draw your pattern onto this special material. It looks a bit like thick clear film or paper. It has an sticky back. You peel off the backing paper. You stick the pattern right onto your fabric. The stabilizer holds the fabric firm as you stitch. This is helpful for stretchy fabrics or knits.
You stitch right through the stabilizer and fabric. When you are done stitching, you soak the fabric in water. The stabilizer and any lines on it wash away. This method is good for transferring embroidery patterns to dark fabric. It is also good for patterns with fine lines or text. The lines don’t smudge because you are stitching through the pattern itself.
Step-by-Step Guides for Common Methods
Let’s look closer at how to use some of these methods. We will go through the steps for each one.
Steps for Tracing with Light
This is a basic method. It works best on light, thin fabrics.
h5. What You Need
- Your pattern printed on paper.
- Your fabric.
- A light source (window, light table, light box).
- An embroidery pattern marking pen that washes away.
h5. How To Do It
- Get ready: Put your pattern on the light source. If using a window, tape the pattern to the window.
- Place fabric: Lay your fabric smoothly over the pattern. Make sure the part you want to stitch is over the design. Use tape to hold the fabric still. This stops it from moving as you trace.
- Trace the lines: Use your special fabric pen. Draw carefully over all the lines of your pattern. Try to keep the lines thin and neat. Trace only the lines you need for your stitching.
- Check your work: Lift the fabric. See if you got all the lines. Add any missing parts.
- Remove tape: Take the tape off the fabric and pattern. Your pattern is now on your fabric, ready to stitch.
h4. Using Tracing paper for embroidery
You can use tracing paper for embroidery to get your pattern onto paper first. Maybe your pattern is in a book or on a screen. You trace it onto tracing paper first. Then you use that tracing paper like your pattern in the steps above. You put the tracing paper under your fabric and trace from there. Tracing paper is thin, so light shines through it easily.
Steps for Using Transfer Paper (Carbon Paper)
This method puts color lines onto your fabric. It is good for fabrics where tracing is hard.
h5. What You Need
- Your pattern printed on paper.
- Your fabric.
- Carbon paper for fabric transfer (in a color that shows on your fabric).
- A tracing tool or dull pencil.
- Tape.
h5. How To Do It
- Get ready: Put your fabric flat on a hard surface. An ironing board is not good; it is too soft. A table or hard floor is better.
- Place paper: Put the carbon paper for fabric transfer on your fabric. Make sure the colored side is down, touching the fabric.
- Place pattern: Put your paper pattern on top of the transfer paper.
- Line it up: Make sure the pattern is where you want it on the fabric. Use tape to hold all three layers together: fabric, transfer paper, pattern. This stops them from slipping.
- Trace the design: Use your tracing tool or dull pencil. Draw firmly over all the lines of your pattern. Press down hard enough to make the color transfer. Be careful not to press where there are no lines, or you might make extra marks.
- Check your work: Lift a corner of the pattern and transfer paper. See if the lines transferred well. If not, put it back and trace that part again.
- Remove paper: Take off the tape, the pattern, and the transfer paper. Your design should be on the fabric.
h5. Tips for Carbon Paper
- Test the transfer paper on a scrap first. See how much pressure you need. See if the lines can be removed later (some are harder than others).
- Use a color that is easy to see but can be hidden by stitches. White or yellow is often best for dark fabric. Blue is often best for light fabric.
- Use a sharp point on your tracing tool for fine lines. But not so sharp that it tears the paper or fabric.
Steps for Using Water-Soluble Stabilizer (Stick-and-Stitch)
This is a simple peel-and-stick method. It is great for difficult fabrics or detailed designs.
h5. What You Need
- Water-soluble stabilizer sheet (like Sulky Fabri-Solvy).
- Your pattern.
- A printer (if printing) or a pen (if drawing).
- Your fabric.
h5. How To Do It
- Get pattern ready: Print your pattern directly onto the dull side of the stabilizer sheet. Make sure you print on the correct side (check the package directions). If you don’t have a printer, you can draw your pattern onto the stabilizer using a permanent pen.
- Cut out pattern: Cut out your design from the stabilizer sheet. Leave a small edge around the pattern lines.
- Stick it on: Peel the backing paper off the stabilizer. Stick the sticky pattern piece onto your fabric. Smooth it down so it sticks well. Make sure it is where you want it.
- Stitch: Put your fabric in the hoop (the stabilizer is part of the layer in the hoop). Stitch your design. Stitch right through the stabilizer lines. The stabilizer helps hold your fabric firm as you stitch.
- Wash away: When you finish stitching, take the fabric out of the hoop. Cut away any large extra pieces of stabilizer near your stitching. Then soak your fabric in water. Follow the package directions. The stabilizer will get soft and dissolve. You might need to rinse it a few times.
- Dry: Let your fabric dry flat. The lines and the stabilizer are gone!
h5. Why Use Stabilizer?
- Works on any fabric color. This is great for transferring embroidery patterns to dark fabric.
- Good for fine lines and small letters.
- Holds knit or stretchy fabrics steady.
- Acts as a guide and a stabilizer at the same time.
Steps for Using Iron-On Transfers
These come ready-made or you make them yourself.
h5. What You Need
- Iron on embroidery transfers (the special paper with the design).
- Your fabric.
- An iron (no steam).
- A hard, heat-safe surface (like a wooden table, not an ironing board).
h5. How To Do It (For Ready-Made Transfers)
- Get ready: Heat your iron to a medium-hot setting. Make sure the steam is off. Put your fabric on a hard, flat surface.
- Place transfer: Put the transfer paper ink-side down on your fabric. Put it exactly where you want the design to be. Tape it in place if needed, but often just holding it is fine.
- Press with iron: Place the hot iron on the back of the transfer paper. Press down firmly. Hold for 10-30 seconds (check package directions). Do not move the iron around like ironing clothes. Just press straight down. Lift the iron and move it to the next part of the design. Press again. Cover the whole design this way.
- Check transfer: Carefully lift a corner of the paper. See if the design has transferred well. If not, put the paper back and press that spot again.
- Remove paper: Once the design is transferred, carefully lift off the paper. Your design is on the fabric.
h5. Making Your Own Heat Transfers
You can buy special pens or paper for heat transfer embroidery. You draw your design onto this paper with the special pen. Then you iron it onto your fabric like a ready-made transfer. Or you can print using special transfer paper for printers. Always read the directions for these products carefully. They can differ.
Choosing the Right Method
With so many ways to transfer patterns, how do you pick? Here are things to think about:
h4. Your Fabric
- Color: Is it light or dark? Tracing works for light fabrics. Carbon paper, heat transfers, or water-soluble stabilizers work for dark fabrics (transferring embroidery patterns to dark fabric).
- Thickness: Is it thin or thick? Tracing needs thin fabric so light can shine through. Carbon paper and stabilizers work on most fabric thicknesses.
- Texture: Is it smooth or bumpy? Smooth fabric is easier to trace on or use carbon paper on. Sticky stabilizer works well on bumpy or fuzzy fabrics like felt or terry cloth.
- Stretch: Is it stretchy? Stabilizer methods are best for stretchy fabrics like t-shirts.
h4. Your Pattern
- Detail: Is it simple or detailed? Tracing, carbon paper, and stabilizer methods can handle fine details. Iron-on transfers might be thicker lines.
- Size: Is it big or small? Tracing a large design on a window can be hard. Carbon paper or stabilizer sheets can be joined for big designs.
- Stitch Type: Will your stitches cover the lines? If yes, methods like carbon paper or some heat transfers are fine even if the lines don’t wash away completely. If your stitching doesn’t cover the lines (like outline stitches), you need a method where the lines do wash away (water soluble pens, wash away pens, water soluble stabilizer) or fade.
h4. What You Have
- Do you have a window or light box? Tracing is easy.
- Do you have fabric pens? Pen methods are simple.
- Do you have transfer paper? Carbon paper is an option.
- Do you have an iron? Heat transfers are possible.
- Do you have water soluble stabilizer? This opens up that method.
h4. What You Like
- Some people find tracing relaxing.
- Some people like the speed of iron-on transfers.
- Some people like the accuracy of the stabilizer method.
Look at this table to help you decide:
| Method | Best For Fabric Color | Best For Fabric Type | Pattern Detail | Removability of Lines | Notes |
|---|---|---|---|---|---|
| Tracing (Light Source) | Light | Thin, Smooth | Fine | Good (if using wash pen) | Needs light source; can be slow |
| Carbon paper for fabric | Light or Dark | Most types (not too textured) | Fine | Varies (test!) | Can smudge; need hard surface |
| Water soluble pens | Light | Most types | Fine | Excellent | Test pen first; may fade over time |
| Wash away embroidery pen | Light | Most types | Fine | Excellent | Same as water soluble; test first |
| Heat Transfer / Iron-on | Light or Dark | Stable fabrics (not too fuzzy) | Simple to Medium | Varies (test!) | Quick for ready designs; lines can be thick |
| Water Soluble Stabilizer | Light or Dark | Most types, including stretchy/fuzzy | Very Fine | Excellent | Supports fabric; needs soaking to remove |
Preparing Your Fabric
Before you transfer your pattern, prepare your fabric. This makes the transfer work better.
h5. Press Your Fabric
Iron your fabric first. Get rid of any wrinkles. A smooth surface makes tracing easier. It helps the transfer paper press better. Wrinkles can mess up your lines.
h5. Secure Your Fabric
Tape your fabric down for tracing or using transfer paper. This stops it from moving. Movement makes your lines wobbly or in the wrong place.
h5. Test Your Marking Tool
Always, always, always test your pen or paper. Use a small piece of the same fabric. Draw a line. See if it shows up well. Then try to remove it. Wash away pens must wash away fully. Check that the color from carbon paper doesn’t stain. This simple step saves you big trouble later.
Making Your Pattern Clear
A clear pattern on your fabric is key. Here are ways to help:
h4. Use Good Light
When tracing, make sure your light is bright. This helps you see the lines clearly. A light box for embroidery tracing gives steady, even light.
h4. Use the Right Pen
Use pens made for fabric. A regular pen might not wash out. Use a fine-tip pen for small details. Use an embroidery pattern marking pen that is meant to be removed. Some pens are just for making marks that you stitch over completely. Know what kind of pen you have.
h4. Be Gentle But Firm
When tracing with a pen, don’t press too hard. You don’t want to stretch the fabric. When using carbon paper, press firmly enough to transfer color, but not so hard it makes deep marks or smudges.
h4. Check As You Go
Stop and check your transfer often. Lift the fabric while tracing to see the lines. Lift the carbon paper while tracing to check the transfer. This way you can fix mistakes early. You can add lines you missed.
Cleaning Up Your Pattern Lines
After you stitch, you might have lines left on your fabric. How you clean them up depends on the method you used.
h4. Using Water
Most water soluble pens for embroidery and wash away embroidery pens come off with water. Water soluble stabilizer also dissolves in water.
h5. Steps for Washing
- Finish stitching: Complete all your embroidery.
- Remove from hoop: Take your fabric out of the hoop.
- Wash or soak: Follow the directions for your marking tool or stabilizer. Some say to rinse under cold water. Some say to soak in a bowl of cool water for a few minutes. Some might need warm water.
- Check: See if the lines are gone. If not, repeat the washing or soaking. You might need to gently rub the lines.
- Dry: Lay your fabric flat on a clean towel to dry. Reshape it if needed. Do not iron until the lines are completely gone. Heat can make some marks permanent.
h4. Other Removal Methods
- Air Soluble Pens: These lines fade on their own. They disappear after a few hours or days in the air. Do not store fabric with these marks folded up for a long time. Exposing them to air makes them fade.
- Heat Erasable Pens: These lines disappear when heat is added. Ironing the fabric makes them vanish. Test these first! Sometimes these lines can reappear if the fabric gets very cold.
- Carbon Paper: Some carbon paper lines wash away. Some do not. This is why testing is important. If they don’t wash away, you must cover them with your stitching.
- Iron-On Transfers: Some iron-on inks wash away. Some do not. Often, the lines need to be covered by stitching.
Always check the product you are using. It will tell you how to remove the lines.
Summary of Methods
Let’s quickly look at the main ways again.
- Tracing: See-through method. Good for light, thin fabrics. Uses light and a fabric pen.
- Transfer Paper: Uses special paper with color. Good for different fabric colors and thicknesses. Needs pressure.
- Fabric Pens: Draw right on the fabric. Pens like water soluble pens for embroidery and wash away embroidery pens wash away with water. Other pens fade in air or with heat.
- Heat Transfer: Uses heat to move ink from paper to fabric. Can be ready-made or you make it. Quick method.
- Water Soluble Stabilizer: Stick-on material you stitch through. Dissolves in water. Great for dark or tricky fabrics and fine details.
These embroidery transfer methods give you choices. You can pick the one that fits your fabric, pattern, and what you like best.
Tips for Better Transfers
- Always test: Try your chosen method on a scrap of your fabric first. This is the most important tip!
- Keep it clean: Make sure your hands and work area are clean. You don’t want to get dirt on your fabric or pattern.
- Use light pressure: When using pens or tracing, don’t press hard. This avoids stretching or damaging the fabric. For carbon paper, use enough pressure to transfer, but not so much it smudges badly.
- Store carefully: If you transfer a pattern but don’t stitch right away, store the fabric flat. Folding might make some lines harder to remove or cause unwanted creases.
- Don’t iron marks: Never iron fabric with water soluble or wash away pen marks on it before washing them out. Heat can set these marks forever.
By following these steps and tips, you can get a nice, clear pattern on your fabric. This makes your embroidery project much more fun and easy to do. Good luck with your stitching!
FAQ: Questions People Ask
h4. Can I use a regular pen to transfer patterns?
No, you should not use a regular pen. Ink from regular pens does not wash out of fabric. It will stain your project forever. Always use embroidery pattern marking pens made for fabric that state they are removable (like water soluble pens for embroidery or wash away embroidery pen).
h4. What is the easiest way for beginners?
Tracing with a water-soluble pen is very easy for beginners, if you have light fabric. If you have dark fabric or a complex pattern, the water-soluble stabilizer (stick-and-stitch) method is also quite simple and gives a clear guide.
h4. How do I transfer a pattern to black fabric?
Transferring embroidery patterns to dark fabric needs methods that show up well. Tracing doesn’t work well because you can’t see through black fabric. Good methods for dark fabric include:
* Using white or yellow carbon paper for fabric transfer.
* Using water soluble stabilizer (stick-and-stitch) where you print the pattern onto the white/clear stabilizer and stick it on.
* Using some heat transfer embroidery methods designed for dark fabrics.
h4. Do iron-on transfers wash away?
It depends on the specific iron on embroidery transfers. Some have ink that washes away, and some do not. You usually need to stitch over the lines of iron-on transfers, as the ink may not be fully removable or may leave a faint mark. Always check the product details.
h4. What are embroidery transfer methods?
These are the different techniques people use to move a design or pattern from paper (or another source) onto the fabric they will stitch on. The goal is to get a clear line to follow with your needle and thread.
h4. Can I reuse transfer paper?
Yes, you can often reuse carbon paper for fabric transfer multiple times. The number of uses depends on the quality of the paper and how much pressure you used. Keep using it until the lines it makes are too faint to see clearly.
h4. Is tracing paper for embroidery needed for tracing?
You can trace directly from a regular paper pattern if the fabric is thin enough and the light is bright enough. But tracing paper for embroidery is very thin and see-through, which makes tracing easier and the lines clearer when using a light source. If your pattern is in a book, tracing it onto tracing paper first is helpful.