
So, you want to make your own sewing patterns? You can do this in a few ways. You can draw them yourself using your body sizes. This is called drafting. You can also copy clothes you already have. This is called tracing. Another way is to use fabric on a dress form, which is called draping fabric. You can even use special computer programs called Pattern making software. Making your own patterns lets you create clothes that fit just right and look exactly how you want them. It’s a fun way to make unique clothes.
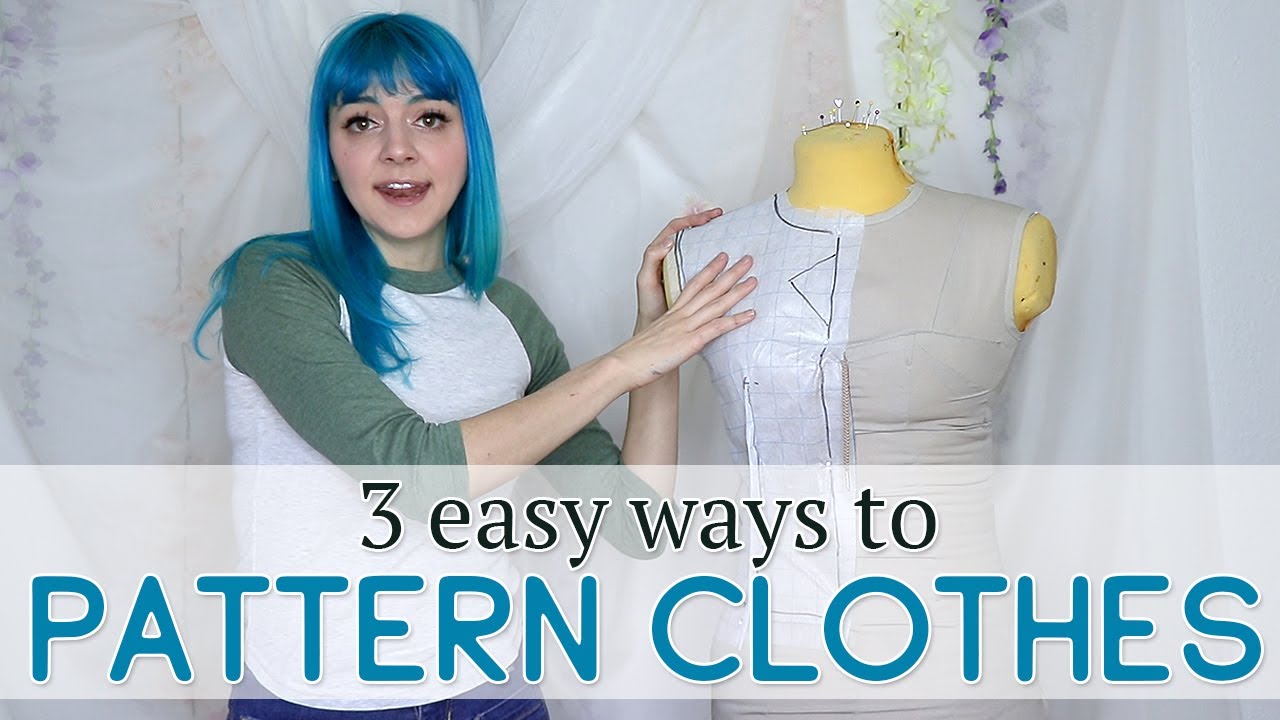
Image Source: i.ytimg.com
Learning How Patterns Work
Making your own patterns is like making a map for your clothes. The pattern tells you how to cut the fabric pieces. It shows the shape of each piece. It also shows where to sew them together. There are different ways to make these maps. We will look at some simple ways.
Getting Started: Your Tools
You need some simple tools to start making patterns.
- Pattern paper: This is a large paper. It can be plain or have a grid on it.
- Rulers: You need a long ruler and maybe a curved ruler.
- Pencils: Use pencils to draw lines. Erasers help fix mistakes.
- Measuring tape: This is key for finding body sizes (Measuring for sewing patterns).
- Scissors: Paper scissors are good.
- Pins: Useful for holding paper or fabric.
- Tracing wheel: Helps copy lines from one paper to another or from clothes.
You do not need fancy things to begin. Simple tools are enough.
Method 1: Drawing Your Own Pattern (Drafting)
Drawing your own pattern from scratch is called drafting. This is a core part of Pattern drafting techniques. It starts with your own body sizes.
Finding Out About Measurements
Good patterns start with good measurements. You need accurate body sizes. This step is very important. It ensures your clothes will fit well. Ask a friend to help you measure. It makes it easier.
Here are some key measurements you need.
- Bust: Measure around the fullest part of your chest. Go under your arms. Keep the tape level.
- Waist: Find the narrowest part of your body. This is usually above your belly button. Measure around it.
- Hips: Measure around the fullest part of your hips. This is usually about 7-9 inches below your waist.
- Back Waist Length: Measure from the bone at the back of your neck down to your waistline.
- Shoulder Width: Measure across your back from one shoulder bone to the other.
- Arm Length: Measure from the shoulder bone down to your wrist. Bend your elbow slightly.
- Around Arm: Measure around the fullest part of your upper arm.
- Neck: Measure around the base of your neck.
Write down all your measurements. Keep them in a safe place.
Here is a simple table to help you write them down:
| Measurement | Your Size (Inches or CM) | Notes (e.g., For dress, For pants) |
|---|---|---|
| Bust | ||
| Waist | ||
| Hips | ||
| Back Waist Length | ||
| Shoulder Width | ||
| Arm Length | ||
| Around Arm | ||
| Neck | ||
| … (Add others as needed) |
Getting these numbers right is the first step in Making your own sewing patterns.
What is a Sloper Pattern?
A Sloper pattern is a basic pattern. It fits your body exactly. It has no style details like gathers, pleats, or extra room for movement. Think of it as a plain shell that fits like a second skin. It is sometimes called a ‘block’ or a ‘foundation pattern’.
Why use a Sloper? It is a starting point. Once you have a Sloper that fits you perfectly, you can change it. You can add fullness, change necklines, add sleeves, and create any design you like. It is a powerful tool for DIY sewing pattern makers. Learning to make and use a Sloper is a key Pattern drafting technique.
How to Draft a Basic Bodice
Let us start with a basic bodice. This is the top part of a shirt or dress. We will make a simple one. This is a basic exercise in Fashion pattern making.
We will draft a ‘bodice front’ and a ‘bodice back’.
You need your measurements: Bust, Waist, Back Waist Length, Shoulder Width, maybe others.
Materials: Pattern paper, pencil, rulers, measuring tape.
Steps for Basic Bodice Back:
- Draw a box: Start by drawing a long, straight line down the side of your paper. This is your center back line.
- Mark lengths: From the top of this line, measure down your Back Waist Length. Draw a line straight across here. This is your waist line.
- Add width: From the center back line, measure across half of your Bust measurement plus a little extra room (maybe 1-2 inches). Draw a line straight up and down here. This forms a box.
- Neckline: From the top center back point, measure across about 2.5 inches and down about 0.75 inches. Draw a gentle curve for the back neckline.
- Shoulder: From the neckline point you just made, measure across your Shoulder Width. Mark this point. From the first top center back point, measure down about 1.5 inches. Draw a line from the shoulder width point to this lower point. This is your shoulder seam line.
- Armhole: From the end of the shoulder line, measure straight down about half of your Across Shoulder measurement. Draw a small line across here. This is a guide for your armhole.
- Side seam: At the waist line, measure across half of your Waist measurement plus some ease. Mark it. Draw a line from the armhole guide line down to this waist point. This is your side seam.
- Draw the armhole curve: Draw a curve from the end of the shoulder line, through the armhole guide line, down to the side seam line. This makes the armhole shape.
This gives you a basic bodice back shape. It is flat. It does not have darts yet. This is a very simple version to get you started.
Steps for Basic Bodice Front:
The bodice front is a bit more complex because of the bust.
- Draw a box: Draw a long, straight line down the side of your paper. This is your center front line.
- Mark lengths: From the top, measure down your Back Waist Length. Draw a line straight across for the waist line. (Yes, you use back waist length for the front box size usually, then adjust).
- Add width: From the center front line, measure across half of your Bust measurement plus the same extra room as the back. Draw a line straight up and down.
- Neckline: From the top center front point, measure across about 3 inches and down about 3 inches. Draw a curve for the front neckline.
- Shoulder: From the neckline point, measure across your Shoulder Width. Mark this point. From the top center front point, measure down about 2 inches (this drop is more than the back). Draw a line from the shoulder width point to this lower point. This is your shoulder line.
- Armhole: From the end of the shoulder line, measure straight down about half of your Across Shoulder measurement. Draw a small line across.
- Side seam: At the waist line, measure across half of your Waist measurement plus ease. Mark it. Draw a line from the armhole guide line down to this waist point.
- Draw the armhole curve: Draw a curve from the end of the shoulder line, through the armhole guide line, down to the side seam line.
Adding Darts:
Basic bodices need darts. Darts are folds sewn into the fabric. They shape the flat fabric to fit curves of the body, like the bust and waist.
- Waist darts: You can add darts at the waist on both front and back. Measure in from the side seam at the waistline (usually about 1-2 inches) and draw lines up. The size of the dart depends on how much you need to shape the waist.
- Bust darts: The front bodice needs a bust dart to go over the chest curve. This usually comes from the side seam towards the fullest part of the bust (the ‘apex’).
Adding darts makes the pattern fit better. Learning where and how big to make darts is a key Pattern drafting technique.
Refining Your Draft
After drawing the basic shapes, you need to add important details.
- Seam allowance: This is the space around the pattern line where you sew. You need to add this. Usually, it’s 5/8 inch or 1.5 cm. Draw a line outside your main pattern line at this distance.
- Hem allowance: Extra length at the bottom for folding up.
- Grainline: A line on the pattern piece. It shows how to place the pattern on the fabric so it hangs correctly. Draw a straight line with arrows at both ends.
- Notches: Small marks on the edges. They help you match pieces when sewing.
- Pattern information: Write the pattern name, piece name (e.g., Bodice Front), size, and number of pieces to cut.
Drafting takes practice. Start with simple shapes like a basic A-line skirt or a boxy top. These are easier than a fitted bodice. Look for simple drafting guides online or in books for beginners. This is part of learning Fashion pattern making.
Table of Basic Pattern Markings
| Marking | What it Looks Like | What it Means |
|---|---|---|
| Grainline | Line with arrows at both ends | Place pattern parallel to fabric selvage/fold |
| Cutting Line | Often a solid line or a bold line | Where you cut the fabric |
| Stitching Line | Often a dashed or lighter line | Where you sew (usually inside the cutting line) |
| Notches | Small lines or triangles on edge | Match these up when sewing pieces together |
| Darts | Lines forming a triangle or shape | Fold and sew to shape the fabric |
| Fold Line | Line with arrows pointing to edge | Place this edge on folded fabric |
| Button/Buttonhole | Circles and lines | Show where buttons and buttonholes go |
Knowing these markings helps you make and use patterns.
Method 2: Copying Existing Clothes (Tracing)
Tracing existing clothing is a simple way to make a DIY sewing pattern. It is faster than drafting from scratch. You are using a finished garment as your guide.
How to Trace Existing Clothing
This method is great for making patterns for clothes that already fit you well.
Materials: Pattern paper, pencil, measuring tape, pins, tracing wheel (optional, but helpful), the garment you want to copy.
Steps:
- Choose the garment: Pick a simple item first. A simple skirt, t-shirt, or pyjama pant is easier than a tailored jacket. Make sure it fits you well.
- Prepare the garment: Lay the garment flat on a table or the floor. Smooth out all wrinkles. Button or zip it up if it has closures.
- Lay paper over garment: Place your pattern paper on top of one part of the garment. Start with a large piece like the back or front bodice.
- Pin the garment: Pin the garment to the paper in a few places. This stops it from moving.
- Trace the edges:
- Use your pencil to trace along the outer edges of the garment pieces. Draw around the neckline, shoulder seams, side seams, armholes, and hem.
- For thick seams, guess where the stitching line is inside the seam allowance.
- A tracing wheel can help here. Roll it along the seam lines. It makes little dots on the paper underneath. Then you can connect the dots with a pencil.
- Trace inside details:
- Find darts, pleats, or pockets. Carefully trace their shapes and locations.
- Mark button placements or buttonhole lengths.
- Repeat for all pieces: Do this for the front, back, sleeves, collar, waistbands, facings, etc. Each piece of the garment needs its own pattern piece.
- Add seam allowance: The lines you traced are the stitching lines (where the fabric is sewn). You need to add seam allowance outside these lines. Measure your desired seam allowance (like 5/8 inch) away from the traced line and draw a new line. This is your cutting line.
- Add hem allowance: Add extra paper at the bottom for the hem.
- Add grainlines and notches: Look at the original garment. How does the fabric run? Draw a grainline on your pattern pieces parallel to the grain of the fabric on the garment. Add notches to help match pieces.
- Label everything: Write the piece name (e.g., Front Skirt), how many to cut, and any other notes on each pattern piece.
Tracing is a fast way to get a basic shape. However, it can be tricky to get perfectly accurate patterns this way. It is often best for casual or loose-fitting clothes. It is a good way to make a quick DIY sewing pattern.
Pros and Cons of Tracing
| Pros | Cons |
|---|---|
| Quick way to get a pattern shape | Can be less accurate than drafting |
| Good for copying favorite clothes | Hard to copy complex designs or fitted items |
| Uses a garment you know fits you | Does not teach you how patterns are built |
| Good for simple, loose shapes | Hard to see inside details like darts |
| Easy for beginners to start with | Need to add seam/hem allowance yourself |
Tracing is a valid DIY sewing pattern method, especially for beginners.
Method 3: Shaping Fabric (Draping)
Draping fabric is another way to make patterns. You work with fabric on a dress form (a body shape). You pin, cut, and shape the fabric right on the form. This creates the design in 3D.
This method is often used in fashion design schools. It helps you see how fabric hangs and moves. Once the fabric is shaped on the form, you take it off. You smooth it out flat on paper. Then you true up the lines and add seam allowances to make the final pattern pieces.
Draping fabric can be very creative. It is a different way to think about Fashion pattern making. It is often best for more fluid or complex designs. You usually need a dress form that is your size or can be adjusted to your size. This method is less common for simple home sewing patterns compared to drafting or tracing.
Method 4: Using Computers (Pattern Making Software)
Today, you can use computers to make patterns. Pattern making software lets you draw patterns on a screen. You can input measurements. The software helps you draw lines, curves, and add details.
Some software is very complex and used by fashion companies. Other programs are simpler and made for home sewers.
Pros of using Pattern making software:
- Can be very accurate.
- Easy to make changes or adjustments.
- Good for creating different sizes (Pattern grading basics).
- Can save and print patterns easily.
Cons of using Pattern making software:
- Can be expensive.
- Takes time to learn the software.
- You still need to know how patterns work.
Using software is another tool in the world of Fashion pattern making. It is a modern way to make patterns, especially if you plan to make many different designs or sizes.
Taking Your Pattern Further: Adjustments and Grading
Once you have a basic pattern (maybe a Sloper or a traced pattern), you will likely need to change it. You might need to make small fit adjustments. Or you might want to change the style. This is where Pattern drafting techniques come into play.
Fitting Your Pattern
The best way to check your pattern is to make a ‘muslin’. This is a test garment. You make it from cheap fabric (like muslin cloth). You sew the pattern pieces together. Then you try it on.
- Does it pull anywhere?
- Is it too tight or too loose?
- Are the shoulders too wide?
- Is the hem level?
Mark any needed changes on the muslin while you wear it. Then take the muslin off. Lay it flat and transfer the changes back to your paper pattern. This helps you get a pattern that truly fits you.
Changing the Style
Your basic pattern is a starting point. You can change it to make new designs.
- Want a wider neckline? Draw a new neckline shape on your pattern.
- Want to add gathers? Cut the pattern and spread the pieces apart.
- Want a different sleeve? Draw a new sleeve shape using the armhole of your bodice pattern as a guide.
- Want to add pockets? Draw the pocket shapes and placement on the pattern.
This is how designers create many different looks from a basic pattern. It is part of Pattern drafting techniques and Fashion pattern making.
Learning Pattern Grading Basics
Pattern grading means making a pattern bigger or smaller. You take a pattern in one size and change it to make the same style pattern in other sizes.
This is important if you want to make clothes for others. Or if your size changes.
Basic grading involves moving points on the pattern out or in by a set amount. These amounts are based on standard size charts. For example, to make a pattern one size bigger, you might move the side seams out by a small amount, make the shoulder a little wider, and add a little length.
Grading can be complex to do manually. It requires careful measurements and calculations. Pattern making software can often do grading automatically, which is a big help if you grade often.
Even understanding the idea of grading is useful. It shows how pattern companies make patterns in many sizes from one basic design.
Putting It All Together: Making Your First Garment
You have your pattern pieces now. They fit you (you hope!) and have the style you want.
- Choose fabric: Pick a fabric suitable for your design.
- Lay out pattern pieces: Place your pattern pieces on the fabric. Follow the grainlines. Pin them down.
- Cut the fabric: Use sharp scissors to cut carefully around the cutting lines.
- Transfer markings: Mark darts, notches, button places onto the fabric using chalk or tailors tacks.
- Sew: Follow the instructions (if you have them) or sew the pieces together based on the notches and your pattern lines.
Making your own pattern is a big step! It gives you so much control over your clothes.
Which Method is Best for You?
- Drafting: Good if you want to learn how patterns are built. Gives you a perfect base (Sloper) to create many designs. Needs measurements and some drawing skills. Great for learning Pattern drafting techniques.
- Tracing: Good for copying favorite clothes you own. Fast way to get a DIY sewing pattern. Best for simple shapes. Does not need drawing from scratch.
- Draping: Good for seeing design in 3D. Needs a dress form. More artistic. Less common for everyday home sewing.
- Software: Good for accuracy, making changes easily, and grading. Needs a computer and learning the program.
Many people use a mix of methods. They might draft a basic Sloper, then trace details from other garments, and finally adjust everything using drafting techniques.
Tips for Success
- Start simple: Do not try to make a complex jacket first. Begin with a simple skirt or a basic top.
- Use cheap fabric for tests: Make a muslin first before cutting into your good fabric. This saves you from costly mistakes.
- Be patient: Making patterns takes practice. Your first one might not be perfect. Keep trying.
- Measure twice, cut once: This old saying is very true in sewing and pattern making.
- Keep notes: Write down any changes you make to a pattern. This helps you next time.
- Learn from others: Look for pattern making books, blogs, or classes. Seeing how others do it helps a lot. Fashion pattern making has many standard rules and methods.
Making your own sewing patterns is a skill that grows over time. Every pattern you make teaches you something new.
Exploring Further in Fashion Pattern Making
Once you are comfortable with basic drafting and tracing, you can learn more.
- More complex shapes: Learn how to draft pants, sleeves, collars, and jackets.
- Working with different fabrics: Some patterns need to be drafted differently for stretchy knits versus woven fabrics.
- Advanced pattern drafting techniques: Learn about adding ease for movement, creating different types of darts or pleats, and making patterns for tailored clothes.
- Digital tools: Explore different types of Pattern making software.
- Historical patterns: Study how patterns were made in the past.
The world of Fashion pattern making is large and always changing. Making your own patterns opens up endless possibilities for your sewing projects. You are not limited to what you find in a store. You can create clothes that fit your style and your body perfectly. It is a rewarding journey.
Frequently Asked Questions (FAQ)
Q: Is making my own pattern hard?
A: It can seem hard at first. But if you start simple and take it step-by-step, it is not too hard. Tracing is often the easiest way to start for beginners.
Q: Do I need a dress form for pattern making?
A: No, not always. Draping needs a dress form. But drafting and tracing methods only need your measurements and flat surfaces.
Q: What is “ease”?
A: Ease is extra room in a pattern. It is added so you can move and breathe in the clothes. A fitted dress has little ease. A loose shirt has a lot of ease. Your Sloper pattern has almost no ease. You add ease when you design a garment from your Sloper.
Q: Can I sell patterns I make myself?
A: Yes, many people learn to make patterns and then sell them. But start by making patterns for yourself and people you know. Get good at it first.
Q: How do I know if my measurements are right?
A: Ask someone to help you. Wear clothes that are close-fitting but not tight when you measure. Keep the measuring tape level. Measure a few times to be sure.
Q: What is the difference between a pattern and a block?
A: They are often the same thing! A ‘block’ or ‘Sloper pattern’ is a basic, fitted pattern with no style details. It is used as a foundation to create other fashion patterns.
Q: How long does it take to draft a basic pattern?
A: The first time might take a few hours as you learn. With practice, you can draft a basic bodice or skirt in under an hour.
Making your own patterns is a rewarding skill. It gives you creative freedom and helps you make clothes that truly fit you. Start with a simple project, be patient, and enjoy the process!