
Making machine embroidery patches lets you turn your ideas into cool fabric badges. You can make custom patches for jackets, bags, or gifts. It’s a fun way to add a personal touch. This guide will walk you through every step. You will learn how to make great patches with your embroidery machine.
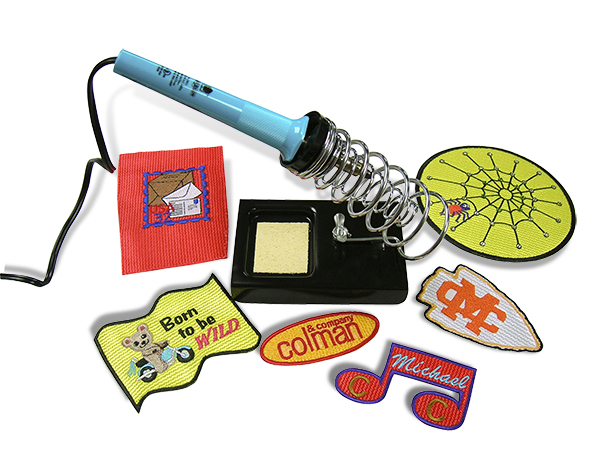
Image Source: colmanandcompany.com
Grasping What Machine Embroidery Patches Are
What are machine embroidery patches? They are designs stitched onto fabric using an embroidery machine. These fabric pieces are then cut out. You can attach them to things like clothes or hats. People often use a border stitch around the edge. This makes the patch sturdy and gives it a finished look.
Why Make Your Own Patches?
Making your own DIY embroidery patches is rewarding. It lets you be creative. You can design exactly what you want. You don’t have to search for a patch that almost fits your idea. It’s also a great way to save money if you need many patches. Making patches can even turn into a small business. You can make patches for friends, groups, or customers.
Gathering Your Machine Embroidery Patch Supplies
Before you start, you need the right tools and materials. Having everything ready makes the process smooth. Here is a list of the main machine embroidery patch supplies you will need:
- Embroidery Machine: This is the heart of the process. Make sure it is in good working order.
- Embroidery Thread: You need good quality embroidery thread. Choose colors that match your design. Rayon or polyester threads work well. Polyester is often more colorfast.
- Fabric for the Patch Base: This is the material you stitch the design onto. Common choices are twill, felt, or canvas. Choose a fabric that is stable and not too stretchy. The color of the fabric will be the background color of your patch.
- Stabilizer: This is very important! Stabilizer for embroidery patches keeps your fabric from puckering. It supports the stitches. There are different kinds, and you might need more than one type.
- Embroidery Needles: Use needles made for embroidery. Ballpoint needles are good for knits. Sharp needles work well for woven fabrics like twill. Change your needle often for best results. A fresh needle prevents snags.
- Sharp Scissors: You need small, sharp scissors for trimming threads. You also need sharp scissors for cutting out embroidered patches neatly. Special appliqué scissors can help with close trimming.
- Patch Backing Material: This is what you put on the back of the finished patch. It covers the stitches. It also helps you attach the patch. Common options include iron-on patch backing or simple fabric for sew on machine embroidered patches.
- Design Software: You need software to create or change your embroidery design. This is key for how to digitize embroidery patches. The software turns your image into stitches the machine can read.
- Embroidery Hoops: Your machine needs hoops to hold the fabric and stabilizer tight. Choose a hoop that fits your design size.
- Other Useful Tools: Tweezers (for picking threads), seam ripper (for fixing mistakes), temporary adhesive spray, and a pressing cloth might be helpful.
Make sure you have these items before you start. This helps you work without stopping.
Planning Your Patch Project
Think about your patch design first.
What size will it be?
What colors will you use?
What shape will it be?
Will it be appliqué embroidery patches?
Will you use iron-on patch backing or sew on machine embroidered patches?
Planning saves time and materials.
Steps to Make Embroidered Patches
Here are the main steps to make embroidered patches. Follow these steps carefully. This helps you get good results. This is your machine embroidery patch tutorial.
Step 1: Design Your Patch File
This is the first step in how to digitize embroidery patches. Digitizing means turning your artwork into stitch instructions for the machine.
- Create Your Artwork: You can draw your design. Or you can use digital art software. Keep the design simple, especially when you are starting. Small text or tiny details can be hard to stitch.
- Use Digitizing Software: Open your artwork in embroidery digitizing software. This software is different from drawing software. It creates stitch paths.
- Set Stitch Types: Choose different stitch types for different parts of your design.
- A fill stitch covers large areas smoothly.
- A satin stitch makes thick lines, good for borders or letters.
- A run stitch is a simple outline.
- Set Stitch Density: This tells the machine how close together the stitches are. For patches, you usually want stitches to be close. This makes the patch design dense and sturdy. It helps cover the fabric background well.
- Plan the Stitching Order: Arrange the parts of your design so they stitch in the right order. You usually stitch the main design first. Then you stitch any details. The border stitch is usually the last step.
- Add a Border: A patch needs a border. A satin stitch border is common. It gives the patch a finished edge. It also helps keep the edges from fraying after you cut it out. Make sure the border stitches go slightly over where you will cut.
- Save the File: Save your design file in the format your embroidery machine uses. Common formats are .DST, .PES, .JEF, etc.
Digitizing takes practice. Start with simple designs. Many digitizing software programs have auto-digitizing features. But manual digitizing often gives better results.
Step 2: Prepare Your Fabric and Stabilizer
This step is about getting your materials ready for stitching. This is where you work with stabilizer for embroidery patches.
- Cut Your Fabric: Cut a piece of your base fabric larger than your patch design. Make it a few inches bigger on all sides. This gives you room to hoop the fabric well.
- Choose Your Stabilizer: Choosing the right stabilizer for embroidery patches is very important. Patches need strong support. This is because you cut the fabric away later. A sturdy cutaway stabilizer is often the best choice. It stays with the stitches. It gives the patch structure. Sometimes, you might use a layer of tearaway stabilizer with the cutaway. Some people use water-soluble topper stabilizer on top of textured fabric. This keeps stitches from sinking into the fabric pile.
- Cutaway Stabilizer: This is strong. You cut it away from the back of the embroidery, but some stays under the stitches. It gives the patch body.
- Tearaway Stabilizer: This tears away easily after stitching. It’s less common for patches as the main support unless the patch fabric is very stable itself. It might be used as an extra layer.
- Water-Soluble Stabilizer: This washes away. It is good as a topping. It can also be used as a backing if you want a flexible patch that you can wash completely clean on the back. This is good for stand-alone lace type patches, but less common for solid fabric patches.
- Layer Fabric and Stabilizer: Put your cutaway stabilizer under your fabric. If using another type like tearaway, add that layer too. Make sure they are smooth. No wrinkles! You can use a light spray of temporary adhesive between layers to keep them from shifting.
- Hoop Everything Tightly: Put your layered fabric and stabilizer into your embroidery hoop. Hoop them together tightly. The fabric and stabilizer must be drum-tight in the hoop. If they are loose, your design can shift. This leads to poor registration (colors not lining up) and puckering. Make sure the grain of the fabric is straight in the hoop.
Getting the right stabilizer for embroidery patches and hooping correctly are key steps for success. Don’t rush this part.
Step 3: Load and Set Up the Machine
Now you take your prepared hoop to the embroidery machine.
- Attach the Hoop: Snap or slide the hooped fabric onto your machine’s embroidery arm. Make sure it is secure.
- Load the Design File: Connect your machine to your computer or use a USB stick. Load the patch design file you digitized earlier.
- Select Colors: The machine software will show you the color stops in your design. Match the thread colors on your machine to the colors in your design. Load the first color thread.
- Check Needle and Bobbin: Make sure you have the right needle in the machine for your fabric type. Check that your bobbin is full of the correct color thread (usually white or the border color).
- Check Design Position: Use the machine’s functions to check where the design will stitch on your hooped fabric. Make sure it is centered where you want it. Some machines let you trace the design outline. This is helpful.
Your machine is now ready to stitch your patch design.
Step 4: Stitch the Patch Design
This is the exciting part! The machine does the work.
- Start Stitching: Begin the embroidery process. The machine will stitch the design layer by layer, following your digitized file.
- Change Threads: The machine will stop when it needs a new thread color. Change the thread carefully. Trim any connection stitches if your machine makes them between color stops.
- Monitor the Stitching: Watch the machine as it stitches. Look for any problems like thread breaks, loops, or snags. Stop the machine if you see an issue. Fix the problem before starting again.
- Stitching Appliqué (If applicable): If your design includes appliqué embroidery patches, the machine will stitch an outline where the appliqué fabric goes. You will stop the machine, place your appliqué fabric over this outline, and the machine will stitch it down. Then you trim the extra appliqué fabric outside the stitches. The machine then stitches a border or satin stitch over the raw edge of the appliqué fabric. Follow your machine’s instructions for appliqué steps.
- Stitch the Border: The last step is usually the patch border. A dense satin stitch border gives the patch a professional look. It also helps seal the edges when you cut the patch out. The border should stitch just slightly past the edge of the design onto the base fabric.
Let the machine finish stitching all the colors and the border.
Step 5: Finish the Patch
Once the machine stops, your design is stitched onto the fabric/stabilizer piece. Now you need to finish it.
- Remove from Hoop: Take the hooped fabric off the machine. Carefully remove the fabric and stabilizer from the hoop.
- Remove Stabilizer: If you used tearaway stabilizer, gently tear it away from around the design. If you used water-soluble topper, wet it to remove it (follow product instructions). If you used cutaway, you will trim it later.
- Trim Threads: Use small, sharp scissors to trim all the loose threads on the front and back of the design. Make it look neat.
- Cutting Out Embroidered Patches: This step needs care. You need to cut the patch out of the larger fabric piece.
- Cut around the outside edge of the patch border.
- Cut close to the border stitching. Be careful not to cut into the stitches themselves. Leave a small, even margin of fabric around the border. This margin is often just 1/16th to 1/8th of an inch wide. It depends on how your border was digitized.
- Using sharp scissors made for fabric helps get a clean cut. Some people use rotary cutters with special templates. Some even use heat-cutting tools for synthetic fabrics (use caution and good ventilation!). But sharp scissors work well for most patches.
- If you used cutaway stabilizer, you will trim the stabilizer along with the fabric on the back. Cut the stabilizer neatly close to the stitching on the back.
Cutting out embroidered patches neatly gives your patch a professional finish.
Step 6: Add Patch Backing
After cutting out the patch, you usually add something to the back. This makes the patch look finished and helps with attaching it.
- Choosing Backing: You can use simple fabric, felt, or a special patch backing material.
- Iron-On Patch Backing: This is a popular choice. It is a sheet of material with heat-activated glue on one side. You cut a piece of this backing slightly smaller than your finished patch. Place it on the back of the patch with the glue side down. Follow the product instructions, usually applying heat and pressure with an iron or heat press. This creates an iron-on patch backing.
- Plain Fabric/Felt: You can cut a piece of plain fabric or felt slightly smaller than the patch. You place it on the back to cover the stitches. This is for sew on machine embroidered patches. You will sew this patch onto your item later. The fabric backing just makes the back look tidy.
Adding backing gives your patch body and makes it easier to attach.
Comprehending Stabilizer Choices for Patches
Let’s talk more about stabilizer for embroidery patches. It is critical. The right stabilizer prevents many problems.
- Why Patches Need Strong Stabilizer: Unlike stitching onto a garment, where the garment fabric itself provides support, a patch is a stand-alone item cut from a larger piece. It needs internal support to hold its shape, especially around the edges where it is cut.
- Cutaway is Key: For most fabric patches, a medium to heavy weight cutaway stabilizer is the best choice. It does not stretch. It stays with the stitches after cutting. It gives the patch firmness. Think of it like the frame for a picture.
- Layering Stabilizer: Sometimes, one layer of cutaway isn’t enough, especially for dense designs or unstable fabrics. You might need two layers of medium-weight cutaway. Or you might use one layer of cutaway with a layer of tearaway for extra stiffness during stitching. Experiment to see what works best for your fabric and design.
- Topper Stabilizers: Use water-soluble topper on fabrics with texture or pile (like terrycloth or corduroy). It lays on top of the fabric and holds the stitches on the surface. Without it, stitches can sink into the fabric.
- Using Fusible Stabilizer: Some stabilizers have a heat-activated glue. You can iron these onto your patch fabric before hooping. This adds stability and can prevent the fabric from shifting. It does not replace the main cutaway stabilizer needed for the patch structure itself.
Choosing the right stabilizer for embroidery patches might take some testing. Don’t skip this step or use the wrong type. It really affects how your patch looks and lasts.
Interpreting the Design Process: How to Digitize
Let’s go deeper into how to digitize embroidery patches. This is a skill you build over time.
- Start with Artwork: Good digitizing starts with good artwork. A clear, simple image is easier to digitize well. Avoid blurry images or designs with very fine lines.
- Define Stitch Regions: In the software, you outline different areas of your design. You tell the software what kind of stitch to use for each area (fill, satin, etc.).
- Set Stitch Angles: For fill stitches, you set the direction of the stitches. This can add texture or depth to your design. For satin stitches, the angle follows the shape you are outlining.
- Push and Pull Compensation: This is an important setting for patches. Embroidery stitches pull the fabric slightly. Satin stitches tend to pull inward. Fill stitches can push outward. The software has settings (like “push and pull compensation”) to adjust for this. This helps shapes stay the correct size and helps colors line up well (registration). You often need a little extra “push” on satin borders to make sure they cover the cut edge later.
- Underlay Stitches: Good digitizing includes underlay. These are stitches sewn first, beneath the main stitches. They help stabilize the fabric, give the main stitches something to lay on evenly, and prevent the fabric color from showing through.
- Adding the Border Stitch: Design the border as the last object to stitch. Make it a dense satin stitch. The width of the border satin stitch is important. It needs to be wide enough to cover the fabric edge you cut, plus a little extra.
- Place a Placement Line: Often, the first stitch of a patch design is a simple outline (a run stitch). This shows you exactly where the patch will stitch on your hooped fabric. If you are doing appliqué embroidery patches, this first line shows where to place your appliqué fabric.
- Saving for Your Machine: Always save in the file format your machine needs. Check your machine manual for supported formats.
Learning how to digitize embroidery patches well takes time. Many people start with simple designs. You can also buy pre-digitized patch designs online.
Perfecting the Cut: Cutting Out Embroidered Patches
Getting a clean edge when cutting out embroidered patches is crucial. A messy cut ruins the look.
- Sharp Scissors Are a Must: This cannot be said enough. Dull scissors chew the fabric. They leave frayed edges. Keep a pair of small, sharp scissors just for this. Appliqué scissors, which have a blunt tip on one blade, can help prevent you from accidentally cutting the fabric base under the design when trimming appliqué layers. They also work well for trimming close to dense borders.
- Cut Evenly: Try to keep the margin of fabric you leave around the border consistent. A steady hand helps.
- Cut Close, But Not Too Close: Cut right next to the satin border stitch. You want to see a tiny, even edge of fabric all around. If you cut into the border stitches, they can unravel. If you leave too much fabric, it looks messy. The density and width of your border stitch affect how forgiving this step is. A wider, denser border hides small cutting imperfections better.
- Cutting Different Shapes: Round or oval patches need smooth, curved cuts. Patches with points or sharp corners need precise cuts at those points.
- Practice Makes Perfect: Your first patch cuts might not be perfect. Keep practicing. You will get better at feeling how close you can cut to the stitches.
- Using Other Tools: For making many identical patches, some people use dies and a press to cut them out. This gives very consistent shapes. For home use, sharp scissors are the standard tool for cutting out embroidered patches.
Take your time when cutting out embroidered patches. It is the final step that makes the patch look finished.
Adding the Finish: Patch Backing Options
Once your patch is cut out, you need to finish the back. This also prepares it for attaching. You have a few main choices for patch backing.
- Iron-On Patch Backing: This is very popular for ease of use.
- What it is: A sheet material with a heat-activated adhesive on one side.
- How to use:
- Cut a piece of the iron-on patch backing slightly smaller than your finished patch. You don’t want the glue layer sticking out the sides.
- Place the glue side (often looks shiny or has a papery feel) down onto the back of your embroidered patch.
- Place the patch backing-down onto a heat-resistant surface. You can cover it with a pressing cloth.
- Apply heat and pressure with an iron or heat press. Follow the specific instructions for your backing material. Heat settings and time vary. Typically, you need medium to high heat and firm pressure for 15-30 seconds.
- Let it cool completely. The glue hardens as it cools.
- Pros: Easy to apply to clothing or bags, no sewing needed (initially).
- Cons: May not be permanent, can loosen over time or with washing, doesn’t stick well to all fabrics (like nylon or waterproof materials). Heat can damage some delicate threads or fabrics.
- Sew-On Backing: This is a simple way to finish the back for patches you plan to sew on.
- What it is: Just a piece of plain fabric or felt.
- How to use:
- Cut a piece of fabric or felt slightly smaller than your patch.
- Place it on the back of your embroidered patch to cover the stitches.
- You don’t glue or iron this backing on permanently. It is just there to make the back look tidy.
- Pros: No heat needed, simple. Prepares the patch perfectly for sew on machine embroidered patches.
- Cons: Doesn’t add structure or iron-on ability.
- Velcro Backing: Some patches are made with the hook side of Velcro on the back.
- How to use:
- Cut the hook side of Velcro slightly smaller than your patch.
- You can sew it onto the fabric backing before you cut the patch out, while it’s still hooped or on the large fabric piece. Stitch it down firmly.
- Then cut out the patch as usual.
- Or, you can try to glue or sew it onto an iron-on patch backing after it’s attached to the patch. Sewing is usually more secure.
- Pros: Allows the patch to be easily attached and removed from loop-side Velcro surfaces (like on tactical gear, uniforms, bags).
- Cons: Adds bulk.
- How to use:
Choose the backing type that works best for how you plan to use the patch. Iron-on patch backing is great for quick attachment, while finishing for sew on machine embroidered patches is often more permanent.
Expanding Your Skills: Appliqué Embroidery Patches
Appliqué embroidery patches are a type of patch that uses pieces of fabric cut out and stitched onto the patch base. This saves stitches and can add different textures or patterns.
- How it Works: The digitizing for appliqué includes steps for placing and trimming the appliqué fabric.
- Placement Stitch: The machine stitches an outline on your base fabric and stabilizer. This shows you where to put your appliqué fabric piece.
- Material Placement: You stop the machine and carefully lay a piece of your appliqué fabric over the placement outline.
- Tackdown Stitch: The machine stitches again, using a stitch that holds the appliqué fabric firmly to the base fabric within the placement outline.
- Trimming: You stop the machine again. Carefully use sharp scissors to trim away the extra appliqué fabric outside the tackdown stitch. Cut close to the stitches without cutting them.
- Cover Stitch (Satin or Decorative): The machine then stitches over the raw edge of the trimmed appliqué fabric. This is usually a satin stitch or a decorative stitch. It covers the trimmed edge and finishes the appliqué part.
- Benefits: Appliqué embroidery patches use less thread for large areas. They can create cool effects with patterned fabrics. They are often lighter than fully embroidered patches of the same size.
- Designing Appliqué Patches: In digitizing software, you mark areas as appliqué. The software then creates the necessary placement, tackdown, and cover stitches.
Using appliqué is a great way to add variety to your patch-making skills.
Tips for Better Patch Results
- Test Stitch: Always do a test stitch of your design (or at least parts of it, like the border) on the same fabric and stabilizer you plan to use for the real patch. This helps you check density, registration, and how it stitches before you commit.
- Needle Size and Type: Use a needle size that matches your thread and fabric. A too-small needle can cause thread breaks. A too-large needle can leave big holes.
- Thread Quality: Good quality thread makes a big difference. Cheap threads can break often or lack shine.
- Hooping is Key: We said it before, but it is worth saying again. A well-hooped fabric and stabilizer are essential for preventing puckering and distortion.
- Clean Your Machine: Lint and thread bits build up. Clean your machine often. This helps it run smoothly and stitch better.
- Pressing: After stitching (before cutting), you can sometimes gently press the back of the embroidery with a cool iron. Use a pressing cloth. This can help the stitches lay flat. Be careful not to distort the design. Do not press if you are using heat-sensitive materials.
- Consider Edge Options: Most patches have a satin border, sometimes called a merrowed edge (though true merrowing is done on a special machine after the patch is cut). A dense satin border is the closest look you can get with a home embroidery machine. You can also use a simple run stitch border if you plan to stitch the patch down completely and don’t need a thick edge.
Follow these tips for better results with your machine embroidery patch tutorial.
Troubleshooting Common Patch Issues
Even with good planning, you might have problems. Here are some common ones and how to fix them:
- Puckering: The fabric wrinkles around the design.
- Fix: Use stronger stabilizer. Hoop tighter. Add underlay stitches in digitizing. Check digitizing settings for push/pull compensation.
- Poor Registration: Colors or design elements don’t line up correctly.
- Fix: This is often a hooping issue. Make sure fabric and stabilizer are drum-tight. Check digitizing for stitch order and compensation settings. Make sure the machine is calibrated.
- Thread Breaks: Thread keeps snapping during stitching.
- Fix: Use better quality thread. Change your needle. Check thread path for snags. Make sure bobbin tension is correct. Design density might be too high – stitches are too close together.
- Fabric Showing Through Stitches: You can see the base fabric color through the embroidered areas.
- Fix: Increase stitch density in digitizing. Add underlay stitches. Use a stabilizer that matches the fabric color, or use a colored bobbin thread that matches the top thread color if the back might show.
- Border Not Covering Edge: The final satin border doesn’t fully cover the fabric edge after cutting.
- Fix: In digitizing, make the border wider. Add more push compensation to the border stitch. Make sure you are cutting correctly, not leaving too much fabric margin outside the border.
Working through problems helps you learn. Don’t get discouraged!
Finishing and Attaching Your Patches
Once you have finished cutting out embroidered patches and added the backing:
- Iron-On: If you used iron-on patch backing, you can now iron the patch onto fabric items. Follow the backing product instructions. Remember that ironing might not be permanent, especially after washing.
- Sew-On: If you prepared the patch for sew on machine embroidered patches (with fabric backing or just the cut edge), you can hand stitch or machine stitch it onto your item. Stitch around the border for a secure hold.
You can also use strong fabric glue for attaching patches to items that cannot be ironed or sewn easily.
Frequently Asked Questions (FAQ)
Q: What is the best fabric for machine embroidery patches?
A: Stable fabrics work best. Twill, felt, canvas, or denim are popular choices. They don’t stretch much, which helps the stitches lay flat.
Q: Do I have to digitize my own designs?
A: No, you can buy pre-digitized patch designs. Many websites sell them. This is a good way to start if you don’t have digitizing software or experience.
Q: Can I wash machine embroidered patches?
A: Yes, usually you can. However, check the type of thread and stabilizer used. Polyester threads are often more colorfast than rayon. If you used water-soluble stabilizer, it will wash away. If you used iron-on backing, washing might cause it to loosen over time. It’s usually best to wash the item the patch is attached to according to its care label.
Q: How do I make the edge of my patch look like a store-bought one?
A: Store-bought patches often have a thick, rolled edge called a merrowed edge. This is done with a special merrowing machine after the patch is embroidered and cut. With a home embroidery machine, the closest you can get is a very dense, wide satin stitch border. Digitizing it correctly is key.
Q: My patch is curling after I cut it out. Why?
A: This is often due to not using strong enough stabilizer or not hooping tightly enough. The stitches pull on the fabric, and without enough support, it curls. Make sure you are using a sturdy cutaway stabilizer appropriate for the stitch density of your design.
Conclusion
Making machine embroidery patches is a rewarding craft. It lets you create custom pieces with your personal touch. By following this guide, gathering the right machine embroidery patch supplies, learning the steps to make embroidered patches, choosing the correct stabilizer for embroidery patches, and practicing how to digitize embroidery patches and cutting out embroidered patches, you can make great looking patches. Whether you use iron-on patch backing or sew on machine embroidered patches, your finished patches will be unique. Enjoy your DIY embroidery patches journey!